










Home Improvement Projects Organized by Skill Level: Your Complete Guide to DIY Success
Whether you’ve just moved into your first home or you’ve been a homeowner for decades, the world of home improvement can feel both exciting and overwhelming. There are thousands of projects you could take on, ranging from simple cosmetic updates that require nothing more than a paintbrush to complex structural renovations that demand professional-grade skills and specialized tools. Understanding where your abilities fall on the spectrum — and which projects match those abilities — is the single most important thing you can do before picking up a hammer or opening your wallet.
This guide breaks down home improvement projects into clear skill tiers so you can approach your home with confidence, avoid costly mistakes, and build your capabilities over time. Think of it as a roadmap: start where you are, learn as you go, and gradually work your way toward tackling larger and more rewarding challenges. Every expert DIYer started somewhere, and that somewhere was usually replacing a doorknob or patching a small hole in drywall.
By organizing projects this way, you’ll also get a clearer sense of when it’s genuinely worth calling a professional. Not every task is meant to be a DIY endeavor, and recognizing that boundary is itself a valuable skill. Safety, code compliance, and long-term structural integrity are always more important than saving a few hundred dollars on labor costs.
Beginner Projects: Building Confidence and Core Skills
Beginner projects are defined by one key characteristic: they are forgiving. If you make a mistake, you can usually fix it without significant cost or damage. These tasks typically require only basic tools — a hammer, screwdrivers, a tape measure, and perhaps a drill — and the techniques involved can be learned in an afternoon by watching a few tutorial videos. More importantly, completing beginner projects successfully gives you the psychological foundation to attempt more challenging work later on.
Painting is the quintessential beginner project and for good reason. A fresh coat of paint can transform a room entirely, costs relatively little, and requires no special training. The keys to a professional-looking result are preparation and patience: clean and sand the surfaces, apply painter’s tape carefully, use primer on bare or heavily repaired walls, and work in thin, even coats. Interior painting, touch-ups, and even exterior trim painting all fall comfortably within the beginner category, provided you’re not working at extreme heights.
Other excellent beginner projects include replacing outlet covers and light switch plates, installing new cabinet hardware, caulking around bathtubs and sinks, swapping out old faucets with new fixtures (as long as you’re comfortable turning off the water supply), and hanging shelves or artwork using wall anchors. These are the kinds of tasks that make a noticeable difference in your home’s appearance and functionality while teaching you fundamentals — like how to find a stud, how to use a level, and how to read a product label — that you’ll use again and again.
Essential Tools for Beginners
Before diving into beginner projects, assembling a basic toolkit is essential. You don’t need to spend a fortune — a modest set of reliable tools will serve you far better than a large collection of cheap ones. Focus on quality in the items you’ll use most frequently: a good cordless drill-driver, a 16-foot tape measure, a 4-foot level, a set of Phillips and flathead screwdrivers, and a standard claw hammer are the absolute core. Add a utility knife, a stud finder, and a set of pliers and you’ll be ready for the vast majority of beginner tasks.
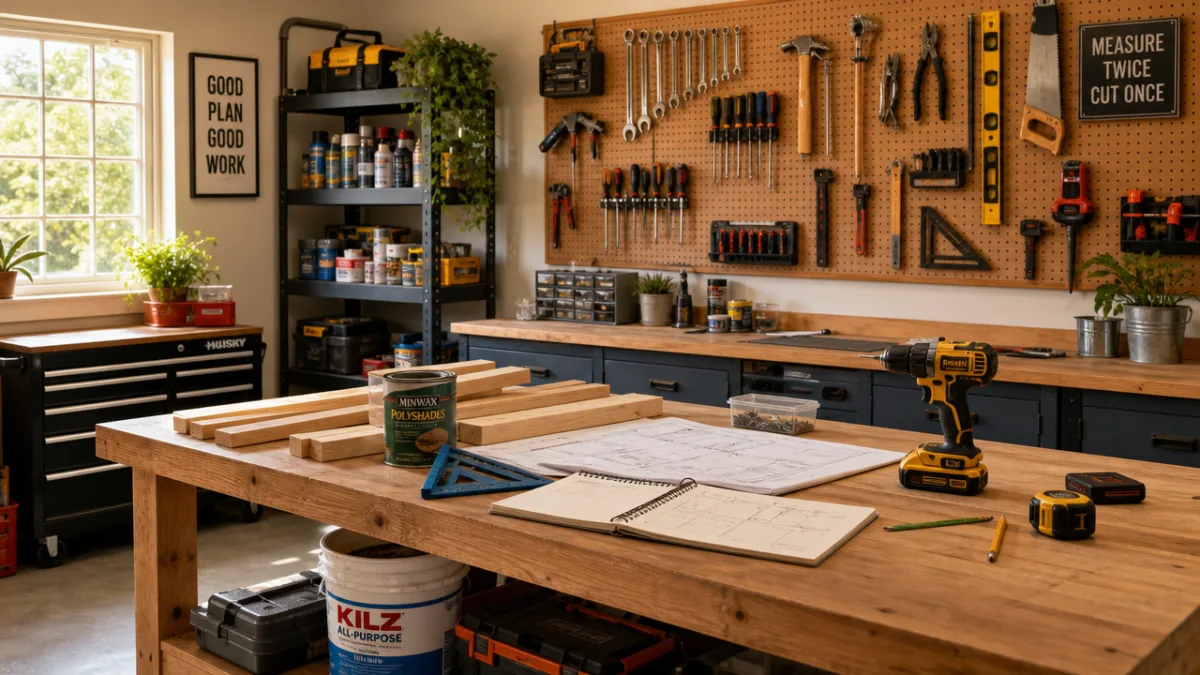
Organization matters as much as the tools themselves. Keeping your tools clean, properly stored, and easy to find will save you time and frustration on every single project you undertake. A simple toolbox or wall-mounted pegboard in the garage is a worthwhile early investment. Label everything, store batteries separately from devices to extend their lifespan, and get in the habit of putting tools back where they belong immediately after use. This discipline will feel tedious at first but becomes second nature quickly, and it prevents the maddening experience of searching for a screwdriver when you’re in the middle of a task.
Intermediate Projects: Expanding Your Capabilities
Once you’ve successfully completed several beginner projects, you’ll start to notice something: the skills begin to overlap and compound. You understand how materials behave, you’ve learned to read instructions carefully, and you’ve developed spatial reasoning around your home’s layout. This is the moment to start taking on intermediate projects — tasks that require more planning, more precision, and often a combination of skills from different trades. These projects are still very achievable for motivated homeowners but demand more preparation and respect for the process.
Tile installation is a classic intermediate project that covers backsplashes, bathroom floors, and shower surrounds. The process involves measuring and planning a layout, mixing and spreading mortar or adhesive, cutting tiles with a tile saw or snap cutter, and applying grout neatly. Each of these steps requires care and some practice, but none is beyond a patient beginner who’s willing to do their homework. The same goes for laminate or luxury vinyl plank flooring installation, which has become dramatically easier thanks to modern click-lock systems that require no adhesive and can be completed over a weekend in most rooms.
Drywall patching and installation also moves from beginner (small holes) to intermediate (replacing entire panels, finishing joints, texturing) as the scope increases. Building a simple deck, installing a ceiling fan, replacing an interior door and its casing, and adding recessed lighting to an existing circuit are all intermediate-level projects that add real value to your home. At this level, you’ll want to start reading about building codes, understanding permit requirements in your municipality, and developing a habit of double-checking your work against manufacturer specifications and local regulations.
Planning and Safety at the Intermediate Level
Intermediate projects almost always require a planning phase that goes beyond simply buying the right materials. Before starting any project at this level, create a written plan that includes a materials list, a rough timeline, and a clear understanding of the sequence of steps. Skipping this phase is one of the most common reasons intermediate projects go wrong — you get halfway through installing a tile backsplash only to realize you forgot to account for the electrical outlet in the middle of the wall, or you run out of flooring material because your measurement was slightly off.
Safety also becomes a more pressing concern at this skill level. Intermediate projects often involve power tools like circular saws, jigsaws, and tile saws, as well as work around live electrical circuits or plumbing. Always turn off breakers at the panel before working on any electrical component, and use a non-contact voltage tester to verify that the circuit is actually dead before touching any wires. When using power saws, wear eye and ear protection, keep your work secured firmly to a sawhorse or workbench, and never bypass the blade guard. Taking time to set up your workspace safely is never wasted time.
Advanced Projects: Structural and Systems-Level Work
Advanced home improvement projects are those that touch the bones of your house — the framing, the main plumbing lines, the electrical panel, the roof structure, or the foundation. These are not projects to approach lightly. They require a deep understanding of building science, an ability to read and interpret architectural plans or engineering drawings, and often a significant investment in specialized tools and materials. More critically, they typically require permits and inspections, and for good reason: mistakes at this level can compromise your home’s safety and its resale value.
Kitchen remodels that involve moving walls, relocating plumbing, or upgrading electrical service to accommodate new appliances fall squarely into the advanced category. So does finishing a basement, which involves waterproofing, framing, adding egress windows, running new electrical circuits, and ensuring proper ventilation. Roof replacement, while physically demanding rather than technically complex, involves serious fall risks and requires a thorough understanding of underlayment, flashing, ventilation, and weatherproofing details that are easy to get wrong. Advanced work almost always involves subcontractors for at least some portions — even skilled DIYers hire electricians for panel work and structural engineers for load-bearing decisions.
Adding a room addition or building a detached garage are perhaps the most ambitious projects a homeowner can take on. These involve site preparation, foundation work, framing, roofing, exterior finishing, and then all of the interior trades in sequence. They require a project management mindset in addition to technical skills: coordinating inspections, scheduling subcontractors, managing a materials budget, and making dozens of decisions about specifications and finishes throughout the process. For homeowners who have worked their way up through beginner and intermediate projects, taking on an addition is an enormously satisfying achievement — but it should be approached with a realistic timeline measured in months, not weekends.
When to Hire a Professional
Even the most capable DIYer has a clear line beyond which hiring a licensed professional is the right choice. Electrical panel upgrades, gas line work, structural modifications that affect load-bearing elements, and foundation repairs are the most common examples of tasks where the risk of a DIY approach outweighs the potential savings. This isn’t a failure of skill — it’s a recognition that certain work requires licensing, insurance, and accountability that only a professional can provide. If something goes wrong with work you did yourself on a load-bearing wall and your house later has structural issues, your homeowner’s insurance may not cover the damage.
There’s also an important distinction between work that is technically illegal for a homeowner to perform and work that is simply difficult. In many jurisdictions, homeowners are permitted to do their own electrical and plumbing work on their primary residence, provided they pull the appropriate permits and have the work inspected. In others, certain work must be done by a licensed contractor regardless of who owns the property. Knowing your local code before starting any advanced project is non-negotiable. A brief call to your local building department will clarify what’s allowed and save you from complications when you eventually sell your home.
Seasonal and Maintenance Projects: The Underrated Foundation
Among all categories of home improvement, routine maintenance is simultaneously the most important and the most overlooked. Deferred maintenance is how small problems become expensive disasters: a tiny roof leak ignored for two years becomes rotted sheathing and mold in the attic; a slow drip under the kitchen sink becomes a warped cabinet floor; a crack in the driveway admits water that freezes and expands, splitting the concrete completely. Developing a seasonal maintenance routine is one of the highest-value things a homeowner can do, and most of the tasks involved are at the beginner or intermediate level.
Spring maintenance should include inspecting the roof for winter damage, cleaning gutters, testing smoke and carbon monoxide detectors, servicing the air conditioning system (or scheduling a professional tune-up), inspecting the foundation for cracks, and checking exterior caulking and weatherstripping. Fall maintenance is equally important: cleaning the chimney, draining and winterizing outdoor hose bibs, checking the furnace filter and scheduling a furnace inspection, sealing any gaps where pests might enter for the winter, and ensuring that grading around the foundation directs water away from the house.
A useful approach is to create a simple home maintenance calendar broken down by month. Assign tasks to specific months based on your climate and the age of your home’s systems. For example, a home in a cold climate might include gutter cleaning in November, furnace filter replacement in October and March, and air conditioner coil cleaning in May. Homes with older appliances or aging roofs may have more frequent inspection tasks than newer construction. Keeping a log of completed maintenance with dates creates a valuable record that’s also useful when selling your home — buyers and their inspectors appreciate documented maintenance history.
Seasonal Maintenance Checklist by Season
- Spring: Inspect roof and attic for winter damage, clean and test gutters and downspouts, service air conditioning equipment, check window and door seals, inspect the deck or patio for frost heave or rot, flush the water heater to remove sediment buildup, and test all GFCI outlets throughout the home.
- Summer: Trim trees and shrubs away from the house, check the dryer vent for lint buildup, inspect exterior paint for peeling or cracking, test garage door safety reversal, and clean refrigerator coils for energy efficiency.
- Fall: Service the furnace or heat pump, replace smoke and CO detector batteries, drain and store garden hoses, check weatherstripping on all exterior doors, clean the chimney if you use a fireplace, and inspect the attic insulation and ventilation before heating season.
- Winter: Monitor for ice dams on the roof after heavy snowfall, check exposed pipes in unheated spaces during extreme cold, test the sump pump if your area receives significant snowmelt, and use the quieter season for interior projects and planning spring renovations.

Project Planning and Budgeting: Making Every Dollar Count
No home improvement article would be complete without an honest discussion of budgeting, because money — specifically the lack of a realistic plan for it — is the number one reason renovation projects go wrong. The classic piece of advice is to take your initial budget estimate and add 20 percent as a contingency fund for unexpected discoveries. In older homes, that figure should probably be closer to 30 percent. When you open walls, pull up old flooring, or dig around a foundation, you will find surprises, and those surprises almost always cost money to address properly.
Getting multiple quotes before starting any project that involves hired labor is essential. For significant work, aim for at least three quotes from licensed, insured contractors. Be very specific in what you ask each contractor to quote so that you’re comparing apples to apples — a vague scope of work produces wildly varying quotes that aren’t useful for comparison. Ask each contractor about their timeline, their subcontractor relationships, their warranty terms, and how they handle unexpected discoveries once work begins. References from past clients are valuable, but online reviews and licensing verification through your state contractor board are equally important.
Material costs can be controlled more directly than labor costs. Learn to work with the supply chain rather than against it: shop at the end of a season for discounted materials, visit salvage yards and Habitat for Humanity ReStores for quality fixtures at steep discounts, and buy materials in standard dimensions to avoid custom-cut premiums. For large projects, consider renting tools rather than buying them — a tile saw, a floor sander, a trencher, or a scaffolding system used once doesn’t justify the purchase price for most homeowners. Tool rental costs are predictable and add relatively little to a project budget when weighed against the purchase price of professional equipment.
Return on Investment: Which Projects Add the Most Value
Not all home improvement projects deliver equal financial returns when it comes time to sell your home, and understanding this distinction helps you prioritize intelligently. According to industry data that’s been consistent over many years, minor Kitchen remodels, bathroom updates, exterior improvements (fresh paint, new garage doors, updated landscaping), and the addition of a wood deck or composite deck consistently deliver strong returns relative to their cost. Major kitchen gut-renovations, swimming pool installations, and highly personalized specialty rooms (home theaters, wine cellars) often recoup a smaller percentage of their cost because they appeal to a narrower buyer pool.
Energy efficiency improvements deserve special attention in this calculation because they deliver dual returns: they reduce your monthly utility bills immediately while also increasing your home’s appeal to buyers who are increasingly focused on operating costs. Upgrading insulation in the attic, replacing old single-pane windows, installing a smart thermostat, and sealing air leaks throughout the house are all projects with strong combined returns. In some cases, federal and state tax credits or utility rebates are available for energy efficiency improvements, effectively reducing the project’s net cost and improving the return calculation further.
Perhaps most importantly, don’t let the investment calculus override your actual enjoyment of your home. You live in your house every day, and improvements that make daily life more pleasant, comfortable, or functional have real value even if they don’t show up clearly in a comparative market analysis. A beautifully organized mudroom, a garage that actually accommodates your car, or a master bathroom that feels like a retreat are worth pursuing for the quality of life they provide — especially if you plan to stay in your home for many years before selling. The best home improvement project is always the one that genuinely improves how you live.

Building a Long-Term Home Improvement Strategy
The most successful DIY homeowners treat their home as an ongoing project rather than a series of isolated tasks. They maintain a running list of improvements they want to make, organized roughly by priority and budget, and they update that list regularly as conditions change, as they discover new needs, or as they learn new skills. This approach allows them to plan purchases strategically — buying materials during sales, watching for the right weather window to tackle exterior work, and sequencing projects so that earlier work doesn’t have to be undone for later improvements.
Sequencing matters enormously in renovation work. As a general principle, work from the top of the house down and from the outside in. Roof and attic improvements come before interior ceiling work; exterior waterproofing comes before interior basement finishing; rough mechanical work (framing, electrical, plumbing) always precedes drywall, which always precedes painting, which always precedes trim and finish work. Violating this sequence isn’t always catastrophic, but it frequently means having to undo completed work — a demoralizing and expensive outcome that proper planning prevents entirely.
Skills development should be a conscious part of your home improvement strategy. Take a tile-setting class at a local tile shop. Watch professional contractors work when you’re having something done and ask questions. Build practice panels in your garage before tackling a visible wall. Read books on building construction so you understand the system your individual tasks fit into. Every skill you add makes the next project easier and expands the range of work you’re able to approach with confidence. The journey from beginner to advanced DIYer is genuinely one of the most rewarding educational experiences available to a homeowner — one that produces lasting, tangible results in the place you call home.
Community Resources and Continued Learning
One of the most underutilized resources for DIY homeowners is the local community of experienced tradespeople and fellow homeowners. Many hardware stores offer free weekend classes on topics like basic plumbing, tile installation, or deck building. Community colleges frequently offer continuing education courses in construction trades at very low cost. Online communities dedicated to home improvement — forums, subreddits, and video channels — offer an enormous repository of collective knowledge and are generally welcoming to newcomers who ask thoughtful questions.
Your local library system is also a surprisingly rich resource for home improvement knowledge. Books on construction, plumbing, electrical work, and landscaping by authors like Rex Cauldwell, Don Vandervort, and the editors of Fine Homebuilding and This Old House Magazine offer depth and nuance that YouTube tutorials rarely match. When you encounter a problem you’ve never seen before — an unusual tile pattern, a tricky structural condition, a mystery pipe configuration — a good reference book often provides the clearest path to a correct solution. Building a small home reference library costs very little and pays dividends over many years of homeownership.
Finally, remember that the goal of building home improvement skills is not to become a professional contractor — it’s to become a more capable, more confident, and more informed steward of your home. You don’t have to do every project yourself to benefit from understanding how homes are built and how they work. That knowledge makes you a better communicator with contractors, a more discerning buyer when evaluating quotes, and a more proactive maintainer of the largest investment most people will ever make. Start with the projects that match your current skills, do them well, and let your capabilities grow naturally from there. Your home — and your sense of accomplishment — will reflect the effort.








What do you think?
It is nice to know your opinion. Leave a comment.