










Easy Crochet Mitten Patterns: A Complete Guide for Beginners and Beyond
Introduction to Crochet Mittens: Why They’re the Perfect Project
Crochet mittens have long been a beloved staple of the fiber arts world, and for good reason. They strike the ideal balance between practicality and creative expression, making them one of the most satisfying projects a crocheter can undertake. Whether you’re just picking up a hook for the first time or you’ve been crocheting for years, mittens offer a rewarding challenge that never quite gets old. The finished product is something you can wear, gift, or display with genuine pride.
Unlike larger projects such as blankets or sweaters, mittens are compact enough to carry around in a bag, meaning you can work on them during commutes, lunch breaks, or quiet evenings at home. This portability factor alone makes them exceptionally appealing to busy crafters who want to make progress on their projects without dedicating enormous blocks of uninterrupted time. A single mitten can often be completed in just a few hours, and the sense of accomplishment that comes with finishing one is immensely motivating.
Beyond the practical appeal, crochet mittens are endlessly customizable. You can experiment with different yarn weights, color combinations, and stitch patterns to create something that perfectly reflects your personal style. From cozy chunky mittens in rich winter tones to delicate lace-style designs in soft pastels, the possibilities are virtually limitless. The patterns available today range from the refreshingly simple to the delightfully intricate, ensuring there is truly something for every skill level and aesthetic preference.
Essential Supplies and Materials for Mitten Making
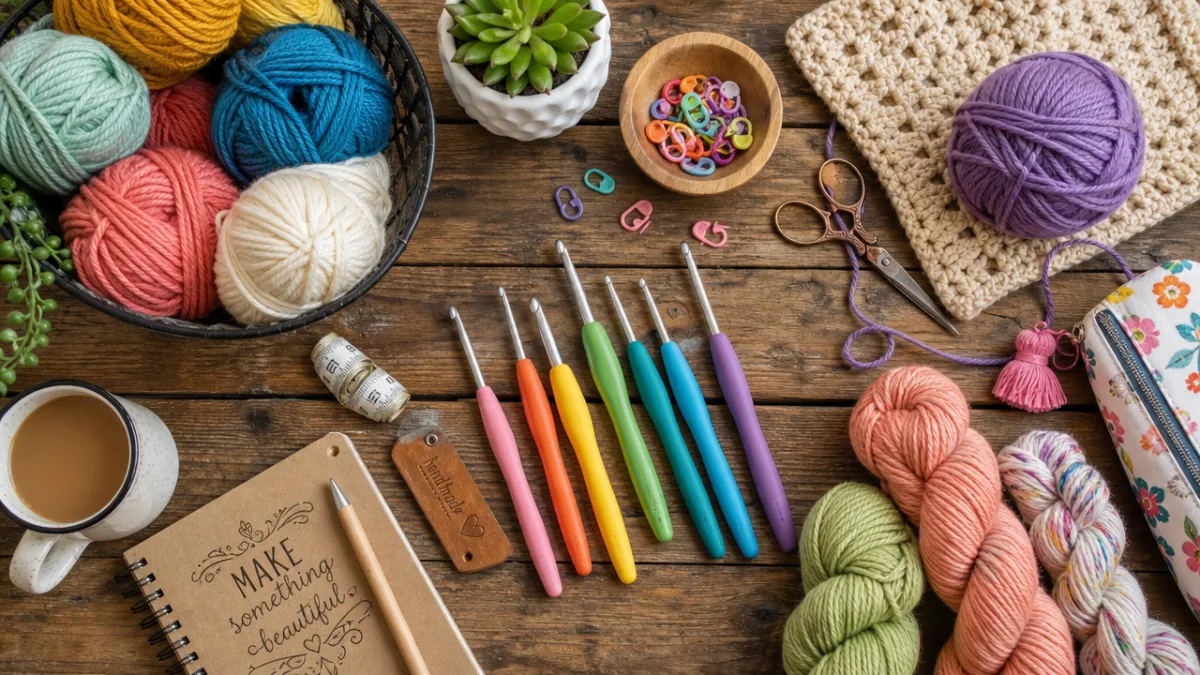
Before you dive into your first mitten pattern, it’s important to gather the right supplies. Having quality materials on hand from the start will make your crocheting experience smoother and more enjoyable, and it will significantly impact the look and feel of your finished mittens. The three core materials you’ll need are yarn, a crochet hook, and a set of basic finishing tools including scissors, a yarn needle for weaving in ends, and stitch markers to help you keep track of your rounds.
Yarn selection is arguably the most important decision you’ll make for any mitten project. For warm, functional mittens designed to withstand cold weather, wool or wool-blend yarns are the gold standard. Wool naturally regulates temperature, wicks moisture away from the skin, and provides exceptional insulation even when damp. Popular choices include Cascade 220, Lion Brand Fishermen’s Wool, and Malabrigo Rios. If you or your recipient has sensitivities to animal fibers, high-quality acrylic yarns like Lion Brand Pound of Love or Caron Simply Soft offer warmth and durability without the itch factor.
Hook size matters enormously when it comes to achieving the correct gauge for your pattern. Most worsted weight mitten patterns call for a 5.0mm or 5.5mm hook, but always check the recommended hook size in your chosen pattern and work a gauge swatch before beginning. A gauge that is too loose will result in mittens that are floppy and drafty, while a gauge that is too tight will produce stiff, uncomfortable fabric. Taking the time to swatch may feel tedious, but it is the single best way to ensure your finished mittens will be the right size and have the right drape.
- Yarn: Worsted weight wool or wool-blend for warmth and durability; acrylic for easy care and allergy-friendly options
- Crochet hook: Typically 5.0mm–5.5mm for worsted weight, adjusted based on your personal tension
- Stitch markers: Locking markers work best for marking the beginning of rounds and thumb placement
- Yarn needle: A blunt-tipped tapestry needle for weaving in ends and seaming if required
- Scissors: Sharp embroidery scissors for clean cuts close to the work
- Measuring tape: Essential for checking gauge and mitten length as you work
Understanding Mitten Construction: Key Techniques to Know
Crochet mittens can be constructed in several different ways, and understanding the basic structure will help you approach any pattern with confidence. The most common construction method for beginners involves working in the round from the cuff upward, gradually shaping the hand and thumb as you go. This seamless approach creates a polished finish and eliminates the need for sewing pieces together, which can be a stumbling block for newer crafters who haven’t yet mastered the art of invisible seaming.
The thumb is typically the most technically interesting part of a crochet mitten pattern. In most designs, stitches are placed on a stitch holder or length of scrap yarn partway through the hand section, and the fabric is continued past the opening until the mitten top is complete. After the hand is finished, you return to the thumb opening, pick up stitches around the edges, and work the thumb separately in the round. This technique, while it sounds intimidating on paper, quickly becomes second nature once you’ve worked through it once or twice.
Working in the round means you’ll be using either a slip stitch join at the end of each row and turning, or a continuous spiral method that avoids join marks entirely. Many modern mitten patterns favor the continuous spiral approach for a cleaner look, but both methods produce beautiful results. It’s worth becoming comfortable with both techniques, as different patterns will call for different approaches. Understanding the “why” behind each construction choice will also help you troubleshoot any issues that arise mid-project and give you the knowledge to adapt patterns to your own preferences.
Beginner-Friendly Mitten Patterns to Try First
If you’re new to crocheting mittens, starting with a simple pattern that uses basic stitches is the smartest approach. The single crochet mitten is a classic entry-level project that introduces you to working in the round, increasing and decreasing for shaping, and handling the thumb construction — all without any complicated stitch work to distract from learning the structure. A basic single crochet mitten worked in a bulky yarn on a larger hook can be completed in under two hours, making it a fantastic confidence booster for beginners.
Half double crochet mittens are another wonderful starting point, offering a slightly taller stitch that creates a softer, more flexible fabric than single crochet alone. The half double crochet stitch is easy to memorize and works up quickly, so you’ll see visible progress with every round you complete. Many free and low-cost patterns available online use this stitch exclusively, making them accessible to crafters who are still building their repertoire of techniques. Beautiful Dawn Designs, in particular, is known for offering clear, well-photographed tutorials that walk beginners through each step with patience and detail.
As you grow in confidence, you might try a simple ribbed cuff mitten pattern, which introduces the concept of working in the back loop only to create the stretchy texture that makes mittens stay put on the wrist. This is a small technical addition that makes a significant difference in the finished product’s functionality. Ribbed cuffs look polished and professional, and the technique is straightforward enough that most beginners can master it within a single practice session. Once you’ve completed your first ribbed cuff mitten, you’ll likely never go back to a plain cuff again.
- Basic Single Crochet Mitten: The ideal first project, using only one stitch and focusing on construction fundamentals
- Half Double Crochet Mitten: A step up in texture and softness, still very beginner-accessible
- Ribbed Cuff Mitten: Introduces back-loop-only technique for a stretchy, professional-looking cuff
- Striped Mitten: A color-changing project that teaches yarn joining without complex colorwork
- Fingerless Mitten: A forgiving variation that eliminates top shaping and works up even faster
Intermediate and Advanced Mitten Patterns for Growing Skills
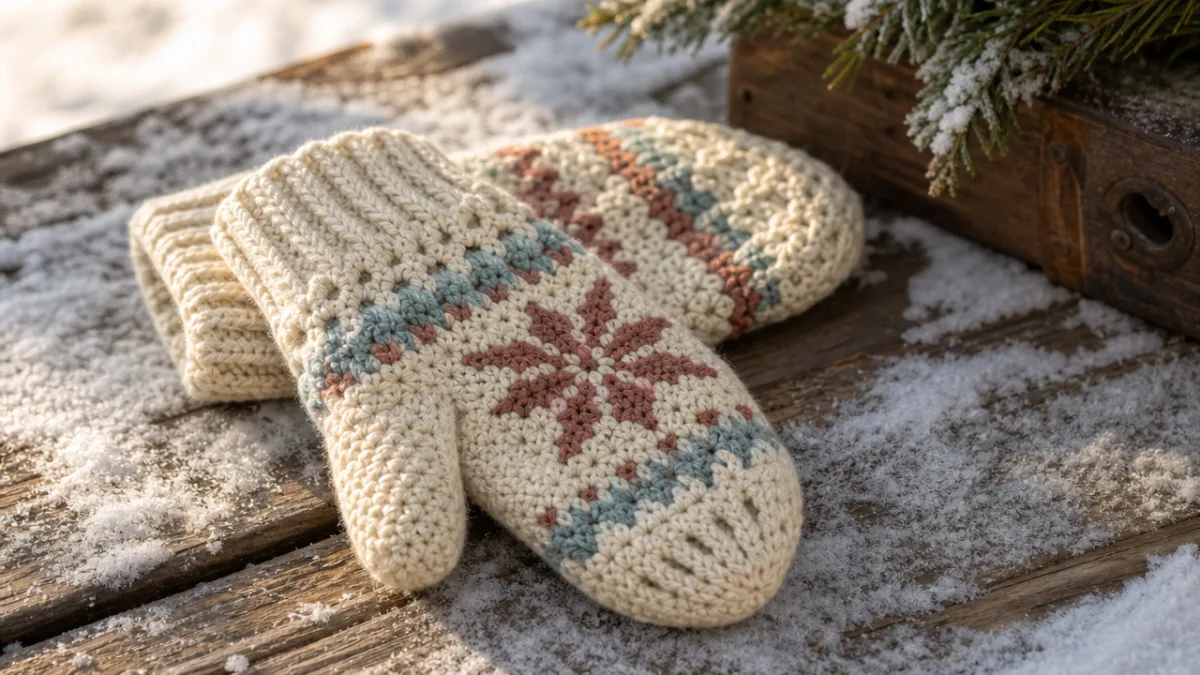
Once you’ve mastered the basics, the world of intermediate and advanced crochet mitten patterns opens up with exciting possibilities. Colorwork mittens, inspired by traditional Scandinavian and Fair Isle knitting traditions, are one of the most stunning directions you can take your mitten making. In crochet, colorwork is typically achieved through the tapestry crochet method, where you carry multiple strands of yarn simultaneously and work over the non-active colors to create geometric patterns, folk motifs, and intricate repeating designs embedded directly into the fabric of the mitten.
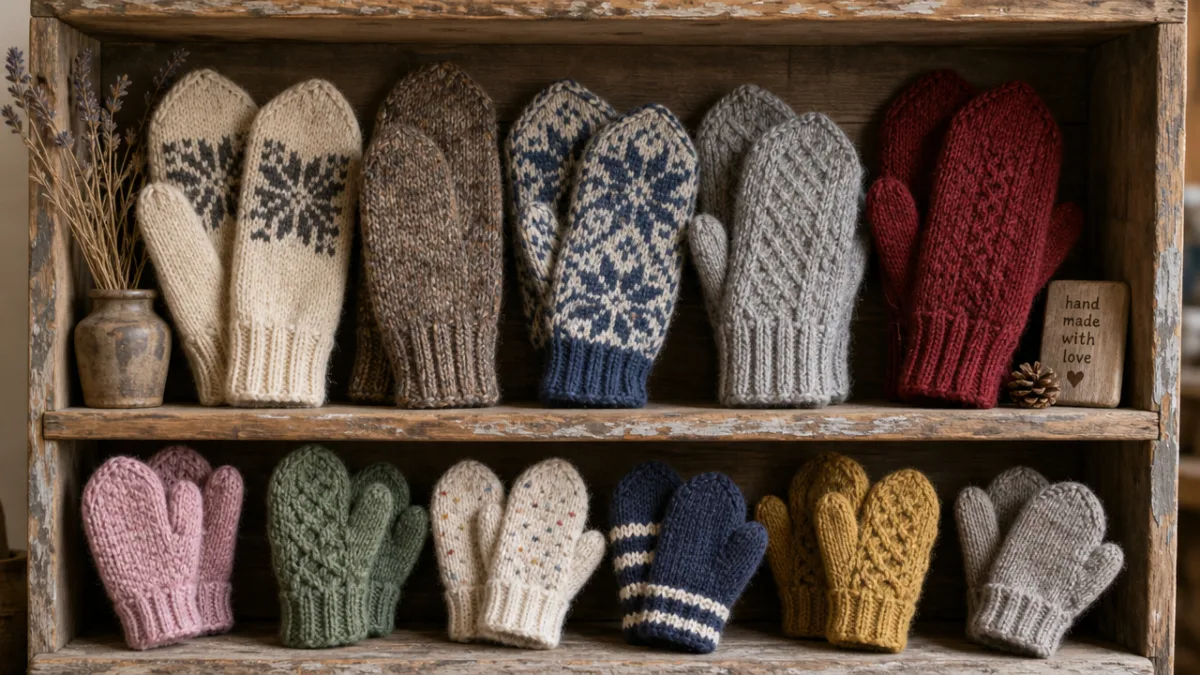
Cable-effect crochet mittens are another spectacular intermediate project that showcases how surprisingly versatile crochet can be. While cables are traditionally associated with knitting, crochet cables are created using front post and back post double crochet stitches that pull the fabric forward and backward in alternating directions, mimicking the twisted rope appearance of a traditional cable. A pair of cable mittens has an heirloom quality that makes them a cherished gift, and the cable technique, while it requires concentration to learn initially, quickly develops into a satisfying rhythm.
For truly advanced crocheters, lace mitten patterns offer an extraordinary creative challenge. Worked in fingering or sport weight yarn with a smaller hook, lace mittens incorporate chain spaces, picots, and complex stitch combinations to create an intricate, open fabric that is surprisingly beautiful despite its delicacy. While lace mittens aren’t designed for harsh outdoor conditions, they make stunning decorative pieces, elegant dress gloves for cooler evenings, or meaningful handmade gifts for someone special. Reading a lace chart for the first time can feel overwhelming, but breaking the pattern into small sections and working methodically through each row builds both skill and confidence.
Sizing Your Mittens: A Guide to Getting the Perfect Fit
One of the most common frustrations crocheters encounter with mitten patterns is sizing. A mitten that fits perfectly in theory can end up too snug, too loose, too short, or too long in practice, particularly if you haven’t worked a gauge swatch or taken hand measurements before starting. The good news is that with a few simple measurements and some basic math, you can adapt virtually any mitten pattern to achieve a custom fit that works beautifully for the intended wearer, whether that’s yourself, a child, or an adult with an unusually large or small hand.
The two most important measurements for mitten sizing are hand circumference and hand length. Hand circumference is measured around the widest part of the palm, typically just below the knuckles, with the thumb excluded. Hand length is measured from the base of the wrist to the tip of the middle finger. Most adult mitten patterns are designed to fit a hand circumference of 7 to 8 inches, which covers the average adult woman’s hand comfortably. Men’s hands tend to be larger, averaging 8 to 9 inches in circumference, so you may need to increase the stitch count or use a heavier yarn weight to accommodate a larger hand.
Children’s mittens require special attention to sizing because children’s hands grow so rapidly. It’s generally a good idea to make children’s mittens slightly larger than the child’s current hand size to allow for some growth over the winter season. Most reputable children’s mitten patterns offer sizing in age ranges such as toddler (1–3 years), child small (3–5 years), child medium (5–8 years), and child large (8–12 years), with corresponding hand measurements listed alongside each size. Always cross-reference the listed measurements with an actual tracing of the child’s hand for the most accurate results, as children’s proportions can vary significantly even within the same age range.
- Toddler (1–3 years): Approximately 5–5.5 inch circumference, 4.5–5 inch length
- Child Small (3–5 years): Approximately 5.5–6 inch circumference, 5–5.5 inch length
- Child Large (6–10 years): Approximately 6–6.5 inch circumference, 6–7 inch length
- Adult Small/Medium: Approximately 7–7.5 inch circumference, 9–10 inch length
- Adult Large/XL: Approximately 8–9 inch circumference, 10–11 inch length
Caring for Your Crochet Mittens: Tips for Longevity
A beautiful pair of handmade crochet mittens deserves proper care to ensure it lasts for many winters to come. The care requirements for your mittens will depend largely on the fiber content of the yarn you used to make them. Wool mittens, for example, require more careful handling than acrylic mittens, but with the right approach, wool can remain beautiful and functional for decades. Always check the yarn label for specific washing instructions before cleaning any handmade item, as different wool varieties and blends have different tolerances for heat and agitation.
For wool and wool-blend mittens, hand washing in cool water with a gentle wool wash such as Eucalan or Soak is the safest method. Submerge the mittens and gently squeeze the water through the fibers without agitating, wringing, or twisting, as this can cause felting and permanently distort the shape. After washing, press the mittens gently between two clean towels to remove excess water, then reshape them by hand and lay them flat on a dry towel away from direct sunlight or heat sources. Blocking wet wool mittens over a mitten blocker or even a piece of cardboard cut to the correct shape will help them dry in perfect proportions.
Acrylic and synthetic mittens are considerably more forgiving when it comes to care. Most can be machine washed on a gentle cycle in cool water and laid flat to dry, though some can even tolerate low-heat tumble drying. However, it’s worth noting that acrylic yarn should never be placed in a hot dryer or near high heat sources, as extreme heat can cause acrylic fibers to melt, distort, or lose their shape permanently. Storing your mittens properly during the off-season — clean, dry, and in a sealed bag or breathable cotton storage bag — will protect them from moths, moisture, and dust, keeping them fresh and ready for the following winter.
Creative Ways to Customize and Embellish Your Mittens
One of the greatest joys of making handmade mittens is the opportunity to add personal touches that make each pair completely unique. Even the simplest mitten pattern can be transformed into something extraordinary with a few thoughtful embellishments or design modifications. Adding a contrasting color stripe to the cuff, working the thumb in a complementary shade, or incorporating a small floral motif crocheted separately and sewn on as an appliqué are all simple ways to elevate a basic pattern into something that feels truly special and intentional.
Buttons are a particularly charming embellishment option for crochet mittens. A row of small vintage buttons sewn along the cuff adds a whimsical, storybook quality that is especially appealing on children’s mittens. You can also add button closures to create convertible mitten-glove hybrids, where a flap folds back and buttons in place to reveal fingerless glove functionality underneath. This practical design has gained significant popularity in recent years and is a wonderful option for people who need their hands free frequently throughout the day but still want the warmth of a full mitten available when needed.
Pom-poms, tassels, and yarn fringe are other popular embellishment choices that add texture and playfulness to finished mittens. A fluffy pom-pom attached to the cuff or tip of a mitten is particularly popular for children’s designs and can be made from the same yarn as the mitten or from a contrasting color or texture for visual interest. For a more sophisticated look, consider adding a single elegant tassel in a complementary shade, or experimenting with embroidery stitches worked over the finished mitten fabric to create floral, geometric, or monogram designs. The only limit to mitten customization is your own creativity, and the handmade quality of crocheted mittens makes every embellishment feel meaningful and intentional.








What do you think?
It is nice to know your opinion. Leave a comment.