










DIY Floral Jar Crafts for Cozy Room Decor: Your Complete Guide to Easy Handmade Home Ideas
Why Floral Jar Crafts Are the Perfect Home Decor Project
There is something deeply satisfying about transforming simple, everyday objects into beautiful pieces of home decor that reflect your personal style. Floral jar crafts sit at the perfect intersection of accessibility and creativity — they require minimal tools, cost very little to make, and produce results that look genuinely charming displayed on a shelf, windowsill, or bedside table. Whether you are an experienced crafter or picking up a hot glue gun for the very first time, these projects meet you exactly where you are and reward your effort generously.
The cozy home aesthetic has taken over interior design conversations in recent years, and for very good reason. People crave spaces that feel warm, lived-in, and personally curated rather than sterile and showroom-perfect. Handmade decor is one of the most effective ways to inject that sense of warmth into a room because it carries a story — the hours you spent, the choices you made, the flowers you selected — and that story becomes part of your living space in a way that mass-produced items simply cannot replicate.
Floral jar crafts are also wonderfully versatile. The same basic technique can produce a rustic farmhouse centerpiece, a romantic vintage accent, a minimalist Scandinavian vase, or a maximalist bohemian statement piece depending on the jars you choose, the flowers you use, and the finishing touches you apply. This guide will walk you through everything you need to know to create stunning floral jar arrangements that make your room feel genuinely cozy and uniquely yours.
Gathering Your Materials: Everything You Need to Get Started
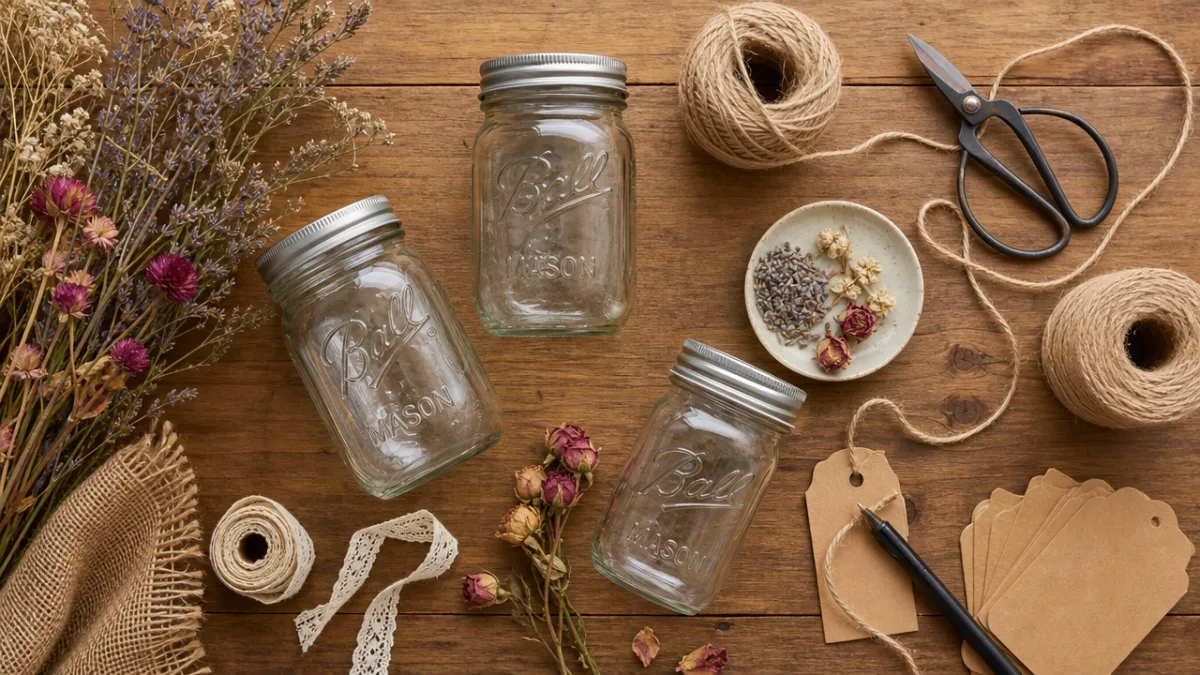
Before you begin any craft project, taking the time to gather your materials thoughtfully makes the entire experience smoother and more enjoyable. For floral jar crafts, the good news is that you likely already have many of the essentials at home. Start by collecting glass jars in various sizes — mason jars are the classic choice, but pasta sauce jars, pickle jars, jam jars, and even old candle vessels all work beautifully. Variety in height and width will allow you to create dynamic, layered arrangements that draw the eye.
When it comes to flowers, you have several wonderful options to consider. Dried flowers have become enormously popular because they last indefinitely, require no water, and carry a soft, nostalgic quality that suits the cozy aesthetic perfectly. Pampas grass, dried lavender, eucalyptus, baby’s breath, and dried roses are all excellent starting points. Silk flowers are another practical option, particularly if you want vivid color that holds up over time. Fresh flowers, of course, bring unmatched fragrance and natural beauty, though they require more frequent replacement and some water management in your jars.
Beyond jars and flowers, you will want to gather a few additional supplies to elevate your finished pieces. Consider adding some or all of the following to your crafting toolkit:
- Twine, ribbon, or lace for wrapping jar necks and adding texture
- Acrylic paint or chalk paint for tinting or fully painting jars
- Mod Podge and tissue paper for a decoupage finish
- Hot glue gun and glue sticks for attaching embellishments
- Floral wire and floral foam for structure and support inside jars
- Burlap, kraft paper, or fabric scraps for wrapping or layering
- Spray paint in matte, metallic, or frosted finishes
- Small decorative items like buttons, charms, or dried citrus slices
Having these supplies on hand gives you the flexibility to experiment as you go rather than stopping mid-project to search for something you need. A well-stocked craft station also makes the creative process feel more like play and less like a chore, which ultimately produces better, more joyful results. Even if your budget is limited, starting with just jars, dried flowers, and some twine will give you results you will be proud to display.
Step-by-Step Techniques for Preparing and Decorating Your Jars
The preparation stage is where your jars are transformed from plain containers into vessels with character and intention. Begin by cleaning your jars thoroughly — any residue from their original contents can affect how paint, glue, or other finishes adhere to the glass. Remove labels completely by soaking jars in warm, soapy water and using a scrubbing pad or a bit of cooking oil to dissolve stubborn adhesive. Once clean and dry, your jars are a blank canvas ready for whatever treatment you have in mind.
Painting is one of the most transformative techniques available to you. Chalk paint adheres to glass without priming and dries to a beautifully matte, velvety finish that looks instantly rustic and handmade. Apply it with a dry brush in loose, uneven strokes rather than aiming for full coverage — the variations in opacity actually add to the charm. Alternatively, fill a jar with diluted acrylic paint, swirl it around to coat the inside, then pour out the excess and let it dry. This interior-coating technique, sometimes called a “sea glass” effect, allows light to filter beautifully through the tinted glass.
Frosted spray paint is another incredibly effective option for creating an elegant, diffused look. Simply place your clean jars on newspaper in a well-ventilated area, apply the frosted spray in light, even coats, and allow each coat to dry fully before adding the next. The resulting finish is soft and dreamy, making any flowers placed inside look as though they are emerging from mist. For a more textural approach, consider wrapping the lower portion of your jar in layers of twine secured with hot glue, creating a woven band that adds warmth and a natural, earthy quality to the finished piece.
Creating Beautiful Arrangements Inside Your Jars
Once your jars are decorated to your satisfaction, the real magic begins with the floral arrangement itself. For dried flower arrangements, start by trimming your stems to different lengths so that the final arrangement has dimension and movement rather than looking flat and uniform. Begin with your largest, most voluminous blooms in the center, then fill in around them with medium-sized flowers, and finally tuck in delicate accent pieces like dried baby’s breath, small seed pods, or sprigs of preserved eucalyptus to fill any gaps and add texture.
If you are working with fresh flowers and want them to last as long as possible in your jars, there are a few practical steps worth taking. Fill jars only partway with clean water, trim stems at a 45-degree angle to maximize water uptake, remove any leaves that would sit below the waterline to prevent bacterial growth, and keep arrangements out of direct sunlight and away from heating vents. Changing the water every two days and re-trimming stems will extend the life of your blooms significantly, often adding a week or more of display time.
For those who want arrangements to feel more intentional and polished, learning a few basic principles of floral design goes a long way. Work with odd numbers of stems since groupings of three, five, or seven flowers tend to look more natural than even numbers. Consider the rule of thirds when building height — aim for your tallest element to be roughly one and a half times the height of your jar. Create visual balance by distributing color and texture throughout the arrangement rather than clustering all of one type in a single spot. These simple principles transform a casual bunch of stems into something that looks genuinely considered and artful.
Styling and Displaying Your Floral Jar Arrangements
Creating beautiful floral jar arrangements is only half the experience — how you display them in your room determines how much impact they ultimately have on the overall atmosphere. The most effective displays work with the existing elements of a space rather than competing with them. Consider the colors already present in your room through textiles, furniture, and wall art, and choose flower colors that complement or gently contrast with those tones. A room with warm terracotta and cream tones might welcome arrangements featuring dried orange blooms, cream pampas grass, and touches of burgundy, while a cooler room with blues and grays might suit white flowers, silvery eucalyptus, and touches of dusty mauve.
Grouping multiple jars together is almost always more visually powerful than placing a single jar in isolation. The trick is to vary the heights, widths, and finishes of your jars so that the grouping feels curated rather than cluttered. A classic approach is to arrange three jars of graduating heights in a loose triangle, keeping them close enough that they read as a unified display but with enough space between them to avoid feeling crowded. Adding a small candle, a smooth river stone, a small framed photo, or a few scattered dried petals around the base of your arrangement grounds it visually and turns a collection of jars into a styled vignette.
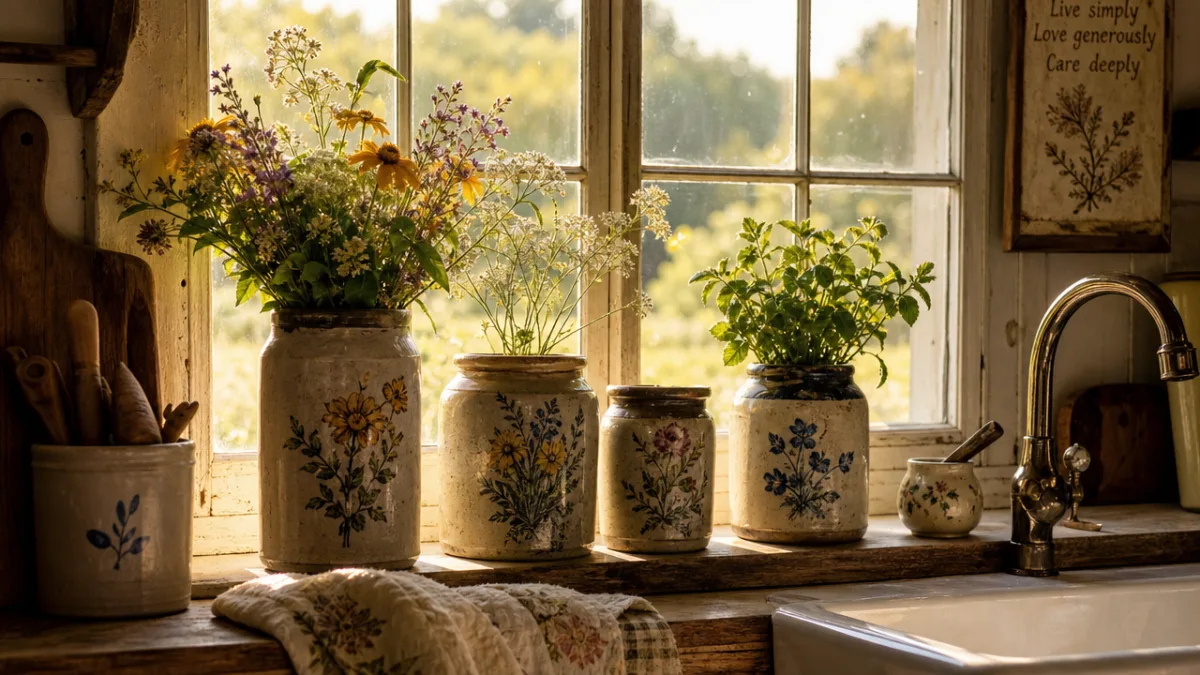
Think carefully about location within your room as well. Windowsills are wonderful for floral jar displays because natural light filters through glass beautifully and highlights the colors and textures of dried or fresh flowers. Mantlepieces, bookshelves, bedside tables, dining tables, and bathroom countertops are all excellent options too. In smaller spaces, consider vertical display — mounting a floating shelf specifically to house a collection of jar arrangements gives them a dedicated home and draws the eye upward in a way that makes rooms feel larger and more considered. Even tucking a small jar arrangement into a bathroom corner can turn a purely functional space into one that feels genuinely welcoming.

Seasonal Styling Ideas to Keep Your Decor Fresh Year-Round
One of the greatest joys of working with floral jar arrangements as a decor format is how easily they adapt to the changing seasons, allowing you to refresh your space without replacing furniture or repainting walls. In spring and summer, lean into fresh color and abundant texture — think bright ranunculus, garden roses, wildflowers, and sprigs of fresh herbs like rosemary and lavender tucked into clear, unpainted jars that show off the green of stems in water. The overall effect is fresh, alive, and full of natural energy.
As autumn arrives, swap in the rich, earthy tones of the season. Dried wheat, rust-colored dried roses, cinnamon sticks bundled with twine and placed beside a tall jar, small dried seed pods, and golden dried grasses all capture the cozy warmth that autumn interiors crave. Painting jars in matte terracotta, deep forest green, or warm amber at this time of year helps the arrangements feel anchored in the season. Adding small decorative gourds or cinnamon-scented pine cones nearby completes a display that feels genuinely autumnal without being overly themed or kitschy.
Winter arrangements carry their own quiet magic. Think white, silver, and deep evergreen — dried white cotton stems, silver-painted eucalyptus, small pinecones tucked into frosted jars, and sprigs of preserved holly or juniper. The interplay of frosted glass and white botanicals in the low light of winter evenings is genuinely beautiful and deeply cozy. For the holiday season specifically, adding a string of small battery-operated fairy lights draped around or inside clear jars creates a soft, glowing effect that requires almost no effort but produces a completely enchanting result.
Budget-Friendly Tips and Creative Variations to Inspire Your Own Style
One of the most liberating aspects of floral jar crafts is that they genuinely do not require a significant financial investment to produce beautiful results. Some of the most charming arrangements come from the most humble materials — foraged branches, wildflowers picked from a meadow walk, rosemary clipped from a kitchen garden, or dried grasses gathered from the edge of a field. Nature provides an astonishing abundance of interesting, beautiful material if you learn to look for it with craft in mind. Even weeds, when dried and arranged thoughtfully, can look remarkably elegant.
Thrift stores and garage sales are invaluable resources for jar hunters. People regularly donate interesting glass vessels — vintage apothecary jars, old milk bottles, mismatched mason jars, and ornate pickle jars — that cost almost nothing but have enormous craft potential. Dollar stores and discount home goods shops are equally worth exploring for inexpensive silk flowers, plain jars, and basic craft supplies. Shopping this way not only keeps costs down but also gives your projects a genuinely eclectic, collected-over-time quality that is very difficult to achieve when buying everything new and matching from a single retailer.
Creative variations on the basic floral jar concept are practically limitless, and exploring them is part of the joy of making these projects your own. Consider some of these inspiring directions to take your craft further:
- Fairy light jars: Fill clear jars with battery-operated fairy lights and a few dried flowers for a glowing, magical night light effect.
- Herb jar gardens: Plant small herbs like thyme, mint, or basil in wide-mouthed jars on a sunny kitchen windowsill for a functional and beautiful living display.
- Scented jar arrangements: Combine dried lavender, dried orange slices, cinnamon sticks, and cloves in a jar for a natural potpourri that looks beautiful and smells wonderful.
- Terrarium-style jars: Layer small stones, activated charcoal, and potting soil in a wide jar, then plant tiny succulents or ferns for a self-contained miniature garden.
- Memory jars: Fill a jar with dried flowers from meaningful occasions — a wedding bouquet, a birthday arrangement, flowers from a garden you loved — as a way of preserving and displaying precious memories.
Gift-giving is another dimension of floral jar crafts well worth exploring. A handmade floral jar arrangement is one of the most thoughtful, personal, and cost-effective gifts you can offer someone. Unlike store-bought flowers, which feel generic, a jar you have decorated yourself and filled with flowers you chose deliberately communicates genuine care and creativity. Tailor the colors, style, and flowers to the recipient’s personality and the occasion, and you have a gift that is both beautiful and deeply meaningful — the kind of thing people keep displayed on their shelves long after store-bought gifts have been forgotten.
Making Your Craft Practice Sustainable and Long-Lasting
As you develop your floral jar craft practice, thinking about sustainability adds another layer of richness and intention to what you make. Choosing dried flowers over fresh ones significantly reduces waste since dried arrangements can last for months or even years. When dried arrangements eventually fade or shed, the botanicals can often be composted, and the jars are endlessly reusable. This circular approach to crafting aligns beautifully with the broader movement toward conscious consumption and mindful home-making that many people are embracing as part of a simpler, more intentional lifestyle.
Sourcing materials locally and seasonally is another meaningful practice. Buying dried flowers from local farmers markets, foraging for natural materials from your own environment, and growing flowers in your garden specifically for drying all connect your craft to the natural rhythms of the place where you live. There is something deeply grounding about a creative practice that keeps you aware of the seasons, that sends you outdoors looking for interesting seed pods and grasses, and that transforms the natural abundance around you into something beautiful for your home. This kind of craft is not just about the objects produced — it is about the relationship it builds between you and the living world.
Building a sustainable craft practice also means investing in quality tools that will serve you for years. A good hot glue gun, a quality pair of floral scissors, a set of reliable acrylic paints, and a collection of well-maintained jars accumulate over time into a toolkit that makes every project easier and more enjoyable. Caring for your tools — cleaning glue gun tips, keeping scissors sharp, storing paints properly to prevent drying — extends their life significantly and means you spend less money replacing things. The most seasoned crafters often work with the same beloved tools for years, and those tools become part of the creative experience in a way that disposable, cheap alternatives simply cannot.
Sharing Your Creations and Finding Community
Sharing your floral jar crafts with others — whether online or in person — opens up a wonderful dimension of creative community that can sustain and inspire your practice for years to come. Platforms like Pinterest, Instagram, and dedicated craft communities are full of makers at every skill level who share their projects, techniques, and ideas generously. Engaging with these communities by sharing your own work, commenting thoughtfully on others’, and saving inspiration for future projects creates a creative ecosystem that feeds your motivation and keeps your ideas fresh.
Hosting a craft session with friends or family members is another beautiful way to share this hobby. Set up a table with an assortment of jars, flowers, and embellishments, and invite people to make their own arrangements to take home. These sessions are naturally social and collaborative — people share ideas, help each other problem-solve, and leave with something handmade and personal. They are also wonderfully low-pressure since there is no wrong way to arrange flowers in a jar, which makes them ideal for groups with mixed crafting experience levels.
Ultimately, floral jar crafts are about so much more than decoration. They are about slowing down, engaging your hands in something tangible and beautiful, and making your living space feel genuinely reflective of who you are and what you love. In a world that increasingly pushes speed, consumption, and passive experience, there is quiet radicalism in sitting down with a handful of dried flowers, a rescued glass jar, and an hour of unhurried time to make something lovely. Your home is the backdrop of your daily life, and filling it with things you have made yourself — however simply — transforms that backdrop into something that truly nourishes you every time you walk into the room.








What do you think?
It is nice to know your opinion. Leave a comment.