










DIY Wall Art: Transform Your Space with Creative Handmade Masterpieces
There is something deeply satisfying about hanging a piece of art on your wall and knowing that you made it yourself. DIY wall art has surged in popularity over the past decade, and for good reason — it combines personal creativity with practical home décor, resulting in spaces that feel genuinely unique and intentional. Whether you are a seasoned crafter or someone who has never picked up a paintbrush, the world of handmade wall art offers entry points for every skill level and aesthetic preference.
Beyond the creative fulfillment, DIY wall art is remarkably budget-friendly compared to purchasing original pieces from galleries or boutique home stores. A single abstract canvas that might cost hundreds of dollars at a retail shop can be recreated at home for a fraction of the price using basic supplies from your local craft store. This accessibility means you can fill entire walls with beautiful, meaningful artwork without breaking the bank, and you can refresh your décor as often as your tastes evolve.
This guide walks you through everything you need to know about creating stunning wall art at home — from understanding the different styles and materials available to mastering specific techniques and displaying your finished pieces like a professional. By the time you finish reading, you will feel confident and inspired to start your very first DIY wall art project, or to elevate the work you are already doing.
Understanding the Different Styles of DIY Wall Art
Before you gather your supplies and start creating, it helps to spend a little time exploring the broad landscape of DIY wall art styles. The options are genuinely vast: abstract painting, macramé fiber art, pressed botanicals, geometric tape art, block printing, photo collages, and mixed media assemblages are just a handful of the directions you can take. Each style carries its own mood and suits different interior design aesthetics, so thinking about your existing décor before you begin will help ensure your finished piece feels cohesive rather than out of place.
Abstract art is one of the most forgiving and expressive styles for beginners because it operates outside the constraints of accurate representation. You do not need to know how to draw a perfect circle or replicate a realistic landscape — instead, you are working with color, texture, movement, and emotion. A simple palette knife technique using bold acrylics on canvas can produce a striking abstract piece in an afternoon. Many artists use household items like plastic wrap, sponges, or even old credit cards to create unexpected textures that add real visual depth to their work.
On the more structured end of the spectrum, geometric wall art offers clean lines and satisfying symmetry that pairs beautifully with modern, Scandinavian, or minimalist interiors. Painter’s tape is your best friend here — by carefully taping off sections of a canvas or wood panel and filling each shape with a different color or shade, you can create sophisticated geometric compositions that look professionally designed. Triangles, hexagons, chevrons, and diamond patterns are all popular choices that deliver maximum visual impact with relatively minimal artistic skill required.
Fiber Arts and Textile Wall Hangings
Macramé and woven wall hangings have experienced a massive revival in recent years, bringing warmth, texture, and a bohemian sensibility to living rooms, bedrooms, and entryways. These pieces are made by knotting, weaving, or looping fibers — typically cotton rope, yarn, or wool — onto a dowel rod or piece of driftwood. The result is a dimensional textile artwork that adds softness to spaces that might otherwise feel too hard or clinical. The rhythmic, meditative quality of knotting and weaving also makes these projects particularly enjoyable to create.
Fiber wall art does not require any special equipment beyond the fibers themselves and something to hang them from. Beginners can start with simple fringe designs and basic square knots before gradually working up to more complex patterns involving spirals, braids, and decorative loops. YouTube tutorials and Pinterest boards dedicated to macramé offer step-by-step guidance for dozens of different patterns, making it easy to learn entirely from free online resources. Once you understand the foundational knots, you will find that you can improvise and develop your own signature style relatively quickly.
Essential Supplies and Tools for Getting Started
One of the most common mistakes new DIY artists make is over-investing in supplies before they know which styles and techniques resonate with them. It is far better to start with a modest, versatile toolkit and expand from there as your interests develop. At the most basic level, you will need a surface to work on, some kind of medium to apply to it, and the tools to apply that medium. Everything else is optional enhancement rather than necessity.
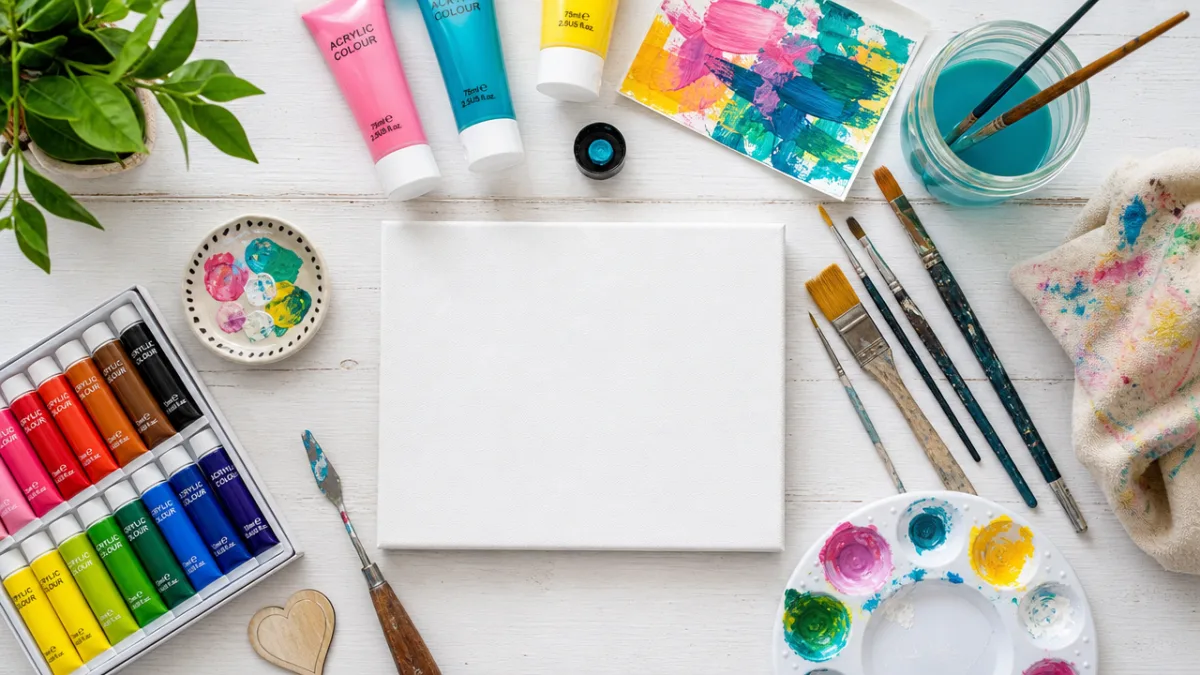
For painting-based projects, a set of quality acrylic paints in a range of colors is a worthwhile investment because acrylics are water-soluble while wet (making cleanup easy), dry quickly, and are incredibly versatile. They can be thinned with water to create watercolor-like washes, thickened with gel mediums for impasto textures, or used straight from the tube for bold, opaque coverage. A few flat brushes, a couple of round brushes, and a palette knife will handle the majority of techniques you are likely to explore in your first several projects.
Canvases are available in a huge range of sizes at very affordable prices, particularly when purchased in multipacks. However, do not overlook alternative surfaces — reclaimed wood planks, old window frames, thrift store mirrors, cardboard panels, and even fabric stretched over a simple frame can all serve as excellent painting or mixed media surfaces. Using unconventional surfaces often produces more interesting results than working on a standard white canvas, and the sustainable aspect of repurposing materials adds another layer of satisfaction to the creative process.
- Acrylic paints — versatile, fast-drying, and available in hundreds of colors; ideal for beginners and experienced artists alike.
- Canvases or wood panels — the most common surfaces; available in multipacks for affordable practice and experimentation.
- Painter’s tape — essential for clean geometric lines and protecting areas you want to keep paint-free.
- Palette knives — excellent for mixing colors and applying thick, textured paint strokes.
- Mod Podge or similar sealant — used to seal finished pieces and adhere collage elements securely to a surface.
- Macramé cord or yarn — the primary material for fiber arts projects; natural cotton is the most popular choice.
- Dowel rods or driftwood — used as the top support for hanging textile wall art pieces.
Step-by-Step Techniques for Stunning Results
Learning a handful of core techniques will unlock a surprisingly wide range of DIY wall art possibilities. You do not need to master dozens of different methods — instead, becoming genuinely comfortable with three or four versatile approaches will allow you to produce pieces of consistently high quality while still leaving plenty of room for experimentation and growth. The techniques outlined here are beginner-accessible but can also be pushed to produce sophisticated, gallery-worthy results in the hands of a more experienced creator.
The fluid art or pour painting technique has taken the DIY world by storm over the past several years, and for good reason. By mixing acrylic paint with a pouring medium to achieve a thin, flowing consistency and then pouring or tilting it across a canvas, you create organic, marbled patterns that are utterly unique — no two pours ever produce exactly the same result. The process is intuitive and forgiving, which makes it enormously appealing to beginners, but experienced artists can manipulate the outcome significantly by carefully controlling the viscosity of their paints, the order in which they pour colors, and the angle and speed at which they tilt the canvas.
Block printing is another accessible technique that produces beautiful, repeatable patterns perfect for creating a series of coordinated pieces. You carve a design into a linoleum block or a soft rubber eraser using carving tools, ink the surface with a brayer, and then press it firmly onto paper, fabric, or canvas. The resulting print has a handcrafted quality that cannot be replicated by digital means — slight variations in pressure and ink distribution give each print a living, organic character that mass-produced art simply cannot match. Once you have carved your block, you can produce dozens of prints quickly, making this a great technique for creating gifts or filling a large gallery wall affordably.
Creating Depth and Visual Interest
One of the hallmarks of truly compelling wall art is a sense of depth — the feeling that the image has layers, that there is something happening beneath the surface. Achieving this does not require years of training; it simply requires building up your piece in intentional stages. In painting, this means starting with broad background washes before adding midground elements and finally detailed foreground work. Each layer you add pushes the previous layer back visually, creating the illusion of three-dimensional space on a flat surface.
Texture is another powerful tool for creating visual interest and depth in DIY wall art. Physical texture — actual raised surfaces you can feel with your fingers — catches light in ways that flat paint never can, creating a dynamic piece that literally looks different depending on the time of day and the quality of the light. You can build texture using thick impasto paint, modeling paste, sand mixed into your paint, crumpled tissue paper adhered to the surface before painting, or even natural materials like dried leaves, twigs, or seeds embedded into a mixed media piece.
Designing a Gallery Wall That Makes a Statement
Creating individual pieces of wall art is tremendously satisfying, but arranging multiple pieces together into a cohesive gallery wall elevates the entire effect to something truly transformative. A well-designed gallery wall becomes the visual centerpiece of a room — the first thing guests notice and the thing they remember long after they leave. However, pulling off a gallery wall successfully requires a bit of planning and an understanding of basic visual composition principles, otherwise the arrangement can feel chaotic and cluttered rather than curated and intentional.
The first principle to master is balance, which does not necessarily mean symmetry. A symmetrical gallery wall — identical frames arranged in a perfect grid — is clean and formal, which suits certain spaces beautifully. But an asymmetrical arrangement can feel more dynamic and lived-in while still maintaining visual balance through careful distribution of weight. In asymmetrical arrangements, visual weight comes from factors like size, color, and busyness of the image — a large, dark-colored piece carries more visual weight than a small, light one, and these weights need to be roughly balanced across the arrangement for the composition to feel settled and intentional.
Before committing to any nail holes in your wall, lay your intended arrangement out on the floor and live with it for a day. Walk past it, look at it from different angles, and notice whether any piece feels out of place or whether the overall grouping lacks cohesion. It is much easier to adjust the arrangement on the floor than to keep filling and repainting nail holes. Many experienced decorators also recommend cutting out paper templates in the exact size of each frame and using painter’s tape to arrange these templates on the wall before hanging anything — this gives you a true preview of exactly how the finished gallery wall will look in situ.
Mixing Sizes, Shapes, and Textures
The most visually engaging gallery walls typically include a mix of different frame sizes, shapes, and materials rather than relying on a single uniform style. Varying the scale creates visual rhythm and prevents the eye from becoming bored — a large anchor piece surrounded by smaller works draws the eye in and then leads it outward in an expanding pattern. Mixing rectangular frames with circular mirrors, unframed canvases, and three-dimensional objects like wall sconces or hanging plants adds further dimensionality and prevents the arrangement from feeling like a flat sheet of paper pinned to the wall.
When mixing frames, you can achieve cohesion through color even when the shapes and sizes vary significantly. A collection of frames in varying sizes but all finished in matte black creates a unified, modern feel regardless of how diverse the artwork within them might be. Similarly, all-white or all-natural wood frames can tie together a very eclectic mix of art styles and image types. The key is to have at least one repeating element — whether color, material, subject matter, or color palette within the artworks themselves — that acts as a visual thread connecting the disparate pieces.
Personalizing Your Art to Reflect Your Story
The true power of DIY wall art lies in its capacity for deep personalization. Unlike purchasing art from a store, where you are choosing from what happens to be available, making your own art means you can represent exactly what matters to you — your family, your travels, your values, your favorite colors, your memories, and your dreams. This personal resonance transforms wall art from mere decoration into a form of meaningful self-expression that makes your home feel genuinely reflective of who you are rather than a catalog showroom.
Incorporating personal photography into wall art is one of the most straightforward ways to achieve this kind of meaningful personalization. You do not need to simply print and frame a photograph as-is — instead, consider applying artistic treatments that transform the image into something more visually striking. Transferring a photo onto canvas using gel medium creates a painterly, textured effect. Printing onto watercolor paper and then adding hand-painted washes of color on top blurs the line between photography and painting in beautiful ways. You can also create large-scale photographic triptychs by splitting a single meaningful image across three canvases for a dramatic, wall-filling installation.
Text and typography offer another rich avenue for personal expression in DIY wall art. A meaningful quote, a family name, a set of coordinates marking a significant place, or even the first few lines of a beloved poem can become the conceptual and visual anchor of a piece. Hand-lettering these elements directly onto canvas gives the work an authenticity and warmth that printed vinyl letters simply cannot replicate, and the slight imperfections of handwork are a feature rather than a flaw — they are proof of a human hand at work, which is precisely what makes handmade art so valuable and moving.
- Choose a meaningful theme — Start with a concept that genuinely resonates with you, whether it is a place, a feeling, a memory, or a value you want to celebrate daily.
- Gather your reference materials — Collect photographs, fabric swatches, color samples, and other references before you begin to ensure your finished piece feels cohesive.
- Sketch or plan loosely — A rough thumbnail sketch or a digital mockup helps you visualize the composition before committing paint or fiber to your surface.
- Work in layers — Build your piece gradually, allowing each layer to dry or set before adding the next, to create depth and prevent muddying of colors.
- Step back frequently — Artists who step back from their work regularly and view it from a distance catch compositional issues far earlier than those who stay nose-to-canvas throughout the process.
- Know when to stop — Over-working a piece is one of the most common mistakes in DIY art; learn to recognize when a piece has reached its best point and resist the urge to add more.
- Document your process — Photographing your work at various stages creates a satisfying record of your creative journey and helps you learn from each project.

Displaying and Caring for Your Finished Pieces
Once you have invested time and creative energy into making a piece of DIY wall art, it deserves to be displayed and cared for properly. How a piece is hung, lit, and maintained has an enormous impact on how it reads in the space — even a beautifully made artwork can fail to make its full impact if it is hung too high, in poor lighting, or in a location where it competes with too many surrounding elements. Taking a few extra minutes to think carefully about placement and presentation is always time well spent.
The standard rule of thumb for hanging art is to position the center of the piece at approximately eye level — around 57 to 60 inches from the floor in most spaces. This is the hanging height used by most professional galleries and museums because it allows viewers to engage with the work comfortably without straining their necks upward or bending down awkwardly. Over sofas and other furniture, the bottom of the frame should sit roughly six to eight inches above the furniture piece so that the art and furniture read as a cohesive unit rather than as separate, unrelated elements floating in space.
Lighting is a frequently overlooked but critically important factor in how wall art presents in a room. Natural daylight is beautiful but inconsistent — the same piece can look dramatically different in morning light versus afternoon light, and in rooms with limited windows, art can look flat and lifeless without supplementary lighting. Picture lights mounted directly above a frame, small track lights directed at a gallery wall, or even a simple plug-in spotlight aimed at a statement piece can completely transform how the art reads in the space, adding drama, warmth, and a sense that the work is genuinely valued and celebrated.
Long-Term Care and Preservation
Protecting your DIY wall art from the effects of time, light, and environmental factors will ensure that it looks beautiful for years and even decades to come. For acrylic paintings, applying a UV-protective varnish once the paint has fully cured (typically after several weeks, even if the surface feels dry to the touch much sooner) will prevent yellowing and color fading caused by exposure to sunlight. Varnish also creates a protective layer against dust and humidity, making the surface easier to clean gently with a soft, dry cloth without risking damage to the paint layer beneath.
Fiber arts and textile wall hangings require slightly different care. Keep them away from direct sunlight as much as possible, as UV exposure will bleach and weaken natural fibers over time. Dust them periodically with a soft brush attachment on a vacuum cleaner set to low suction, or gently shake them outdoors on a still day. If your fiber art becomes crumpled or misshapen during storage or moving, hanging it in a humid bathroom for a short period — not in contact with any water — can help the fibers relax and fall back into their natural positions.
Perhaps most importantly, give yourself permission to evolve your collection over time. DIY wall art is not a permanent commitment in the way that built-in architectural features are — pieces can be swapped out seasonally, rearranged as your tastes develop, gifted to friends and family, or simply retired to storage when they no longer speak to you as strongly as they once did. Treating your wall art as a living collection rather than a fixed installation keeps your home feeling fresh, dynamic, and genuinely reflective of who you are right now — and that is ultimately the most beautiful thing any wall art can do.








What do you think?
It is nice to know your opinion. Leave a comment.