










How To Burn Candles Correctly: The Complete Guide to Scented Candle Tips
Understanding Why Candle Care Matters
Lighting a candle seems pretty foolproof, right? Strike a match, enjoy the glow. But if you’ve ever watched a gorgeous, pricey candle slowly tunnel down the middle while thick walls of wax just sit there untouched, you already know there’s more to it than that. How you burn your candles genuinely matters — it affects how long they last, how well they throw their scent, and yes, how safely they burn in your home. A few small habits can literally double the life of a candle and make the whole experience so much better.
The candle market has exploded over the last couple of decades. People are spending billions every year on everything from simple tealights to hand-poured artisanal soy candles that run sixty or seventy dollars a pop. When you spend real money on a quality scented candle, you should be getting every hour of burn time and every bit of fragrance out of it. The frustrating reality is that most people never glance at the care instructions, and without realizing it, they undermine the whole thing on the very first burn. A little know-how goes a long way.
There’s also a safety side to all of this that’s worth taking seriously. Candles are a surprisingly common cause of house fires, and the culprits are almost always the same: improper use and leaving flames unattended. Knowing how to burn a candle correctly means knowing how to keep your home safe while still enjoying all the warmth, glow, and fragrance that make candles worth having in the first place. This guide walks you through everything, from that very first lighting to the final flicker.
The Critical First Burn: Setting the Memory of Your Candle
If you only remember one thing from this entire guide, make it this: the first burn is everything. Wax has a kind of physical memory, and whatever melt pool forms the first time you light your candle will set the pattern for every burn after that. Burn it for just thirty or forty-five minutes that first time, and the wax essentially learns to melt in a small ring around the wick — and it’ll keep doing exactly that. That’s what causes tunneling, where you end up with a deep crater down the middle and untouched walls of wax you’ll never get to use.
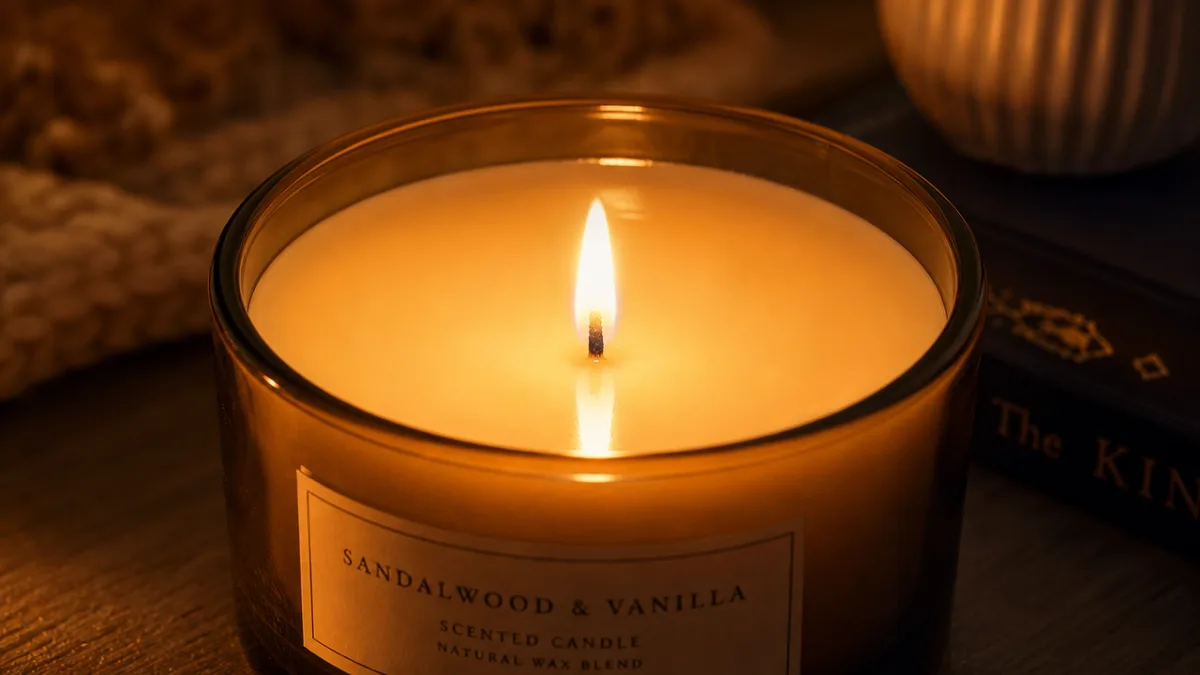
The fix is simple, but it requires patience: let the melt pool reach all the way to the edge of the container on that first burn. Depending on how wide your candle is, that could take anywhere from two to four hours. A standard three-inch candle usually needs three to four hours to melt edge to edge; a narrower one might get there in closer to two. Don’t blow it out early just because you need to step out for a bit — plan your first burn for an evening when you’ll actually be home for a few hours and can let it do its thing.
The depth of that melt pool matters too. You want to see liquid wax that’s roughly a quarter of an inch deep across the whole surface. That depth is what fully activates the fragrance oils in the wax and gets them releasing into the air — that’s the rich, room-filling scent you’re actually paying for. If the pool is shallow, the fragrance isn’t fully kicking in, and you’re essentially burning through wax without getting the full benefit. It’s also a sign the candle might just need a longer burn to really hit its stride.
Trimming the Wick: The Step Everyone Skips
Ask candle lovers whether they trim their wicks regularly, and a surprising number will sheepishly admit they never do. It’s probably the most overlooked part of candle care, which is a shame because it makes such a noticeable difference. When a wick gets too long, it burns hotter than it’s supposed to, the wax melts too fast and unevenly, and you get a big, flickery flame that produces soot — which is what leaves those black marks climbing up the inside of your glass jar and puts carbon particles into your home’s air.
The rule is simple: trim to about a quarter of an inch before every single burn, no exceptions. That includes the very first one, since candles sometimes arrive with wicks that are already a little long. A wick trimmer is an inexpensive little tool that makes the job easy — most have a small tray that catches the trimmed carbon so it doesn’t fall back into the wax. No wick trimmer? Small nail scissors or regular scissors work just fine. Just make sure the wick is fully cool and dry before you go near it.
After each burn, once the wax has hardened back up, take a look at the top of the wick. There’s often a small black mushroom-shaped carbon buildup sitting there. That’s totally normal, but it has to come off before the next burn. Light a candle with a mushroomed wick and that carbon mass burns super hot — it burns through wax faster, cranks up the soot, and can make the flame grow way taller than it should. A cleanly trimmed, quarter-inch wick gives you a steady flame about an inch tall, which is exactly what you want for a safe, even, efficient burn.
Burn Time and Placement: Where and How Long to Burn
Once you’ve nailed the first burn and started trimming your wicks, the length of each burn session still matters. After that initial lighting, try to keep each session to four hours or less. Burning longer than that lets the wax overheat, which can dull the fragrance or even make it smell a bit off. It also puts prolonged heat stress on the container — glass jars especially can crack if they get too hot for too long. After four hours, put the candle out, let the wax solidify completely, and light it again fresh when you’re ready.
Where you place your candle has a bigger impact than most people realize. Always set it on a flat, stable, heat-resistant surface, well away from anything flammable like curtains, books, or fabric. Keep it out of drafts — moving air makes the flame flicker, which leads to uneven burning and more soot. A lot of common candle problems, including tunneling and excessive smoking, trace straight back to the candle sitting near an air vent, an open window, or a fan. It sounds almost too simple, but moving the candle to a more sheltered spot can completely change how it performs.
If you like burning multiple candles at once — and plenty of people do, especially when setting a mood — give them some breathing room. Candles placed too close together radiate heat onto each other, which speeds up wax consumption and can overheat the containers. A good rule of thumb is to keep them at least three inches apart. And of course, keep candles away from children and pets, and don’t leave a lit candle alone in a room. These habits don’t take any extra effort once they’re second nature, and they make a real difference for both safety and burn quality.

How to Extinguish a Candle the Right Way
Most of us just blow out a candle without thinking twice, and honestly, that’s fine — but it does come with a drawback. Blowing almost always sends a thin curl of black, acrid smoke drifting up into the air, carrying carbon particles and unburned fragrance oils with it. In a smaller room, that brief plume can actually cut through the lovely scent you’ve spent the last few hours building up. If the fragrance experience is the whole point for you — and if you’re reading a candle care guide, it probably is — it’s worth trying a different method.
A wick dipper is a really elegant solution. It’s a simple little tool, basically a thin metal wand with a curved tip, that lets you gently push the burning wick down into the liquid wax to smother the flame — no smoke at all. You then lift the wick back out and straighten it, and since it’s been briefly dipped in wax, it’s already primed for the next time you light it. Wick dippers are cheap, widely available, and genuinely beloved by candle enthusiasts for good reason. A classic candle snuffer — the bell-shaped one on a long handle — also works well by cutting off the flame’s oxygen supply with barely any smoke.
One thing to avoid regardless of method: don’t put the lid on while the wax is still liquid. Trapping heat and moisture above the surface can cause condensation to form, which can mess with your next burn. It can also make the fragrance go a little stale if the lid is on tight. If your candle came with a lid, save it for storage between burns once the wax has fully cooled and re-set. That way it’ll keep dust off the wax surface and protect the fragrance until you’re ready to light it again.
Maximizing Scent Throw and Getting the Most From Your Candle
Scent throw is the term candle people use for how well a candle actually fills a space with fragrance. There are two kinds: cold throw, which is what you smell when the candle isn’t lit, and hot throw, which is the scent during burning. Hot throw is what most people care about, and it varies quite a bit depending on the wax type, the quality of the fragrance oils, the wick size, and — crucially — how you burn it. Every tip in this guide, from nailing the first burn to trimming the wick to keeping the flame out of drafts, feeds directly into getting the best possible hot throw from your candle.
Room size matters more than people tend to think. A candle that smells incredible in a small bathroom might seem almost undetectable in a big open-plan living room. Most candles are made with a particular square footage in mind, and good candle makers will often note this on the packaging. For larger spaces, try burning two complementary candles at once, or look for candles with a higher fragrance load. Coconut wax and coconut-soy blends are known for holding and releasing fragrance particularly well compared to straight paraffin or pure soy.
Temperature and humidity play a role too — candles tend to perform better in warmer rooms because heat helps fragrance molecules get into the air more efficiently. If you want to set the mood before guests arrive, light your candle twenty to thirty minutes beforehand so it has time to build up a proper melt pool and start scenting the space. Here’s a quick checklist of best practices for getting the most out of your candle’s scent throw:
- Always get a full edge-to-edge melt pool on the first burn to activate all the fragrance in the wax.
- Keep the wick trimmed to a quarter inch before every burn for the right flame height.
- Burn in a room that’s actually sized appropriately for the candle’s coverage area.
- Close doors and windows so the fragrance doesn’t escape before it has a chance to build up.
- Store candles with their lids on and out of direct sunlight, which can break down fragrance oils over time.
- Let the candle cool completely between sessions so the wax can fully re-set.
And finally, know when to let a candle go. Once the wax is down to about half an inch from the bottom of the container, it’s time to stop burning it. Pushing past that point risks overheating the container — especially glass jars — and can damage whatever surface it’s sitting on. The bright side is that a glass candle jar with a bit of residual wax is easy to repurpose. Pop it in the freezer for a few minutes and the remaining wax will contract and lift right out, leaving you with a clean, pretty jar that works great for storage, as a small planter, or even as a drinking glass.

Common Candle Mistakes and How to Avoid Them
Even people who’ve been burning candles for years fall into some pretty consistent traps. One of the most common is repeatedly burning for short sessions — the exact habit that causes tunneling. Another is letting debris collect in the melt pool. Every time you trim the wick, make sure the trimmings don’t fall into the wax. Any foreign material in the melt pool can unexpectedly reignite and create a second, uncontrolled flame, or it can clog the wick and cause uneven burning. Always fish out any trimmings, spent matches, or other bits before or after each burn.
Moving a lit candle — or one where the wax is still liquid — is another mistake with real consequences. Liquid wax is easier to spill than you’d think, and a spilled candle can spread an open flame across a surface in seconds. Always wait until the wax has completely re-solidified before you move a candle anywhere, and keep it level when you do. This is especially worth keeping in mind with wide, large candles that take quite a while to fully cool after being put out.
Using a container that wasn’t designed for candles is a mistake that can be genuinely dangerous. If you make your own candles at home, always use vessels that are rated for candle use and built to handle sustained heat. Regular drinking glasses, for example, can shatter from the prolonged thermal stress of a burning candle. Stick to purpose-built candle containers or ones that have been explicitly tested for this use. Here’s a summary of the most common candle mistakes to keep in your back pocket:
- Tunneling: Caused by not letting the wax reach the edges on the first burn. Always give that first session enough time.
- Skipping wick trimming: Leads to mushrooming, soot, and a flame that gets too large and too hot.
- Burning in a draft: Causes uneven burning, more soot, and weakened scent throw.
- Burning too long: Sessions over four hours overheat the wax and can degrade the fragrance.
- Burning too low: Going past the last half-inch of wax risks overheating the container and scorching the surface beneath it.
- Moving a lit candle: Risks spilling liquid wax and spreading flame somewhere it absolutely shouldn’t be.
Keep these pitfalls in mind and apply the simple techniques laid out throughout this guide, and you’ll notice a real difference — candles that burn more evenly, last noticeably longer, and actually fill your space with the fragrance you paid for. Candle care is one of those rare things where a small amount of effort pays off way more than you’d expect. Light with intention, burn mindfully, and enjoy every last bit of every candle you own.








What do you think?
It is nice to know your opinion. Leave a comment.