










DIY Round Door Hanger: Complete Guide to Crafting Beautiful Wood Signs
Introduction to Round Wood Door Hangers
Round wood door hangers have quietly become one of the most popular DIY projects going around right now, and honestly, it’s easy to see why. Unlike the classic rectangular sign, a circular design has this soft, organic quality that just works with almost any home style — whether you’re going for full farmhouse charm or something a lot more modern and minimal. There’s something about a handcrafted piece on your front door that makes a real first impression, turning an ordinary entryway into something that actually feels like you.
What I love most about this project is that it really is for everyone. You don’t need a fully kitted-out workshop or years of woodworking experience. Whether you’ve been making things with your hands for decades or you’re picking up a paintbrush for the very first time, a round door hanger is genuinely approachable. A little patience, the right supplies, and a willingness to just try — that’s really all it takes to end up with something that looks like it came from a boutique shop or an Etsy storefront.
And beyond how it looks, there’s real meaning in making one yourself. You get to decide everything — the size, the colors, the wording, the whole vibe. That means it’ll actually match your home instead of being close-enough. It also makes one of the most thoughtful gifts you can give for a housewarming, a holiday, a wedding, or really any time you want to hand someone something made with genuine care rather than grabbed off a shelf at the last minute.
Materials and Tools You Will Need
Before you dive in, it’s worth taking a few minutes to gather everything you need. The star of the show is your circular wood blank — you can find these at Hobby Lobby, Michaels, Jo-Ann Fabrics, or plenty of online shops. Most people go with something in the 12 to 14 inch range for a front door, though blanks come as small as 10 inches and as large as 18. Whatever size you choose, look for something smooth with no major knots, and at least half an inch thick so it holds up properly.
Beyond the wood, you’ll want paints, brushes, and a few finishing supplies. Acrylic craft paints are a great choice — they stick to wood well and come in just about every color you can imagine. Grab a foam brush or a wide flat brush for laying down base coats, plus some finer brushes for detail work. Painter’s tape is handy for keeping edges clean, and a sheet of 220-grit sandpaper will help you prep the surface. If you’re planning to add lettering, stencils are a lifesaver — either pre-made ones from the craft store or vinyl stencils cut with a Cricut or Silhouette machine.
Don’t skip the finishing and hanging supplies either. A good outdoor-grade sealant — or Mod Podge in matte or gloss — will protect your work from moisture, UV rays, and everyday wear, which really matters if your door gets a lot of sun or rain. For hanging, jute twine, ribbon, or leather cord all look great and are easy to work with. A lot of crafters also pile on some embellishments like faux florals, a burlap bow, or a little seasonal greenery to give the whole thing more depth and personality.
- Circular wood blank (12–14 inches in diameter, at least 0.5 inch thick)
- Acrylic craft paints in your chosen color palette
- Foam brush and fine-detail brushes
- Fine-grit sandpaper (180–220 grit)
- Painter’s tape or vinyl stencils
- Outdoor-grade sealant or Mod Podge
- Drill with a small drill bit for the hanging hole
- Jute twine, ribbon, or leather cord for hanging
- Optional embellishments: faux florals, greenery, bows

Preparing Your Wood Surface
Here’s something that makes a bigger difference than most beginners expect: how well you prep your wood determines how good the finished sign looks, even more than the painting itself. Start by giving the whole surface a light sanding with your fine-grit sandpaper. You’re just knocking off any rough spots, small splinters, or imperfections from manufacturing — nothing aggressive. Sand with the grain using gentle, even strokes, then wipe everything down with a tack cloth or a barely damp microfiber cloth. Let it dry completely before you do anything else.
Once it’s clean and dry, think about priming it. A thin coat of white gesso or a wood conditioner creates a nice even surface, especially if your wood has a porous grain that tends to drink up paint unevenly. A primer layer means your background color will look more vivid and opaque with fewer coats, which saves you time and paint. Apply it with your foam brush using long, smooth strokes and give it 15 to 30 minutes to dry — longer if your workspace is humid or cool.
Now you’re ready for your base coat. This is your background color and it sets the whole tone of the design, so choose it thoughtfully. Crisp white, warm cream, slate gray, navy, forest green — all classic choices that work beautifully depending on your home’s palette and what season or theme you’re going for. The golden rule here is thin coats: two or three light layers, each one fully dry before the next, will always look better than one thick coat slapped on in a hurry. Thin coats dry faster, don’t drip, and give you that smooth, even surface you want before the real design work begins.
Designing and Painting Your Sign
This is where things get really fun. Once your base coat is dry, it’s time to actually design and paint your sign. If you’re going freehand, start by sketching your layout lightly in pencil — it’s so much easier to adjust placement before any paint is involved. With a circular sign, the center naturally pulls the eye, so that’s usually the best spot for your main text or focal image. Wreath-style borders, floral rings, or simple geometric bands look wonderful around the outer edge, framing whatever’s in the middle in a way that feels finished and intentional.
If the idea of freehand lettering makes you nervous, stencils are the way to go and there’s absolutely no shame in it. Vinyl stencils from a Cricut or Silhouette are especially great because you can position them exactly where you need them and peel them away to reveal really sharp, clean edges. No cutting machine? Pre-made stencils from the craft store work nearly as well. The trick is pressing the stencil down firmly so paint can’t sneak underneath, then applying color with a stippling or pouncing motion — basically dabbing the brush up and down rather than dragging it side to side.
Color and technique choices can take your sign from nice to really impressive. Try dry brushing over a textured area — load just a small amount of paint on your brush and drag it lightly across the surface — for that worn, vintage look that’s everywhere right now. A fine detail brush can add subtle shadows or highlights to your lettering to make it look almost three-dimensional. And if you want something that photographs beautifully and catches light in person, a little metallic gold, silver, or copper on borders and flourishes goes a long way.
- Sketch your design lightly in pencil to plan the composition.
- Apply or position your stencils and secure the edges firmly.
- Paint the main design elements using thin, even coats.
- Remove stencils carefully while paint is still slightly wet to avoid peeling.
- Add hand-painted details, flourishes, or borders using a fine brush.
- Touch up any imperfections once the paint is fully dry.

Sealing and Finishing Touches
Sealing is one of those steps you really can’t skip, especially for something that’s going to live outside. Even a covered porch gets humidity, temperature swings, and the occasional splash of rain, and without a sealant layer, your paint will start chipping and fading sooner than you’d like. Wait until everything is completely dry — ideally a full 24 hours — before you apply anything. Then brush or spray on an even coat of outdoor-rated clear sealant, working in smooth overlapping strokes and resisting the urge to go back over spots that have already started to set, since that’s what causes streaking.
Two to three coats of sealant will give you real, lasting protection, with full drying time between each one. The finish you choose is totally a matter of personal taste. Matte has that soft, understated farmhouse look that never feels too shiny. Satin lands in a nice middle ground — a gentle sheen that makes colors pop without going overboard. Gloss gives you the most vivid color and the strongest moisture resistance, which makes it the practical choice if your sign is going to see a lot of weather.
While that last coat of sealant is drying, go ahead and prep your hanging hardware. Drill a small centered hole near the top of the circle, making sure you’re not so close to the edge that you risk splitting the wood. Thread your cord, twine, or ribbon through and tie it off securely. Hold it up to your door to check the length before you commit — you might want the sign to hang closer or farther from the door than you’d initially imagined. A lot of people leave a bit of extra length and tie a bow at the top, which adds a really sweet, finished touch to the whole thing.
Adding Seasonal and Decorative Embellishments
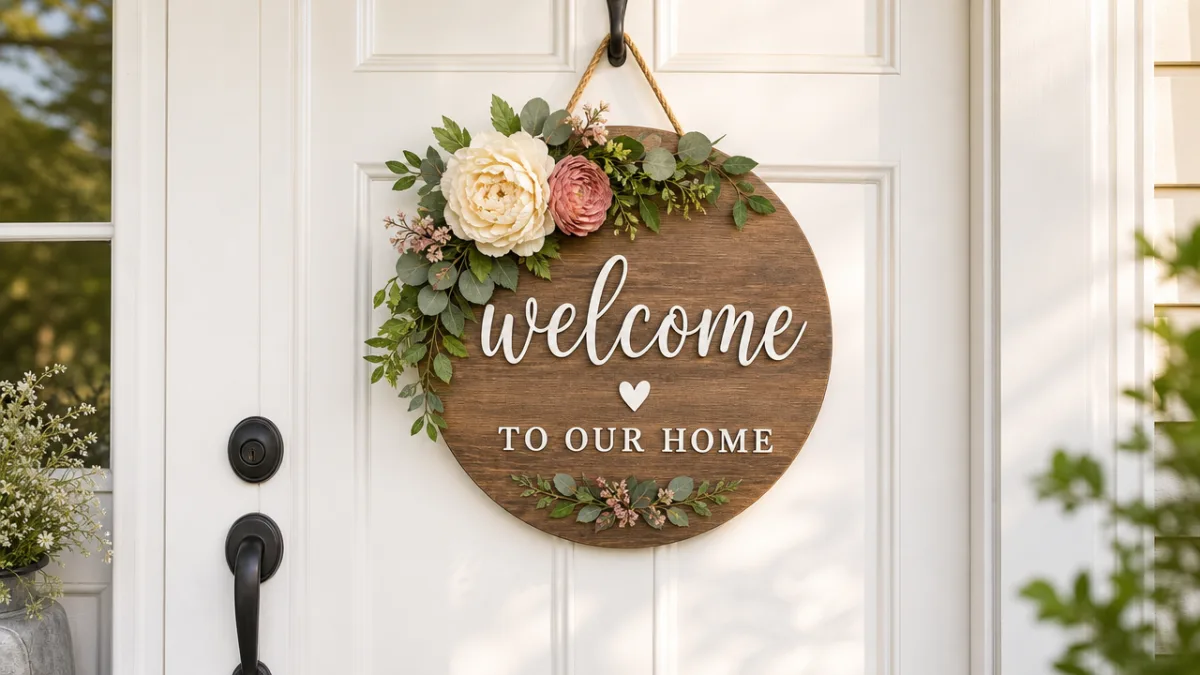
One of the best things about a round door hanger is how easy it is to keep it feeling fresh all year long. The painted wood sign itself is your permanent base, and then the embellishments are where you get to have fun with the seasons. In spring, wire on some faux cherry blossoms or a cluster of pastel ribbon. Summer calls for bright sunflowers or a simple ring of faux greenery — cheerful and welcoming without feeling overdone.
Fall might honestly be the most fun season for this kind of thing. Dried orange slices, cinnamon sticks, little pinecones, faux leaves in burnt amber and golden yellow — you can hot-glue or wire all of these into a loose, organic cluster at the top of the hanger and it instantly looks like something from a boutique market. Tie a plaid ribbon bow around it and you’ve got something really cozy and put-together. Winter is equally gorgeous: dried eucalyptus, gold and silver ribbon, jingle bells, faux holly, cranberry clusters — arranged into a full, lush bouquet that looks almost fragrant.
Even if you’re not planning to swap things out seasonally, a few permanent embellishments can make your sign feel a lot more dimensional and intentional. A big burlap or linen bow wired to the top adds warmth and texture right away. Small metal charms, wooden letter cutouts, or decorative picks can build up a layered, eye-catching arrangement that makes people want to look closer. When you’re building any of these clusters, think about balance — larger pieces toward the center, smaller accents fanning out toward the edges — and it’ll come together naturally.
Display, Care, and Longevity Tips
Where you hang your sign matters more than you might think. The ideal spot is somewhere covered — a front porch with an overhang, a recessed entryway, or even an interior-facing door — where it’s shielded from direct rain and the harshest afternoon sun. If your door is in full sun for hours every day, it’s worth investing in a UV-resistant sealant or a UV-protective spray on top, since even the best acrylic paint will eventually fade without that extra layer of protection.
Day-to-day care is pretty low-maintenance. Give it a gentle wipe with a soft dry cloth now and then to knock off dust and cobwebs. If it gets damp, pat it dry rather than leaving it wet — moisture sitting on wood for too long is never ideal. Once or twice a year, especially as you’re rotating in a new season’s embellishments, take a look at the sealant. If the surface feels a little rough or the finish looks dull, a fresh coat will bring it right back. That one small habit can genuinely add years to your sign’s life.
And if you find yourself hooked on this project — which honestly happens to a lot of people — consider building out a small rotating collection. A sign for each season, a few holidays, maybe one that’s just for whenever you feel like a change. Store the ones you’re not using somewhere cool and dry, wrapped in kraft paper or tucked into shallow boxes so they don’t scratch each other, and label them so you’re not hunting through everything every time you want to swap. Over time you’ll end up with this little curated set of handmade pieces that mark the rhythm of your year, each one carrying something personal in the way that only things made by your own hands really can.








What do you think?
It is nice to know your opinion. Leave a comment.