










DIY Planter: A Complete Guide to Building Beautiful Planters for Your Home and Garden
Why DIY Planters Are Worth Your Time and Effort
There is something deeply satisfying about building a planter with your own hands and then watching plants flourish inside it. DIY planters offer a level of customization that store-bought options simply cannot match. You control the dimensions, the materials, the finish, and the overall aesthetic, meaning your planter can perfectly complement your existing décor rather than clashing with it or looking like an afterthought. Whether you want something rustic and weathered or sleek and modern, the choice is entirely yours.
Beyond the creative satisfaction, building your own planters is almost always more economical than purchasing high-quality alternatives from garden centers or home décor stores. A premium cedar planter box can cost well over a hundred dollars at retail, yet the raw materials to construct the same box yourself often cost a fraction of that price. When you factor in the ability to scale up and build multiple planters for a patio, balcony, or garden bed, the savings become even more meaningful over time.
DIY planters also make exceptional gifts. A handmade wooden planter filled with herb starts or succulents is a thoughtful, personalized present for housewarming parties, birthdays, or the holidays. Friends and family appreciate the time and intention behind a handmade item in a way that a mass-produced gift rarely inspires. Once you learn the basics of planter construction, you will find yourself returning to the project again and again as a creative outlet and a practical solution to your gardening needs.
Choosing the Right Materials for Your DIY Planter
The material you select for your planter will determine its longevity, appearance, and suitability for different plants and environments. Wood is by far the most popular choice for beginner and intermediate DIYers. Cedar and redwood are particularly well regarded because they contain natural oils that resist rot, insects, and moisture far better than softer woods like pine. While pine is cheaper and easier to find, it will degrade more quickly when exposed to soil and water, so investing in a rot-resistant wood at the outset will pay dividends in the long run.
Concrete and hypertufa planters have surged in popularity in recent years because of their rugged, industrial aesthetic and remarkable durability. Hypertufa, a mix of Portland cement, peat moss, and perlite, is significantly lighter than solid concrete while still being incredibly sturdy. These planters develop a beautiful, organic patina over time as moss and algae colonize their textured surfaces. They are ideal for alpine plants, succulents, and ornamental grasses that thrive in well-drained, somewhat harsh conditions.
Reclaimed and repurposed materials open up an entirely different world of creative possibilities. Old wine crates, galvanized metal buckets, ceramic colanders, wooden pallets, and even worn leather boots can all be transformed into charming planters with minimal effort. When working with reclaimed materials, pay attention to what substances they may have previously contained. Containers that held chemicals or treated wood that leached toxic preservatives are not appropriate for growing edible plants, though they work fine for purely ornamental use.
- Cedar and redwood: naturally rot-resistant, beautiful grain, ideal for raised beds and window boxes
- Pine and spruce: affordable and easy to work with, best used with a liner or sealant
- Concrete and hypertufa: extremely durable, develops attractive patina, heavy but long-lasting
- Galvanized metal: modern industrial look, excellent drainage when holes are drilled, heats up quickly in sun
- Reclaimed wood and pallets: sustainable, rustic aesthetic, check for chemical treatments before use

Essential Tools and Supplies Before You Begin
Walking into a DIY planter project without the right tools is a recipe for frustration and poor results. Fortunately, most basic planter builds require only a modest toolkit that many homeowners already possess. At a minimum, you will need a tape measure, a pencil, a circular saw or miter saw for cutting lumber to length, a drill with bits suitable for both pilot holes and driving screws, and a sanding block or orbital sander to smooth rough edges. Safety glasses and work gloves should always be considered non-negotiable additions to this list.
For finishing your planter, gather the appropriate sealants, stains, or paints suited to outdoor use. Exterior wood stain penetrates the wood grain and offers protection while allowing the natural texture to show through, which is often the most aesthetically pleasing option for cedar or redwood. Exterior paint provides a more opaque finish and is ideal if you want a bold color pop on your patio or balcony. Whichever finish you choose, always apply a primer first if the manufacturer recommends it, and plan to apply at least two coats for adequate weather protection.
Drainage is one of the most critical yet frequently overlooked aspects of planter construction. Regardless of the material you use, your planter must have holes in the bottom to allow excess water to escape. Without drainage, soil becomes waterlogged, roots suffocate, and plants die quickly from root rot. For wooden planters, drill at least four to six half-inch holes evenly spaced across the bottom panel. Line the bottom with landscape fabric or a piece of weed barrier cloth to prevent soil from washing out through the holes while still allowing water to drain freely.
- Tape measure and pencil for accurate marking and layout
- Circular saw, miter saw, or handsaw for cutting lumber
- Drill and assorted bits for pilot holes, countersinks, and driving screws
- Exterior wood screws in appropriate lengths for your board thickness
- Sandpaper in 80-grit and 120-grit for rough shaping and final smoothing
- Exterior wood stain, paint, or sealant for weather protection
- Landscape fabric for lining the interior of the finished planter
Step-by-Step Instructions for a Classic Wooden Box Planter
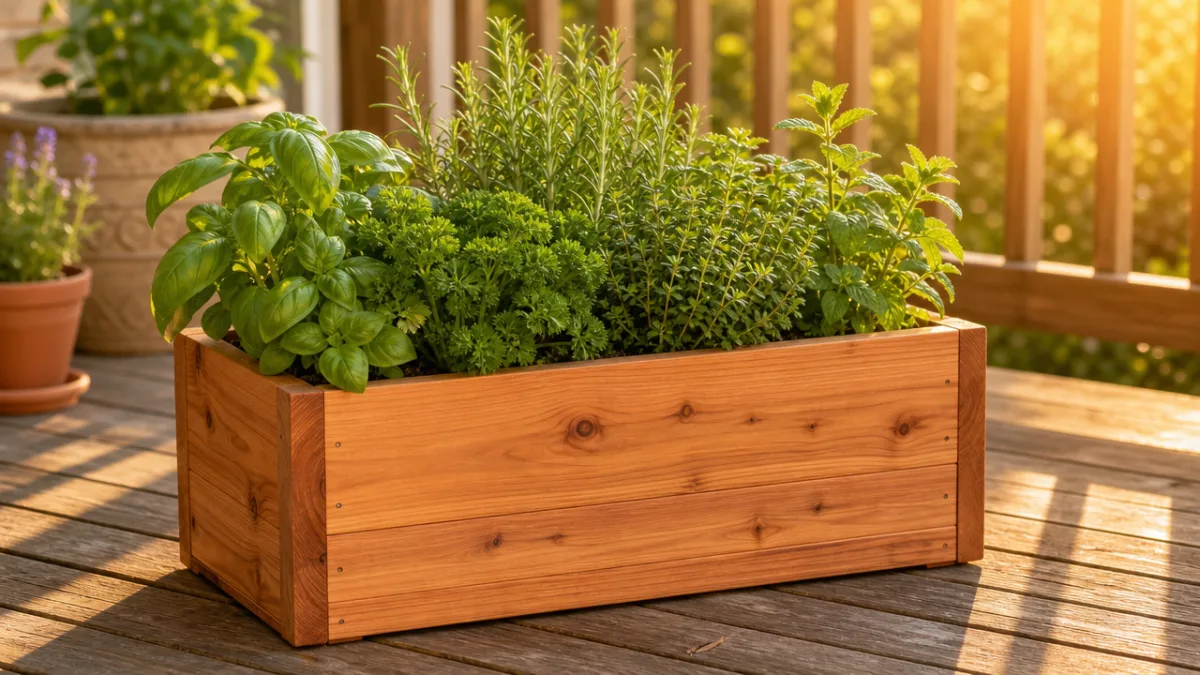
The classic rectangular box planter is the perfect starting project for beginners because its construction relies on simple butt joints, basic measurements, and straightforward assembly. Begin by deciding on your finished dimensions. A planter measuring approximately 24 inches long, 12 inches wide, and 12 inches deep is versatile enough for herbs, annuals, and small perennials, and it sits comfortably on a patio table, railing, or garden bench. From a single eight-foot cedar board ripped to your preferred width, you can typically cut all four side panels and the bottom with material left over.
Once your pieces are cut, sand all faces and edges with 80-grit sandpaper to remove splinters and mill marks, then follow up with 120-grit for a smoother finish. Lay out your two long side panels and two short end panels. Pre-drill pilot holes to prevent the wood from splitting, then assemble the four walls by driving two screws through the long side panels into the end grain of each short panel. Use a square to check that your corners are at 90 degrees before driving the final screws home. A few drops of exterior wood glue at each joint will add significant strength to the finished box.
With the box assembled, cut your bottom panel to fit snugly inside the four walls and attach it using screws driven up from the bottom through the base into the lower edges of the side panels. Drill your drainage holes at this stage if you have not already done so. Finally, cut four short lengths of scrap wood to serve as feet, attaching them to the corners of the bottom exterior to elevate the planter slightly off the ground. This small detail dramatically improves drainage, prevents the bottom from sitting in standing water, and extends the life of the planter considerably.
Finishing the exterior is the final construction step before planting. Apply your chosen stain or paint in thin, even coats, working with the grain of the wood rather than against it. Allow each coat to dry completely according to the manufacturer’s instructions before applying the next. Once the finish is fully cured, line the interior with a sheet of landscape fabric, folded and stapled into the corners to create a neat, fitted liner. Fill the planter with a high-quality potting mix — never garden soil, which compacts badly in containers — and you are ready to plant.
Creative Design Ideas and Customization Options
Once you have mastered the basic rectangular box, an entire world of design variations opens up before you. Tall, narrow tower planters are spectacular for vertical gardening on compact balconies, allowing you to grow strawberries, lettuce, or trailing flowers in a small footprint that would otherwise accommodate only a single pot. Tiered planters built as stair-step structures make dramatic focal points in garden beds and can house a symphony of plants at different heights, creating visual interest throughout the growing season.
Painted finishes allow you to integrate your planters seamlessly into any design scheme. A cluster of planters painted in coordinating shades of sage green, dusty blue, and warm terracotta can anchor a patio color palette and make a space feel intentionally designed rather than randomly assembled. Geometric patterns, stenciled motifs, and even hand-painted botanical illustrations transform a simple wooden box into a genuine piece of garden art. If you prefer a more understated look, a clear exterior oil finish lets the natural beauty of the wood speak for itself while still offering solid weather protection.
For those who enjoy mixing materials, consider combining wood with metal hardware for an industrial-chic aesthetic. Iron pipe legs bolted to the underside of a wooden planter box create a modern potting bench effect that looks striking on an urban rooftop terrace. Copper pipe fittings used as corner accents age gracefully to a rich verdigris patina over time. Hairpin legs sourced from hardware suppliers or online marketplaces elevate a planter to coffee table height and give it a mid-century modern character that works beautifully in contemporary outdoor spaces.
- Herb gardens: plant basil, rosemary, thyme, and mint together for a productive kitchen windowsill planter
- Pollinator boxes: fill with lavender, echinacea, and salvia to attract bees and butterflies
- Succulent displays: use a shallow tray-style planter with gritty cactus mix for a low-maintenance arrangement
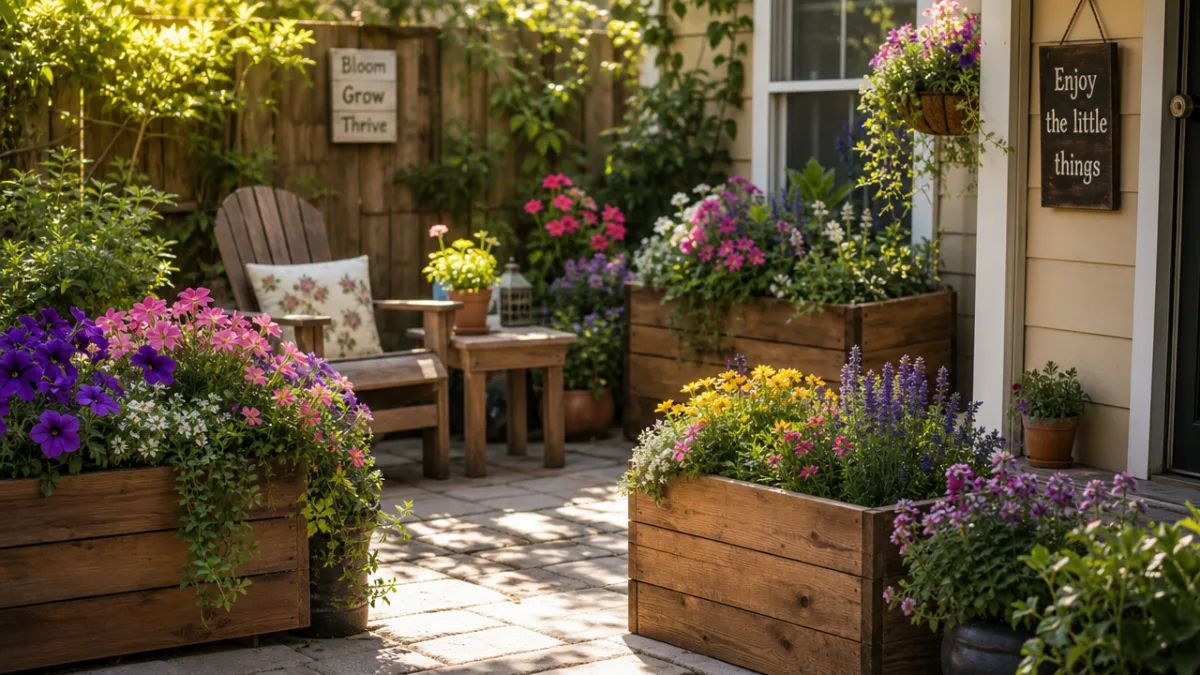
- Trailing flower planters: plant petunias, lobelia, or sweet potato vine for a cascading waterfall effect
- Privacy screens: line a deck railing with tall planters filled with ornamental grasses for natural screening
Caring for Your DIY Planter and the Plants Within It
A well-built planter is an investment, and protecting that investment requires ongoing maintenance. Inspect your wooden planter at the start of each growing season for any signs of rot, cracking, or failing joinery. Pay particular attention to the bottom panels and corners where moisture tends to linger longest. Lightly sand any areas where the finish has weathered or peeled, wipe away dust, and apply a fresh coat of exterior stain or sealant. This annual refresh takes no more than an hour and can extend the life of a well-built planter by many years.
Container plants have different watering needs than those grown in the ground, and understanding this distinction is key to keeping your planter garden thriving. Because potting mix dries out much faster than garden soil, especially in terracotta, metal, or thin wooden containers, most container plants need more frequent watering than their in-ground counterparts. During hot summer months, checking soil moisture daily is not excessive. A simple finger test — pushing your index finger an inch into the soil — will tell you more reliably than any timer or schedule whether your plants need water right now.
Fertilization is another area where container gardening demands more attention than ground-level planting. The nutrients in potting mix are finite and get flushed out over time with regular watering. Begin feeding your container plants with a balanced, slow-release granular fertilizer at planting time, then supplement with a liquid fertilizer every two to three weeks throughout the growing season. Reducing fertilization in late summer encourages plants to harden off before the first frost rather than pushing tender new growth that will be damaged by cold temperatures.
At the end of the growing season, take time to properly winterize both your planters and any perennial plants they contain. Empty the planter of spent annuals and their root systems, then top up the remaining soil with fresh compost before storing for the winter. Wooden planters should ideally be stored in a shed or garage during harsh winters to prevent the freeze-thaw cycle from splitting the wood or popping joinery apart. If outdoor storage is unavoidable, elevate the planter on bricks to prevent it from sitting directly on frozen ground, and drape it with burlap to reduce moisture infiltration during the coldest months.
Troubleshooting Common DIY Planter Problems
Even carefully built planters can develop problems, and knowing how to diagnose and address them will save you time, money, and plants. One of the most common issues is inadequate drainage leading to waterlogged soil. If you notice standing water pooling on the surface long after watering, or if your plants look wilted despite moist soil, the drainage holes may be blocked by compacted soil or root growth. Tipping the planter on its side to check and clear the holes, then adding a layer of coarse gravel or broken pottery shards over the landscape fabric, will usually resolve the issue quickly.
Wood rot is the most serious structural problem a wooden planter can develop. It typically begins at the bottom corners and base panels where moisture is trapped most persistently. Early-stage rot appears as soft, discolored wood that yields to gentle pressure from a screwdriver or fingernail. If you catch it early, you can cut out the affected section, treat the surrounding wood with a borate-based wood preservative, and sister in a new piece of lumber. Advanced rot that compromises the structural integrity of the entire box usually means it is time to build a replacement, though the hardware and any metal legs or feet can often be salvaged and reused.
Pest damage is another challenge that container gardeners face regularly. Slugs and snails find the protected undersides of wooden planters irresistible as daytime hiding spots, emerging at night to feast on foliage. Copper tape applied around the exterior rim of the planter creates an electrical-like barrier that slugs and snails are reluctant to cross. For more persistent infestations, iron phosphate-based slug bait scattered around and under the planter is effective, non-toxic to pets and wildlife, and breaks down harmlessly in the soil. Regular inspection of the planter’s exterior and the ground beneath it will help you spot problems early before they escalate into significant plant damage.
Cracking and splitting in wooden planters is often caused by rapid changes in moisture content rather than structural failure. Wood expands when wet and contracts when dry, and this repeated movement eventually opens gaps at joints and cracks along the grain. Preventing this cycle starts with proper finishing: a high-quality exterior sealant creates a moisture barrier that slows the rate at which the wood absorbs and releases water. If cracks have already formed, clean them out, fill them with an exterior wood filler or flexible sealant, allow them to cure fully, and refinish the affected area. Keeping the planter slightly shaded during the hottest part of the day also reduces the thermal stress that accelerates cracking in direct sunlight.








What do you think?
It is nice to know your opinion. Leave a comment.