










DIY IKEA Nightstand Hack: Transform a Basic Piece into a Stunning Bedside Table
Introduction: Why IKEA Hacks Are the Secret to Affordable Custom Furniture
There is something deeply satisfying about walking past a piece of furniture you built yourself and knowing that it cost a fraction of what a comparable store-bought item would have run you. IKEA hacks have become one of the most popular DIY trends in home decor, and for very good reason. By starting with an affordable, well-engineered base from IKEA, you eliminate the hardest parts of furniture building — precise joinery, flat surfaces, and structural integrity — and get to focus entirely on the creative transformation that makes a piece uniquely yours.
Nightstands are one of the best candidates for an IKEA hack because they are small enough to manage easily, yet visible enough in a bedroom to make a real design statement. The nightstand sits right beside the place where you begin and end every single day, so it deserves more personality than a plain flat-pack box can offer. Whether you want a Scandinavian minimalist look, a mid-century modern vibe, or a rustic farmhouse aesthetic, the right IKEA hack can deliver it at a fraction of boutique furniture prices.
This guide walks you through everything you need to know to pull off a beautiful DIY IKEA nightstand hack from start to finish. We cover choosing the right base piece, gathering your materials, the step-by-step building process, finishing techniques that look professional, and styling tips to make your new nightstand shine. Even if you have never picked up a paintbrush or a drill before, this project is entirely achievable over a single weekend with a little patience and the right instructions.
Choosing the Right IKEA Base for Your Nightstand Hack
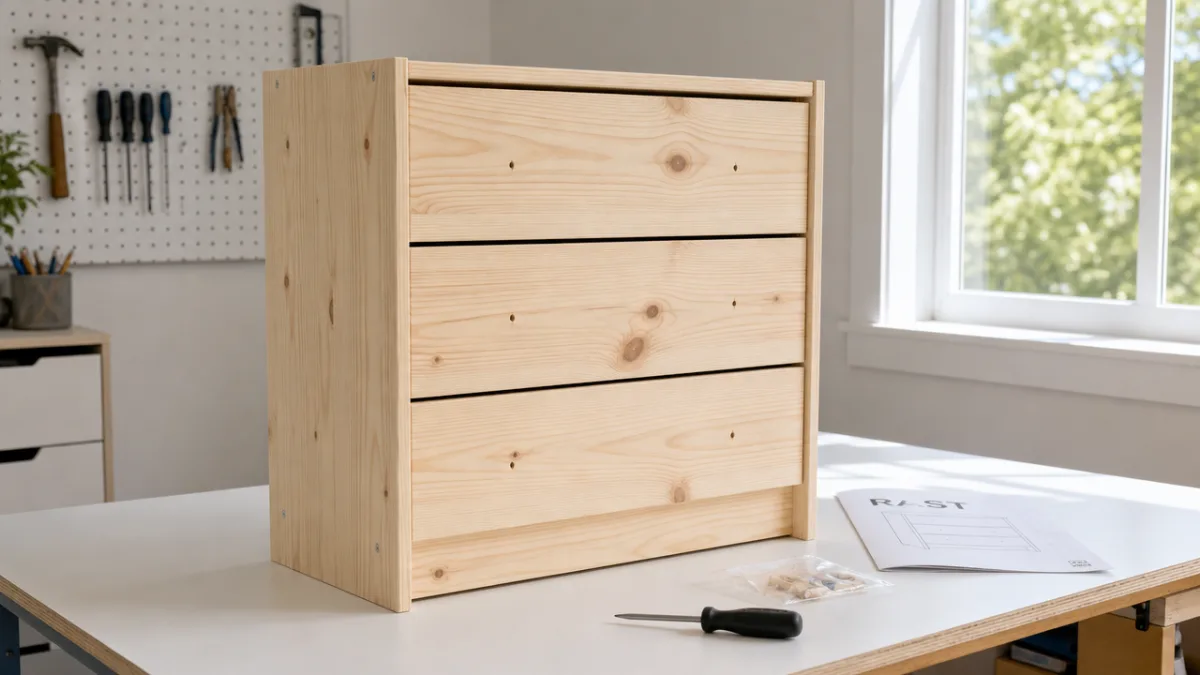
The foundation of any great IKEA hack is choosing the right starting piece, and IKEA gives you several excellent options to work with for a nightstand project. The RAST three-drawer chest is one of the most beloved hack bases in the DIY community because of its simple, unadorned lines, its solid pine construction, and its remarkably low price point. At just over thirty dollars, it is practically begging to be transformed. Its three drawers provide generous storage for everything from books and chargers to hand cream and reading glasses.
Another popular option is the LACK side table, which offers a sleek, minimalist profile perfect for smaller bedrooms or for people who prefer a more open, airy look beside their bed. The LACK is extremely lightweight and its hollow construction makes it easy to modify with paint, wallpaper inserts, or decorative trim. For those wanting something with a bit more visual weight and storage, the HEMNES nightstand with its two drawers and lower shelf provides a more traditional silhouette that responds beautifully to new hardware and a fresh paint color.
When selecting your base piece, think carefully about the scale of your bedroom and the height of your mattress. A nightstand should ideally sit within a few inches of your mattress height so that reaching for a glass of water or your phone in the dark is comfortable and natural. Measure your bed before you shop, note the clearance you need around the piece, and consider whether you want the hack to feel light and sculptural or solid and grounded. These decisions will guide not only which IKEA piece you choose but also every design decision that follows.
Materials and Tools You Will Need
One of the greatest advantages of an IKEA hack project is that the materials list is manageable and most items are available at any hardware or craft store. For a painted and updated hardware hack — one of the most popular approaches — you will need sandpaper in 120-grit and 220-grit, a quality wood primer, your chosen paint in either a sample pot or a small quart, a foam roller for smooth finishes, a small angled brush for corners and edges, and painter’s tape to keep lines crisp. Budget around twenty to forty dollars for paint supplies depending on the brand you choose.
Hardware is where your hack can truly come alive and express a distinct design personality. New drawer pulls and knobs are the single fastest way to elevate a piece from flat-pack ordinary to boutique extraordinary. Brass pulls give a warm, mid-century modern feel; black matte hardware reads as modern and graphic; ceramic knobs with hand-painted details evoke a bohemian or cottage aesthetic. Measure the existing drill holes on your IKEA piece carefully before purchasing hardware, as the center-to-center distance must match or you will need to fill and re-drill, which adds steps but is entirely doable.
Beyond paint and hardware, you may want to gather a few additional materials depending on how ambitious your hack becomes. Wood filler is useful for smoothing any imperfections in the pine surface before painting. If you plan to add decorative molding to the drawer fronts — a technique that instantly makes flat IKEA drawers look like high-end custom cabinetry — you will need thin craft wood molding from the lumber section, a small miter box and saw, and strong wood glue. A level, a pencil, and a measuring tape round out the toolkit and ensure every detail goes on straight.
- 120-grit and 220-grit sandpaper or a sanding block
- Quality wood primer, preferably shellac-based for IKEA pine
- Paint in your chosen color and finish (satin or eggshell recommended)
- Foam roller and small angled brush
- Painter’s tape
- New drawer pulls or knobs
- Wood filler and a putty knife
- Decorative molding (optional but highly recommended)
- Wood glue and clamps
- Screwdriver and drill with appropriate bits
- Level, pencil, and measuring tape
Step-by-Step Instructions for the Hack
Begin by assembling your IKEA piece fully according to its instructions before making any modifications. It is much easier to understand what you are working with, where the drawer fronts sit, and how everything lines up once the piece is fully built. Once assembled, remove the drawers and set the drawer fronts aside for painting separately. Use your 120-grit sandpaper to lightly scuff all surfaces you plan to paint, including the carcass of the nightstand and all drawer fronts. This step is not optional — it creates the mechanical adhesion that keeps your paint from peeling later.
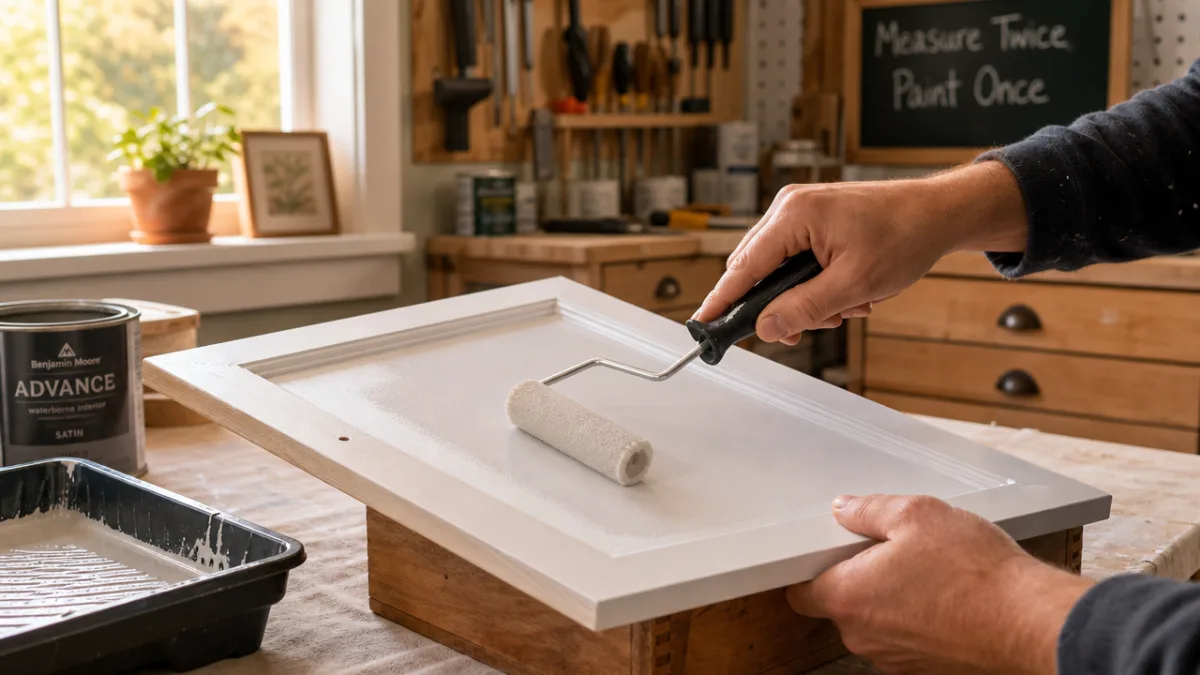
Apply your primer in a thin, even coat using the foam roller on flat surfaces and the angled brush in corners and along edges. Allow the primer to dry completely according to the manufacturer’s instructions, which is typically one to two hours. Once dry, lightly sand again with your 220-grit paper to knock down any raised grain or brush marks, then wipe away dust with a slightly damp cloth before it dries. Apply a second thin coat of primer if the wood grain is still showing through noticeably. This patience at the priming stage is what separates a professional-looking finish from one that looks homemade in the worst sense.
Now comes the rewarding part: painting. Apply your first coat of paint with the foam roller in long, overlapping strokes, working in one direction. Use the angled brush to cut in around edges. Allow to dry fully, then apply a second coat. For very deep or saturated colors, a third thin coat may be needed. While your paint dries, use this time to attach your decorative molding to the drawer fronts if you are using that technique. Measure and mark the placement of your molding rectangles on each drawer front, apply a thin bead of wood glue, press the molding in place, and hold or clamp until set. Once the molding is secured and the paint is completely dry — at least 24 hours for full cure — you can lightly sand the painted surfaces one final time with 220-grit for a silky smooth result.
- Assemble the IKEA piece fully, then remove all drawer fronts.
- Sand all surfaces with 120-grit sandpaper to scuff and prepare them for primer.
- Apply a thin, even coat of primer to all surfaces and allow to dry fully.
- Sand lightly with 220-grit paper and wipe away dust before the second primer coat.
- Apply two to three thin coats of paint, allowing full drying between each coat.
- Attach decorative molding to drawer fronts with wood glue while paint dries.
- Allow painted surfaces to cure for at least 24 hours before handling.
- Install new hardware using a drill, filling and re-drilling holes if necessary.
- Reassemble all drawers and do a final inspection for touch-ups.
Finishing Touches That Make All the Difference
The finishing stage is where your IKEA hack stops looking like a project and starts looking like a purchase. Installing your new hardware is the most transformative single step in the entire process. Hold each pull or knob up to the drawer front before committing to drill, and take a photograph to help you visualize the final result. Once you drill and attach the hardware, stand back and look at the piece from a distance of several feet — this is how guests will see it, and the perspective often reveals whether spacing and alignment feel right or need a small adjustment.
If you want to add even more custom detailing, consider lining the inside of the drawers with decorative paper or fabric. This is entirely hidden when the drawers are closed but adds a lovely surprise element every time you open one, and it also protects the raw wood interior from staining. Peel-and-stick wallpaper works beautifully for this purpose and comes in hundreds of patterns. Cut it to fit the bottom of each drawer, smooth out any bubbles, and press firmly into the corners. This small detail takes about fifteen minutes but adds an element of craftsmanship that elevates the entire piece.
A final protective topcoat is worth considering, especially for a nightstand that will see regular use. A water-based polycrylic in a matte or satin finish applied over your dried paint adds durability without yellowing, which is a common problem with oil-based varnishes over light paint colors. Apply one or two thin coats with a foam brush or roller, allow to dry, and your piece will be significantly more resistant to scratches, water rings from glasses, and the general wear that a bedside table accumulates over years of use. This final step is the professional touch that ensures your weekend of work lasts for a very long time.
Styling Your New Nightstand for Maximum Impact
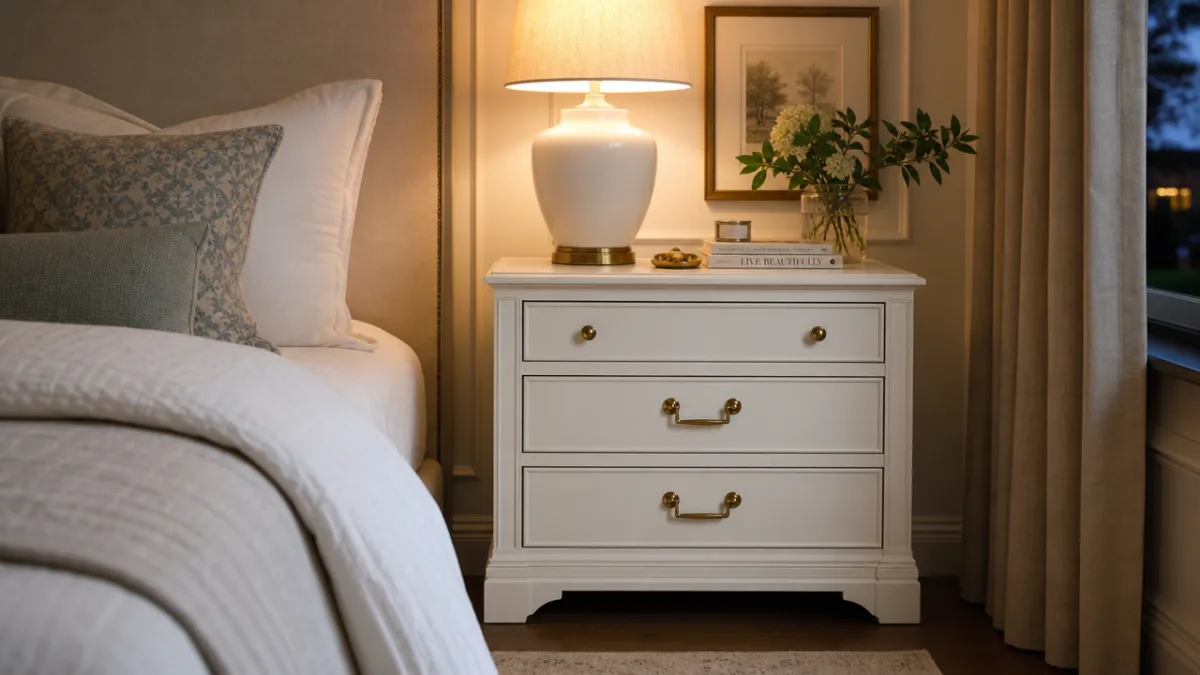
Building a beautiful piece is only half the equation — how you style and dress the nightstand determines whether it becomes a focal point in your bedroom or quietly blends into the background. The most effective nightstand styling follows a loose rule of threes: group items in odd numbers, vary the heights of objects, and balance decorative pieces with functional ones. A tall stack of two or three books, a low-profile table lamp, and a single small plant or object of personal meaning create a vignette that feels curated without looking overly staged or fussy.
Lighting deserves particular attention because a nightstand lamp does double duty as both a functional reading light and a mood-setting accent. Plug-in sconces mounted on the wall above the nightstand are a popular choice because they free up the entire surface for styling, but a well-chosen table lamp sitting on the nightstand itself can become a design statement in its own right. Look for lamps with bases in materials or finishes that echo your new hardware — a brushed brass lamp base alongside brass drawer pulls creates a cohesive, considered look that feels intentional and polished.
Do not neglect the wall above and around the nightstand as part of the overall vignette. A piece of art, a small wall-hung plant, a mirror, or even a simple floating shelf can extend the visual impact of your hack upward and make the entire corner of the room feel designed rather than merely furnished. If you painted your nightstand a bold color, keep the wall and surrounding textiles relatively neutral to let the piece speak. If your hack is more understated — perhaps a soft white with minimal hardware — you have more freedom to introduce pattern and color in the bedding and wall decor around it.
Budget Breakdown and Where to Save or Splurge
One of the most compelling reasons to pursue an IKEA nightstand hack rather than buying a finished piece is the cost savings, but it helps to go in with a realistic budget in mind. The IKEA RAST base starts at around thirty dollars, while the HEMNES nightstand runs closer to eighty dollars depending on your location and current pricing. Factor in paint supplies at approximately twenty to thirty-five dollars, hardware at anywhere from fifteen to sixty dollars depending on the style and material you choose, and any additional materials like molding or drawer liner paper at another ten to twenty dollars. Total investment for a high-quality hack typically lands between eighty and two hundred dollars.
The area where most DIYers find the biggest payoff from a slightly larger investment is hardware. Cheap hardware has a way of undermining an otherwise beautiful paint job — the weight, the sound of the drawer closing, and the visual presence of the pull all communicate quality or the lack of it. Spending thirty to fifty dollars on solid brass or high-quality black iron pulls rather than the cheapest option is a splurge that pays visible dividends every single day. Meanwhile, you can confidently save money on paint by choosing a mid-range brand rather than the most premium option available, since the difference in finish quality is minimal when proper priming and application technique are used.
It is also worth considering the long-term value of this kind of project beyond just the dollars and cents. A custom hacked nightstand that perfectly matches your bedroom’s color palette, hardware style, and storage needs is something you are unlikely to tire of quickly, unlike a trend-driven piece purchased at a fast-furniture retailer. The investment of a weekend afternoon and a modest materials budget yields a piece with genuine personal meaning, real craftsmanship, and the quiet pride of having made something with your own hands. In a world of mass-produced interchangeable furniture, that counts for a great deal.
Common Mistakes to Avoid and Pro Tips for Success
The most common mistake first-time IKEA hackers make is skipping or rushing the priming stage. IKEA pine and the laminate surfaces found on pieces like the LACK are notoriously difficult for paint to adhere to without proper preparation. Skipping primer almost guarantees chipping and peeling within months, even with high-quality paint. Using a shellac-based primer like Zinsser BIN on bare pine or a bonding primer on laminate surfaces is the single most important technique you can adopt to ensure a finish that holds up beautifully over years of regular use.
Another frequent stumbling block is applying paint coats that are too thick in an attempt to save time. Thick coats of paint take much longer to dry fully, are prone to drips and sags, and often result in an uneven texture once dried. Thin coats, even if you need three or four of them, will always produce a smoother, more professional result than two thick ones. If you see a drip forming while you paint, catch it immediately with your brush before it dries — a dried drip requires sanding down and repainting the entire section, which costs far more time than the minute it takes to brush it smooth while it is still wet.
Finally, give your finished piece adequate time to cure before putting it back into service. Paint may feel dry to the touch within an hour or two, but it continues to harden and cure for days or even weeks after application. Using a freshly painted piece too soon — stacking heavy books, dragging objects across the surface, or pressing against it with a damp glass — can leave permanent impressions or marks in the paint film before it has fully hardened. Waiting a full 48 to 72 hours before regular use, and being gentle for the first week, is a small patience tax that protects weeks of careful work and ensures your beautiful new nightstand looks as good in five years as it does on the day you finish it.








What do you think?
It is nice to know your opinion. Leave a comment.