










“`html
DIY Wonky Mirror: How to Make a Beautifully Imperfect Statement Piece for Your Home
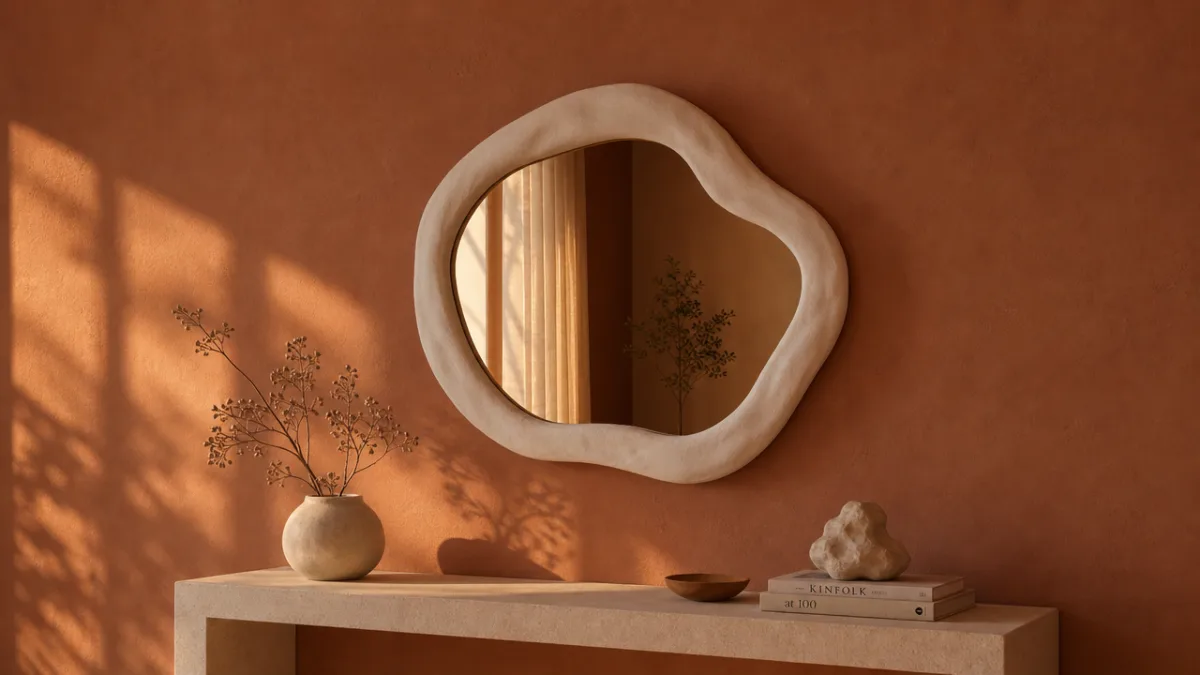
There’s something genuinely freeing about letting go of perfection in home décor. The wonky mirror trend has swept through the interior design world, and honestly, it’s easy to see why — organic shapes, irregular edges, and that unmistakably handmade quality are things no factory can fake. Whether you call it a wonky mirror, an organic mirror, or a squiggly mirror, this DIY project is your chance to make something truly one-of-a-kind. Something that reflects not just your face, but your personality too.
What I love most about the wonky mirror is how approachable it is. You don’t need years of art school training or a shed full of expensive equipment to pull this off. A little patience, some basic materials, and a willingness to ditch the ruler — that’s really all it takes to make something that looks like it belongs in a boutique or a design magazine. The process itself is half the joy.
Understanding the Wonky Mirror Aesthetic
The wonky mirror draws from the broader organic and maximalist design movements that have been growing in popularity over the last few years. It’s a direct pushback against the rigid geometric shapes that defined minimalism for so long. Instead, it takes its cues from nature — think of a pebble smoothed by a river, or the outline of a leaf. Those kinds of soft, unpredictable forms are exactly what gives the wonky mirror its character.
Interior designers have always known that a mirror does a lot more than help you check your hair. It’s a visual anchor, a light source, and a pretty clear signal of the homeowner’s taste. A wonky mirror, with its lopsided charm and playful proportions, says something specific: that the person who hung it isn’t precious about rules. It communicates creativity and a certain easy confidence that’s hard to fake with anything mass-produced.
The roots of this trend actually go back to the arts and crafts movement, which celebrated handmade objects and the visible mark of the maker. When you look at a wonky mirror you built yourself, you can trace every choice you made — every curve, every bump, every little wobble in the edge. That’s not a flaw, that’s the whole point. It’s what gives the thing its warmth, and what makes it genuinely impossible to replicate at a chain retailer.
Materials and Tools You Will Need
Getting your materials sorted before you start will make the whole experience a lot smoother and more fun. The good news is that this project won’t break the bank. Most of what you need is available at hardware stores, craft shops, or online, and there’s a decent chance you’ve already got some of it lying around. Getting everything together upfront means you can actually focus on the creative bit once you sit down.
For the mirror itself, you’ve got two main routes. You can pick up a plain rectangular or round mirror from a discount home store and work around the existing shape, or you can order a custom-cut piece of mirror glass from a glazier and specify an organic shape from the start. The second option gives you more creative freedom but takes a little more planning. If you go that route — or if you’re cutting anything yourself — please wear heavy-duty gloves and eye protection whenever you’re handling glass edges. No exceptions.
Beyond the mirror, here’s what you’ll need to see this project through:
- Air-dry clay or polymer clay in your chosen color (white, terracotta, and black are all popular choices)
- A rolling pin or smooth bottle for flattening the clay
- A craft knife or wire clay cutter for shaping
- Strong adhesive like E6000 or a heavy-duty epoxy
- Sandpaper in fine and medium grits for smoothing edges
- Acrylic paint and brushes if you want to add color
- D-ring hangers or sawtooth brackets for mounting
- A cardboard template to guide your shape
- A pencil and ruler for basic planning, even if the finished piece is anything but
Having a workspace that can handle a bit of mess will make this so much more enjoyable. Lay down a plastic sheet or some old newspaper, make sure you’ve got good lighting, and honestly — have a cup of tea or coffee nearby. Stepping back to look at your work with fresh eyes is part of the process, and it goes better with a warm drink.

Designing Your Wonky Mirror Shape
This is where the fun really kicks in — and also where a lot of first-timers get a bit stuck in their heads. There’s this strange pressure to make something that’s perfectly imperfect, which can lead to overthinking pretty quickly. The best thing you can do is start with a loose sketch and then give yourself full permission to ignore it as you go. The charm of a wonky mirror is its spontaneity, and the sooner you lean into that, the better the whole thing feels.
Start by cutting out a cardboard template that’s slightly larger than your mirror. This becomes the base of your clay frame. On that template, draw your outer edge freehand — try to keep your hand moving fluidly without stopping and starting too much, since that’s what gives you those natural, organic curves. Elongated ovals with uneven proportions, lopsided teardrop shapes, rounded rectangles where every corner does something slightly different — all of these work beautifully. There are no wrong answers, just more or less interesting ones.
Once you’re happy with the template, think about how thick and deep you want the frame to be. A chunkier frame has a really sculptural quality that works well as a solo statement piece — above a console table or a fireplace, for instance. A slimmer, more delicate frame fits better in smaller spaces or as part of a gallery wall. This choice affects how much clay you’ll need and how long drying will take, so it’s worth settling on before you commit.
A lot of makers find it really helpful to spend a few minutes looking at reference images before they start — not to copy anything directly, but just to warm up their eye for interesting proportions and unexpected details. Some wonky mirrors have a consistent ripple all the way around; others mix smooth curves with sharper dips and juts. A quick scroll through Pinterest or Instagram can give you a mental reservoir to pull from without putting any pressure on you to recreate what you’ve seen.
Step-by-Step Construction Process
With your design ready and your materials laid out, it’s time to actually make the thing. Work through the steps below, but stay loose — the best handmade work comes from responding to what the material is doing rather than forcing it to follow a plan. Clay in particular will suggest things to you as you work, and learning to follow those little nudges is a big part of what makes this kind of project so satisfying.
- Prepare the mirror surface: Give the mirror a thorough clean with glass cleaner and a lint-free cloth. If you bought a framed mirror, carefully remove the existing frame. The glass needs to be completely free of grease and dust, or the adhesive won’t bond properly later on.
- Roll out your clay: Knead the clay until it’s soft and easy to work with, then roll it out to an even thickness of about one centimeter — or thicker if you want a more substantial frame. Use your cardboard template to cut the outer border shape, then cut out the inner opening that will sit around the mirror’s edge.
- Shape and refine the edges: This is the most creative part. Use your fingers, a wooden stylus, or whatever you’ve got handy — the edge of a ruler, a bottle cap — to push, pinch, and texture the outer edge of the clay frame. Lean into asymmetry. No two sides should look the same, and that’s a feature, not a bug.
- Smooth any unintended rough areas: A damp fingertip or a flat silicone tool can smooth out spots where the clay has cracked or looks accidentally messy rather than deliberately wonky. There is a difference between the two, and you’ll get better at spotting it the more you work.
- Allow the clay to dry completely: Air-dry clay usually needs 24 to 72 hours depending on how thick it is and how humid your space is. Don’t rush this. Sticking the mirror to undried clay is a quick way to end up with warping and cracks that’ll ruin the finished piece.
- Sand and paint as desired: Once fully dry, sand down any areas that need it using fine-grit sandpaper. Then apply your paint in thin, even layers, letting each coat dry fully before adding the next.
- Attach the mirror glass: Apply strong adhesive around the inner opening on the back of the clay frame, then press the mirror into place. Let the adhesive cure fully according to the manufacturer’s instructions before you touch it again.
- Add hanging hardware: Attach D-ring hangers or a sawtooth bracket to the back of the frame using screws or strong adhesive, making sure everything is centered and level so the mirror hangs straight.
One tip I’d really recommend: take photos throughout. It gives you a satisfying record of the whole process, but more practically, looking at your work on a screen can reveal things your eye misses when your nose is six inches from the clay. A quick snap and a moment of calm assessment can save you from a decision you’ll regret — or push you to take something further than you’d originally planned.

Finishing Touches and Surface Treatments
The finishing stage is where your wonky mirror goes from a well-made craft project to something genuinely beautiful, and it deserves just as much thought as everything that came before it. The surface treatment you choose affects the mirror’s visual weight, how it sits alongside everything else in the room, and the overall mood it brings to the space. Take your time here, test things on scrap clay if you can, and trust your gut about what actually feels right for your home.
A simple white or cream finish is by far the most popular choice, and it really does earn its reputation. There’s a clean, sculptural quality to it that works in almost any interior and lets the organic shape speak for itself without color getting in the way. For a particularly refined matte white, apply two or three thin coats of white gesso, sand lightly between each one, and finish with a coat of flat white acrylic. The result looks remarkably like plaster or ceramic and holds up much better than it looks.
If you want to go bolder, deep terracotta, earthy sage green, or rich chocolate brown are all gorgeous options that anchor the mirror visually and create a beautiful contrast with the reflective glass. Metallic finishes are worth considering too — a brushed gold or antique bronze applied over a dark base coat using a dry-brush technique can make the whole piece look genuinely expensive. Layering colors and finishes adds depth and complexity in a way that a single flat coat never quite achieves.
Texture is another avenue worth exploring before the clay fully dries. Pressing fabric, leaves, or lace into the surface leaves beautiful subtle impressions. Dragging a comb across sections creates a lined effect; pressing your fingertips in a repeated pattern gives something more tactile and organic. These details catch light in really interesting ways and add a level of refinement that can turn a simple frame into something extraordinary. It’s one of those finishing touches that looks intentional and considered without requiring much extra effort.
Styling and Displaying Your Wonky Mirror
Making the mirror is one thing — displaying it well is another. The way you hang and style it will determine whether it reads as a quiet accent or the star of the room, and that depends entirely on your space, your existing furniture, and the atmosphere you’re going for. A bit of thoughtful styling really can be the difference between good and genuinely stunning.
Think carefully about hanging height. The conventional advice is eye level, but with a statement piece like this, there’s a real case for going a touch higher — giving it room to breathe and letting it be appreciated as an art object rather than just something functional. Above a console table, a fireplace, or a bedroom dresser are all classic spots that work beautifully. In a hallway, a large wonky mirror hung at a slightly unexpected angle creates a playful, gallery-like feel that sets a great tone right from the front door.
What you style around the mirror matters just as much as the mirror itself. Consider pairing it with:
- A collection of sculptural ceramic vases in complementary earthy tones
- Dried botanicals or pampas grass in tall vessels for organic texture
- Small framed artworks or prints that echo the mirror’s color palette
- A trailing plant like pothos or string of pearls for softness and a bit of life
- Candles in varied heights and textures to add warmth and atmosphere
- Books stacked horizontally as visual anchors on a shelf or surface below
Don’t overlook lighting — the way light hits the reflective surface can amplify your styling enormously. Wall sconces on either side of the mirror create symmetry and warmth; a single pendant or floor lamp off to one side gives a moodier, more dramatic effect. Natural light from a nearby window is always the most flattering, and using your mirror to catch and bounce that light into darker corners is one of interior design’s oldest and most effective tricks.
And finally, don’t be afraid to let the mirror stand completely alone on a big expanse of wall. Its shape is strong enough to carry a space all by itself, and sometimes the bravest styling decision is just… restraint. One dramatic mirror, a freshly painted wall, nothing else competing for attention — that can be one of the most powerful statements a room makes. The imperfection of the form, shown off without apology, becomes a declaration of joyful, confident creativity. Which is exactly the right reason to make something by hand.
“`








What do you think?
It is nice to know your opinion. Leave a comment.