










DIY Jute Rope Vase Tutorial: Easy Budget-Friendly Home Decor Craft
Introduction: Why Jute Rope Vases Are the Perfect DIY Project
If you’ve been scrolling through home decor inspiration and feeling overwhelmed by the price tags attached to stylish, natural-material accents, jute rope vases might be exactly the project you’ve been looking for. These charming, textured vases bring an organic warmth to any room, blending seamlessly with bohemian, farmhouse, coastal, and minimalist aesthetics alike. Best of all, they cost a fraction of what you’d pay in a boutique home decor store, and the process of making them is surprisingly relaxing and rewarding.
Jute, a natural plant-based fiber, has been experiencing a major design revival over the past several years. Interior designers and everyday decorators alike have embraced its earthy tone, rough-hewn texture, and incredible versatility. When wrapped around a simple glass or plastic vessel, jute rope transforms the most ordinary object into something that looks curated, intentional, and stylish. The beauty of this craft is that no two vases turn out exactly alike, giving each piece a handmade authenticity that mass-produced items simply cannot replicate.
Beyond aesthetics, there’s something deeply satisfying about making something beautiful with your own hands. DIY home decor projects like this one allow you to customize colors, textures, and sizes to perfectly suit your space. Whether you’re decorating a cozy apartment, refreshing a home office, or looking for a thoughtful handmade gift, a jute rope vase checks every box. In this comprehensive tutorial, we’ll walk you through everything you need to know, from gathering your materials to displaying your finished creation with confidence.
The History and Appeal of Natural Fiber Crafts
Natural fiber crafts have been practiced across cultures for thousands of years, from intricate basket weaving in West Africa to macramé wall hangings popularized in 1970s America. Jute itself has a long history as one of the world’s most important agricultural crops, cultivated primarily in South Asia and prized for its strength, biodiversity, and biodegradability. Today, as more people seek sustainable alternatives to synthetic materials, jute has found a beloved second life in the world of home crafting and interior design.
The contemporary appeal of jute rope crafts goes beyond mere nostalgia. In a world increasingly dominated by digital experiences and plastic conveniences, there’s a growing cultural appetite for tactile, natural materials that connect us to something slower and more grounded. A jute rope vase sitting on a windowsill with a few dried flowers or a sprig of eucalyptus isn’t just decoration — it’s a small but meaningful statement about the kind of home and life you want to cultivate. That philosophical dimension gives even the simplest DIY project a deeper sense of purpose.
Materials You’ll Need: Gathering Your Supplies
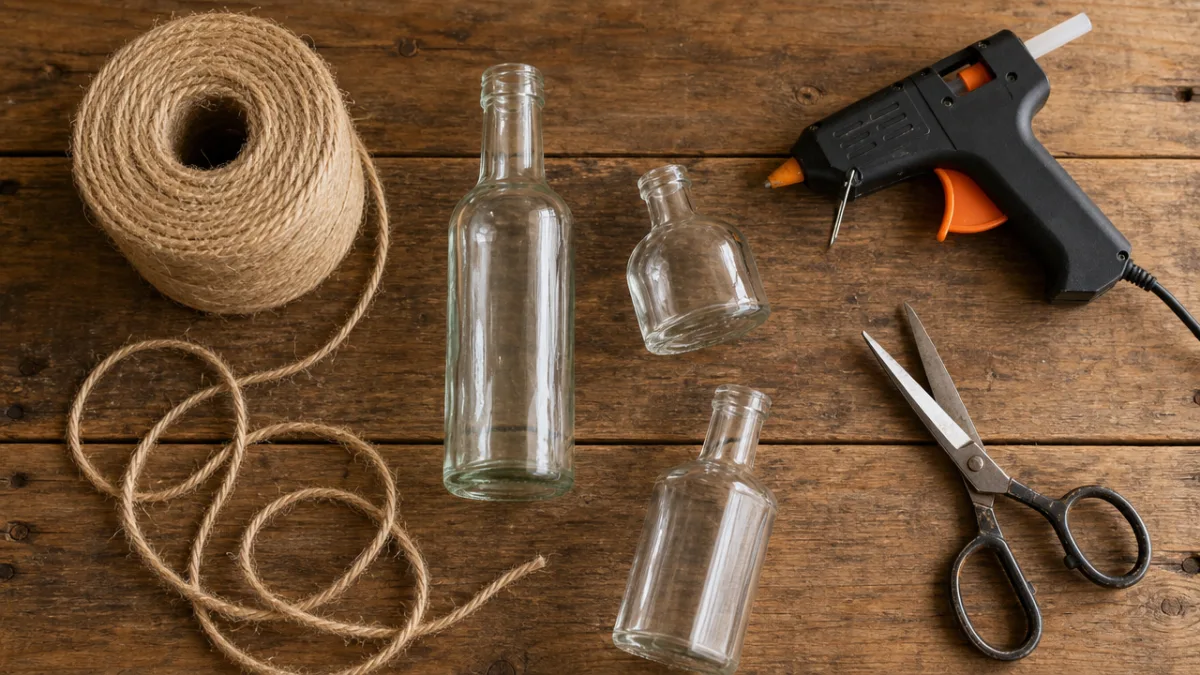
One of the greatest advantages of this project is how accessible and affordable the materials are. You likely already have some of them at home, and the rest can be found at any craft store, hardware store, or online marketplace. Before you begin, it’s helpful to lay everything out on a clean workspace so you’re not hunting for supplies mid-project. Having everything within arm’s reach makes the crafting process much smoother and more enjoyable, especially for beginners who are still developing their technique.
The most important material, of course, is the jute rope itself. You’ll want to choose a thickness that suits your vision — thinner rope around 3mm to 4mm in diameter creates a more delicate, refined look, while thicker rope around 6mm to 8mm produces a chunkier, more rustic effect. Most craft stores sell jute twine and rope in a variety of thicknesses, and it’s inexpensive enough that you can experiment with different gauges without worrying about the cost. A standard 50-meter spool is more than enough for several medium-sized vases.
For the vessel itself, you have a wide range of options. Empty glass bottles — think wine bottles, pasta sauce jars, or olive oil containers — work beautifully and have interesting shapes that add visual character. Plain terracotta pots, tin cans, and even cardboard tubes can also serve as the base structure. The key is to choose something with a relatively smooth, firm surface that the rope can adhere to cleanly. If you’re using a glass bottle with a label, make sure to remove it completely and clean the surface thoroughly before you begin.
Complete Materials List
- Jute rope or twine (3mm to 8mm thickness depending on desired look)
- A clean glass bottle, jar, tin can, or other vessel of your choice
- Hot glue gun and plenty of glue sticks
- Sharp scissors or craft snips
- Ruler or measuring tape
- Clothespins or binder clips (optional, for holding rope in place while glue dries)
- Decorative elements such as dried flowers, feathers, shells, or ribbon
- Spray sealant or Mod Podge (optional, for added durability)
- Newspaper or a silicone mat to protect your work surface
Step-by-Step Instructions: Wrapping Your Vase
Now comes the fun part — the actual wrapping process. Begin by plugging in your hot glue gun and allowing it to heat up fully before you start. While you’re waiting, decide where on your vessel you want to begin wrapping. Most crafters find it easiest to start at the very bottom of the vase, working their way upward in tight, even rows. Starting at the base gives you maximum control and ensures the vase will sit flat and stable on any surface without the rope unraveling from the bottom up.
Apply a small bead of hot glue to the very bottom edge of your vessel, then press the end of your jute rope firmly into the glue. Hold it in place for about ten to fifteen seconds until the glue sets. This first anchor point is crucial — if it comes loose later, the rest of your wrapping can unravel. Once your starting point is secure, begin coiling the rope tightly around the base of the vessel, applying small dabs of hot glue every inch or two to keep the rope locked in place. The goal is to have no gaps between the rows of rope as you spiral upward.
As you work your way up the vessel, maintain consistent tension in the rope. Too loose and you’ll get gaps and an uneven look; too tight and the rope may bunch or cause the coils to shift out of alignment. A steady, medium tension produces the cleanest result. Pause every few rows to step back and check your work from different angles. It’s much easier to correct any spacing issues while the glue is still fresh than to try to fix them later. Take your time with this step — patience is truly the most important tool in this entire project.
Handling Curves, Necks, and Tricky Spots
If you’re working with a bottle that has a narrow neck or pronounced curves, those areas require a little extra attention. When you reach a section where the vessel begins to curve inward, like the shoulder of a wine bottle, you’ll need to slightly angle each row of rope to follow the contour naturally. Adding a small extra dab of glue at the inner edge of each coil where it meets the curve will help prevent gaps from forming on the outside of the bend. Don’t rush these sections — they’re where the craftsmanship really shows.
For very narrow necks, you may choose to stop your wrapping at the shoulder and leave the neck of the bottle exposed. This creates a beautiful contrast between the natural, textured rope and the smooth glass, and it’s a look that many experienced crafters prefer because it actually highlights both materials rather than trying to cover everything uniformly. Alternatively, you can switch to a thinner twine for the neck section, which will wrap more easily around tight curves and give the finished piece an elegant, graduated texture from base to top.
Finishing Touches: Personalizing Your Jute Vase
Once you’ve wrapped the entire surface of your vessel and secured the final end of the rope with a thorough bead of hot glue, it’s time to think about personalization. This is where your individual style really gets to shine. The simplest and most popular finishing touch is to tuck in a bundle of dried botanicals — pampas grass, dried lavender, cotton stems, or preserved eucalyptus all look stunning against the earthy tone of jute and require no water, making them a perfectly low-maintenance display option for any room in the house.
For a more decorated look, consider wrapping a length of natural twine, colored ribbon, or even leather cord around the neck of your vase and tying it in a simple bow or knot. Shells, wooden beads, dried seed pods, and small feathers can be hot-glued to the exterior of the vase for added dimension and visual interest. If you’re making a set of vases in varying heights and widths, you might differentiate them by adding different embellishments to each one, creating a cohesive collection that still feels varied and layered when grouped together on a shelf or mantel.
If you want to make your vase functional enough to hold fresh flowers with water, you’ll need to address waterproofing. The simplest solution is to place a smaller glass vessel or a plastic cup inside your jute vase to hold the water, keeping it separated from the rope. You can also coat the interior of your vessel with a waterproof sealant or even multiple layers of Mod Podge before you begin wrapping the outside, though this works best with solid containers like tins or terracotta pots rather than bottles with narrow openings. Either approach extends the versatility of your finished piece considerably.
Color and Texture Variations to Try
While natural, undyed jute has a timeless appeal, there are several creative variations worth exploring once you’ve mastered the basic technique. Painted jute is one of the most popular trends in this space — simply brush diluted chalk paint or acrylic paint over your finished vase in a dry-brush technique to add subtle color while still allowing the texture of the rope to show through. White-washed jute vases have a soft, Scandinavian quality, while terracotta-tinted or sage-green variations feel right at home in earthy, biophilic interiors.
Mixing different materials with your jute is another exciting avenue. Wrapping the lower half of a vase in jute and the upper half in a contrasting natural material like seagrass or cotton macramé cord creates an interesting visual layering effect. You might also experiment with braided jute techniques, where you braid three strands of rope together before wrapping, producing a raised, dimensional surface that catches light beautifully and adds a level of visual complexity beyond simple single-strand wrapping.
Display Ideas: Styling Your Jute Vases at Home
The way you display your finished jute vases can make an enormous difference in their visual impact. A single vase can be a beautiful accent piece, but a thoughtfully arranged grouping of three or more vases in varying heights, widths, and textures creates a gallery-worthy vignette that draws the eye and anchors a space. When styling a group, the classic design principle of odd numbers applies — three or five vases almost always look more dynamic and intentional than an even-numbered pairing, which can sometimes feel too symmetrical and static.
Consider the surfaces and locations throughout your home where a jute vase grouping would have maximum impact. A fireplace mantel is an ideal canvas, especially when combined with other natural elements like candles, wooden objects, and trailing greenery. Open shelving in a kitchen or living area provides another wonderful opportunity, where your jute vases can be interspersed among books, small plants, and other curated objects for an effortlessly styled look. Even a simple windowsill arrangement with a few vases of different heights can transform an overlooked corner of a room into a moment of intentional beauty.
Dining tables and console tables are two more high-impact locations. A cluster of jute vases filled with dried grasses or wildflowers makes a gorgeous, low-maintenance centerpiece that feels organic and unforced. On a console table in an entryway, a tall jute vase filled with long dried branches or oversized pampas grass creates a dramatic first impression for anyone entering your home. The key in any display is to let the natural texture of the jute breathe — avoid overcrowding the vases with too many objects, and give them enough negative space to be appreciated as individual pieces.
Seasonal Styling for Year-Round Appeal
One of the most appealing qualities of jute rope vases is how easily they transition across seasons. In spring and summer, fill them with light, airy dried grasses, white cotton flowers, or even freshly cut stems placed in a waterproof inner vessel. The neutral tone of jute pairs beautifully with soft pastels, bright whites, and cheerful yellows, keeping your space feeling fresh and lively during the warmer months. You might also incorporate small seashells or coral-colored accents for a coastal summer vibe that feels relaxed and sun-drenched.
As autumn rolls around, the earthy warmth of natural jute feels even more fitting. Swap out your light summer botanicals for deep-toned dried arrangements featuring burnt orange, rust, and burgundy elements. Dried magnolia leaves, cotton bolls, wheat stalks, and cinnamon sticks all complement jute’s natural palette perfectly during the fall season. A grouping of jute vases on a fall-themed shelf or dining table, surrounded by small pumpkins and flickering candles, creates an atmosphere that is inviting and richly layered without feeling overdone or kitschy.
Making Multiple Vases: Tips for Gifting and Selling
Once you’ve completed your first jute rope vase and experienced the satisfaction of the finished result, it’s very common to want to make more. Many crafters find that this project is genuinely difficult to stop once you get started — the rhythmic, meditative quality of wrapping rope in tight, even rows is surprisingly addictive. If you’re planning to make a batch of vases for gifting, selling at a craft fair, or decorating multiple rooms, there are a few strategies that can help you work more efficiently while maintaining consistent quality across each piece.
Batch processing is your best friend when making multiple vases. Rather than completing one vase from start to finish before moving on to the next, work on several simultaneously. Prepare all your vessels at once by removing labels and cleaning surfaces, then move through each step with all vases before progressing to the next. This approach saves time and also ensures greater consistency in your technique, since your muscle memory is sharpest when you’re performing the same motion repeatedly in a single session rather than starting and stopping between projects.
If you’re thinking about selling your jute vases, the good news is that there’s a genuine and growing market for handmade natural decor items. Platforms like Etsy, local farmers markets, and Instagram shops are all viable venues for this type of product. Pricing your work fairly means accounting for the cost of materials, the time invested, and the unique handmade value of each piece. A well-photographed jute vase with a thoughtful description and a few dried botanical accents can sell for ten to thirty dollars or more depending on size and complexity — a very healthy return on a project that costs only a dollar or two to make.
Packaging and Presentation for Gifts
When giving a jute rope vase as a gift, presentation matters enormously. Because the vase itself already has a rustic, natural aesthetic, lean into that theme with your packaging choices. Wrapping the vase loosely in brown kraft paper and securing it with a length of matching jute twine tied in a simple bow creates a gift that looks cohesive and considered. A small handwritten tag attached to the twine adds a personal, heartfelt touch that store-bought gifts rarely achieve. If you’re gifting the vase with dried florals already arranged inside, place it in a kraft paper bag or a simple wooden crate for stability and charm.
For a more elaborate gift presentation, consider pairing your jute vase with complementary handmade or natural items — a small beeswax candle, a packet of wildflower seeds, a bar of artisan soap, or a bundle of dried lavender. Grouping these items together in a woven basket or on a small wooden tray creates a gift set that feels luxurious and thoughtfully assembled, even though the total cost remains minimal. The jute vase becomes the centerpiece of a curated lifestyle gift that communicates care, creativity, and a love of beautiful, natural things.








What do you think?
It is nice to know your opinion. Leave a comment.