










DIY Home Wall Art Decor Using Popsicle Sticks: A Complete Guide to Stunning Handmade Creations
Introduction to Popsicle Stick Wall Art
Popsicle stick wall art has become one of those DIY trends that genuinely took off for good reason. What started as a kids’ craft has grown into something that interior designers and budget-savvy homeowners are taking seriously — and honestly, it makes sense. That little wooden stick you associate with summer ice cream turns out to be a surprisingly capable building material. With the right approach, you can use them to create geometric patterns, rustic frames, decorative mirrors, and layered wall sculptures that can completely change the feel of a room.
One of the biggest draws here is just how cheap and easy it is to get started. A big bag of craft sticks costs a few dollars at any craft store, and you probably already have most of what you need at home — wood glue, paint, sandpaper. That’s really it. This is the kind of project that works whether you’ve never made anything in your life or you’re an experienced crafter looking for a fresh medium. And when a piece comes together well, it genuinely looks like it cost way more than it did.
There’s also something surprisingly satisfying about the process itself. The repetitive work of assembling and arranging sticks has a meditative quality that a lot of people find calming. And when you hang something on your wall that you built with your own hands, it hits differently than anything you’d buy at a store. Every piece carries a little bit of your patience and creativity in it, which makes it genuinely meaningful in a way that mass-produced decor just can’t match.
Essential Materials and Tools You Will Need
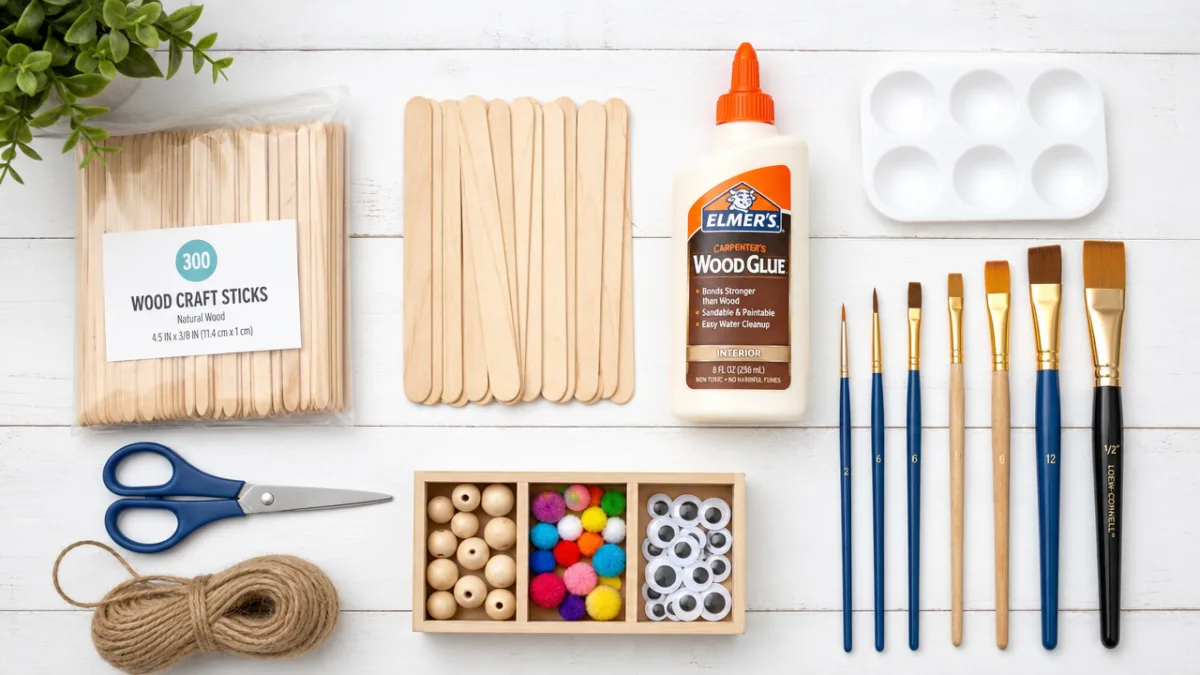
Getting your materials sorted before you start makes the whole process a lot smoother. The obvious starting point is the sticks themselves. Standard popsicle sticks run about 4.5 inches long and come in natural wood, but you’ll also find jumbo sticks, mini sticks, and even pre-colored packs at most craft retailers. If you’re planning a larger wall piece, jumbo sticks are worth considering — they have more visual presence and hold up better structurally when you’re building something substantial.
For adhesive, wood glue is the go-to because it bonds wood to wood really well and dries clear, so you don’t end up with visible glue lines ruining your finish. Hot glue guns are popular too, especially when you want to move quickly without waiting around for things to cure. A lot of people use both — hot glue to hold pieces in position right away, and wood glue underneath for the long-term strength. Keep a damp cloth close by to clean up any squeeze-out before it dries.
Beyond that, you’ll want acrylic paints, wood stain (anything from light oak to deep walnut works beautifully), spray paint for smooth even coverage, sandpaper in fine and medium grits, and a sealant or varnish to protect everything when you’re done. Don’t forget to think about how you’ll actually hang the piece — picture-hanging strips, sawtooth hangers, or nails all work depending on the weight. A ruler, pencil, cutting mat, and craft knife round things out nicely when your design calls for any precision cutting.
- Standard or jumbo popsicle sticks (wood craft sticks)
- Wood glue and/or a hot glue gun with glue sticks
- Acrylic paints, wood stain, and/or spray paint
- Fine and medium grit sandpaper
- Sealant or varnish for protection and finish
- Ruler, pencil, and cutting mat for precision
- Wall mounting hardware appropriate to your piece’s weight
Popular Design Styles and Pattern Ideas
The range of things you can actually make with popsicle sticks is a little surprising when you start looking into it. Geometric patterns are probably the most popular starting point, and it’s easy to see why — straight lines, angles, and repeating shapes are basically what popsicle sticks were made for. Herringbone arrangements, chevron patterns, sunburst designs, hexagonal lattices — all of these come together beautifully with careful spacing and a bit of planning. The finished look tends to feel modern and clean, which slots in perfectly with contemporary and minimalist interiors.
Rustic and farmhouse-style art is another huge category. Stain the sticks in warm browns and layer them horizontally or diagonally, and you get something that looks remarkably close to reclaimed barn wood — a look that usually runs hundreds of dollars when you buy it ready-made, but costs a fraction of that with craft sticks. Throw in some twine, a bit of burlap, or a few dried flowers, and you’ve got a genuine mixed-media piece with real texture and personality.
If you’re after something more personal, sticks can be cut and arranged to spell out letters, words, and phrases. A child’s name in bright colors makes a lovely bedroom piece, while a word like “DREAM” or “HOME” can anchor a whole gallery wall. Mandala-style designs — sticks fanned out from a central point in circular layers — create these deeply intricate, almost hypnotic pieces that people always want to stop and look at. Animal silhouettes, nature scenes, abstract compositions — honestly, once you start thinking about it, the possibilities are pretty wide open.
- Geometric herringbone or chevron wall panels
- Starburst or sunburst mirror frames
- Rustic horizontal plank-style art pieces
- Personalized name or word signs
- Mandala or radial symmetry designs
- Abstract layered color-block compositions
- Framed artwork or photo display boards
Step-by-Step Project: Creating a Geometric Sunburst
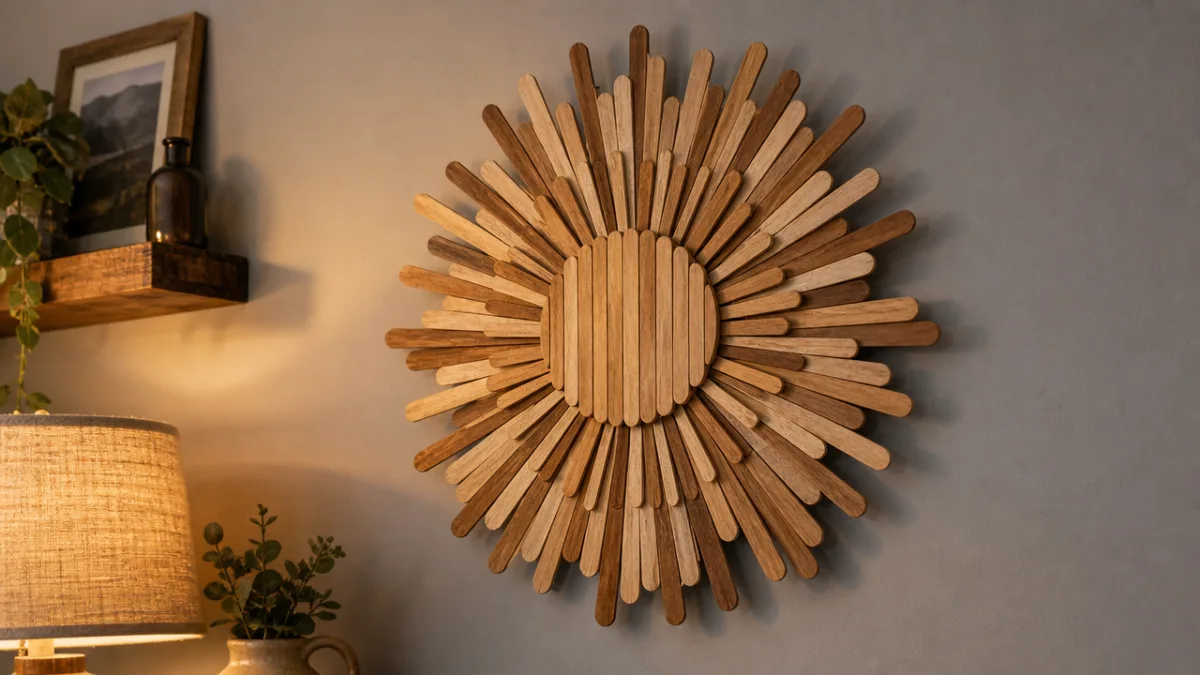
The geometric sunburst is one of those projects that looks impressive but is actually very approachable — a great first project if you’re just getting started. You’ll need roughly 100 to 150 standard popsicle sticks and something circular to use as a base: a round piece of cardboard, a wooden plaque, or even a sturdy paper plate will do the job. Mark the center point clearly and plan your first layer of sticks radiating outward like spokes on a wheel. Getting the spacing even at this stage is key — it’s what gives the finished piece that balanced, satisfying look.
Glue your first ring of sticks to the base, all pointing outward from the center at even intervals, then let it dry completely before moving on. Add a second layer, rotating it slightly so the sticks fill the gaps between the first. Keep going, rotating each new layer a bit and letting the sticks extend further outward as you build toward the edges. The layering is what creates that lovely sense of depth — the finished piece ends up looking far more complex than the actual process warrants. Work slowly and check your spacing often; it’s easy to drift without noticing.
Once everything is dry and solid, it’s time to paint or stain, and this is honestly where the magic happens. A single solid color looks clean and modern. Alternating sticks in two complementary colors adds rhythm and visual interest. Metallic spray paint — gold, silver, copper — gives the whole thing a glamorous quality that looks surprisingly high-end hanging in a living room or dining area. Finish with a coat of clear sealant, attach your hanging hardware to the back, and you’re done. It’s genuinely satisfying to step back and look at it on the wall.
Finishing Techniques That Elevate Your Work
The gap between a piece that looks charmingly homemade and one that looks genuinely polished usually comes down to how you finish it. Before any paint or stain goes on, give the assembled piece a light sanding with fine-grit sandpaper. This takes care of rough edges, splinters, and any dried glue residue that would otherwise show through your finish, and it helps the surface accept paint more evenly. It takes just a few minutes and makes a noticeable difference in the final result.
When painting, thin coats are your friend. One thick coat tends to drip, cover unevenly, and flatten out the wood texture in a way that makes craft projects look a bit cheap. A wide flat brush, long strokes along the length of the sticks, and two or three thin coats with full drying time between each — that’s the approach that gives you smooth, rich coverage. If you want something more translucent that lets the wood grain show through, diluting your acrylic paint with roughly equal parts water gives you a nice washy, tinted effect.
Staining instead of painting is a beautiful option when you want to lean into the natural warmth of the wood. A pre-stain conditioner applied first helps the stain absorb evenly, which matters because grain varies quite a bit from stick to stick. Wipe-on gel stains are particularly easy to work with and forgiving if you’re new to staining. Whatever finish you choose, seal it when it’s fully dry — matte, satin, or gloss depending on the look you’re after. That final coat of varnish is what pulls everything together and makes a piece feel finished rather than just done.
Displaying and Integrating Your Art Into Your Home
Making the art is half the work — where and how you hang it matters just as much. Before you commit to a spot, take a few minutes to hold the piece up in different rooms and against different walls. Natural light, wall color, surrounding furniture, and the overall scale of a space all affect how something reads in context. A piece that looked great in your bright craft room might feel too heavy in a dim hallway, so it’s worth auditioning a few options before you reach for the drill.
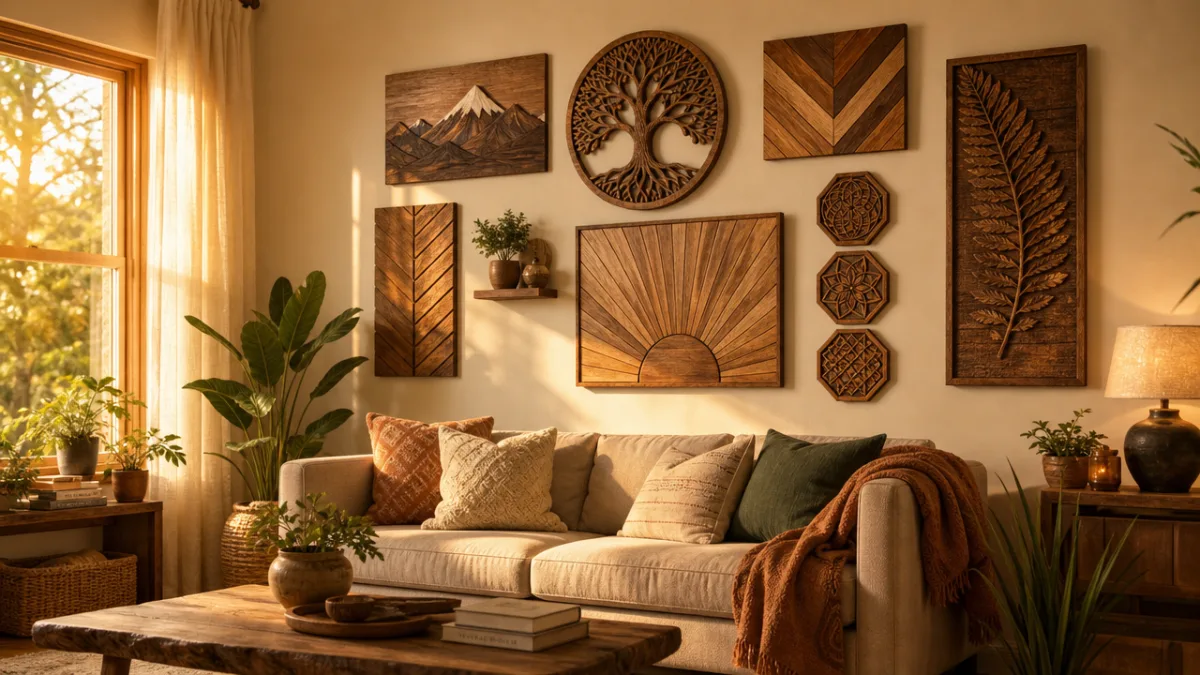
A gallery wall made entirely of popsicle stick pieces can make a really bold, cohesive statement. The key is variety within a unified palette — different shapes, sizes, and designs that all share a color scheme, like whites, creams, and gold, feel curated rather than chaotic. Mixing flat geometric pieces with more dimensional sculptural ones adds another layer of texture and interest. A good tip before hanging anything: lay out your planned arrangement on the floor and photograph it from above. That lets you refine the composition without making a single unnecessary hole in the wall.
These pieces also play really well with other things you already have in your home. A herringbone panel behind a shelf of plants and books creates a rich, layered backdrop that makes everything in front of it look better. A sunburst centered above a bed headboard gives a bedroom a clear focal point that draws your eye as soon as you walk in. In a kid’s room, colorful name signs or animal shapes hung at a child’s eye level add real personality — and kids genuinely love having something made just for them on their wall. Whatever your style — farmhouse, Scandinavian, maximalist eclectic — there’s a popsicle stick design that can fit right in.
Tips for Advanced Projects and Ongoing Creativity
Once you’ve got the basics down, the more ambitious projects start to feel genuinely exciting rather than intimidating. Three-dimensional wall sculptures that project several inches out from the surface create dramatic shadows that shift throughout the day as the light moves — they take more planning and stronger adhesives, but the results are really something. Incorporating other natural materials like driftwood, river stones, air-dry clay, or dried botanicals into your work expands what you can do texturally and visually in ways that feel fresh and unexpected.
Cutting sticks into non-standard lengths and shapes opens up a whole new range of design possibilities. A craft knife or small hobby saw lets you make diagonal cuts, pointed ends, and custom sizes that go well beyond what standard stick lengths can do. Always use a proper cutting mat and take sensible safety precautions with sharp tools. Softer, rounded shapes achieved through careful sanding or scoring contrast really nicely with hard geometric lines, and that contrast is often what gives a piece a more sophisticated, intentional feel.
Sharing your projects on Pinterest, Instagram, or crafting communities is worth doing — not just as a creative record, but because those communities are genuinely warm and helpful. Experienced crafters are usually happy to troubleshoot problems, suggest ideas, and cheer on finished work. If you want to keep improving steadily, giving yourself a simple challenge — one new piece a month, say — helps maintain momentum. The jump from your first simple geometric panel to a complex multi-dimensional wall installation happens gradually, but it does happen, and the whole journey is more fun than you’d expect from a bag of craft sticks and some glue.








What do you think?
It is nice to know your opinion. Leave a comment.