










DIY Giant Glowy Paper Mushroom Tutorial: Create Magical Illuminated Fungi for Your Space
There is something undeniably enchanting about oversized paper mushrooms that glow from within, casting a warm and whimsical light across any room or outdoor setting. These magical DIY creations have taken the crafting world by storm, appearing at fairy-tale weddings, bohemian garden parties, children’s birthday celebrations, and cozy bedroom corners alike. Whether you are a seasoned paper crafter or picking up scissors for the first time, this tutorial will walk you through everything you need to know to create your very own stunning giant glowy paper mushrooms from scratch.
The beauty of this project lies not only in its visual payoff but also in its accessibility. Most of the materials required are inexpensive, widely available at craft stores or online, and easy to work with even for beginners. You do not need a professional workshop or specialized tools — just a spacious table, some patience, and a genuine enthusiasm for creating something truly eye-catching. The result is a large-scale decorative piece that looks far more impressive and costly than the humble materials used to construct it.
Beyond their aesthetic appeal, these glowing paper mushrooms carry a satisfying DIY spirit that makes them meaningful as well as beautiful. Crafting something with your own hands and then watching it light up your space — literally — is an experience that store-bought decorations simply cannot replicate. Throughout this guide, you will find detailed instructions, tips for customization, and suggestions for displaying your finished mushrooms so they make the greatest possible impact.
Materials and Tools You Will Need
Gathering your supplies before you begin is one of the most important steps in any successful craft project, and this one is no exception. For the mushroom cap, you will need large sheets of tissue paper or crepe paper in your chosen colors — classic red with white spots is always a crowd favorite, but dusty pink, warm amber, soft lilac, and earthy brown all look absolutely stunning when illuminated. You will also need a balloon or a large bowl to use as a mold for shaping the cap, along with a mixture of white school glue and water for the paper mache process.
For the mushroom stem, a cardboard tube — such as those found inside rolls of wrapping paper or a rolled sheet of thick cardboard — works beautifully. You will need additional layers of paper mache to strengthen and shape it, as well as white or cream-colored tissue paper for the final surface coat. To create the glowing effect, you have several options: battery-operated fairy lights are the most popular choice due to their safety and convenience, but LED strip lights or even a simple battery-powered lantern placed inside the cap can work wonderfully depending on your design.
Other essential materials include a hot glue gun with plenty of glue sticks, scissors, a craft knife or box cutter for more precise cuts, acrylic paint in your chosen mushroom colors, white paint for the spots, Mod Podge or a similar sealant to finish and protect the surface, and a length of wire or thin dowel rod if you plan to mount your mushroom as a freestanding structure. Optional but highly recommended additions include glitter for extra sparkle, glow-in-the-dark paint for an even more magical effect, and floral wire for creating delicate grass or leaf embellishments around the base.
- Large tissue paper or crepe paper in assorted colors
- Balloon or large bowl for mold shaping
- White school glue and water (1:1 ratio) for paper mache
- Cardboard tube for the stem
- Battery-operated fairy lights or LED strip lights
- Hot glue gun and glue sticks
- Acrylic paint and brushes
- Mod Podge or decoupage sealant
- Scissors and craft knife
- Optional: glitter, glow-in-the-dark paint, floral wire
Building the Mushroom Cap: Step-by-Step
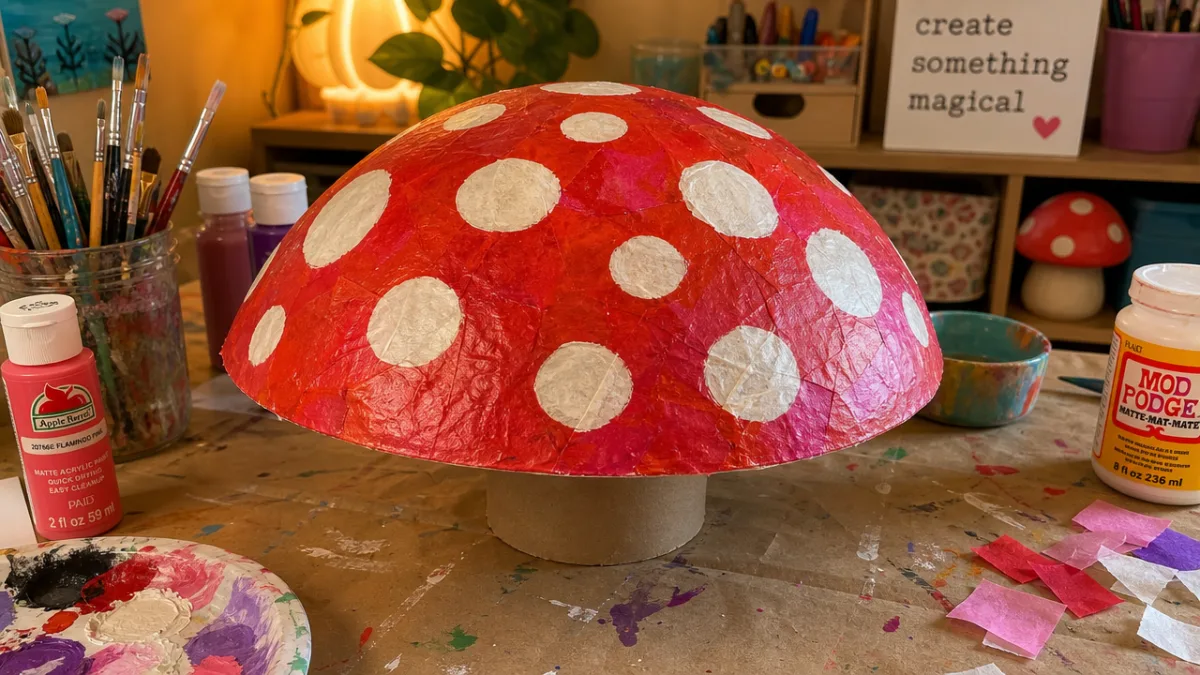
The mushroom cap is undoubtedly the most dramatic and visually striking element of this project, so it deserves careful attention and a little extra time. Begin by inflating your balloon to the desired size — for a truly giant mushroom, aim for a circumference of roughly 18 to 24 inches, which will give you a cap that is impressively large without becoming structurally unwieldy. Tie the balloon off and set it knot-side down in a bowl or cup to keep it steady while you work. This will be your mold, and you will be building layers of paper mache over the top hemisphere of the balloon to form the iconic rounded mushroom cap shape.
Mix your paper mache paste by combining white school glue and water in equal parts in a bowl, stirring thoroughly until you have a smooth, consistent mixture. Tear your tissue paper or newspaper into strips roughly two inches wide and six to eight inches long — tearing rather than cutting gives the edges a softer, more blended finish once dry. Dip each strip into the paste, run it gently between your fingers to remove excess liquid, and lay it over the balloon, smoothing it flat as you go. Cover the top two-thirds of the balloon in this first layer, then set it aside to dry completely, which typically takes four to six hours depending on humidity.
Once the first layer is fully dry to the touch, apply a second layer in the same manner, and then a third. Three layers is generally sufficient for a sturdy cap, but if you plan to handle the mushroom frequently or display it outdoors, four or even five layers will provide greater durability. After the final layer has dried completely — overnight is best — carefully pop the balloon and gently remove it from inside the hardened shell. You should now have a beautiful dome shape. Use your scissors to trim the open edge of the cap into a smooth, even curve, slightly flared outward at the bottom to mimic the look of a real mushroom cap.
Constructing and Attaching the Stem
The stem of your giant paper mushroom needs to be both visually convincing and structurally sound enough to support the weight of the cap above it. If you are working with a cardboard tube, begin by cutting it to your preferred height — anywhere from twelve to twenty-four inches works well depending on how tall you want your finished mushroom to stand. For extra strength, you can insert a wooden dowel rod through the center of the tube before you begin adding your paper mache layers. This inner support will make a significant difference if your mushroom will be freestanding or displayed in a high-traffic area where it might occasionally be bumped or jostled.
Apply two to three layers of paper mache to the outside of the cardboard tube, just as you did with the cap. For a more realistic mushroom stem shape, you may want to make the base slightly wider than the top — you can achieve this by adding extra layers of crumpled newspaper at the bottom and covering them smoothly with your paper mache strips. Allow the stem to dry completely between layers, and pay particular attention to the very top of the stem, where it will attach to the cap. This joint needs to be particularly well-reinforced, so consider adding a small cardboard disc at the top of the stem to create a wider surface area for attachment.
Once both the cap and stem are fully dry and cured, it is time to join them together. Before you do, this is the ideal moment to thread your fairy lights through the interior. Feed the battery pack end of the lights down through the cap and out through the bottom of the stem, leaving the actual lights clustered inside the cap where they will create the most beautiful glow. Use hot glue to attach the top of the stem firmly to the interior of the cap, holding it steady for a full minute to ensure the bond is strong. For extra security, reinforce the joint with a few additional paper mache strips applied around the seam and allowed to dry before you move on to painting.
Painting, Decorating, and Adding the Glow
Now comes the most creatively expressive stage of the entire project: painting and decorating your mushroom to bring it fully to life. Begin with a base coat of white or light cream acrylic paint applied all over both the cap and stem — this neutralizing primer layer ensures that your final colors appear bright, true, and vibrant rather than being muddied by the gray or tan tones of the dried paper mache beneath. Allow this base coat to dry thoroughly, then apply your chosen cap color. Two coats are usually needed for full, even coverage, and a wide, flat brush will give you the smoothest finish.
For the classic fairy-tale mushroom look, paint the cap in a rich, warm red — cadmium red or a slightly muted brick red both look beautiful — and then add white spots once the red is completely dry. The spots can be painted freehand for a casual, organic look, or you can cut a circular stencil from cardboard for perfect, consistent circles. The stem is traditionally white or pale cream, but do not be afraid to experiment: soft sage green, dusty blush, or a warm ivory with subtle brown shading around the base can look absolutely stunning. Adding subtle shading with a slightly darker tone of your main color around the edges of the cap will give your mushroom a beautifully dimensional, three-dimensional appearance.
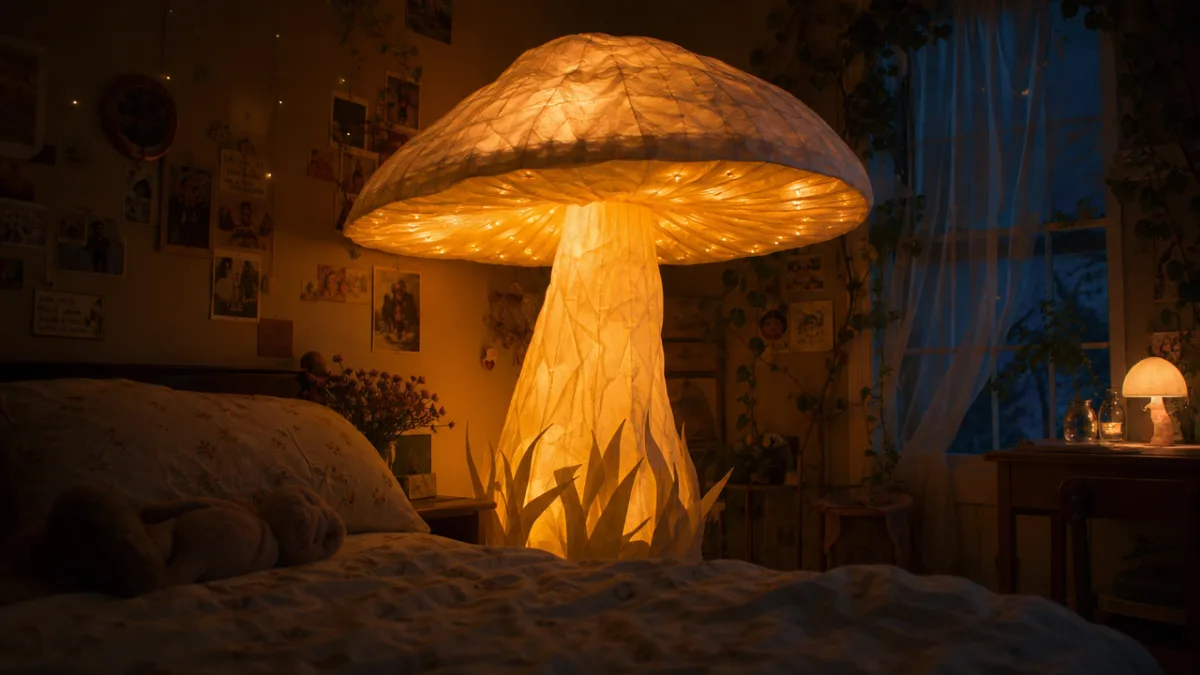
Once your paint is fully dry, apply a coat of Mod Podge over the entire surface — this seals the paint, adds a gentle sheen, and significantly strengthens the paper mache structure. If you want extra sparkle, dust the wet Mod Podge lightly with iridescent or holographic glitter before it dries. For the glowing effect, simply switch on your fairy lights and watch the magic happen: the warm light will filter beautifully through the layers of paper, creating a soft, diffused glow that is absolutely enchanting in a darkened room. If you applied glow-in-the-dark paint to the spots or the edges of the cap, turn off the lights entirely to reveal an additional layer of luminous magic.
- Apply a white base coat to the entire mushroom and allow to dry fully.
- Paint the cap in your chosen color using two even coats.
- Add white spots to the cap once the base color is completely dry.
- Paint and shade the stem in white, cream, or your preferred complementary color.
- Seal the entire surface with Mod Podge and add glitter if desired.
- Switch on the fairy lights to test the glow effect and make any adjustments.
Display Ideas and Creative Variations
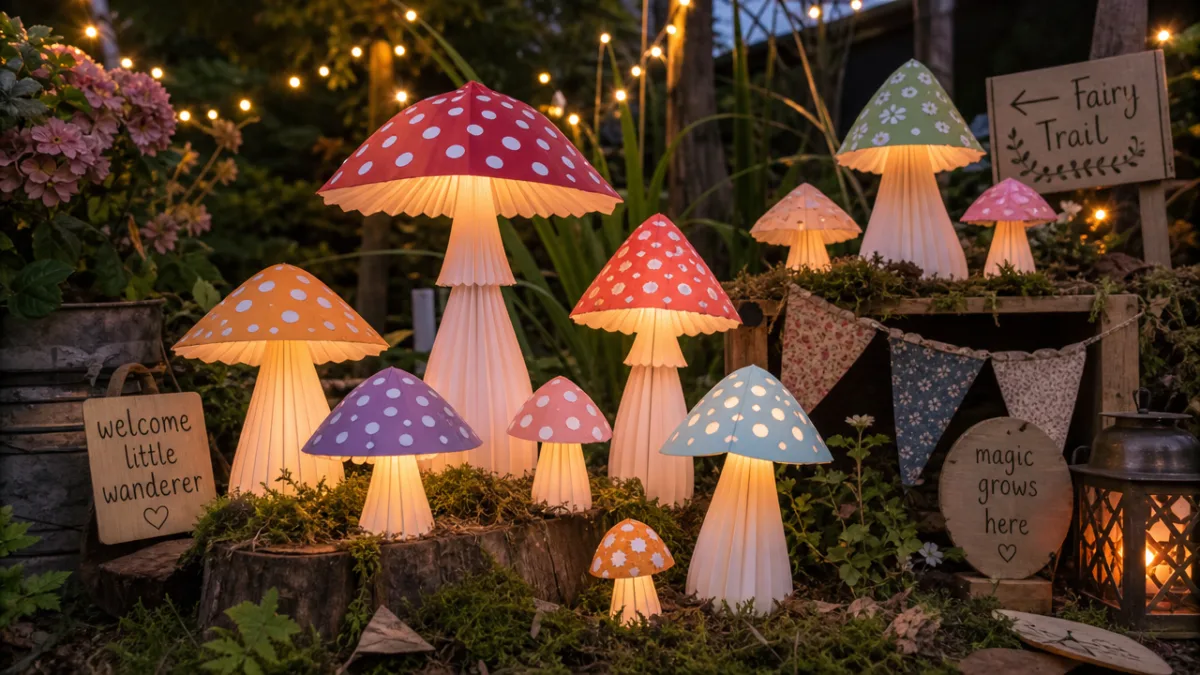
One of the most wonderful things about these giant glowing paper mushrooms is how versatile they are as decorative objects. For indoor display, a cluster of three mushrooms in varying sizes arranged in a corner of a bedroom, nursery, or living room creates a deeply immersive fairy-tale vignette. Try grouping a very large mushroom flanked by a medium and a small one, varying the colors slightly across the trio — perhaps a deep red, a warm orange, and a soft pink — to create a natural-looking, cohesive family of fungi. Place them on a low surface covered with green moss sheet from the craft store, and scatter a few small pebbles and dried leaves around the base to complete the woodland scene.
For outdoor events such as garden parties, outdoor weddings, or festival installations, these mushrooms can be made considerably more weather-resistant with a few extra steps. Apply three to four additional layers of paper mache for increased thickness, seal with two heavy coats of outdoor Mod Podge or a clear exterior varnish, and use battery-operated lights rather than plug-in options to avoid any electrical safety concerns in damp environments. To anchor them outdoors, attach a length of wooden dowel to the base of the stem and push it firmly into the ground. A gentle spray with waterproof sealant before the event gives an extra layer of protection against light dew or unexpected drizzle.
Creative variations on this project are virtually unlimited, and once you have mastered the basic technique you may find yourself eager to explore them. Consider making glow-in-the-dark mushrooms painted entirely in luminescent paint for a striking blacklight party installation. Try a pastel rainbow cluster for a children’s party or nursery decoration. Miniature versions of the same technique — made using small balloons and short cardboard tubes — can be used to create a delightful centerpiece arrangement for a dinner table or shelf. You can even make flat, wall-mounted mushrooms using the same paper mache cap technique applied over a flat disc mold and hung on the wall with fairy lights behind a sheer fabric backing for a glowing wall art effect.
Tips for Success and Common Mistakes to Avoid
After completing this project, most crafters find that the paper mache drying time is the element they most underestimated going in. Rushing through the drying stages — applying a new layer before the previous one is fully dry, or painting over damp paper mache — is the single most common mistake that leads to structural weakness, surface cracking, and uneven paint absorption. Genuine patience at each drying stage is not optional; it is fundamental to a successful outcome. If you live in a particularly humid environment, consider using a fan or a gentle hair dryer set to a low, cool setting to accelerate drying between layers.
Another frequent challenge is achieving an even, smooth surface on the finished cap. Because tissue paper can wrinkle and bubble as the paste dries, it helps to smooth each strip very firmly with your fingers as you apply it, working out any air bubbles toward the edges. Applying strips in alternating directions — horizontal in one layer, diagonal in the next — also helps create a more even, interlocked structure with fewer weak points. If your dried surface has lumps or ridges despite your best efforts, a light sanding with fine-grit sandpaper after the final layer is completely cured will smooth things out beautifully before you begin painting.
Finally, do not overlook the importance of the lighting choice and placement in determining the final visual effect of your mushroom. Warm white fairy lights tend to give the most atmospheric, cozy glow, while cool white lights create a more ethereal, moonlit effect. Colored LED lights — soft pink, lavender, or amber — can completely transform the mood of the piece and are worth experimenting with. If you want the entire cap to glow as evenly as possible rather than having bright spots where individual lights cluster, spread the lights across the full interior surface of the cap using a little removable adhesive putty, attaching each light individually to the inner surface before closing the joint between cap and stem.
- Always allow each paper mache layer to dry completely before applying the next.
- Apply strips in alternating directions for a stronger, more even structure.
- Sand lightly after the final layer to create a smooth painting surface.
- Spread fairy lights evenly inside the cap for a uniform, diffused glow.
- Use at least two coats of Mod Podge for durability and a polished finish.
- Reinforce the cap-to-stem joint thoroughly before painting.
- For outdoor use, apply exterior varnish and use battery-powered lights.
Sharing Your Creation and Finding Inspiration
Once your giant glowy paper mushroom is complete and glowing beautifully in its chosen spot, sharing it with the wider crafting community is a joy that should not be underestimated. Platforms like Pinterest, Instagram, and TikTok are teeming with fellow mushroom enthusiasts who will genuinely delight in seeing your finished piece. Photograph your mushroom in the best possible light — both literally and figuratively — by waiting until dusk or turning off the room lights and letting the fairy lights carry the image. A slow shutter speed on your phone camera, activated by tapping and holding the shutter button in portrait mode, will capture the glow beautifully without overexposing the highlights.
The community of paper crafters and home decorators who gravitate toward this style of project is warm, generous, and endlessly creative. Browsing through existing mushroom tutorials and finished project galleries will give you a wealth of ideas for your next creation — because there almost certainly will be a next one once you have experienced the satisfaction of completing your first. You might find yourself inspired by someone’s use of ombre coloring across a cluster of caps, or a particularly clever approach to making a mushroom that is large enough to serve as a seat for small children at a fairy-themed birthday party. This project has a way of opening doors to a whole world of whimsical large-scale paper crafting.
Most importantly, allow yourself to enjoy the process as much as the finished product. Giant glowing paper mushrooms are not about perfection — no two real mushrooms are identical, and the slight irregularities and handmade qualities of your creation are precisely what give it its charm and character. The slight wobble in a painted spot, the subtle texture of the paper showing through the paint, the gentle warmth of the light glowing through layers of tissue paper you applied with your own hands: these are not flaws, but rather the fingerprints of a maker, and they are exactly what makes this kind of handcrafted decoration so deeply special and irreplaceable in a world of mass-produced goods.








What do you think?
It is nice to know your opinion. Leave a comment.