










DIY Home Decor Upgrades That Look Luxe but Cost Less
Why Expensive-Looking Decor Doesn’t Have to Cost a Fortune
There is a persistent myth in the world of interior design that achieving a high-end, polished look requires a substantial budget and the help of a professional decorator. The reality, however, tells a very different story. With the right techniques, materials, and a little creativity, virtually anyone can transform a tired living space into something that looks like it belongs in the pages of an upscale design magazine — all without breaking the bank or taking out a second mortgage.
The secret lies in understanding what actually makes a space feel luxurious. It rarely comes down to how much money was spent. Instead, luxury is communicated through cohesion, texture, intentional detail, and the strategic use of a few well-chosen statement pieces. When you train your eye to identify these elements, you begin to see opportunities for elegant upgrades in even the most humble and budget-conscious corners of your home.
This guide is designed to walk you through some of the most effective DIY home decor upgrades that deliver maximum visual impact at minimum cost. Whether you are a seasoned crafter or someone who has never picked up a paintbrush for decorative purposes, these ideas are approachable, practical, and genuinely transformative. By the end, you will have a clear roadmap for elevating your space with confidence and creativity.
Understanding the Psychology of Perceived Value
Before diving into specific projects, it helps to understand why certain spaces feel expensive even when they are not. Designers rely heavily on the psychology of perceived value — the way our brains interpret visual cues to assign worth and quality to what we see. High ceilings feel grand, layered lighting feels intimate and curated, and rich textures like velvet, linen, and aged wood signal care and refinement regardless of their actual price tag.
When you apply this understanding intentionally, you stop shopping for expensive items and start shopping for items that mimic the visual language of luxury. A $12 throw blanket in a deep jewel tone draped artfully over a chair communicates warmth and sophistication in a way that a $5 bright synthetic version simply does not, even though the price difference is minor. These distinctions are learnable, and once you internalize them, every thrift store trip and hardware run becomes a treasure hunt.
Transforming Walls with Paint, Texture, and Architectural Detail
Nothing changes a room more dramatically — or more affordably — than what you do with its walls. Paint is the single most cost-effective upgrade available to any homeowner or renter, and yet most people underuse it by defaulting to plain white or a single uninspired neutral. The real magic happens when you move beyond the basics and start treating your walls as a design canvas. Techniques like color blocking, two-tone painting, and faux finishes can make a standard room look like it was designed by a professional with a serious budget.
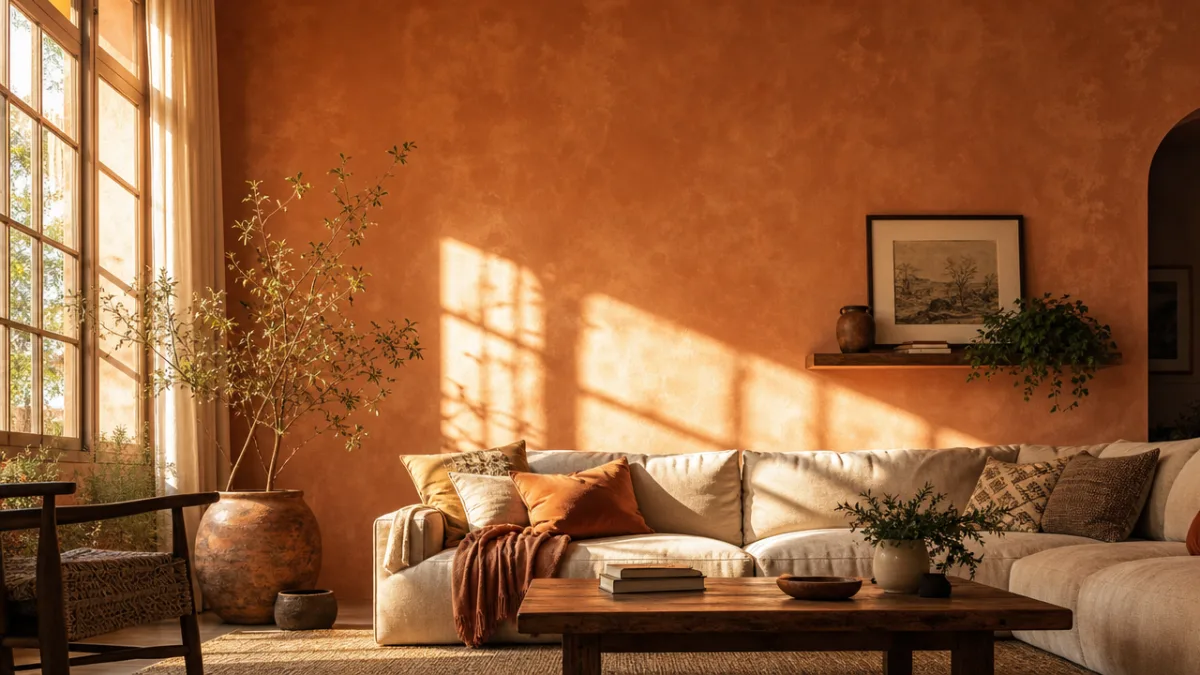
One of the most popular and impactful techniques right now is the limewash paint finish, which gives walls a soft, ancient, organic texture reminiscent of Italian villas and European farmhouses. Limewash paint is available at most home improvement stores and is applied with a large brush in overlapping strokes that are then partially wiped away while still wet. The result is a dimensional, layered wall treatment that looks like it cost thousands of dollars but typically runs between $30 and $60 for a standard room. The imperfect, handmade quality is precisely what makes it look so rich and authentic.
For those who want architectural interest without the expense of real molding installation, peel-and-stick wainscoting panels and paintable wallpaper borders have become remarkably convincing alternatives. You can also use standard wooden trim pieces from the hardware store to create the look of board-and-batten, picture frame molding, or shiplap on an accent wall. Paint everything — wall and trim — the same color for a seamlessly sophisticated finish that reads as deliberately designed rather than DIY. These kinds of architectural details are what separate rooms that feel finished from those that feel incomplete.
Faux Finishes and Specialty Paint Techniques Worth Trying
Beyond limewash, there are several other faux finish techniques that punch well above their weight in terms of visual impact. Color washing involves applying a diluted glaze over a base coat in circular motions to create a soft, dreamy depth of color that plain flat paint simply cannot achieve. Venetian plaster, while more involved, uses a specialty product troweled onto walls in thin layers to create a smooth, marble-like sheen that is genuinely stunning in entryways, dining rooms, or bathrooms.
Stenciling is another technique that has experienced a major revival, and for good reason. Modern stencil designs have moved well beyond the country cottage aesthetic into geometric, Moroccan, and abstract patterns that feel current and design-forward. A single feature wall treated with a repeating stencil pattern in a contrasting or metallic tone can anchor an entire room and become its most talked-about element. Stencils are reusable, the process is forgiving, and the supplies typically cost under $30 total, making this one of the highest-return investments in decorative DIY.
Furniture Refresh and Upcycling Techniques
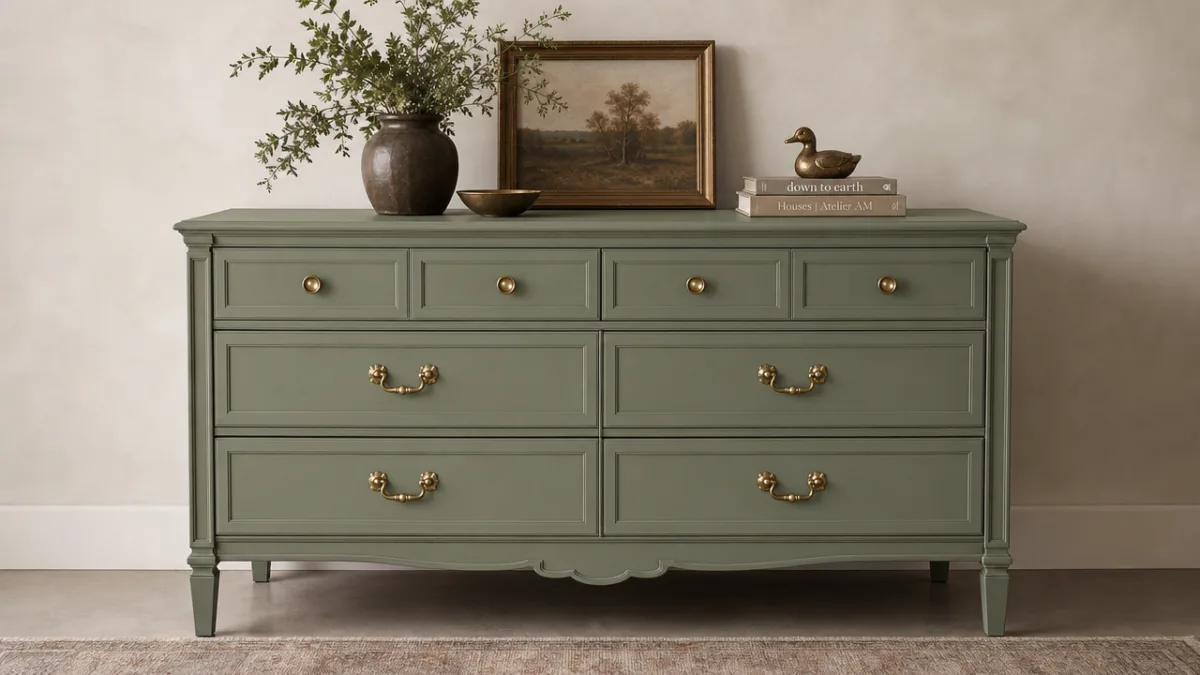
Buying new furniture is almost never the most economical path to a better-looking room, and it is rarely even the most interesting one. Some of the most beautifully curated interiors in the world are filled with pieces that were found secondhand, inherited, or rescued from the curb. The key is knowing how to see past a piece’s current condition to its underlying structure and potential. A solidly built vintage dresser with ugly hardware and peeling veneer is not garbage — it is a blank canvas waiting for the right vision.
Chalk paint is the furniture upcycler’s best friend because it adheres to almost any surface without priming or sanding, dries quickly, and produces a beautiful matte finish that can be distressed, waxed, or sealed depending on the desired look. A $20 can of chalk paint and an afternoon of effort can turn a scratched thrift store side table into a chic accent piece that looks like it came from a boutique home goods store. The distressed look in particular mimics the patina of authentic antique furniture, which is one of the most reliably elegant aesthetics in interior design across any style category.
Hardware replacement is another upgrade that delivers outsized results for minimal investment. Swapping out the original handles and knobs on cabinets, dressers, and kitchen cabinetry is one of the fastest and most dramatic transformations available to a DIYer. Brushed brass, matte black, and unlacquered bronze are currently the hardware finishes that read as most high-end and current. A full set of new cabinet hardware for a bathroom vanity typically costs between $15 and $40 and requires only a screwdriver and twenty minutes to install. The visual payoff is immediate and impressive, instantly making standard builder-grade cabinetry feel intentional and elevated.
Reupholstering and Fabric Upgrades on a Budget
Reupholstering a chair or sofa is often assumed to require professional skills, but for many pieces — particularly dining chairs with removable seat cushions — it is genuinely a beginner-level project. All you need is a piece of fabric large enough to wrap the cushion, a staple gun, and the confidence to just try it. The cushion is removed, the old fabric peeled away, the new fabric stretched taut and stapled to the underside, and the cushion replaced. Start to finish, the process takes about 15 minutes per chair and can cost as little as $10 if you choose a fabric remnant from a craft store.
For upholstered sofas and chairs that cannot be easily disassembled, high-quality furniture slipcovers have improved dramatically in both fit and appearance. Linen-look and velvet slipcovers in particular drape beautifully and can completely transform an old or mismatched piece into something that looks like it was chosen deliberately. Paired with the right throw pillows and a blanket, a slipovered sofa can anchor a room with real visual authority. The best slipcovers include tie-backs, elastic hems, or foam tuck strips to keep them neat and fitted rather than sloppy.
Lighting Upgrades That Completely Change the Ambiance
Lighting is arguably the single most underestimated element in home decor, and upgrading it thoughtfully is one of the most powerful things you can do for any room’s atmosphere. Most homes, particularly rentals and builder-grade properties, come equipped with overhead fixtures that cast a flat, unflattering light that actively works against any decorating efforts made at the furniture and accessory level. The good news is that lighting upgrades do not have to be expensive or require an electrician — many of the best solutions are completely plug-based and renter-friendly.
Swapping standard light bulbs for warm-toned LED options in the 2700K to 3000K range is the simplest and most immediate upgrade available. The difference between harsh cool light and soft warm light in a room is genuinely remarkable — it is the difference between a space that feels clinical and exhausting and one that feels welcoming, intimate, and beautifully staged at all hours of the day. Pair this with the strategic placement of floor lamps, table lamps, and wall sconces to create layered lighting at different heights, and you have instantly elevated your room’s atmosphere without touching a single other element.
Battery-operated and plug-in wall sconces have become a genuine game-changer for renters and budget decorators. These fixtures install without any wiring and create the polished, layered look typically associated with professionally designed spaces. Placed on either side of a bed, a mirror, or a piece of art, they frame the space in a way that reads as intentional and sophisticated. Pendant lights on swag cords offer a similar advantage over dining tables or in reading nooks, providing a design statement without requiring hardwiring. The effect is far removed from the bare-bulb aesthetic of most rentals.
DIY Lamp and Shade Upgrades
Lamp shades are one of those small details that have an outsized effect on a room’s overall look, and they are remarkably easy and inexpensive to customize. A plain white drum shade can be transformed with paint, fabric, trim, or even decoupage to become a genuine design accent. Clip-on shades in linen, rattan, or pleated fabric can replace boring plastic diffusers on basic pendant fixtures for under $20 each and instantly elevate the entire light fixture from forgettable to charming.
Dimmer switches, which cost approximately $15 each and can be installed by most people with a basic understanding of electrical safety, are one of the highest-return small investments available to homeowners. The ability to dial light levels down to create ambiance in the evening is something that professionally designed spaces use constantly and that most people do not think to add to their own homes. Combined with warm bulbs and layered light sources, a dimmer switch transforms a standard room into one that feels designed, comfortable, and genuinely beautiful at any time of day.
Accessorizing and Styling with Intention
The final layer of any beautifully designed room is its accessories — the objects, textiles, and decorative elements that bring personality, color, and life to a space. This is where many people either overspend on items that do not cohere, or underspend and leave a room feeling bare and unfinished. The key to accessorizing well is not the size of the budget but the clarity of intention. Every object in a curated room is there for a reason, and nothing is there by accident or default.
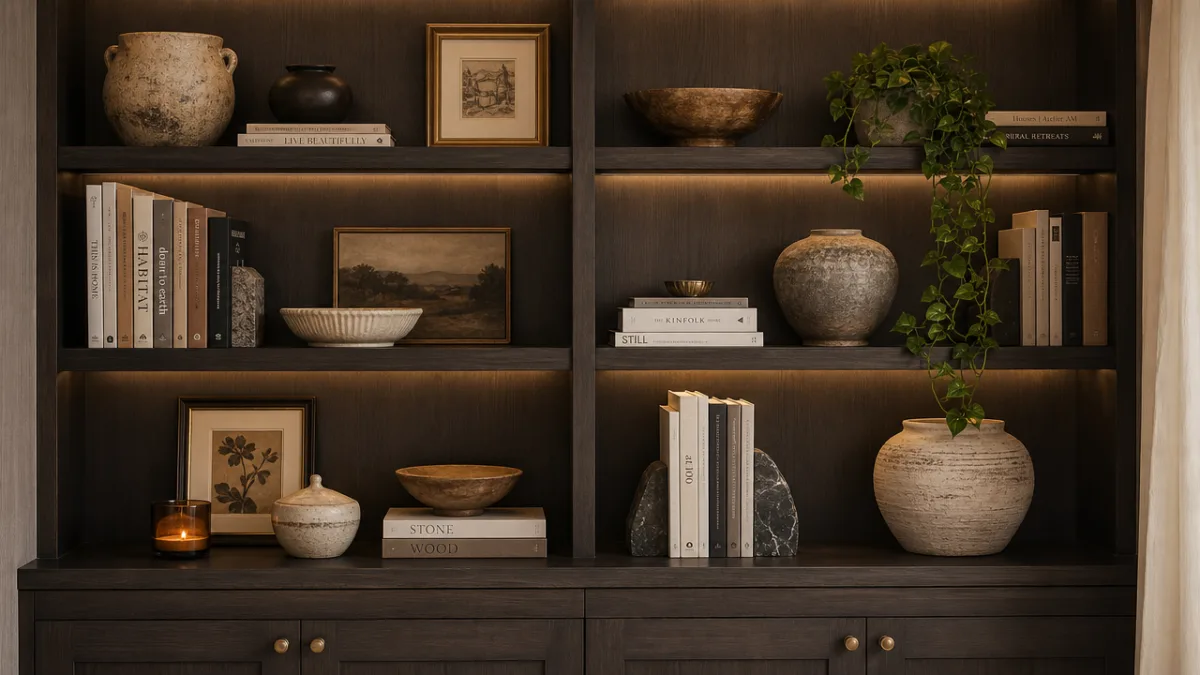
Grouping objects in odd numbers — particularly threes — is one of the oldest and most reliable rules in decorative styling. Three objects of varying heights, textures, and shapes arranged together on a shelf, console, or coffee table create visual interest and a sense of curation that a single object or an even-numbered pair rarely achieves. This principle costs nothing to apply and works regardless of what objects you are working with, from thrifted ceramics to collected stones to books stacked with a candle on top. The arrangement itself is the art.
Textiles deserve special attention because they contribute more to a room’s sense of warmth and luxury than almost any other category of accessory. A bed dressed with layered bedding in complementary textures — a smooth duvet, a chunky knit throw, a linen euro sham — conveys a level of intentionality and comfort that is immediately associated with high-end hospitality design. The same principle applies to sofas, armchairs, and even dining benches. Choosing textiles in a limited palette of two to three colors and layering at least two different textures creates that coveted collected-over-time look that no single shopping trip can replicate.
Gallery Walls, Mirrors, and Statement Art on a Budget
Original art is wonderful, but it is absolutely not required to create a room with artistic presence and visual depth. Some of the most effective gallery walls are composed entirely of thrifted frames repainted in a uniform color, printable art downloaded from free or low-cost sites, personal photographs printed through an online service, and decorative objects like pressed botanicals, architectural fragments, or vintage maps. The cohesion comes not from the individual pieces but from the consistency of framing, the intentionality of the arrangement, and the relationship between the wall and the furniture below it.
Mirrors are one of the most reliable tools in the budget decorator’s arsenal because they serve double duty as both functional objects and visual enhancers. A large mirror in a small room makes the space feel significantly larger and brighter by reflecting both light and the surrounding decor. Placed opposite a window, a mirror essentially doubles your natural light. Vintage and thrift store mirrors can often be found for a fraction of retail price and updated with spray paint, trim, or even rope wrapping around the frame for a fresh, current look. A large statement mirror hung low on the wall behind a console or sideboard is one of the fastest ways to make a room look designer-curated on a shoestring budget.
Bringing It All Together: Developing Your Own Design Eye
The most important skill you can develop as a DIY decorator is not any specific technique — it is the ability to see your space honestly and edit it with confidence. Most rooms that feel cluttered, dated, or uninspiring suffer not from a lack of things but from a surplus of things that do not work together. The discipline of removing items that compete with your vision is just as important as the skill of adding ones that enhance it. A room with twenty carefully chosen objects will almost always feel more luxurious than one with fifty mismatched ones.
Creating a simple mood board before beginning any project helps enormously in maintaining coherence across all your choices. This does not have to be a formal design exercise — a collection of saved images on your phone, a Pinterest board, or even a few magazine pages pinned to a corkboard will serve the purpose. The goal is to identify the common threads that attract you across multiple images: the colors, the textures, the amount of visual clutter, the quality of light, the mix of old and new. Once you can articulate your aesthetic in even rough terms, every decision becomes easier and more consistent.
Finally, give yourself permission to do this gradually and imperfectly. The most beautifully designed homes were not completed in a single weekend shopping trip. They evolved over time as their owners developed their taste, discovered new techniques, and learned to edit with increasing confidence. Every DIY project you complete teaches you something — about color, about scale, about your own preferences — that makes the next one better. The investment is not just in your home but in your own creative capability, and that is something that appreciates steadily over time with every room you touch.
Building a Toolkit for Ongoing DIY Success
Having the right tools on hand makes every project easier, faster, and more professional in its results. A basic DIY decor toolkit should include a quality paintbrush set in multiple sizes, a staple gun with extra staples, a level for hanging art and shelving, a cordless drill with a basic bit set, sandpaper in several grits, painter’s tape in multiple widths, and a reliable hot glue gun. Most of these items are available at any hardware store and represent a one-time investment that pays dividends across dozens of future projects.
Beyond tools, building a small inventory of materials that you return to repeatedly — chalk paint in your favorite neutrals, a few yards of a versatile fabric, a supply of picture hooks and Command strips, and an assortment of hardware in your preferred finish — means you are always ready to act on an inspiration without an extra trip to the store. Proximity to materials reduces the friction between an idea and its execution, which is the real secret behind the most prolific and successful DIY decorators. When the tools are ready and the materials are at hand, creativity flows freely and results compound beautifully over time.








What do you think?
It is nice to know your opinion. Leave a comment.