










DIY Floating Shelves Anyone Can Build in One Weekend
Floating shelves are one of those home improvement projects that look way harder than they actually are. With the right tools, a few hours of focused work, and a willingness to follow a pretty simple process, you can turn any blank wall into something functional and great-looking. Whether you’re trying to get your home office under control, add some personality to a living room, or squeeze more storage out of a tiny bathroom, floating shelves are a surprisingly elegant fix — and you won’t need to hire anyone or spend a fortune to pull it off.
One of the best things about building your own floating shelves is that you control every single detail. The wood species, the finish, the length, the depth, the spacing — all of it is up to you. Store-bought shelves almost never fit a wall just right or match your existing décor the way you want them to. Going the DIY route fixes that, and honestly, there’s something really satisfying about pointing to a shelf full of books or plants and knowing you built it yourself. This project works great for beginners and seasoned DIYers alike.
Tools and Materials You Will Need
Before you pick up a saw or a drill, take some time to gather everything in one place — it’ll save you multiple hardware store runs and keep you from losing momentum mid-project. For a standard floating shelf, you’ll need a solid wood board or a good-quality plywood panel, heavy-duty floating shelf brackets or a French cleat system, wood screws, wall anchors suited to your wall type, sandpaper in a few different grits, wood stain or paint, and a clear protective topcoat. How much of each depends on how many shelves you’re building and how long they need to be.
On the tool side, you’ll want a stud finder, a level, a tape measure, a pencil, a power drill with a few different bits, a circular saw or miter saw for cutting boards to length, a sander or sanding block, and a paintbrush or foam roller for finishing. A laser level is a nice upgrade that makes hanging multiple shelves in perfect alignment a lot easier, but a regular bubble level works perfectly fine if you’re patient. And please don’t skip the safety glasses and dust mask when you’re cutting and sanding — no shelf is worth a trip to urgent care.
When it comes to wood selection, pine is a popular starting point because it’s affordable and easy to finish. Oak gives you a beautiful grain and holds up really well over time, and walnut is the go-to if you want something that looks rich and high-end. Most big box hardware stores carry standard dimensional lumber up to twelve feet long, and many will make rough cuts for you right in the store for a small fee. If you want a more polished result, a local lumber yard can plane and square your boards and help you pick pieces with minimal knots and warping — well worth the extra step for a cleaner finished look.
- Stud finder and pencil for marking wall layout accurately
- Power drill with Phillips, flat, and drill bit attachments
- Level or laser level for perfectly horizontal placement
- Circular saw or miter saw for clean, straight cuts
- Sandpaper in 80, 120, and 220 grit for smooth finishing
- Wood stain, paint, or oil finish plus a protective topcoat
- Floating shelf brackets or French cleat hardware
Planning Your Shelf Layout and Wall Preparation
Good planning is honestly what makes the difference between shelves that look like they were professionally designed and shelves that feel a little off. Start by figuring out exactly where on the wall you want everything, keeping in mind the furniture, artwork, and foot traffic already in the room. Sketch the wall out roughly to scale, marking doors, windows, light switches, and outlets. Then decide how many shelves you want, how far apart they’ll be vertically, and where they’ll start and stop horizontally. A good rule of thumb is to space shelves somewhere between ten and fourteen inches apart — enough room to actually place and grab things without it feeling cramped.
Once you’ve got a plan on paper, use your stud finder to locate the studs behind the drywall. In most North American homes, studs are spaced sixteen inches apart on center, and finding them matters a lot — screwing directly into a stud is dramatically stronger than relying on drywall anchors alone. Mark each stud location lightly with a pencil at the height where each shelf will go. If your shelf spans a stretch of wall with no studs, or if you’re working with plaster or concrete block, you’ll need heavy-duty anchors rated for the kind of weight you’re planning to put up there.
Wall prep also means checking for anything hiding inside the wall, like electrical wires or plumbing pipes — especially important in kitchens and bathrooms. A basic multi-scanner tool can detect both metal and live wiring behind drywall, which gives you a lot more confidence before you start drilling. While you’re at it, repair any existing holes or cracks in the wall, and if the paint around where the brackets will mount is chipped or uneven, touch it up now. It’s a lot harder to deal with those things once the shelves are in the way.
Cutting, Sanding, and Finishing Your Shelf Boards
With your layout set and your wall prepped, it’s time to turn raw lumber into actual shelf boards. Start by measuring your shelf lengths carefully and marking your cut lines with a pencil and a square — that square is what keeps your line perfectly perpendicular to the edge of the board. If you’re using a circular saw, clamp a straightedge guide to the board so your cut stays clean and straight instead of drifting freehand. A miter saw makes this step faster and more precise if you have one, giving you crisp, square ends that’ll look clean against the wall and at any corners.
After cutting, start sanding the faces and edges of each board, beginning with 80-grit to knock out any mill marks, rough spots, or small imperfections. Move to 120-grit to smooth things out further, then finish with 220-grit for a silky surface that’ll take stain or paint evenly. Always sand with the grain — going against it leaves scratches that show up very clearly once you apply a finish. Give the front edge of each shelf some extra attention, since that’s what people will see and touch most. Round it slightly with fine sandpaper so it feels finished and comfortable.
Finishing your boards before hanging them is so much easier than trying to stain or paint them once they’re on the wall. If you’re using pine, apply a wood conditioner first — pine absorbs stain unevenly without it and can end up looking blotchy. Then brush or wipe on your stain in long, even strokes and wipe away the excess within a few minutes. Let it dry completely — usually four to eight hours, depending on the product — then apply two or three coats of clear polyurethane or water-based topcoat, lightly sanding with 220-grit between coats. The result is a surface that looks great and actually holds up to daily life.
- Measure and mark cut lines using a square for accuracy
- Make clean cuts with a circular saw guided by a clamped straightedge
- Sand progressively from 80-grit through 120-grit to 220-grit
- Apply wood conditioner if using pine or other soft, porous wood
- Brush on stain evenly and wipe away excess before it dries
- Allow full drying time, then apply two to three coats of topcoat
- Sand lightly between topcoat layers for a smooth, even finish
Installing the Brackets and Hanging Your Shelves
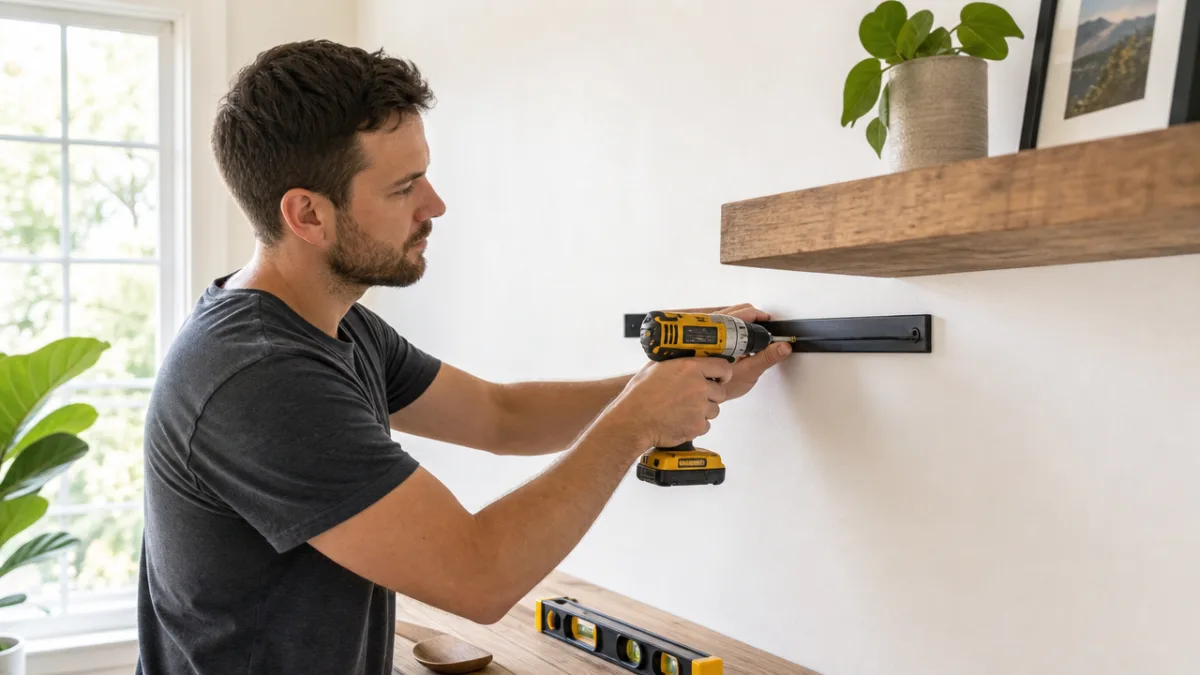
With your finished boards ready and your wall marked up, bracket installation is where everything starts coming together. If you’re using traditional L-shaped floating shelf brackets, hold each one against the wall at your marked height and use a level to confirm it’s perfectly horizontal before you drill anything. Mark the screw hole positions through the bracket’s mounting plate with a pencil, set the bracket aside, and drill your pilot holes with a bit slightly smaller than your screw diameter. For holes that land on a stud, drill straight in with confidence. For holes that miss studs, get your wall anchors seated before driving the screws.
Drive the screws until each bracket sits flush and completely solid against the wall. Test every single bracket by grabbing it with both hands and pushing down and out firmly — it shouldn’t move at all. If something feels loose, the anchor probably didn’t seat correctly in the drywall, and you really want to fix that before you’re loading heavy objects onto the shelf above it. If you’re going with a French cleat system — two interlocking beveled strips, one on the wall and one on the back of the shelf — the process is similar, but the wall cleat absolutely has to be perfectly level since the whole shelf hangs from it.
Once all the brackets are mounted and tested, set your finished shelf board on top of and against them. Most floating shelf hardware comes with small screws that drive upward through the bracket into the underside of the shelf board, locking it in place so it can’t shift or lift off. Drill these carefully so you don’t punch through the top surface of the shelf. Step back often during this process and check the alignment from different spots in the room — lighting can create optical illusions that make a perfectly level shelf look slightly tilted, so trust your level, not just your eyes.
Styling and Loading Your New Floating Shelves
The shelves are up — now comes the fun part. Deciding what to put on them and how to arrange it is where your personality gets to show up. A few simple styling principles go a long way here. Vary the heights of your objects to create visual rhythm, mixing taller things like vases or CANDLEs with medium-height books and smaller accessories like little sculptures or folded textiles. Odd numbers tend to look more dynamic than even groupings, so try arranging things in threes or fives rather than pairs. And leave some breathing room between clusters — you don’t need to fill every inch of space.
Think about both the function and the look of what you’re putting up there. In a home office, books organized by height can be mixed with small plants, a framed photo, or a decorative object that adds personality without creating visual chaos. In a kitchen, open shelves look great when dishes and glasses are stacked neatly with a small potted herb or a nice-looking oil bottle tucked in. In a bathroom, rolled towels, small baskets for toiletries, and a candle or two can make the whole space feel a little more like a spa. The goal is for it to look intentional, not like a dumping ground for whatever didn’t have a home elsewhere.
Also worth keeping in mind: don’t overload your shelves. Even a well-installed floating shelf has a real weight limit that depends on bracket strength, how many studs the brackets are hitting, and the wall’s overall structure. Most standard floating shelf brackets for residential use handle somewhere between twenty-five and fifty pounds per shelf, though heavy-duty options are available if you’re planning to store a lot of books or heavier gear. Spread weight evenly across the full length of the shelf rather than piling everything at one end, and check in periodically to make sure all the screws and anchors are still snug — seasonal changes in temperature and humidity cause wood to expand and contract, and things can loosen up over time.
Troubleshooting Common Problems and Pro Tips for Success
Even with a solid plan, things don’t always go perfectly — and floating shelves are no exception. One of the most common surprises is realizing mid-installation that your wall isn’t as flat as it looked. Older homes especially tend to have walls with subtle bows and dips that only become obvious when you hold a long, straight shelf up against them. If a small gap appears between the back of the shelf and the wall, a thin bead of paintable caulk in a matching color will hide it cleanly. For bigger gaps, small shims placed behind the bracket mounting plate during installation can compensate for the irregularity before it becomes a permanent problem.
Another thing that comes up fairly often is screws or anchors that strip out and just spin without gripping during installation. If a screw strips inside a stud, pull it out, drill your pilot hole slightly off-center to catch fresh wood, and use a slightly longer screw for better bite. If a wall anchor strips out in drywall, remove it and switch to a toggle bolt or snap toggle anchor — both grip incredibly well in drywall without needing a stud. When buying anchors, always get ones rated for at least twice the weight you’re planning to put on the shelf, since manufacturers’ ratings are typically calculated under ideal conditions that don’t always match what’s happening in your actual wall.
A few pro tips are worth baking into your process right from the start. First, buy a little more wood than you think you need — having a spare board on hand if you make a bad cut or find a defect after staining is so much less stressful than driving back to the store for one piece. Second, take photos of your wall before the brackets and shelves go up, documenting exactly where every screw and anchor is. You’ll be really glad you did if you ever need to remove the shelves or do any work on the wall later. Third, if you’re building multiple shelves, finish all the boards before you hang any of them — working in batches is more efficient and gives you a consistent color and sheen across the whole installation.
Finally, don’t overlook what good lighting can do for your shelves. Small LED puck lights or a thin strip of LED tape mounted to the underside or top of a shelf can completely transform the way the whole wall looks, casting a warm glow that makes even a simple arrangement feel considered and intentional. Battery-powered options need no wiring at all, so anyone can add them regardless of their electrical experience. And fair warning: once you finish your first set of floating shelves and see what they do for a room, there’s a very good chance you’ll be mentally mapping out where to build the next set before the finish on these ones has fully dried.








What do you think?
It is nice to know your opinion. Leave a comment.