










32 Remodeling Hacks That Could Save You Time and Money
Introduction: Smarter Remodeling Starts Before You Pick Up a Tool
Home remodeling projects have a well-earned reputation for going over budget and running past deadlines. Whether you’re tackling a kitchen refresh, a bathroom overhaul, or a full-scale room transformation, the costs can spiral quickly if you don’t approach the work strategically. The good news is that experienced renovators and contractors have developed a wealth of practical hacks that can dramatically reduce both the time and money you spend on any given project.
Many homeowners make the mistake of diving headfirst into a remodel without doing thorough research or planning. They fall in love with a design on social media, buy the materials, and then discover mid-project that they’re missing key supplies, that measurements were off, or that the chosen approach requires expensive professional help they hadn’t budgeted for. A little preparation at the front end of a project can prevent hours of backtracking and hundreds, sometimes thousands, of dollars in unexpected expenses.
This guide compiles 32 of the most effective remodeling hacks across every major area of the home. From clever paint tricks to smart material swaps, cabinet shortcuts to flooring hacks, these tips are designed to help you work more efficiently without sacrificing quality. Whether you’re a seasoned DIYer or attempting your very first renovation, these strategies will help you stretch every dollar and make the most of every hour you put into your home.
Planning and Budgeting Hacks That Set You Up for Success
The single most powerful thing you can do before starting any remodeling project is to build a detailed plan. This means measuring every surface you intend to work on, sketching out your vision to scale, and researching the cost of every material and tool you’ll need. Experienced renovators recommend adding a 15 to 20 percent contingency buffer to your overall budget to account for surprises, because in remodeling, there are almost always surprises hiding behind walls or under floors.
One of the most underused planning hacks is to visit your local building permit office or check your municipality’s website before starting work. Many homeowners skip this step and later discover that the work they completed without a permit must be torn out or redone. Permits exist not just for legal compliance but for safety verification. The cost of pulling a permit is almost always far less than the cost of fixing unpermitted work when you go to sell the home or if an inspector gets involved.
When it comes to budgeting, timing your purchases around major retail holidays can save you a significant amount of money on appliances, flooring, and fixtures. Black Friday, Labor Day, and Memorial Day sales at home improvement stores routinely offer discounts of 20 to 40 percent on big-ticket items. Additionally, buying floor models or scratch-and-dent appliances from appliance dealers can save you hundreds of dollars on items that are functionally perfect but cosmetically imperfect in places nobody will ever see once installed.
Create a Materials List Before Stepping Foot in the Store
Walking into a home improvement store without a precise materials list is one of the most expensive mistakes a remodeler can make. Impulse purchases, redundant buys, and forgotten items that require a second trip all add up fast. Before any shopping trip, calculate your square footage, add a 10 percent overage for waste and cuts, and write down every item by name, quantity, and specification. Keep this list on your phone so it’s always accessible and updatable as the project evolves.
Use Free Design Tools to Visualize Before You Commit
Several free or low-cost software tools allow you to mock up a remodeled room in 3D before purchasing a single item. Programs like RoomSketcher, IKEA Place, and even the design tools built into major home improvement retailer websites let you experiment with layouts, colors, and furniture arrangements without any financial commitment. Spending a few hours virtually designing your space can prevent costly mistakes like buying tile that clashes with your cabinetry or choosing a paint color that looks completely different under your home’s lighting conditions.
Kitchen Remodeling Hacks That Deliver Maximum Impact
The kitchen is consistently the room that provides the highest return on investment when remodeled, but it’s also one of the most expensive rooms to renovate from scratch. The smartest kitchen remodeling hack is to keep your existing cabinet boxes in place and simply replace the doors and hardware. Cabinet boxes are structurally sound in most homes for decades, and a set of new doors combined with updated hardware can transform the look of a kitchen completely for a fraction of the cost of full cabinet replacement.
Painting existing cabinets is another transformative and budget-friendly option when the bones of your cabinetry are in good condition. The key to a professional result is proper preparation: degreasing thoroughly, sanding lightly, using a high-quality bonding primer, and applying a cabinet-specific paint in thin coats. Many homeowners who skip preparation steps end up with peeling paint within a year. Done correctly, painted cabinets can look indistinguishable from brand-new factory-finished cabinetry and can last many years with minimal touch-ups.
For countertops, consider concrete overlays or countertop refinishing kits as an alternative to a full replacement. These products have improved dramatically in recent years and can mimic the look of granite, marble, or quartz at a small fraction of the cost. Another savvy approach is to use a premium material like quartz or granite on only the main preparation area and a lower island, and then use butcher block or tile on the remaining countertop runs. This mixing of materials can look intentional and designer-curated while keeping overall costs manageable.
Upgrade Your Backsplash Without Breaking the Budget
Peel-and-stick tile panels have become genuinely impressive in recent years and represent one of the best value plays in kitchen remodeling. Modern versions made from real stone veneer or high-quality vinyl are difficult to distinguish from traditionally installed tile when done neatly. For a permanent installation, subway tile remains one of the least expensive tile options available and has a classic, timeless look that works across virtually every kitchen style from farmhouse to modern. Installing your own backsplash over a weekend is one of the most satisfying and cost-effective kitchen upgrades available.
Maximize Storage With Simple Add-On Solutions
Before resorting to a full cabinet renovation to gain storage, explore the many inexpensive organizational inserts and add-ons that can maximize the capacity of your existing cabinets. Pull-out drawer organizers, lazy Susans for corner cabinets, under-shelf baskets, and door-mounted spice racks can double or triple the usable storage in a kitchen without removing a single cabinet. Open shelving is another popular option that removes upper cabinet doors entirely for a light, airy look while actually improving accessibility and display potential for frequently used items.
Bathroom Remodeling Hacks for a Luxurious Look on a Budget
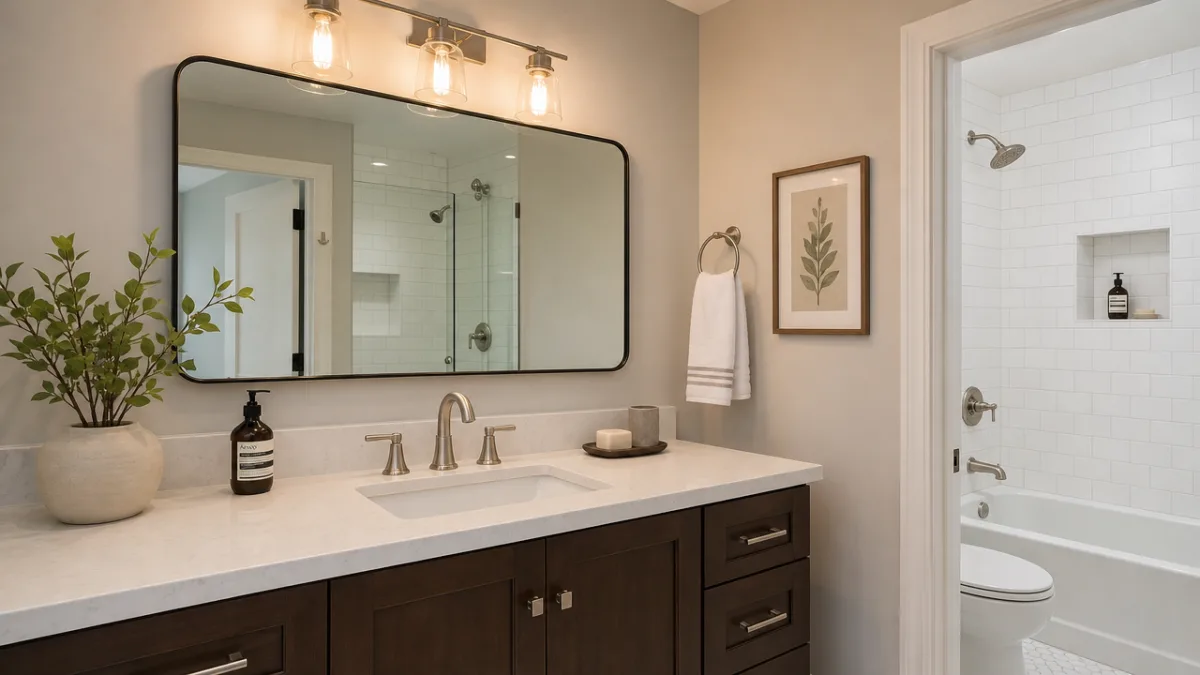
Bathrooms are second only to kitchens in remodeling return on investment, and they offer some of the most dramatic transformation opportunities for relatively modest budgets. One of the most impactful single changes you can make to a bathroom is replacing the vanity light fixture. Bathroom lighting is often the most dated element in an otherwise acceptable space, and a new fixture in a modern finish can completely change the character of a bathroom for as little as fifty to one hundred dollars installed. Pairing a new light with updated mirrors amplifies the effect significantly.
For tiled showers and tub surrounds that are in structurally sound condition but look tired and discolored, professional-grade grout cleaning and recoloring can produce a near-miraculous transformation. Grout colorants are available at home improvement stores and, when applied after thorough cleaning, can make old grout look freshly installed. Follow up with a grout sealer to protect the finish and prevent future staining. This process typically costs under forty dollars and a few hours of work, compared to potentially thousands for a tile replacement.
Refinishing an old bathtub rather than replacing it is one of the most cost-effective bathroom hacks available. Professional tub refinishing typically costs between three hundred and five hundred dollars, while a full tub replacement including labor can easily exceed one thousand to three thousand dollars or more. The refinished surface, when properly cared for, can last ten or more years. Similarly, a toilet does not need to be replaced if it’s functioning properly — often just replacing the seat, lid, and interior tank components for under one hundred dollars total can make an old toilet look and function like new.
Install a New Faucet to Instantly Modernize the Space
Faucet replacement is genuinely one of the most accessible DIY plumbing tasks and one of the highest-impact updates you can make to a bathroom. A dated brass or chrome faucet replaced with a modern matte black, brushed nickel, or oil-rubbed bronze model immediately updates the aesthetic of the entire sink area. Most faucet replacements require nothing more than an adjustable wrench and about an hour of work. Buying during sale events or choosing well-reviewed mid-range brands over premium designer labels will give you the same visual impact at a fraction of the price.
Flooring Hacks That Save Time, Money, and Your Back
Flooring replacement is often one of the most disruptive and expensive aspects of a home remodel, but several smart hacks can dramatically reduce both the cost and complexity. The first decision to make is whether your existing flooring can be repaired, refinished, or covered rather than replaced entirely. Hardwood floors that look worn or scratched can often be belt-sanded and refinished for significantly less than the cost of new hardwood installation. Even floors that have minor damage in isolated areas can be spot-repaired by a skilled professional to blend seamlessly with the surrounding surface.
Luxury vinyl plank flooring has become the go-to recommendation for budget-conscious remodelers because it genuinely delivers on its promise of durability, waterproofing, and visual appeal. Modern LVP products are nearly indistinguishable from real hardwood in photographs and are far more practical in moisture-prone areas like kitchens, bathrooms, and basements. Because most LVP products use a floating floor installation system that clicks together without glue or nails, a confident DIYer can install an entire room in a single day, eliminating substantial labor costs.
When buying flooring, always purchase more than you think you need. The standard recommendation is to add 10 percent to your total square footage calculation to account for waste from cuts, defective planks, and future repairs. Buying all your flooring from the same production run is critical because dye lots can vary, meaning flooring purchased later may not match perfectly. Store extra flooring in your home’s living environment so it acclimates to the same humidity conditions, which prevents buckling or gapping after installation.
Prep Your Subfloor Properly to Avoid Costly Failures
No flooring product performs well when installed over a compromised subfloor, and skipping subfloor preparation is one of the most common reasons DIY flooring projects fail prematurely. Before installing any new flooring, walk the entire subfloor looking and listening for squeaks, soft spots, and high or low areas. Squeaks can usually be silenced with subfloor screws driven into joists. High spots can be sanded down and low spots filled with floor leveling compound. This preparation work adds time upfront but prevents far more time-consuming and expensive failures down the road.
Consider Painting Concrete Floors as a Design Choice
In basements, garages, and even some modern interior spaces, painted or epoxy-coated concrete floors represent an incredibly cost-effective flooring solution that has genuine aesthetic appeal when executed well. Epoxy floor kits available at home improvement stores can transform a dull grey concrete slab into a polished, professional-looking surface in a variety of colors and patterns. Properly prepared and sealed concrete is also highly durable and easy to clean, making it an excellent choice for high-traffic utility spaces where more expensive flooring materials would be wasted.
Painting, Lighting, and Finishing Hacks to Tie It All Together
Paint is consistently ranked as the single best return-on-investment upgrade in home remodeling, delivering dramatic visual impact for relatively minimal cost. But even a seemingly simple painting project can go wrong without the right approach. Professional painters will tell you that surface preparation — cleaning, patching holes, sanding rough spots, and applying primer to stained or previously unpainted surfaces — accounts for 80 percent of the final result. Rushing the preparation phase is the number one reason DIY paint jobs look amateurish compared to professional work.
When selecting paint colors, always test actual paint samples on your wall rather than relying on paint chips or monitor displays. Colors look completely different depending on the direction a room faces, the quality of the light source, and the other colors present in the room. Purchase sample-size pots of your top two or three choices and paint large swatches, at least twelve by twelve inches, on the actual wall. Observe them at different times of day and under both natural and artificial light before committing to a full gallon purchase.
Lighting is the most underestimated element in home remodeling and arguably the single greatest differentiator between a space that looks luxurious and one that looks flat. Simply swapping outdated flush-mount ceiling fixtures for recessed lighting, pendant lights, or a combination of ambient and task lighting can transform a room’s atmosphere entirely. Dimmer switches, which cost as little as fifteen dollars per unit, give you extraordinary control over the mood of any space and can make an ordinary room feel sophisticated and intentional. Layered lighting — combining overhead, task, and accent sources — is the hallmark of professionally designed interiors.
Use Crown Molding and Trim to Add Architectural Character
Adding crown molding, baseboards, or door casing trim to a room is one of the most cost-effective ways to make a space feel finished, polished, and more valuable. Lightweight polyurethane foam molding profiles have made this upgrade more accessible than ever — they’re easy to cut, light enough to be applied with construction adhesive alone in many cases, and paintable to look identical to wood at a significantly lower cost. Even simple three-inch baseboards painted crisp white against a colored wall add a level of refinement that makes an enormous visual difference in any room.
Don’t Overlook Hardware as a Finishing Touch
Cabinet hardware, door handles, switch plates, and outlet covers are the punctuation marks of an interior space — small in size but significant in their collective impact. Replacing every visible piece of hardware in a room with a consistent finish — matte black, brushed gold, satin nickel — is an inexpensive update that creates a sense of intentional design and cohesion throughout the space. A full set of cabinet pulls for an average kitchen typically costs between fifty and two hundred dollars depending on the style and finish chosen, yet the transformation it produces is completely disproportionate to that modest investment.

Structural and Systems Hacks That Protect Your Investment
While cosmetic updates are the most visible and satisfying part of remodeling, the most important work you can do is to ensure that the underlying systems of your home are in good working order. Before spending money on new flooring or cabinetry, it is worth having a licensed plumber inspect your pipes if your home is more than forty years old, and having an electrician audit your panel if you’re adding any significant electrical loads. Discovering a plumbing leak or an undersized electrical panel after new finishes are installed is far more expensive and disruptive than discovering it before.
Insulation is another foundational element that deserves attention during any major remodel. If walls or ceilings are being opened for any reason, take the opportunity to add insulation before closing them back up. The incremental cost of insulation at this stage is minimal compared to the labor cost of opening a finished wall later. Improving insulation in attics, exterior walls, and crawl spaces not only reduces energy bills but also improves comfort, reduces noise transmission, and can qualify homeowners for federal and state energy efficiency tax credits.
One of the most valuable and least celebrated remodeling hacks is to document everything before you close up walls or cover floors. Take photographs and short videos of every pipe run, electrical wire, and structural element before it disappears behind drywall or under flooring. Store these images in a dedicated folder on your cloud storage labeled by room and date. This documentation is invaluable years later when you need to know exactly where a pipe runs or which direction the floor joists travel before drilling into a surface for any reason.
Weatherstripping and Caulking Are Among the Best ROI Updates Available
The unglamorous but genuinely impactful work of sealing your home against air infiltration through weatherstripping, caulking, and spray foam is consistently among the highest return-on-investment updates a homeowner can make. Air sealing reduces heating and cooling costs, prevents moisture infiltration that causes mold and rot, and makes the living environment more comfortable year-round. A tube of exterior caulk costs a few dollars, and a thorough caulking of every window and door frame, exterior penetration, and foundation joint can make a measurable difference in your monthly utility bills.
Plan Utility Upgrades Around Future Needs, Not Just Current Ones
When opening walls or ceilings during a remodel, think strategically about what you might want in that space five to ten years from now. Running an extra electrical circuit, a conduit for future low-voltage wiring, or a dedicated outlet in an unusual location costs very little when the wall is already open but is expensive and disruptive to add later. This forward-thinking approach is particularly valuable in kitchens, bathrooms, home offices, and media rooms, where technology and lifestyle needs evolve rapidly and the demand for power and connectivity tends to only increase over time.
Final Thoughts: Consistency, Patience, and Smart Choices Win Every Time
Successful home remodeling is rarely about having the biggest budget or the most advanced skills. It is almost always about planning carefully, making smart material choices, doing thorough preparation work, and maintaining the patience to let each phase of a project be completed properly before moving on to the next. The homeowners who are happiest with their remodeling outcomes are invariably the ones who researched thoroughly, bought quality materials in the right quantities, and were willing to take the time to do preparation work correctly even when it felt tedious.
The 32 hacks covered in this guide are not shortcuts in the sense of cutting corners — they are strategies for working intelligently rather than wastefully. Whether you adopt every single one or simply incorporate a handful of the most relevant tips into your next project, the cumulative effect of these smarter choices can save you substantial amounts of both money and time. Every dollar saved on materials, every hour spared from inefficient methods, and every mistake avoided through better planning is a direct investment in the quality and value of your finished home.
Approach your next remodel with curiosity and confidence, knowing that millions of homeowners before you have successfully tackled similar projects with similar tools and budgets. Take the time to learn from their experiences, draw inspiration from the wealth of resources available online and in your community, and don’t be afraid to ask for help from professionals when a task genuinely exceeds your current skill level. A well-executed remodel, done with care and smart planning, is one of the most rewarding investments you can make in the place you call home.








What do you think?
It is nice to know your opinion. Leave a comment.