










DIY Pallet Garden Shed for Tool Storage: A Complete Step-by-Step Guide
There is something deeply satisfying about building a functional structure with your own hands, especially when that structure solves a real problem in your home or garden. A pallet garden shed for tool storage is one of the most rewarding weekend projects a homeowner can undertake, combining sustainability, creativity, and practicality into a single, beautiful result. Repurposed wooden pallets are widely available, often free of charge, and surprisingly sturdy when assembled correctly. This guide will walk you through everything you need to know to plan, build, and finish your very own pallet garden shed from the ground up.
The appeal of pallet construction goes beyond cost savings, though those savings are substantial. Pallets are made from hardwood or softwood that has already been kiln-dried or heat-treated to meet international shipping standards, which means the wood is typically resistant to pests and moisture in ways that raw lumber sometimes is not. When you build with pallets, you are giving these sturdy, well-engineered platforms a second life instead of allowing them to pile up in landfills or behind warehouses. It is a genuinely eco-conscious choice that does not require you to sacrifice quality or durability in the finished product.
Before you begin swinging a hammer, it is worth taking a moment to appreciate how much a dedicated tool storage shed can transform your gardening experience. Rakes, shovels, hoes, wheelbarrows, and bags of soil have a way of multiplying over time, and without a proper home for them they end up leaning against fences, getting rained on, or creating hazards in the garage. A well-built pallet shed keeps everything organized, protected from the elements, and instantly accessible whenever you need it, which means less time searching and more time actually gardening.
Planning Your Pallet Shed: Size, Layout, and Permits
Good planning is the foundation of any successful building project, and your pallet shed is no exception. Begin by taking an honest inventory of the tools and equipment you need to store. Walk around your property, count your long-handled tools, measure your wheelbarrow, and note any power equipment like lawn mowers or leaf blowers that might need shelter. This inventory will determine the interior dimensions your shed needs to be truly functional rather than just technically large enough to squeeze everything inside uncomfortably.
Most backyard tool sheds fall in the range of six feet by eight feet to eight feet by ten feet, which is a comfortable size for a typical suburban garden’s worth of equipment. Pallets are generally available in a standard size of 48 inches by 40 inches, so designing your shed around these dimensions will dramatically reduce the amount of cutting and custom fitting required. Sketch out a simple floor plan on graph paper, noting where the door will go, whether you want any windows, and how you plan to arrange shelving and hanging systems inside. The more detail you include at this stage, the fewer surprises you will encounter during construction.
Depending on where you live, you may need a building permit before constructing any outbuilding on your property, even a small one made from repurposed materials. Most municipalities have a square footage threshold below which a permit is not required, commonly around 100 to 120 square feet, but the rules vary significantly by location and zoning classification. Contact your local building or planning department before you begin, and ask specifically about setback requirements, which govern how far a structure must sit from property lines, fences, and your home. Taking this step early costs you nothing and can save you from the considerable expense and frustration of being asked to tear down completed work.
Sourcing and Selecting the Right Pallets
Not all pallets are created equal, and choosing the right ones for a structural building project requires a bit of knowledge. The most important thing to look for is the International Plant Protection Convention stamp, commonly shown as IPPC followed by a country code and treatment code. You want pallets marked HT, which stands for heat-treated, meaning they have been kiln-dried to eliminate pests without the use of chemicals. Avoid pallets marked MB, which stands for methyl bromide, a pesticide that can off-gas over time and poses health risks in an enclosed space. Also pass on any pallets that show signs of heavy staining, chemical spills, or strong unusual odors.
The best places to find free or low-cost pallets include garden centers, hardware stores, flooring retailers, furniture stores, and landscaping suppliers. Many of these businesses accumulate far more pallets than they can return to suppliers and are genuinely happy to let you haul them away. Grocery store distribution centers and appliance retailers are also excellent sources. If you need a larger quantity quickly or want pallets in particularly good condition, local online marketplaces and classified ad sites frequently have listings from businesses looking to offload them in bulk at little to no cost.
When selecting pallets for a structural application like wall framing, prioritize boards that are thick, tightly spaced, and free of major cracks or splits. Gently push and twist each pallet to test for flex and rigidity — a pallet that wobbles or feels loose has compromised joinery that will only get worse under the stresses of a building application. For your floor and walls, you want the sturdiest specimens in your collection. Less structurally sound pallets can be reserved for non-load-bearing uses like interior shelving, tool hangers, or decorative elements. Plan to collect about twenty to thirty percent more pallets than your initial estimate suggests you need, because inevitably some will prove unsuitable once you examine them more closely at home.
Building the Foundation and Floor Frame
A solid, level foundation is the single most important factor in the longevity of any shed, and a pallet shed is no different. Without a proper base, even the most beautifully built walls will rack, twist, and eventually fail as the ground beneath them shifts with seasons and moisture. The good news is that a pallet shed does not require a concrete slab, though that option is always available if you prefer it. For most backyard situations, a gravel pad with concrete deck blocks or skids made from pressure-treated four-by-four lumber will provide more than adequate support while also allowing water to drain freely beneath the structure.
To prepare your site, begin by marking the perimeter of your shed using stakes and string lines, then remove all grass and vegetation from the area. Excavate down approximately four to six inches and fill the space with compacted crushed gravel, checking frequently with a long level to ensure the surface is as flat and level as possible. Once your gravel bed is settled and level, position your concrete deck blocks or pressure-treated skids at regular intervals, typically every four feet, along the perimeter and across the interior. These blocks or skids will support the floor frame and lift the wood off the ground, preventing moisture wicking and extending the life of the structure considerably.
The floor frame can be built from two-by-six or two-by-eight pressure-treated lumber running as rim joists around the perimeter with interior joists spanning between them at sixteen inches on center. Once your frame is built and confirmed to be level and square — check squareness by measuring diagonally from corner to corner in both directions, which should be equal — lay pallets across the joists to create your floor decking. Fasten the pallets to the joists with structural screws rather than nails, which allows for disassembly if needed and provides stronger shear resistance. Fill any large gaps between pallet boards with scrap wood, and you will have a floor that is solid, level, and ready to support your walls.
Constructing the Walls and Door Frame
Wall construction for a pallet shed typically uses pallets stood on their edges and secured together to create a continuous wall surface. Begin at a corner, standing one pallet vertically and securing it to a corner post made from four-by-four pressure-treated lumber. The corner posts run from the floor frame to the top plate and provide the structural anchoring points that tie your walls together. Use heavy-duty structural screws driven at angles through the pallet framing members into the corner posts, and supplement these connections with metal hurricane ties or framing connectors for additional strength and rigidity.
As you add pallets along each wall, connect them to each other with screws driven through the end boards of adjacent pallets and reinforce the connection with metal mending plates on the interior side. Check frequently for plumb and level as you go — it is much easier to make small corrections as you build than to try to straighten a wall after it is complete. The top of each wall gets a continuous horizontal top plate made from two-by-four or two-by-six lumber that spans the entire length and ties all the pallets together into a unified structural element. This top plate also provides the bearing surface for your roof rafters.
The door opening requires some additional framing attention because you are essentially creating a gap in what would otherwise be a continuous structural wall. Frame the opening with doubled two-by-fours on each side forming king studs and jack studs, with a header beam across the top made from doubled two-by-sixes or a manufactured LVL beam depending on the span. This header carries the load from the roof above the opening and transfers it down the sides of the frame to the floor. The door itself can be built from pallets as well — a simple frame of two-by-fours with a pallet face screwed to it makes a rugged, characterful door that fits perfectly with the aesthetic of the shed. Hang it with heavy-duty exterior gate hinges rated for the weight, and add a simple latch or hasp for security.
Roofing Your Pallet Shed
The roof is your shed’s primary defense against the elements, and it deserves careful attention even on a budget-conscious pallet project. The most practical roof design for a small shed is a simple gable or lean-to style with a pitch steep enough to shed rain and snow effectively. A lean-to, also called a skillion roof, is the easiest to build because it uses parallel rafters of identical length running from a higher rear wall to a lower front wall. A gable roof is slightly more complex but sheds precipitation from two sides rather than one, which can be important in areas with heavy snowfall or horizontal rain. For most garden tool sheds, a four-in-twelve pitch — meaning four inches of rise for every twelve inches of horizontal run — provides good drainage without creating excessive height.
Rafters can be cut from standard two-by-six lumber, spaced sixteen to twenty-four inches on center, and resting on the top plates of your walls. At each end, install gable framing to close the triangular space between the top plates and the ridge board. Once your rafter frame is in place, cover it with oriented strand board or plywood sheathing, then apply a layer of roofing felt or synthetic underlayment before your final roofing material. Corrugated metal roofing panels are an excellent choice for a pallet shed — they are inexpensive, extremely durable, require minimal maintenance, and install quickly with specialized roofing screws that have built-in rubber washers to seal each fastener point against leaks.
Overhangs are an often-overlooked detail that significantly extends the life of a wooden structure. By extending your rafters twelve to eighteen inches beyond the wall on all sides, you create an overhang that keeps rain from running directly down your walls and pooling at the foundation. This simple design choice dramatically reduces moisture-related deterioration in the siding and lower wall structure. Finish the eaves with fascia boards and optional soffit panels to give the roof edges a clean, finished appearance while also preventing birds and insects from nesting in the rafter bays. Take particular care to flash and seal any joints or penetrations in the roof with appropriate roofing tape or sealant, as these are the points where leaks most commonly originate.
Finishing, Weatherproofing, and Interior Organization
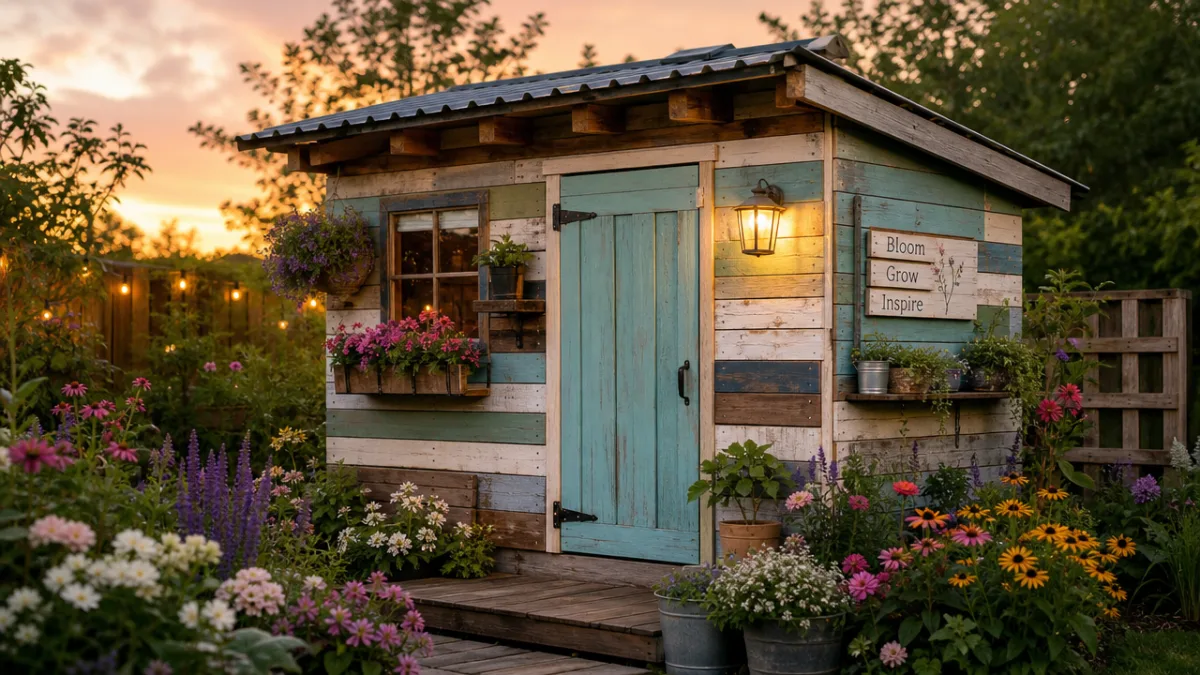
Once the structure is complete and watertight, the finishing work transforms your pallet shed from a construction project into a genuinely attractive garden feature. Begin on the exterior by filling any large gaps between pallet boards with expanding foam sealant, trimming it flush once cured, and then sanding the entire exterior surface lightly to remove splinters and roughness. Apply a coat of exterior wood primer to all exposed surfaces, paying particular attention to end grain, which absorbs moisture most aggressively. Choose an exterior paint or stain in a color that complements your home and garden — earth tones, deep greens, and classic barn reds all look wonderful on pallet structures and have the additional benefit of making imperfections in the wood less visible than lighter colors would.
Interior organization is where your shed goes from merely functional to genuinely useful, and a little planning here pays enormous dividends in daily convenience. Consider installing some or all of the following storage solutions inside your finished shed:
- A French cleat wall system made from ripped two-by-four lumber, which allows hooks, bins, and tool holders to be rearranged infinitely without drilling new holes
- Dedicated long-handle tool holders made from lengths of PVC pipe mounted horizontally, keeping rakes, shovels, hoes, and brooms upright and easily accessible
- A workbench along one wall, built from pallet boards on a two-by-four frame, providing a surface for potting, sharpening tools, or making small repairs
- Overhead storage using the space above the door for items used infrequently, such as extra potting mix, extension cords, or seasonal decorations
- Shelving units on the side walls for smaller items like hand tools, gloves, seed packets, and plant labels
- A dedicated corner for power equipment with a weatherproof power strip and proper clearance around any fuel-powered machines
Ventilation is a practical consideration that is easy to overlook but important for the long-term health of both your shed and your tools. Trapped moisture inside a closed shed accelerates rust on metal tools and encourages mold growth on wooden handles and surfaces. Install a simple louvered vent near the peak of each gable end to allow hot, moist air to escape naturally. If your shed receives significant sunlight, consider adding a solar-powered ventilation fan that runs whenever light is available without requiring any electrical wiring. These small additions cost very little and can extend the serviceable life of your tools and the shed structure itself by many years.
Maintenance, Upgrades, and Long-Term Care
Like any outdoor wooden structure, your pallet shed will need periodic maintenance to keep it looking good and performing well over the years. Establish a simple annual inspection routine, ideally in early spring before the heavy gardening season begins. Walk around the exterior and look for paint or stain that has faded, peeled, or cracked, and touch up these areas promptly to prevent moisture from reaching the wood beneath. Check all fasteners for signs of rust or backing out, and drive or replace any that have worked loose over the winter. Inspect the roof for lifted panels, missing screws, or cracked sealant, and address any issues before the spring rains begin.
The foundation area deserves particular attention during your annual inspection. Check that the gravel pad is still draining freely and has not settled unevenly, which could cause the shed floor to rack or the walls to go out of plumb. Look for any vegetation that has grown up against or beneath the structure and remove it, as plants trap moisture and can accelerate decay. If you used concrete deck blocks or pressure-treated skids, inspect them for cracking or checking and confirm that the shed is still sitting level and securely on each support point. Catching a foundation issue early, when correction might require only adding a shim or releveling a block, is infinitely preferable to dealing with a structural problem that has developed over multiple seasons of neglect.
Over time, you may find that your original shed design no longer fully meets your needs as your gardening ambitions grow. The wonderful thing about pallet construction is that it is inherently modular and expandable. Adding a lean-to addition along one wall for a potting area, a covered front porch for sitting and tool cleaning, or even a cold frame attached to the south-facing side for starting seedlings early in the spring are all projects that integrate naturally with the existing structure. Your pallet shed is not just a storage solution — it is a foundation for a growing garden workspace that can evolve alongside your skills, your interests, and your love of the outdoor life.








What do you think?
It is nice to know your opinion. Leave a comment.