










Bubble Painting for Kids: Easy & Colorful Summer Art Activity
What Is Bubble Painting and Why Kids Absolutely Love It
Bubble painting is one of those magical art activities that feels more like a game than a craft project, which is precisely why children of all ages gravitate toward it with such enthusiasm. The basic concept is beautifully simple: you mix tempera paint with dish soap and a little water, blow through a straw to create a mountain of colorful bubbles, and then press paper onto the surface to capture the delicate circular impressions left behind. The result is a stunning, organic pattern that looks far more sophisticated than the effort it actually requires.
What makes this activity truly special is the element of unpredictability. No two bubble paintings ever turn out exactly the same, which means every child gets a genuinely unique piece of artwork at the end of the session. Kids who might feel intimidated by more structured art projects flourish with bubble painting because there is no wrong way to do it. The bubbles do most of the creative heavy lifting, and the child’s job is simply to blow, press, and marvel at what emerges on the paper. That sense of wonder and surprise keeps children engaged and eager to try it again and again.
Beyond the obvious fun factor, bubble painting introduces children to foundational artistic concepts without any of the pressure that formal art instruction can sometimes bring. As they experiment with overlapping bubbles from different colors, they naturally begin to see how colors mix and interact. Red and blue bubbles that overlap create purple rings; yellow and blue produce unexpected green halos. This kind of hands-on color theory exploration is genuinely educational, making bubble painting a favorite among parents, teachers, and early childhood educators who want activities that are equally engaging and enriching.
Gathering Your Supplies: Everything You Need to Get Started
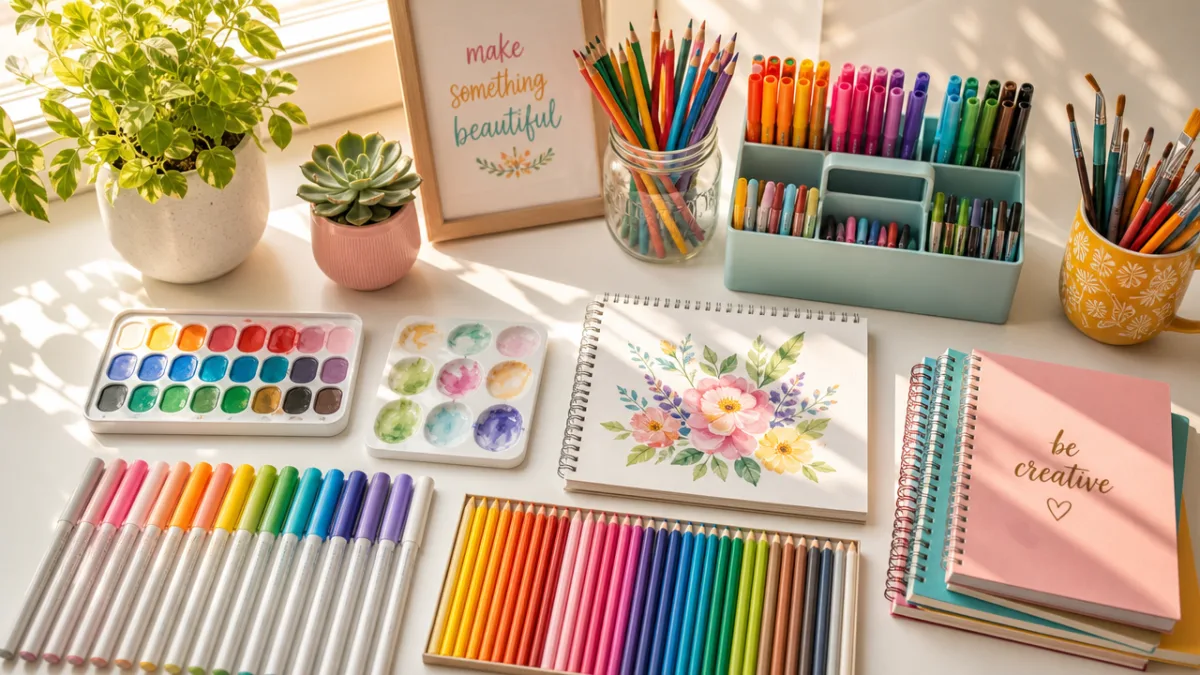
One of the greatest advantages of bubble painting is that it requires almost nothing you wouldn’t already have at home, making it an incredibly accessible activity for families at any budget. At its core, you need just four basic ingredients: liquid dish soap, tempera paint, water, and a straw. Alongside those essentials, you will want some paper to print on — cardstock works particularly well because it is sturdy enough to handle the moisture from the bubbles without immediately buckling or tearing. Watercolor paper is another excellent option that gives the finished artwork a lovely professional look.
For containers, small plastic cups or muffin tins work perfectly. Muffin tins are especially practical for group settings because you can prepare multiple colors simultaneously in a single tray, making it easy for kids to rotate between them without a lot of fuss. You will want to prepare one container per color, and a good rule of thumb for the mixture ratio is roughly one part paint to one part dish soap, with just a small splash of water to thin things out slightly. The mixture should be fluid enough to blow into bubbles but not so watery that the paint becomes too diluted to leave a visible mark on the paper.
A few optional but highly recommended additions can significantly enhance the experience. Aprons or old shirts are nearly essential — bubble painting can and will splatter, especially when enthusiastic little ones really get into their blowing. A plastic tablecloth or newspapers spread beneath the work area will save you enormous cleanup time afterward. If you want to add a bit of extra sparkle to the finished artwork, a tube of glitter glue kept nearby allows children to embellish their dried paintings with shimmering accents. Some families also enjoy having fine-tipped markers available so children can add details like faces, animals, or patterns to the bubble circles once the paint has dried.
- Liquid dish soap (Dawn or similar works best for creating sturdy bubbles)
- Tempera paint in assorted colors — the more variety, the more exciting the results
- Water for thinning the mixture slightly
- Plastic straws — consider reusable metal or paper straws for an eco-friendly option
- Cardstock or watercolor paper cut to your desired size
- Small plastic cups, bowls, or a muffin tin for holding the colored mixtures
- Protective covering for the work surface and old clothing or aprons for the children
Step-by-Step Instructions for the Perfect Bubble Painting Session
Setting up properly before the children even sit down will make the entire experience smoother and more enjoyable for everyone involved. Begin by mixing your colored solutions in advance, stirring them gently to combine the paint and soap without creating a froth before you are ready. Cover your work surface thoroughly and have paper cut to size and ready to go. If you are working with very young children, it helps to write their names on the back of their paper beforehand so there is no confusion about whose artwork belongs to whom once the colorful chaos begins.
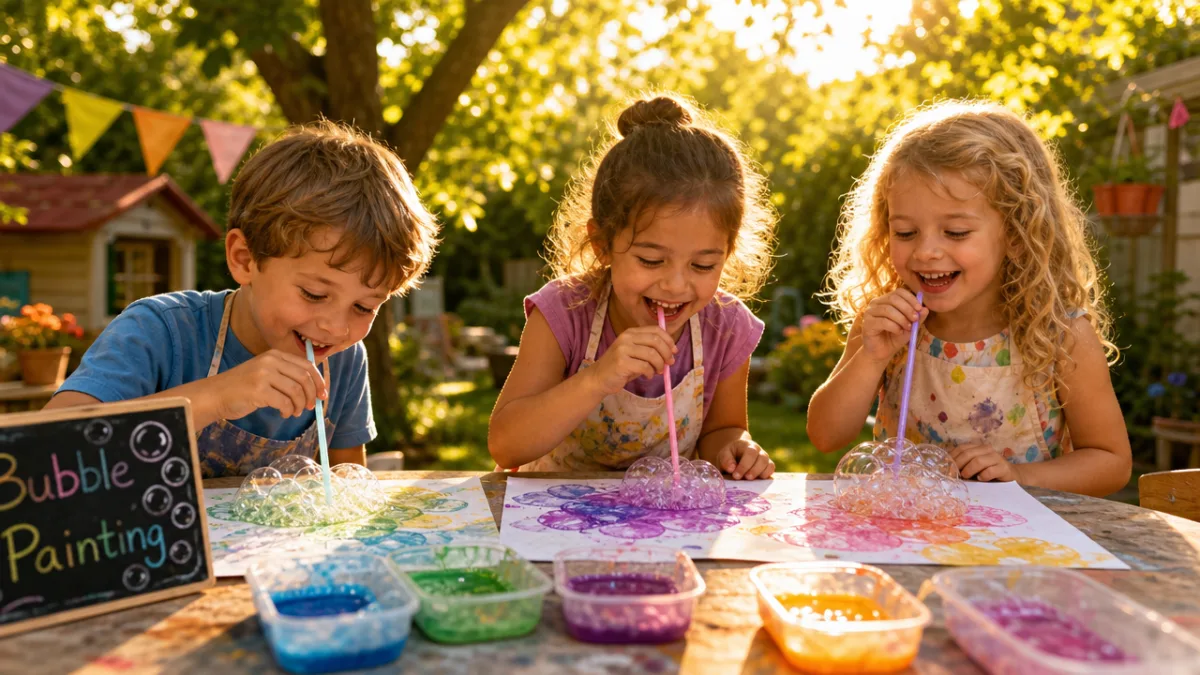
When the children are ready, demonstrate the blowing technique before handing over the straws. Place the straw into the colored mixture and blow steadily and slowly until a dome of colored bubbles rises above the rim of the cup. This step requires a little practice, and younger children especially may need a few attempts before they get the hang of it. It is very important to teach children to blow out through the straw rather than suck in — tasting soapy paint water is an unpleasant experience that is entirely avoidable with a quick demonstration and a gentle reminder before each child starts.
Once a good mound of bubbles has formed above the cup’s rim, gently lay the paper flat on top of the bubbles, pressing it down lightly. When you lift the paper away, you will see a beautiful cluster of circular impressions in vivid color. Encourage children to repeat this process with multiple colors across different areas of their paper, overlapping the prints and exploring how the circles interact when they touch or blend. Allow each layer to dry slightly between applications if you want clean, distinct rings, or press colors together while still wet for a softer, more blended effect.
- Mix your paint solution: combine equal parts tempera paint and dish soap, then add a small amount of water.
- Stir gently to combine without creating bubbles prematurely.
- Place your straw into the mixture and blow steadily until bubbles rise above the container’s edge.
- Carefully press your paper flat against the top of the bubble mound.
- Lift the paper gently and admire the circular impressions left behind.
- Repeat with additional colors, overlapping or leaving space between clusters as desired.
- Allow the finished artwork to dry completely on a flat surface before handling.
Creative Variations to Keep the Activity Fresh and Exciting
Once children have mastered the basic technique, there are a wonderful array of variations that can keep bubble painting exciting across multiple sessions throughout the summer. One particularly popular adaptation is using seasonal colors to create themed artwork — think deep reds, oranges, and yellows for a fall-inspired piece, or pastel pinks, purples, and greens for a spring garden feel. For a Fourth of July celebration, sticking exclusively to red, white, and blue bubbles produces patriotic prints that make beautiful decorations or greeting cards for family members.
Shape-based bubble painting offers another layer of engagement for older children who are ready for a bit more creative direction. Cut simple stencil shapes from cardboard or heavy paper — stars, hearts, butterflies, or fish work beautifully — and lay these over the paper before pressing the bubble mounds onto the surface. When you remove the stencil, the shape remains unpainted while the surrounding area is filled with bubble circles, creating a striking negative space effect that looks genuinely impressive. Children often cannot believe how professional their artwork looks, which does wonders for their artistic confidence.
For a three-dimensional twist, try bubble painting on surfaces beyond flat paper. Canvas bags, plain white t-shirts treated with fabric medium mixed into the paint, terracotta pots, or even smooth river rocks all accept bubble prints beautifully and make wonderful personalized gifts. Plain ceramic tiles found at hardware stores for just a few cents each become gorgeous coasters once the paint is sealed with a clear varnish. Bubble-printed gift wrap made from plain kraft paper is another charming idea that allows children to see their artwork being actively used and appreciated in everyday life.
Themed Bubble Painting Ideas for the Whole Summer
Creating a loose schedule of themed bubble painting sessions can provide a fun, low-pressure structure to summer days that keeps children looking forward to their art time each week. Ocean-themed sessions using blues, greens, and teals can be followed up with children drawing fish, crabs, and sea creatures inside the bubble circles. A garden theme using pinks, yellows, and purples pairs beautifully with the addition of stamped leaves made from real leaves coated in green paint. Space-themed sessions using dark navy paper with metallic silver and gold bubble prints look absolutely spectacular when finished.
Holiday and seasonal themes offer natural anchor points throughout the summer calendar. Independence Day, back-to-school, and end-of-summer celebrations all provide inspiration for color palettes and decorative purposes. Children can create bubble-printed cards for grandparents, bookmarks for the first day of school, or decorative bunting strung across a porch. When artwork has a purpose and an audience, children invest more meaningfully in the process and feel an enormous sense of pride when they see their creations displayed or used.
Collaborative bubble paintings created by groups of children working together on a single large piece of paper are another wonderful variation, particularly for playdates or classroom settings. Each child contributes their bubble prints across different areas of the shared paper, and the final piece becomes a collective masterpiece that belongs to everyone. These collaborative works tend to display a rich diversity of overlapping colors and patterns that individual paintings rarely achieve, and the process of working alongside peers teaches children valuable lessons about cooperation, sharing space, and appreciating contributions that are different from their own.
The Educational and Developmental Benefits of Bubble Painting
Bubble painting sits at a remarkable intersection of art, science, and physical development, offering children a surprisingly rich range of educational experiences wrapped inside what feels to them like pure play. From a scientific standpoint, the activity provides an intuitive, hands-on exploration of surface tension, the properties of soap, and the physics of how bubbles form and behave. Children who repeatedly engage with bubble painting begin to notice patterns in how bubbles stack, why certain mixtures produce bigger bubbles, and what happens when bubbles of different sizes overlap — all observations that lay informal groundwork for scientific thinking.
The physical act of blowing through a straw also delivers meaningful developmental benefits that are easy to overlook. Controlled blowing requires conscious regulation of breath, which strengthens the oral motor muscles used in speech and eating. Occupational therapists and speech-language pathologists frequently recommend blowing activities for children who are developing these muscle groups, making bubble painting a genuinely therapeutic option disguised as a delightful art project. Fine motor skills are also engaged when children carefully press paper onto bubbles and peel it away without tearing, and when they later add embellishments to their dried artwork with markers or glue.
Emotionally and socially, bubble painting provides children with a healthy outlet for self-expression in an environment where there are no mistakes and no wrong answers. The forgiving nature of the activity — where every print is interesting regardless of how it turns out — builds artistic confidence and a positive relationship with creative risk-taking. Children learn to embrace unexpected results rather than fear them, which is a mindset that serves them well far beyond the art table. When the activity is done in a group setting, it also fosters conversation, laughter, and shared excitement as children compare their prints and celebrate each other’s creations.
Connecting Bubble Painting to Core Learning Concepts
For parents or educators looking to extend the learning beyond the art session itself, bubble painting connects naturally to a number of core early childhood curriculum areas. Mathematics enters the picture when children count bubble circles, compare the sizes of different prints, or sort their finished artwork by the number of colors used. Language arts can be incorporated by asking children to describe their finished paintings using rich, sensory vocabulary — describing the colors as vivid, the circles as overlapping, the texture as smooth or bumpy when dry.
Science connections deepen when you introduce simple experiments alongside the painting. What happens when you change the ratio of soap to paint? Do bigger straws make bigger bubbles? What occurs when you blow very fast versus very slowly? Encouraging children to predict outcomes before they try something new introduces the concept of hypothesis testing in a completely low-stakes environment. Recording simple observations in a child-friendly art journal — even just drawing pictures of what they noticed — begins to build habits of scientific documentation.
Perhaps most importantly, bubble painting reinforces the idea that learning and creativity are processes rather than destinations. The focus remains on exploration, experimentation, and the joy of discovery rather than on producing a perfect product. In a world where children are increasingly evaluated against rigid benchmarks, activities like bubble painting serve as a vital reminder that some of the most meaningful growth happens in the messy, colorful, unpredictable spaces between the lines.
Tips for Success, Cleanup, and Displaying Your Finished Masterpieces
A few practical tips gathered from experienced parents and teachers can make the difference between a smooth, joyful session and a frustrating one. First and foremost, always supervise young children closely during the blowing phase to ensure they are blowing out rather than accidentally inhaling. For children under three, consider using a squeeze bottle to create the bubbles for them, allowing them to participate in the pressing and printing steps while you handle the blowing. This adaptation keeps the activity inclusive and safe for even the youngest participants.
Temperature and humidity can subtly affect how the bubbles behave and how quickly the paint dries. On very humid days, paint may take longer to dry and colors may bleed slightly more into one another — which can actually produce beautifully soft, watercolor-like effects. On hot, dry summer days, paint can dry remarkably quickly, sometimes while the paper is still in contact with the bubbles, which produces crisper, more defined rings. Neither outcome is better or worse; they simply offer different aesthetic results worth exploring and embracing.
Cleanup is considerably easier than many parents anticipate, particularly if you have laid down protective coverings in advance. Tempera paint is water-soluble, so warm soapy water handles most spills and stains efficiently. Clothing stains respond best when treated immediately with cold water before the paint has a chance to set. Once the workspace is clean and the artwork is fully dry — which typically takes one to two hours depending on the thickness of the paint layer — you will want to give some thought to how to display or preserve the finished pieces, because they genuinely deserve to be seen.
Creative Ways to Display and Preserve Bubble Artwork
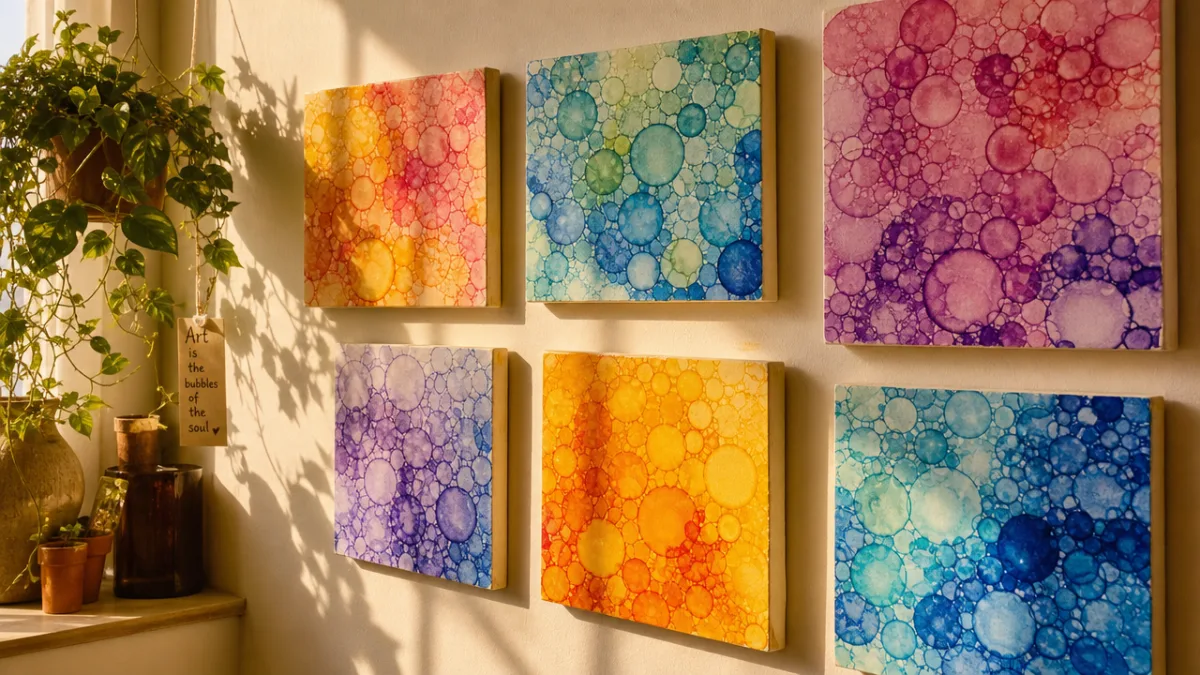
Finished bubble paintings are vivid, eye-catching pieces that deserve to be displayed rather than tucked into a folder and forgotten. A simple clothesline strung across a playroom or along a fence in the backyard, with prints clipped on with wooden pegs, creates an instant art gallery that children feel enormously proud of. Rotating the display weekly and replacing old pieces with new ones keeps the gallery feeling fresh and gives children something to look forward to with each new session.
For permanent keepsakes, consider having your child’s favorite bubble paintings professionally printed as canvas prints, which many online services now offer at very reasonable prices. Laminating smaller prints turns them into durable placemats, bookmarks, or gift tags that hold up to everyday use. A collection of bubble-painted pages bound together with a simple ring clip becomes a beautiful art book that children love to flip through and share with family members who visit. Photographing the artwork and creating a simple digital slideshow or photo book is another lovely way to preserve the memories without requiring physical storage space.
Whatever you choose to do with the finished artwork, the most important thing is to communicate to your child that their creative effort is valued and worth preserving. Displaying artwork sends a clear message that what children make matters, that their ideas and expressions are worthy of attention and care. Bubble painting, for all its delightful simplicity, produces work that genuinely earns its place on the wall — colorful, joyful, and completely unique, just like the young artists who created it. This summer, let the bubbles fly and watch the magic unfold on paper, one colorful circle at a time.








What do you think?
It is nice to know your opinion. Leave a comment.