










Upcycled Bottle Torch Lights: Transform Glass Bottles into Stunning Outdoor Luminaries
Introduction: The Art of Upcycling with Light
There is something deeply satisfying about taking an object that would otherwise end up in a recycling bin and transforming it into something beautiful, functional, and uniquely personal. Upcycled bottle torch lights represent one of the most rewarding DIY projects you can undertake, combining the rustic charm of repurposed glass with the warm, flickering glow of flame or LED light. These handmade luminaries have become increasingly popular among homeowners, garden enthusiasts, and eco-conscious crafters who want to add character and ambiance to their outdoor spaces without spending a fortune on store-bought lighting.
The concept is elegantly simple: glass bottles — wine bottles, spirits bottles, mason jars, or any vessel with an interesting shape — are cleaned, sometimes decorated, and fitted with a wick or a solar-powered LED insert to create a torch light that can illuminate patios, garden paths, deck railings, or tabletops. The variety of bottle shapes, glass colors, and design techniques means that no two upcycled torch lights are ever exactly alike, giving your outdoor space a one-of-a-kind aesthetic that reflects your personality and creativity.
Beyond the visual appeal, there is a genuinely meaningful environmental dimension to this craft. Glass production is energy intensive, and while recycling is better than landfill disposal, upcycling — giving an object a new purpose entirely — is even better for the planet. By turning empty bottles into decorative lights, you are extending the lifecycle of the material, reducing waste, and inspiring others around you to think creatively about objects they might otherwise discard. This article will walk you through everything you need to know to make your own stunning bottle torch lights from scratch.
Choosing the Right Bottles for Your Torch Lights
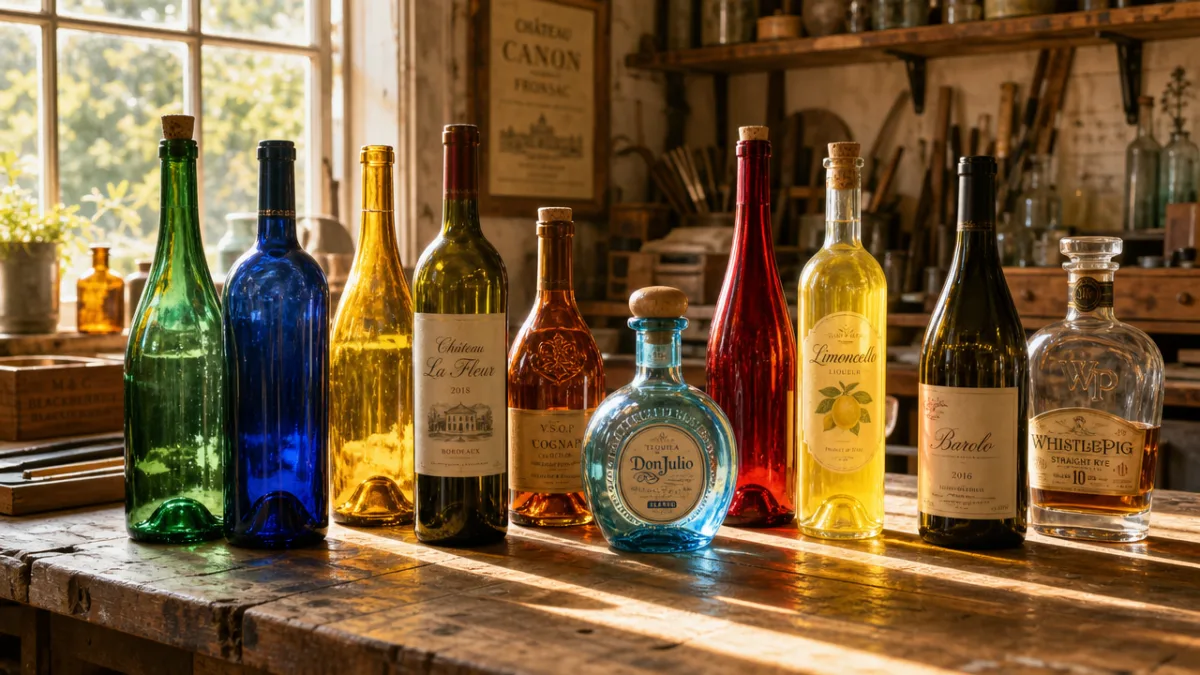
The first and arguably most important step in creating upcycled bottle torch lights is selecting the right bottles. Not all glass bottles are created equal when it comes to this craft. The shape, thickness, color, and mouth diameter of a bottle all play a role in determining how it will perform as a torch light and how it will look once it is lit. Wine bottles are among the most popular choices because of their elegant elongated silhouette, their relatively thick walls which can handle heat well, and the fact that they come in a range of attractive colors including deep green, amber, and clear glass.
Spirits bottles offer another excellent option, particularly those with interesting embossed designs or unique shapes that catch the light in unexpected ways. Whiskey bottles, gin bottles, and tequila bottles often have a more angular, sculptural quality that can look striking when illuminated from within. Olive oil bottles, with their tall narrow forms, create a particularly dramatic torchlight silhouette. Mason jars and other wide-mouth glass containers are ideal if you plan to use a floating wick design or want to add decorative elements like pebbles, shells, or sand inside the vessel.
When selecting bottles, pay attention to the mouth opening. A standard torch wick kit requires an opening of approximately three-quarters of an inch to one inch in diameter. Most wine and spirits bottles fall within this range, but it is worth measuring before you commit to a design. If you plan to use LED inserts or solar-powered lights rather than an open flame, the mouth size becomes less critical, giving you more flexibility in your bottle choices. Always inspect bottles carefully for cracks or chips, as heat from a flame can cause damaged glass to shatter unexpectedly.
- Wine bottles (green, amber, or clear) for a classic, elegant look
- Spirits bottles with embossed designs for a more decorative effect
- Olive oil bottles for tall, dramatic silhouettes
- Mason jars for a rustic, farmhouse-style aesthetic
- Vintage glass bottles for a nostalgic or antique appearance
- Colored glass bottles to cast tinted light when illuminated
Cleaning your chosen bottles thoroughly is non-negotiable before beginning any decoration or assembly. Soak bottles in warm soapy water to loosen labels, then use a bottle brush to scrub the interior and exterior clean. For stubborn label residue, a small amount of rubbing alcohol or a product like Goo Gone applied to the outside of the bottle will dissolve the adhesive quickly. Make sure the bottles are completely dry before moving on to the next stage, especially if you plan to work with paints, etching compounds, or adhesives that require a clean, grease-free surface.
Essential Materials and Tools You Will Need
One of the great joys of the upcycled bottle torch light project is that it requires relatively few materials and tools, most of which are inexpensive and easy to find. At its core, you will need clean glass bottles, torch wick inserts or LED alternatives, and a fuel source if you are going the open-flame route. Torch wick kits are widely available at hardware stores and online retailers, and they typically include a metal collar that fits snugly into the bottle mouth, a fiberglass wick, and a cap to cover the wick when the torch is not in use. These kits are designed to be used with citronella oil or lamp oil, both of which burn cleanly and can help deter mosquitoes when used outdoors.
If you prefer the safer, maintenance-free alternative to open flame, solar-powered LED bottle lights and cork-shaped LED inserts have become widely available and remarkably affordable. Solar bottle lights feature a small photovoltaic panel attached by a wire to an LED that sits inside the bottle. They charge during the day and automatically illuminate at dusk, making them an extremely convenient and energy-efficient option. Cork-style LED lights are battery-powered and mimic the look of a candle flame with a warm amber glow, making them ideal for tabletop displays or covered porch settings where solar charging may not be practical.
Beyond the lighting components, you will want to gather any decorative materials that align with your vision for the finished torch lights. This might include glass paint or frosted glass spray for adding color or translucency effects, sandpaper or a glass etching cream kit for creating matte decorative patterns, twine, rope, or wire for wrapping the bottle neck and creating hanging hooks, and decorative elements like beach glass, pebbles, or colored sand to place inside the bottle for added visual interest. Having a drill with a glass-cutting drill bit can also open up advanced possibilities, such as adding drainage holes or mounting hardware to the bottom of bottles.
- Clean, dry glass bottles of your chosen shapes and sizes
- Torch wick insert kits or solar/LED bottle light alternatives
- Citronella oil or lamp oil (for open-flame versions)
- Glass paint, frosted spray, or glass etching cream for decoration
- Twine, jute rope, copper wire, or leather cord for wrapping
- Strong waterproof adhesive or epoxy for securing decorative elements
- Sandpaper for surface preparation and distressing effects
- Optional: glass-cutting drill bit and drill for advanced assembly
Safety equipment should not be overlooked when working on this project. If you are using glass etching cream, which contains hydrofluoric acid compounds, wear nitrile gloves and work in a well-ventilated area, keeping the cream away from skin and eyes. When drilling glass, always wear safety goggles and keep the drill bit lubricated with water to prevent overheating and cracking. For open-flame torch lights, keep a small bucket of water or a fire extinguisher nearby during testing, and always supervise lit torches when children or pets are present.
Step-by-Step Assembly: Building Your Bottle Torch Light
Once you have gathered all your materials and prepared your bottles, it is time to begin the assembly process. Start with any decorative work you want to apply to the exterior of the bottle, since it is much easier to decorate before the wick or light insert is in place. If you are applying glass paint, use a brush or sponge to apply it in thin, even layers, allowing each coat to dry completely before adding the next. For a frosted or sea-glass effect, apply frosted glass spray in a light, even coat from about twelve inches away, then allow it to cure fully according to the manufacturer’s instructions before handling the bottle further.
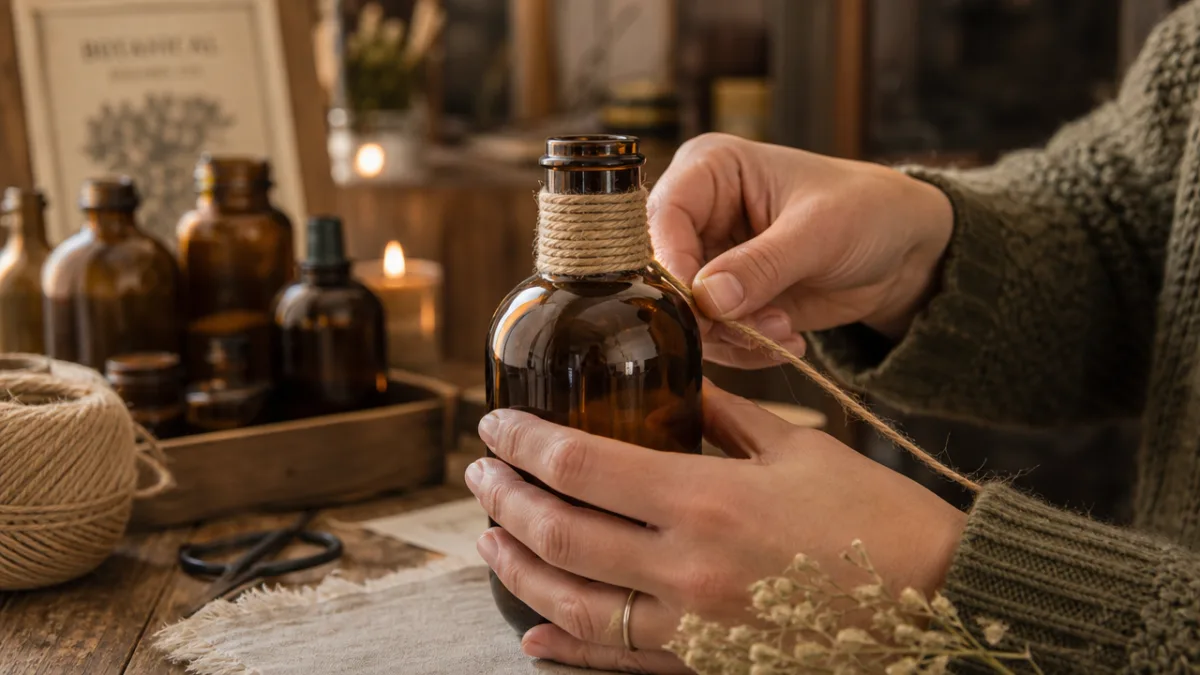
Twine or rope wrapping is one of the most popular decorative techniques for bottle torch lights and requires nothing more than patience and a bit of craft glue. Apply a thin line of waterproof adhesive around the neck of the bottle and begin wrapping your twine tightly, pressing each coil firmly against the last to avoid gaps. Continue wrapping as far down or up the bottle as you like, securing the end with another dab of glue and trimming any excess cleanly. You can create textural interest by alternating between different thicknesses of twine, or incorporate small natural elements like sprigs of dried lavender, small shells, or feathers by tucking them under the wrapping as you go.
To assemble the torch component, fill your clean, dry bottle approximately two-thirds full with citronella oil or lamp oil using a small funnel to avoid spills. Thread the fiberglass wick through the metal collar of your torch insert kit, ensuring that several inches of wick extend down into the bottle to absorb the fuel. Press the metal collar firmly into the mouth of the bottle — it should fit snugly without force, and many kits include rubber gaskets to ensure a secure, leak-proof seal. Allow the wick to soak in the fuel for at least fifteen to twenty minutes before attempting to light it for the first time, as a dry wick can be damaged by immediate ignition.
For LED or solar versions, the assembly process is even simpler. If using a cork-style LED insert, simply press the cork into the clean, dry bottle mouth to fit snugly, switch on the LED, and your torch light is ready. For solar bottle lights, feed the LED wire into the bottle so the bulb rests near the bottom, then position the solar panel collar over the bottle mouth. If placing decorative elements like colored pebbles or sand inside the bottle, add these before inserting the LED component. Take your time arranging interior elements with a long skewer or chopstick for a professional, intentional look.
Creative Design Ideas and Decorating Techniques
The design possibilities for upcycled bottle torch lights are genuinely limitless, and this is where the project becomes a true creative outlet. One of the most striking approaches is the coastal or beach-themed bottle torch, which leans into the naturally nautical quality of glass and light. For this style, fill the bottom of a clear bottle with a layer of white sand, then add a handful of small shells, sea glass, and pebbles before inserting a warm-white LED. Wrap the neck with natural jute rope and finish with a knotted loop for hanging. The result is an enchanting lantern that brings the feeling of a beach bonfire to any outdoor space.
A more rustic, farmhouse-inspired approach might involve distressing bottles with a combination of chalk paint and sandpaper to create a weathered, aged look. Apply a base coat of matte chalk paint in a neutral tone like cream, grey, or sage green, allow it to dry completely, then use fine sandpaper to lightly sand away the paint at the bottle’s natural high points — the shoulders, the base edges, and around any embossed text — to reveal the glass beneath. This creates a beautifully aged effect that looks as though the bottle has been discovered in an old barn or antique market. Pair this treatment with Edison-style warm LED inserts for a look that feels authentically vintage.
For those who love bold color, glass paint allows you to create torch lights that cast richly tinted light across your outdoor space after dark. Painting the interior of a bottle rather than the exterior creates a deeper, more saturated color effect, since the glass itself adds an additional layer of translucency. Use specialty glass paint designed for interior application and a long-handled brush or a small piece of foam sponge attached to a skewer to reach inside the bottle. Warm tones like amber, ruby, and gold create a particularly magical effect when paired with a flickering flame or warm-white LED.
- Coastal theme: white sand, shells, sea glass, jute rope wrapping
- Rustic farmhouse: chalk paint, distressed finish, Edison LED inserts
- Bold color: interior glass painting in warm amber, ruby, or gold tones
- Industrial style: copper wire wrapping, dark-tinted bottles, pipe fittings
- Garden botanical: pressed flowers sealed under glass paint or resin
- Moroccan-inspired: painted geometric patterns, colored glass mosaic accents
- Winter holiday: frosted glass, pine sprigs, fairy lights inside the bottle
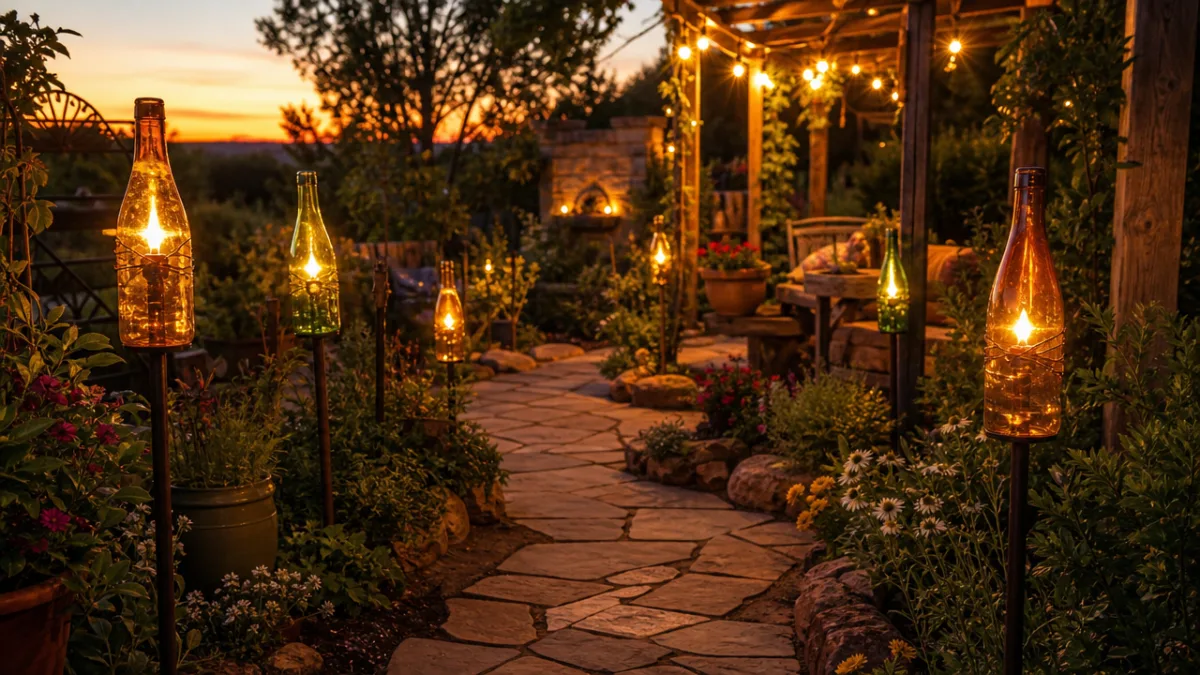
Grouping multiple bottle torch lights together is often more impactful than using them individually. A collection of three to five bottles in varying heights, arranged along a garden path, clustered on a patio table, or hung from a pergola beam at staggered lengths, creates a cohesive display with far more visual drama than a single bottle. When planning a grouped display, consider varying the colors and textures of your bottles while keeping the decorative style consistent — for example, all coastal themed or all rustic farmhouse — to create a curated look that feels intentional rather than haphazard.
Safe Installation and Outdoor Placement Tips
Where and how you place your upcycled bottle torch lights will significantly affect both their safety and their visual impact. For ground-level placement along pathways or borders, purpose-made bottle torch stakes are available at garden centers and online, and these allow you to push a metal spike firmly into the soil and place the bottle securely on top. This is one of the safest and most stable placement methods for open-flame torches, as it keeps the flame well clear of any vegetation or furnishings and the stake prevents the bottle from tipping over in wind. Ensure stakes are driven at least eight inches into the ground for maximum stability.
For tabletop displays, place bottles in sturdy holders that prevent rolling or tipping. You can create your own holders using a ring of tightly wound wire, a bed of decorative pebbles in a shallow tray, or a purpose-built wooden holder with drilled holes sized to grip the bottle snugly. Never place open-flame bottle torches on a table with a tablecloth, on surfaces close to overhead structures, or indoors without excellent ventilation. Keep lit torches at least three feet from any combustible material including wooden furniture, fabric cushions, dried plant material, and paper decorations.
For hanging installations, ensure that your attachment point — whether a pergola beam, a tree branch, or a fence post — is solid and capable of bearing the weight of a filled glass bottle, which can be substantial. Use heavy-gauge wire formed into a secure cage around the bottle, or purpose-made bottle hanger hardware, rather than relying on twine alone to support a hanging torch, particularly if it contains fuel. Check hanging torch lights regularly to ensure the wire or hardware has not corroded or loosened, and never hang open-flame torches in areas with significant air movement that could cause the flame to gutter unpredictably.
Maintenance, Longevity, and Sustainability Considerations
Keeping your upcycled bottle torch lights in good condition requires only modest ongoing attention, but that attention will significantly extend their beauty and lifespan. For open-flame torches, check the wick regularly and trim it to approximately a quarter of an inch above the metal collar if it becomes too long, as an excessively long wick produces more smoke and a less controlled flame. Replace wicks when they become too short to draw fuel effectively, or if they show signs of charring or brittleness. Most wick kits include spare wicks for this purpose, and replacement wicks are also available separately and inexpensively.
The fuel level in open-flame bottle torches should be checked before each use, and bottles should be refilled before the fuel drops below one-quarter full. Running a torch dry can burn the wick and leave residue in the bottle that is difficult to remove. When storing torches for an extended period, such as over the winter months, empty the fuel completely from the bottles and store the bottles clean and dry. Citronella oil that sits in a bottle for many months can thicken or separate, and it is generally better to start fresh with new fuel each season.
For LED and solar versions, maintenance is even simpler. Wipe down the exterior of the bottles occasionally with a damp cloth to keep the glass clean and maximize the light output. Check battery-powered LED inserts periodically and replace batteries as needed. Solar bottle lights should have their photovoltaic panels wiped clean of dust and debris to ensure efficient charging. In regions with harsh winters, bring solar lights indoors during freezing temperatures, as extreme cold can reduce battery capacity and damage the solar cells over time.
From a sustainability perspective, upcycled bottle torch lights occupy an admirable position in the spectrum of DIY projects. Every bottle you transform into a torch light is one fewer bottle being processed by a recycling facility, saving energy and reducing transport emissions. Choosing citronella or plant-based lamp oils rather than petroleum-derived fuels keeps the environmental footprint of open-flame versions lower. For the most sustainable approach of all, solar LED bottle lights consume no fuel whatsoever and draw their energy from sunlight, making them a genuinely green lighting solution that costs almost nothing to run once constructed. Sharing the project with friends and neighbors — giving finished bottle torch lights as gifts, or hosting a bottle torch-making workshop — multiplies the environmental and creative impact far beyond your own outdoor space.
Upcycled bottle torch lights are more than just a practical outdoor lighting solution — they are a statement about the value of creativity, resourcefulness, and environmental responsibility. In a world of mass-produced, disposable goods, there is something quietly radical and deeply rewarding about making something beautiful with your own hands from materials that most people would throw away. Whether you choose a simple single flame torch to light your garden path, or create an elaborate collection of painted and decorated luminaries for your patio, the process of making and the result of displaying these lights carries a satisfaction that no shop-bought product can quite replicate. Start with one bottle, one wick, and one idea — and see where the light takes you.








What do you think?
It is nice to know your opinion. Leave a comment.