










Build an Amazing DIY Pergola and Firepit with Swings: A Complete Step-by-Step Tutorial
Honestly, few things can transform a backyard the way a pergola, firepit, and swings can when they all come together in one spot. There’s something about that combination — the structure overhead, the warmth of a fire at the center, the gentle movement of swings — that makes a space feel both cozy and wide open at the same time. And the good news is that whether you’ve built things before or this is your first big outdoor project, it’s completely doable if you plan carefully and don’t rush.
What’s great about this design is how flexible it is. You can make it bigger or smaller depending on your yard, move the swings around to fit more or fewer seats, and go as simple or as elaborate as you want with the firepit — anywhere from a basic stone ring to a full raised brick structure. What stays the same no matter how you customize it is that feeling you end up with: a place in your own backyard that people just naturally drift toward and don’t want to leave.
Before you grab a single tool, do yourself a favor and actually spend some time in your yard first. Walk around at different times of day, notice where the shade lands, see where water sits after it rains, and think about which views you want to frame or block. The builds that end up feeling right — like they were always supposed to be there — almost always start with that kind of unhurried observation.
Planning Your Layout and Gathering Materials
Good planning really is the foundation here, and that starts with figuring out your footprint. For a combined design like this, somewhere between twelve and sixteen feet square tends to be the sweet spot — roomy enough for the firepit to sit in the middle without feeling boxed in, but still tight enough that the swings on the perimeter feel connected to the fire rather than off in their own corner. Pound in some stakes and run string lines to mark your corners before you dig anything, and use the three-four-five triangle trick to make sure everything is square. It takes ten minutes and saves you a lot of headaches later.
For wood, you’ll want pressure-treated lumber rated for ground contact on anything going into or near the earth. For the upper parts — beams, rafters, decorative pieces — cedar or redwood are wonderful options. They’re naturally rot-resistant, they look warm and beautiful, and cedar in particular will age to a lovely silver-gray on its own if you leave it alone, or take stain and sealant really well if you’d rather keep it looking richer. For the firepit itself, pick up firebrick rated for high heat or a steel insert ring — both are easy to find at any home improvement store.
Write out a full materials list before you make your first store run. Be generous with fasteners especially, because running out of structural bolts or joist hangers halfway through is one of those completely avoidable frustrations that stops a build in its tracks. Here’s what you’ll need to get through the structural phase without any surprise trips back to the store.
- Four to six 6×6 pressure-treated posts, long enough for your desired ceiling height plus burial depth (typically 24 to 36 inches below grade)
- Double 2×10 or 2×12 beams to span between posts on each side of the structure
- 2×6 or 2×8 rafters spaced sixteen to twenty-four inches on center across the top
- Decorative 2×4 lattice or cross-hatch purlins to finish the roof plane
- Heavy-duty post base hardware or enough concrete for direct burial
- Structural bolts, carriage bolts, joist hangers, and galvanized hardware throughout
- Firebrick, a steel firepit ring, and crushed gravel or pea stone for the pit area
- Two heavy-duty eye bolts or swing beam hardware for each swing you’re planning
Setting Posts and Building the Foundation
Setting the posts is probably the most physically demanding stretch of this whole project, and it’s also where precision matters more than anywhere else. Any lean in a post, any unevenness in height — those small errors stack up as you build higher, and fixing them gets harder once the beams are on. Rent a post-hole digger if your soil cooperates, or hire someone to auger the holes if you’re dealing with rock or heavy clay. Either way, dig below your local frost line — usually thirty to forty-eight inches in colder climates — so the posts don’t heave when the ground freezes and thaws.
Once the holes are ready, set each post in a tube form, pour concrete around it, and check for plumb on two sides with a long level. Brace each post while the concrete cures — give it forty-eight to seventy-two hours for anything structural — before you pull the braces and move on. If you’d rather go with surface-mounted post bases on a concrete slab, pour your slab first, let it cure for a full seven days, then set the hardware using anchor bolts you placed during the pour or a hammer-drill and epoxy system after the fact.
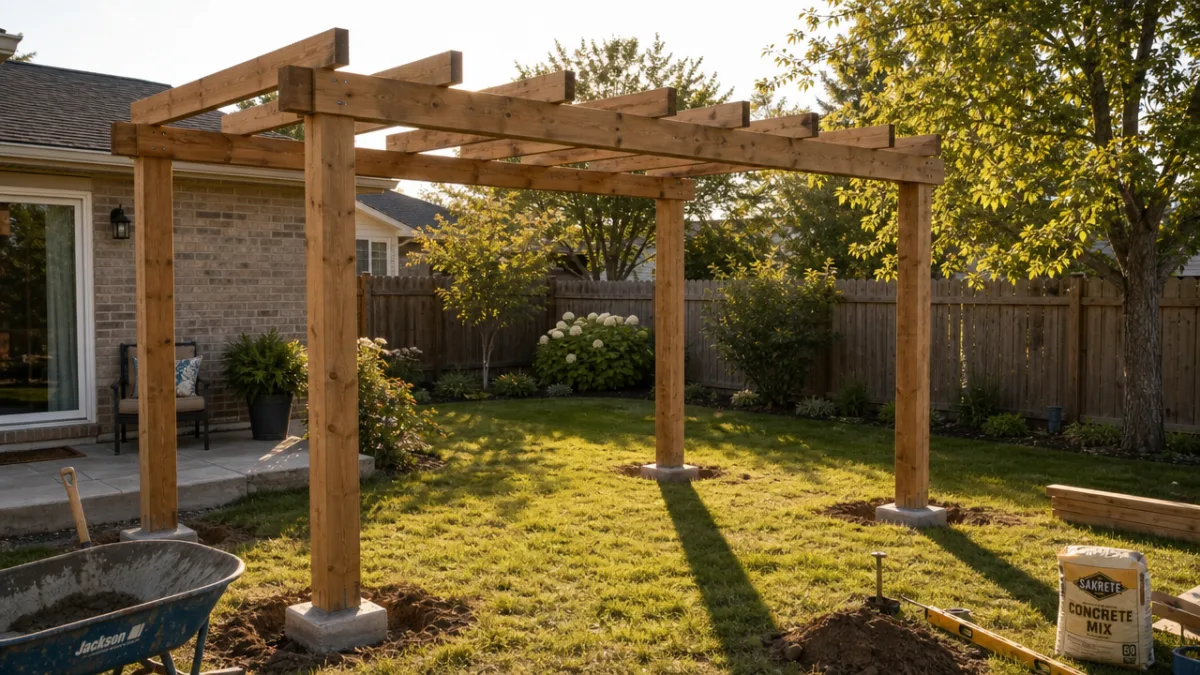
Once your posts are set and the concrete has cured, snap a chalk line at your beam height all the way around the structure and cut each post to that line with a circular saw. This is genuinely one of the most satisfying moments of the build — you step back and suddenly there’s something real standing in your yard. Four or six posts, perfectly level, just waiting for the beams. Take a photo here. You’ll be glad you did when it’s finished.
Installing Beams, Rafters, and the Swing Structure
Getting the doubled beams up between the posts is at least a two-person job, and honestly three people makes it a lot safer. These assemblies are heavy, and trying to hold a beam in place while also driving fasteners is not the move. Have someone steady each end while you bolt it in. You can seat the beam in a notch cut into the top of the post, or use structural post cap hardware to hold it, then run carriage bolts all the way through both the beam and the post to lock everything together.
Rafters run perpendicular to the beams and create those nice shadow lines that give pergolas so much of their visual character. Space them evenly and use rafter ties or hurricane clips at every connection to the beam — this is what keeps everything code-compliant and structurally sound. One detail worth the extra few minutes: give the exposed rafter ends a decorative curved or angled cut with a jigsaw or bandsaw. It softens the whole silhouette of the structure and is one of those small touches that makes it look like something you built on purpose rather than just threw together.
The swing beams need special attention because they’re handling dynamic, swinging loads, not just static weight sitting on top. Whatever rafter or cross-beam you designate for swing support, double it or reinforce it specifically for that purpose. Install heavy-duty eye bolts rated for at least five hundred pounds each, running completely through the beam with a washer and locking nut on top. Use proper outdoor swing hangers rather than S-hooks — they let the rope or chain rotate freely, which prevents the kind of constant sawing action that will eventually eat through your attachment point. Before anyone gets on those swings, test every connection yourself, loading it gradually in both downward and lateral directions before you give it the all-clear.
Constructing the Central Firepit
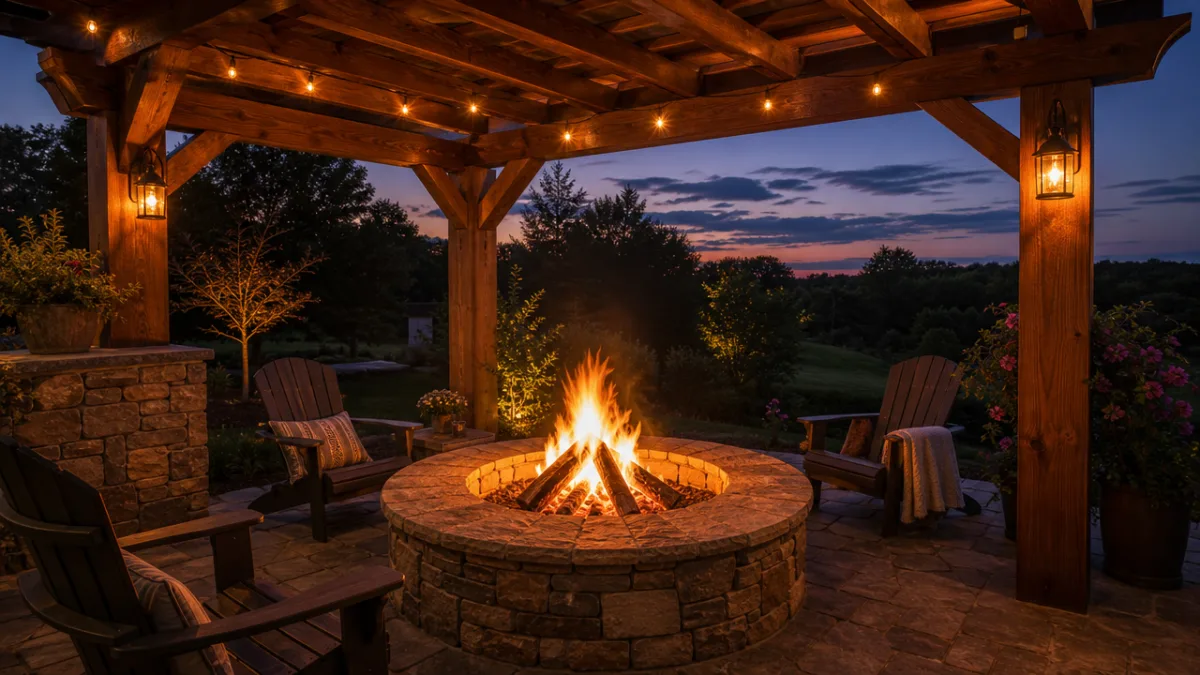
The firepit is really the heart of this whole design, and taking the time to build it properly pays off every single time you use it. Start by marking a circle about thirty-six to forty-eight inches across right at the center of your pergola. Dig it out about twelve inches deep, then pack four to six inches of crushed gravel into the bottom. That gravel layer is doing real work — it drains water and keeps heat from sitting in the ground beneath the pit in a way that could damage surrounding surfaces over time.
If you’re going with a mortared brick firepit, use firebrick and refractory mortar — not standard masonry mortar, which will crack fairly quickly once it goes through enough heat cycles. Build the walls up to grade and then continue above ground to your preferred finished height, usually somewhere between twelve and eighteen inches. Cap the top course with bluestone, granite, or cast concrete pavers. Besides looking clean and finished, that cap gives you a nice surface to set things on while you’re sitting around the fire.
The area right around the firepit and under the pergola should be a non-combustible surface — decomposed granite, flagstone, concrete pavers, or poured concrete all work well and look great. Keep at least three feet of that non-combustible material clear all the way around the pit, and before your first fire, check what your local municipality requires in terms of setbacks from structures and property lines, because those rules vary a lot. And keep a fire extinguisher or a bucket of sand nearby whenever there’s a fire going. That one’s just non-negotiable.
Adding Swings, Finishing Touches, and Lighting
The swings are what really push this project from “nice backyard structure” to something people remember. For the seats themselves, a two-inch-thick hardwood board — oak, ash, or ipe all hold up beautifully — sanded smooth and finished with an exterior oil or sealant, hung on braided polyester rope or galvanized chain, is simple and looks great. Hang the seat so that an average adult’s feet rest comfortably on the ground or a low footrest when seated, which usually puts the seat about seventeen to twenty inches above the finished surface.
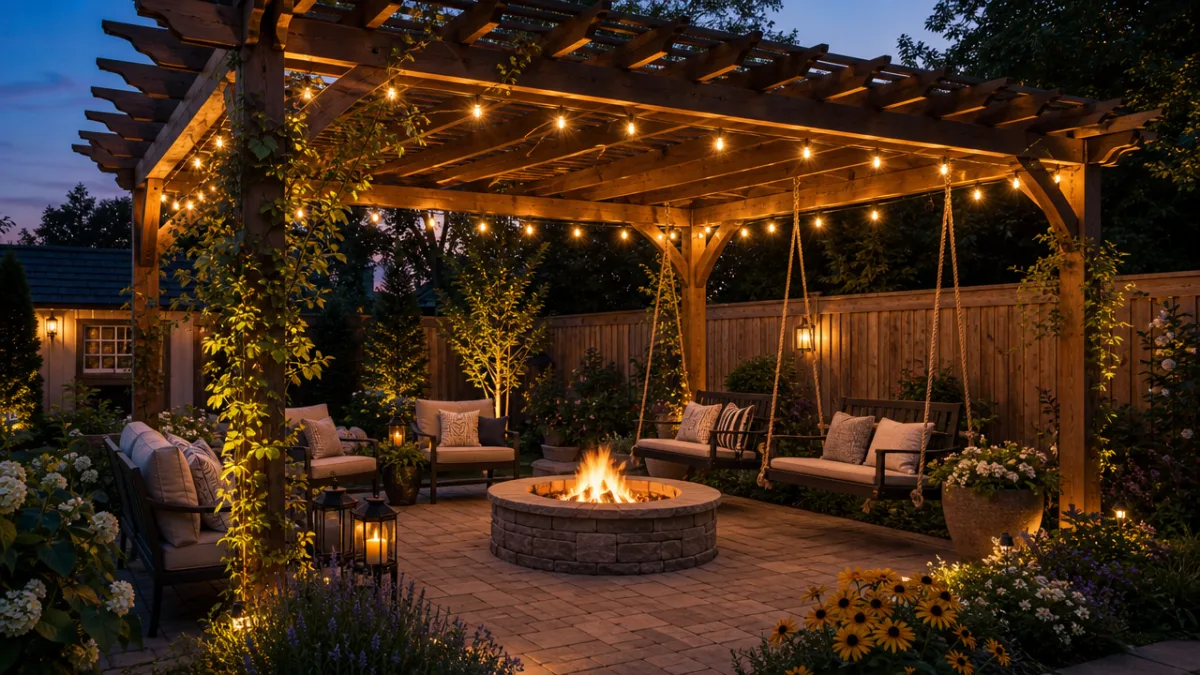
A nice layout to consider: a loveseat-style double swing on one side of the pergola and a pair of singles on the opposite side. That arrangement creates two natural conversation areas around the central fire and makes the space feel lively from multiple angles. Add some outdoor throw cushions in a weather-resistant fabric and the whole thing immediately shifts — it stops feeling like a structure and starts feeling like a room. Look for canvas, Sunbrella, or solution-dyed acrylic covers, which hold up to rain and sun far better than standard outdoor fabric through multiple seasons.
Don’t underestimate what good lighting does for a space like this after dark. String lights along the rafters are probably the single most effective thing you can do — they cast a warm, even glow that feels festive without being harsh, and they genuinely never get old. Stick with commercial-grade LED string lights rated for outdoor use, because the cheaper consumer versions tend to fail fast once moisture and temperature swings get involved. Add a few low-voltage path lights between your house and the pergola, and if you can swing it, install a weatherproof outlet and switch right on the structure. Being able to plug things in out there changes how you use the space.
Finishing, Weatherproofing, and Long-Term Maintenance
Once you’ve finished building, the way you take care of the structure is what determines whether it still looks great in year fifteen or starts looking rough by year three. If you went with cedar or redwood, get a penetrating exterior oil or water-repellent sealant on it within the first few months — before the wood has had much of a chance to gray or start showing surface checks. That first coat soaks into the wood fibers and does a lot to slow down the moisture cycling that eventually leads to cracking, warping, and rot.
Plan to reapply your finish every two to three years, or just use the splash test: pour a little water on the wood, and if it soaks right in instead of beading up, it’s time for another coat. Walk around and check all your hardware once a year — tighten anything that’s worked loose, swap out anything with real rust or corrosion. Give extra attention to the swing attachment hardware, which takes more dynamic stress than any other connection in the structure and deserves a close look at the start of every season.
The firepit has its own rhythm of care. Scoop out the ash after each use and do a proper cleanout before you cover it for winter. If you used mortar, walk around it every spring and look for cracked joints — patch anything that needs it with fresh refractory mortar before the first fire of the season. Keep the opening covered with a metal cap or fitted steel cover when it’s sitting unused for a stretch, especially through wet weather. Water pooling in the pit accelerates the breakdown of both the mortar and that gravel drainage layer underneath. Stay on top of these things and this whole space — the pergola, the firepit, the swings — will be going strong for decades, paying back every hour you put into building it with a lot of really good evenings outside.








What do you think?
It is nice to know your opinion. Leave a comment.