










What Is the Gourmet Beret? An Introduction to This Irresistible Crochet Pattern
The Gourmet Beret is exactly what its delightfully theatrical name promises: a fabulously floppy, generously slouchy crochet hat that sits on your head with all the effortless confidence of a Parisian artist who has never once doubted their aesthetic choices. This pattern has captured the hearts of crochet enthusiasts around the world precisely because it strikes that rare and perfect balance between whimsical and wearable, between playful construction and genuine, everyday utility. Whether you are brand new to the craft or a seasoned hook-wielder with a basket overflowing with yarn stash, the Gourmet Beret invites you in with open arms.
The name itself tells you everything you need to know about the philosophy behind the design. “Gourmet” suggests something crafted with care, with attention to ingredient quality and technique, something that elevates a simple concept into an experience. And a beret, of course, is one of the most iconic silhouettes in hat history — a circle of fabric that has sat atop the heads of revolutionaries, artists, chefs, and schoolchildren alike for centuries. The crochet version takes that beloved shape and gives it texture, dimension, and a handmade warmth that no mass-produced accessory could ever replicate. It is a hat that feels special because it genuinely is special.
What sets the Gourmet Beret apart from countless other crochet hat patterns available online is its emphasis on drape and movement. Many crochet berets can end up stiff or structured in ways that feel more like a bowl than a beret, but this pattern uses stitch choices and construction techniques specifically designed to encourage that signature flop. The finished hat settles onto the head softly, tilts naturally to one side if you want it to, and moves with you throughout the day rather than sitting rigidly in place. It is a pattern that understands how fabric should feel against skin and how a hat should frame a face.
Materials and Tools: What You Will Need to Get Started
Before you cast your first chain and begin what will surely be a deeply satisfying creative journey, it is worth taking a moment to gather your materials thoughtfully. The Gourmet Beret is not a pattern that demands the most expensive yarn on the market, but it does reward quality. A yarn with good drape is your most important consideration — something with a bit of natural fiber content, such as a wool blend, a cotton-acrylic mix, or even a beautiful bamboo yarn, will give you results that look and feel noticeably superior to a yarn that is entirely stiff or scratchy. Aim for a worsted or aran weight for a classic, cozy result, though adventurous makers have also worked this pattern in bulky weight for an oversized, dramatically floppy version.
Your hook size will depend on your yarn choice and, crucially, your personal tension. Most versions of this pattern are worked on a 5mm or 5.5mm hook, though you should always swatch before committing. The beauty of crochet is that gauge adjustments are relatively forgiving in a hat pattern — going up half a hook size will give you a slightly larger, floppier result, while going down will produce a more fitted, structured beret. Neither outcome is wrong; it simply depends on the aesthetic you are chasing. Keep a few different hook sizes nearby when you first sit down with this pattern so you can experiment freely without frustration.
Beyond yarn and hook, you will want to have a yarn needle for weaving in ends, a pair of sharp scissors, and optionally a stitch marker or two to help you track your rounds. If you are planning to add any embellishments — and there are many wonderful options, as we will discuss later — gather those materials in advance as well. Some makers also find a tape measure indispensable for checking the circumference of the hat band before they commit to the full pattern, which can save a great deal of frogging (the affectionate crochet term for unraveling your work) down the line. Preparation is, in this case as in most, the foundation of a happy crafting session.
Understanding the Stitch Construction: How the Flop Happens
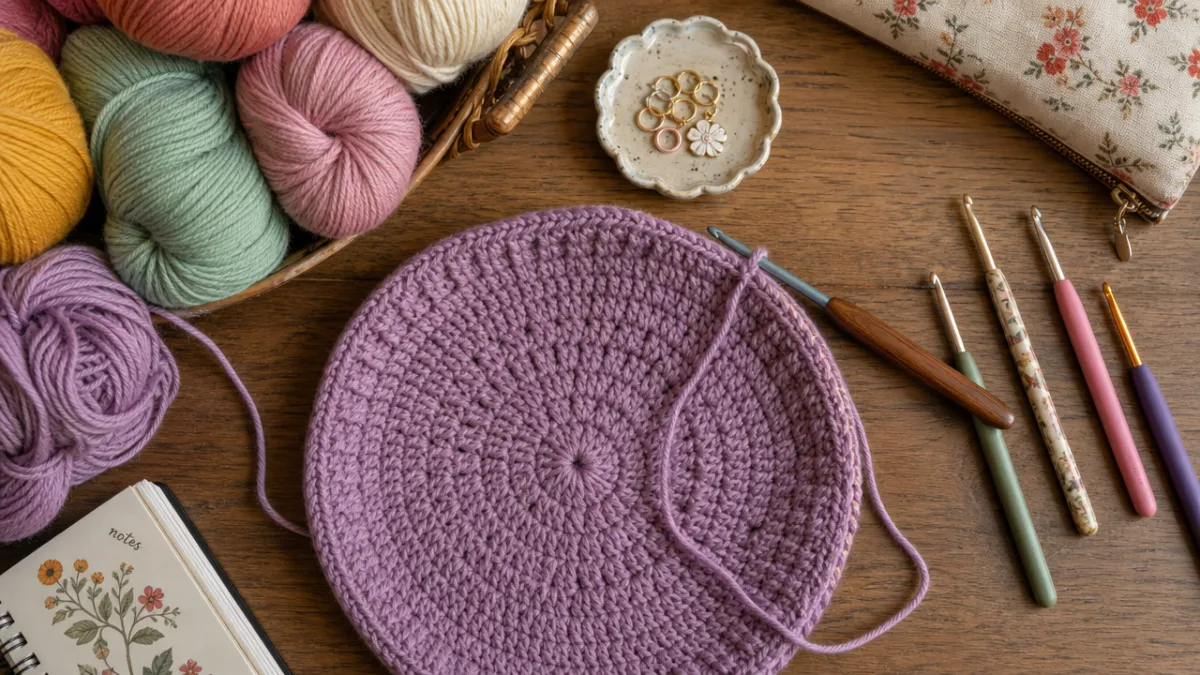
The magic of the Gourmet Beret’s signature silhouette is not accidental — it is the direct result of deliberate stitch choices made at every stage of the pattern. The construction typically begins at the crown of the hat and works outward in expanding rounds, a method that gives the maker precise control over the size and shape of the beret’s disk before the band is added. This top-down construction is one of the reasons the pattern is so satisfying to work: you can try the hat on at any point, lay it flat to assess its diameter, and make decisions in real time rather than hoping everything works out once the piece is finished.
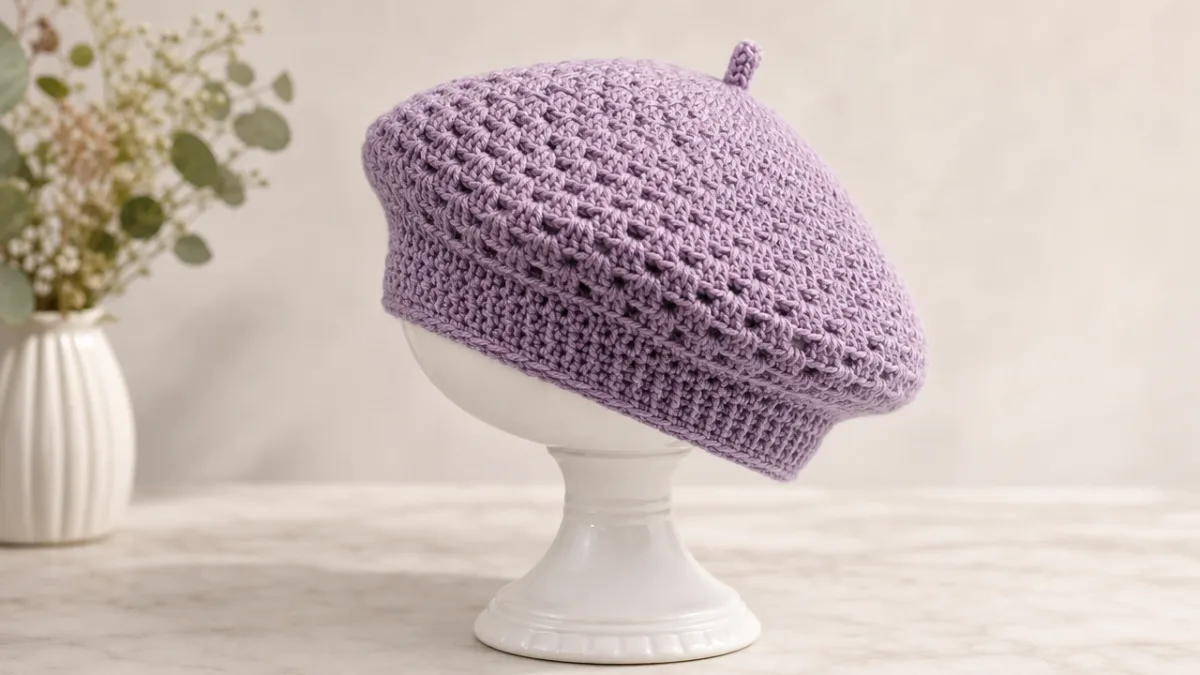
Many versions of the Gourmet Beret incorporate double crochet stitches as their primary building block, often combined with chain spaces or shell stitches to create an open, lacy texture that contributes directly to the drape of the finished piece. A tightly packed fabric of single crochet, while wonderful for many projects, would not give you the floppy, relaxed result this pattern aims for. The openness of the stitchwork allows the fabric to fall naturally under its own weight, which is exactly what a beret needs to do in order to achieve that casual, tilted, slightly rakish look that makes the style so appealing. Every chain space is doing real structural work.
The band, which is typically worked in a ribbed stitch pattern — often rows of slip stitches or back-loop-only single crochet — provides the contrast element that makes the whole design work. A stretchy, snug band anchors the hat to your head while the generous, flowy disk above it does exactly as it pleases. This tension between structure and freedom is at the heart of the beret’s charm. Once you understand how the two elements relate to each other, you can begin to make informed modifications: a wider band for a more retro look, a narrower band for something more modern, a longer disk for maximum floppage. The pattern is a conversation, not a prescription.
Step-by-Step Overview: Working Through the Pattern
While the specific row-by-row instructions will vary depending on which version of the Gourmet Beret pattern you are following, the general construction sequence follows a logical and learnable arc. Understanding this arc before you begin will help you troubleshoot as you go and make the experience feel intuitive rather than mechanical. Most patterns will begin by asking you to create a magic ring or a foundation chain joined into a loop, from which you will work your first round of stitches into the center. This initial round establishes the number of stitches you will be expanding from, and getting it right sets the tone for everything that follows.
The expansion phase — working outward from the crown — typically involves increasing your stitch count at regular intervals across several rounds. A common approach is to double the stitch count in the first round, then increase by a set number every other round until the disk reaches the desired diameter. This is where your tape measure earns its place on the crafting table: the finished disk should measure somewhere between 10 and 13 inches across for an adult size, depending on how much floppy overhang you want above the band. Some patterns include helpful visual cues or stitch count checkpoints at this stage, and it is well worth pausing to verify your count before moving forward.
Once the disk is the right size, the pattern typically transitions into a decrease or straight section that shapes the hat to sit around the head before the band begins. This is often the trickiest part for beginners, as it requires reading the pattern carefully to understand where exactly the decreases fall and how the band stitches are oriented relative to the body of the hat. Take your time here, and do not hesitate to rip back and redo if something looks off — catching a structural issue at this stage is infinitely easier than trying to fix it once the hat is finished. Crochet is a craft that rewards patience and attentiveness in equal measure.
- Crown setup: Create your magic ring and work your initial increase round to establish the center of the beret disk.
- Disk expansion: Continue increasing at regular intervals until the disk measures your target diameter, checking frequently with a tape measure.
- Transition section: Work one or two straight rounds without increases to define the edge of the disk and prepare for the decrease rounds.
- Band decrease: Decrease stitches evenly around to bring the circumference down to fit the head, following your pattern’s stitch count guidance.
- Ribbed band: Work the stretchy band section in your chosen ribbed stitch until it reaches the desired width, then join and fasten off.
- Finishing: Weave in all ends securely, block the finished hat if desired, and add any embellishments.
Finishing, while often treated as an afterthought, is genuinely one of the most important stages of any crochet project. Weaving in ends carefully and thoroughly will ensure your hat holds up to regular wear and washing without unraveling at inconvenient moments. Blocking the finished beret — either by steam blocking or wet blocking — can make a dramatic difference to the final appearance, encouraging the stitches to open up, the fabric to relax, and the shape to settle into exactly the right proportions. If you have never blocked a crochet project before, the Gourmet Beret is a wonderful first candidate, because the results are immediately and obviously transformative.
Customization and Variations: Making the Beret Uniquely Yours
One of the great joys of working with a well-constructed pattern like the Gourmet Beret is the enormous scope it offers for personalization. The basic silhouette is a canvas, and what you paint on it — or stitch into it — is entirely up to you. Color is the most obvious and accessible starting point for customization. A classic beret in a single rich jewel tone has timeless elegance; a striped version with rounds worked in alternating colors has playful energy; a gradient hat worked in a carefully hand-dyed or self-striping yarn creates a painterly effect that looks far more complex than it actually is to execute. The pattern accommodates all of these approaches without requiring any significant modification to the base instructions.
Beyond color, stitch substitutions open up an entirely different dimension of creative possibility. The standard double crochet construction can be swapped for a shell stitch pattern for a more decorative, lacy result, or for a puff stitch variation for something dramatically textured and dimensional. Experienced crocheters might experiment with front post and back post stitches throughout the disk to create raised patterns or even simple cables running from the crown outward. Each of these variations changes the character of the hat significantly while keeping its fundamental structure and wearability intact. This adaptability is a hallmark of a truly excellent pattern design.
Embellishments provide yet another layer of customization opportunity, and this is where the “gourmet” spirit of the pattern really shines through. A large crocheted flower pinned to one side of the band is a classic choice that suits the beret’s romantic aesthetic beautifully. Hand-stitched embroidery in contrasting thread can add delicate botanical motifs or geometric patterns to the disk of the hat. For a more contemporary look, a large button or a cluster of smaller buttons along the band adds tactile interest and a charming artisan quality. Some makers have even added small pompoms, tassels, or yarn fringe around the edge of the disk for a maximalist take that is as theatrical as the pattern’s name suggests.
- Choose a high-drape yarn with natural fiber content for the best possible floppy effect and comfortable wear.
- Swatch and check your gauge before beginning the full pattern, and adjust your hook size accordingly.
- Try the hat on frequently during construction rather than waiting until the end to assess fit and proportion.
- Block your finished beret — this single step can dramatically improve the drape, stitch definition, and overall polish of the finished piece.
- Experiment with embellishments thoughtfully, considering how weight and placement will affect the hat’s natural tilt and balance.
Sizing and Fit: Getting the Perfect Beret for Every Head
The Gourmet Beret is, in its most popular form, written for a standard adult head circumference of approximately 20 to 22 inches, which covers the majority of adult wearers without modification. However, the beauty of crochet is that resizing a hat pattern is genuinely quite straightforward once you understand the underlying geometry. Because the hat is constructed in rounds, adding or subtracting a few rounds from the disk expansion phase and adjusting the stitch count in the band section accordingly will produce a hat that fits a smaller or larger head with ease. This makes the pattern an excellent choice for making matching sets or gifts for people whose head size you may not know precisely.
For children, the disk diameter and band circumference both need to be reduced, typically by working fewer expansion rounds and decreasing to a smaller stitch count before the band begins. Many pattern designers who publish versions of this beret include separate size charts for children’s heads, ranging from toddler through tween, alongside the adult instructions. If your pattern does not include these, a general rule of thumb is to reduce the target disk diameter by approximately two inches and the band circumference by three to four inches for a school-age child. Always measure the intended wearer’s head if possible — crochet fabric is forgiving, but only to a point.
Fit also depends significantly on yarn weight and fiber composition, which is why swatching remains the single most valuable thing you can do before committing to the full pattern. A beret worked in a slippery bamboo yarn will behave very differently on the head from one worked in a grippy wool, even if both use identical stitch counts. The bamboo version may slip and slide more, requiring a tighter band, while the wool version will anchor itself naturally to the hair. These are not problems so much as characteristics, and understanding them in advance — through the small investment of time a swatch requires — will allow you to make the adjustments that result in a hat you will actually wear and love.

The Joy of Gifting and Sharing: Why This Pattern Is a Community Favorite
The Gourmet Beret has earned its devoted following not just because it is a pleasure to wear, but because it is an equally profound pleasure to give. A handmade beret carries with it all of the meaning and warmth that handmade gifts inherently possess — the hours of focused, loving attention, the consideration of color and fiber, the quiet satisfaction of creating something beautiful with your own hands. And because this particular pattern produces results that look impressively complex while remaining genuinely accessible to intermediate-level crocheters, the recipient of a Gourmet Beret often has no idea how achievable the making of it actually was. The finished object punches well above its difficulty weight.
Within the crochet community specifically, patterns like the Gourmet Beret serve an important social function beyond their utility as clothing. They become shared languages — when you mention the Gourmet Beret in a fiber arts group or on a crochet-focused online forum, you are immediately in conversation with dozens or hundreds of others who have worked the same rows, solved the same tension puzzles, and experienced the same small triumphs. Project sharing platforms like Ravelry allow makers to post their finished versions alongside notes on modifications, yarn substitutions, and sizing adjustments, creating a living, collaborative document of collective experience that enriches the pattern far beyond its original written form.
Teaching this pattern to a newer crocheter is itself a deeply satisfying experience. The Gourmet Beret contains enough variety of technique — magic rings, increases, band ribbing, and finishing — to serve as an excellent comprehensive tutorial project, one that leaves the student with a wearable, beautiful finished object and a genuine sense of accomplishment. Many experienced crocheters have introduced friends and family members to the craft through exactly this kind of project: something that seems impressive enough to be motivating but is genuinely achievable within a reasonable timeframe. The beret, in this sense, is more than a hat. It is an invitation into a lifelong creative practice.
Ultimately, what makes the Gourmet Beret such an enduring, beloved pattern is the sum of everything it represents: accessible craft, thoughtful design, personal expression, community connection, and the particular pleasure of wearing something you made yourself. Every time you reach for it on a cool morning and settle it onto your head with that characteristic flop, you are reminded that making things by hand is one of the most fundamentally human and deeply satisfying activities available to us. The pattern is fabulously floppy, as advertised. But it is also, in its small and textile way, genuinely profound. Start your magic ring. The beret is waiting.








What do you think?
It is nice to know your opinion. Leave a comment.