










Modern Garden Room Workshop: A Complete DIY Build Guide
Building a garden room workshop from scratch is one of the most rewarding home improvement projects a dedicated DIY enthusiast can undertake. It combines practical construction skills with thoughtful design, resulting in a dedicated space that adds genuine value to both your lifestyle and your property. Whether you envision it as a woodworking studio, an artist’s retreat, a home office, or a multi-purpose maker’s space, a well-built garden room workshop can transform the way you use your outdoor space entirely.
The appeal of the modern garden room has grown enormously over the past decade, driven partly by the rise of remote working and partly by a renewed cultural interest in making and craftsmanship. Unlike a traditional garden shed, a proper workshop is designed to be comfortable, well-lit, insulated, and wired for power — a genuine room that happens to sit at the bottom of your garden. This guide walks you through every key stage of the build, from initial planning and foundations right through to interior fit-out and finishing touches.
Planning, Permissions, and Design Considerations
Before a single piece of timber is cut or a single foundation post is driven into the ground, thorough planning is essential. Start by measuring your available garden space carefully and deciding on the footprint of your workshop. Most garden rooms fall within permitted development rights in the UK and many other jurisdictions, meaning you won’t need full planning permission — but this is subject to conditions around size, height, proximity to boundaries, and whether the building will be used as a habitable space. Always check your local planning authority’s guidelines before proceeding, as building without the correct permissions can create serious legal and financial complications down the line.
The design phase is where your vision really begins to take shape. Consider how you will use the space on a day-to-day basis. If you’re a woodworker, you’ll need ample floor area for machinery, good overhead clearance, and strong lighting. If you’re creating a painting or pottery studio, natural light becomes a primary concern, which might influence the placement of windows and roof lights. Think carefully about orientation — a south-facing workshop will receive the most natural daylight in the northern hemisphere, which is ideal for fine detail work, though it may require more ventilation management in summer months to prevent overheating.
Create a detailed set of drawings before you begin. These don’t need to be architect-quality, but they should include a floor plan, elevations showing all four sides, a roof plan, and a basic structural layout. Mark the positions of doors, windows, electrical outlets, and any integrated workbenches or storage you plan to build in. Having these plans on paper forces you to think through practical problems before they become expensive mistakes on site, and gives you a reliable reference point throughout the construction process. Dimensions, materials, and construction methods should all be noted clearly.
- Check permitted development rights with your local planning authority before starting any work.
- Consider the orientation of the building relative to sunlight and prevailing wind direction.
- Decide whether you want a pitched roof, a flat roof, or a mono-pitch (lean-to style) design.
- Plan your electrical requirements early — cable routes are far easier to install during the build than retrospectively.
- Think about drainage, especially if you plan to have a sink or wet area inside the workshop.
Budgeting is another critical part of the planning stage that many first-time builders underestimate. A well-built garden room workshop of around 4 metres by 3 metres can cost anywhere from £5,000 to £15,000 or more depending on materials, glazing, insulation specification, and the quality of the fit-out. Materials typically account for 60 to 70 percent of total costs, while tools, fixings, and unforeseen expenses make up the rest. Build a contingency of at least 15 percent into your budget from the outset, as almost every construction project encounters unexpected costs of some kind.
Foundations: Getting the Base Right
The foundation is arguably the most important part of any garden building, yet it is frequently underestimated by first-time builders. A poorly conceived or executed foundation will cause problems for the entire life of the structure — doors will stick, walls will rack, floors will bounce, and in extreme cases the building can become structurally unsafe. For a garden room workshop, you have several foundation options to choose from, and the right choice depends on your soil type, the size of the building, the local frost depth, and how permanent you want the structure to be.
Ground screws have become increasingly popular in recent years as an alternative to poured concrete. These large, helical steel posts are screwed directly into the ground using a specialised drill attachment and can support substantial loads without the mess, cure time, or environmental disruption of concrete. They are particularly well-suited to soft or sandy soils and have the added advantage of being largely reversible if you ever want to remove the building. A typical 4×3 metre garden room requires six to nine ground screws, positioned at corners and intervals along the perimeter and centre of the floor frame.
Alternatively, a concrete pad or a series of concrete piers offers a robust and time-tested solution. A full concrete slab provides a completely level, solid base and is ideal if you plan to operate heavy machinery or store significant weight in the workshop. The slab should typically be at least 100mm thick for a structure of this size, reinforced with steel mesh, and laid on a compacted hardcore sub-base. If you choose individual concrete piers, these should be cast to below the local frost line to prevent frost heave during winter, and each pier should be crowned with a post base fitting to keep the timber structure above ground level and away from moisture.
Whatever foundation method you choose, achieving a perfectly level bearing surface across all support points is critical. Even small variations in level will translate into compounding errors as the structure rises. Use a long spirit level, a laser level, or a water level to check and recheck all points before any structural timber is laid. Take your time at this stage — it is far easier to correct a millimetre of error in the foundation than to compensate for it in the walls or roof framing later in the build.
Structural Framing: Walls, Roof, and Structural Integrity
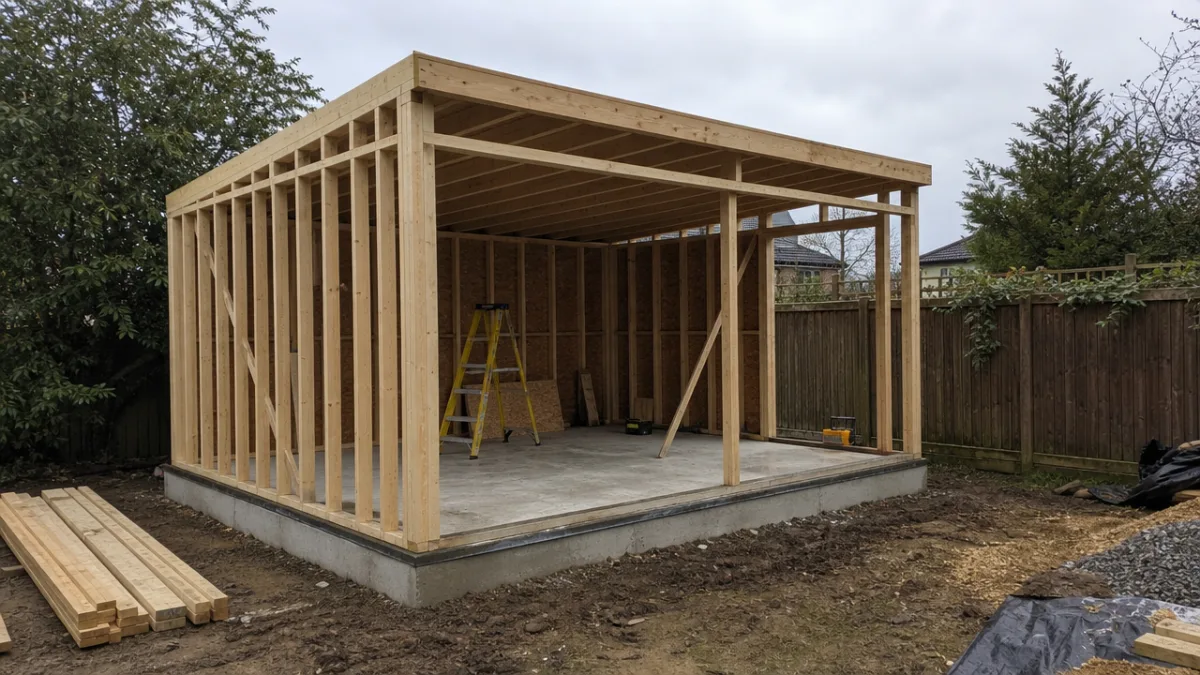
With the foundation in place, structural framing is the stage that really brings your workshop to life. Most DIY garden room builds use timber stud frame construction, which is lightweight, flexible, and within the capabilities of a competent amateur builder. The floor frame is typically constructed from 47x150mm C16 or C24 structural timber, sitting on the foundation posts or slab, with joists spanning between two perimeter bearers. The spacing of the joists — typically 400mm or 600mm centres — determines how stiff the floor feels underfoot and how well it supports sheet materials like OSB or plywood decking.
Wall frames are built from 47x100mm or 47x125mm structural timber, again at 400mm or 600mm stud centres. The additional depth of the larger section allows you to install thicker insulation, which dramatically improves thermal performance and makes the space comfortable to work in year-round without excessive heating costs. Each wall frame is built flat on the deck and then tilted up into position and temporarily braced while the remaining walls are assembled. Corner junctions, window and door openings, and the top plate — the horizontal timber that carries the roof — all require careful detailing to ensure the structure performs as a unified whole.
Roof design is one of the most consequential decisions in the build. A simple mono-pitch or flat roof with a slight fall is the easiest to construct and keep weathertight, but a pitched roof with a traditional ridge beam and rafters offers better headroom, more natural light potential through rooflights, and arguably better aesthetics. Whichever you choose, the roof structure must be designed to handle both dead load (the weight of the roofing materials themselves) and live load (snow and wind), so don’t undersize your rafters or purlins. Most DIY builds use 47x150mm rafters at 400mm centres for modest spans, but it is worth cross-referencing with span tables or consulting a structural engineer if you are at all unsure.
- Build the floor frame first, fixing it securely to the foundation posts or slab.
- Deck the floor with 18mm or 22mm tongue-and-groove OSB or plywood before erecting walls.
- Construct each wall frame flat on the deck, then tilt up and brace in position.
- Install the roof structure, working from one end of the building to the other.
- Apply structural sheathing to walls and roof to add rigidity before cladding or roofing goes on.
Structural sheathing — typically 9mm or 11mm OSB fixed to the outside face of the wall frames — adds significant racking resistance to the structure, meaning it is far better able to resist lateral forces from wind. Without this sheathing, a timber stud frame can be surprisingly flexible. The sheathing also provides a substrate to which breathable membrane, battens, and cladding can subsequently be fixed. Fix sheathing panels with galvanised ring-shank nails at 150mm centres around the perimeter and 300mm centres in the field for maximum rigidity.
Insulation, Cladding, and Weatherproofing
Once the structural frame and sheathing are complete, you are ready to insulate, clad, and weatherproof the building — the stage that transforms an open skeleton into a proper enclosed room. Insulation is one area where it genuinely pays to invest in quality materials and to install them carefully, because thermal performance is difficult and expensive to improve after the build is complete. For a workshop used year-round, aim for at least 100mm of mineral wool or rigid foam insulation in the walls and 150mm in the roof. The floor should also be insulated, ideally with rigid PIR boards between the joists, which offer a high thermal resistance in a compact depth.
Mineral wool batts are the most common choice for stud bay insulation — they are affordable, easy to cut and fit, and have excellent acoustic as well as thermal properties, which is a real bonus in a workshop where power tools generate significant noise. Rigid PIR or PUR foam boards achieve a higher thermal resistance per millimetre, making them ideal for the roof and floor where depth is limited. Whichever material you choose, ensure it fills the full depth of the cavity without gaps or compression, as these drastically reduce effective insulation performance. Fit a continuous vapour control layer on the warm side of the insulation to prevent interstitial condensation.
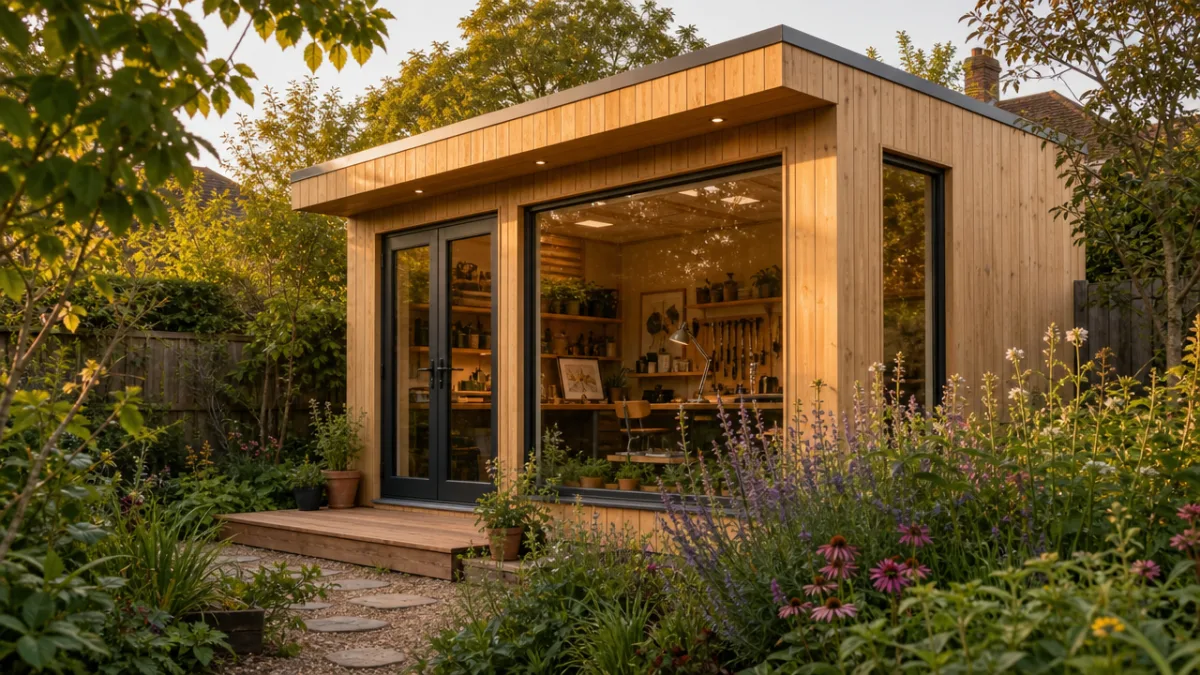
Cladding selection has a huge impact on the finished appearance of the building. Shiplap or tongue-and-groove softwood timber cladding is a classic and sympathetic choice that ages beautifully and is relatively easy to fix. Thermally modified timber such as thermowood is more dimensionally stable and far more durable than untreated softwood. Composite cladding boards offer very low maintenance and consistent colour retention. Fibre cement panels give a more contemporary, industrial aesthetic. Whatever you choose, ensure there is a ventilated cavity between the cladding and the waterproof membrane behind it, typically created using treated vertical battens, to allow any moisture that penetrates behind the cladding to drain away harmlessly.
Roofing materials should be chosen for durability and compatibility with your roof pitch. EPDM rubber membrane is an excellent choice for flat and low-pitch roofs — it is highly durable, straightforward to install, and forms a completely seamless, waterproof barrier. Corrugated metal roofing is fast to install and very durable on mono-pitch roofs. For a pitched roof, fibre cement slates or plain clay tiles provide a traditional appearance with excellent longevity. Whichever material you use, pay meticulous attention to flashings, verge details, and any penetrations through the roof for pipes or rooflights — these junctions are where the vast majority of roof leaks originate.
Electrical Installation and Lighting
A well-designed electrical installation transforms a basic garden room into a genuinely functional workshop, powering tools, lighting your work, running heating, and charging devices. In most jurisdictions, the electrical work for a garden outbuilding must either be carried out by a qualified electrician or notified to building control under Part P of the Building Regulations (in England and Wales). Even if you plan to do some of the preparatory cabling yourself, it is strongly advisable to have a qualified electrician inspect and sign off the installation before commissioning it. The consequences of a faulty electrical installation in a timber building can be catastrophic.
The supply to the workshop will typically run from the main consumer unit in your house via an underground armoured cable — either 2.5mm² or 4mm² two-core and earth SWA (steel wire armoured) cable, depending on the load you intend to draw. The cable should be buried at a minimum depth of 500mm in open ground or 600mm under a driveway, ideally laid in conduit and on a bed of sand, with marker tape above it to warn anyone digging in the future. At the workshop end, the supply should feed a small consumer unit with its own RCD protection, from which individual circuits for sockets, lighting, and any fixed appliances are protected by appropriately rated MCBs.
Lighting is worth spending real time planning, because poor lighting in a workshop is both unpleasant and genuinely dangerous when working with sharp tools or machinery. LED strip lights or LED batten fittings give excellent, even illumination and are highly energy-efficient. For detailed bench work, consider supplementary task lighting mounted directly above the bench. A daylight-balanced colour temperature of around 4000K to 5000K is ideal for a workshop environment, as it renders colours accurately and reduces eye strain over long working sessions. Plan your lighting circuit so that you have both general overhead lighting and the ability to switch zones independently for different areas of the workshop.
- Install a dedicated consumer unit in the workshop with RCD protection and clearly labelled MCBs.
- Provide ample double socket outlets — a minimum of six is a good starting point for most workshops.
- Include at least one 16-amp or 32-amp commando socket if you plan to run heavy machinery.
- Consider installing a separate circuit for a workshop heater to avoid nuisance tripping during cold starts.
- Install outdoor-rated luminaires around the exterior for security and safe access after dark.
Heating and ventilation deserve equal consideration alongside lighting. An electric panel heater or fan heater on a thermostat is the simplest solution, but infrared radiant heaters are increasingly popular in workshops because they heat surfaces and people directly rather than trying to warm the air, making them more efficient in a space where doors are frequently opened. Ventilation is critical in a workshop where sanding, finishing, and painting generate dust and fumes — install at least one openable window and consider a dedicated extractor fan vented to the outside to maintain air quality and prevent condensation build-up.
Interior Fit-Out: Workbenches, Storage, and Finishing
With the shell of the workshop complete and the electrics installed and commissioned, the interior fit-out is the final and in many ways most enjoyable phase of the build. This is where the space becomes truly your own, reflecting your workflow, your tools, and your personal aesthetic. A well-designed workshop interior maximises usable space, keeps tools accessible without creating clutter, and provides a comfortable and inspiring environment in which to work. Begin by lining the interior walls and ceiling with plasterboard or OSB — the former gives a cleaner, more finished look, while the latter provides a robust surface to which shelves and fixings can be attached at any point without needing to locate noggins.
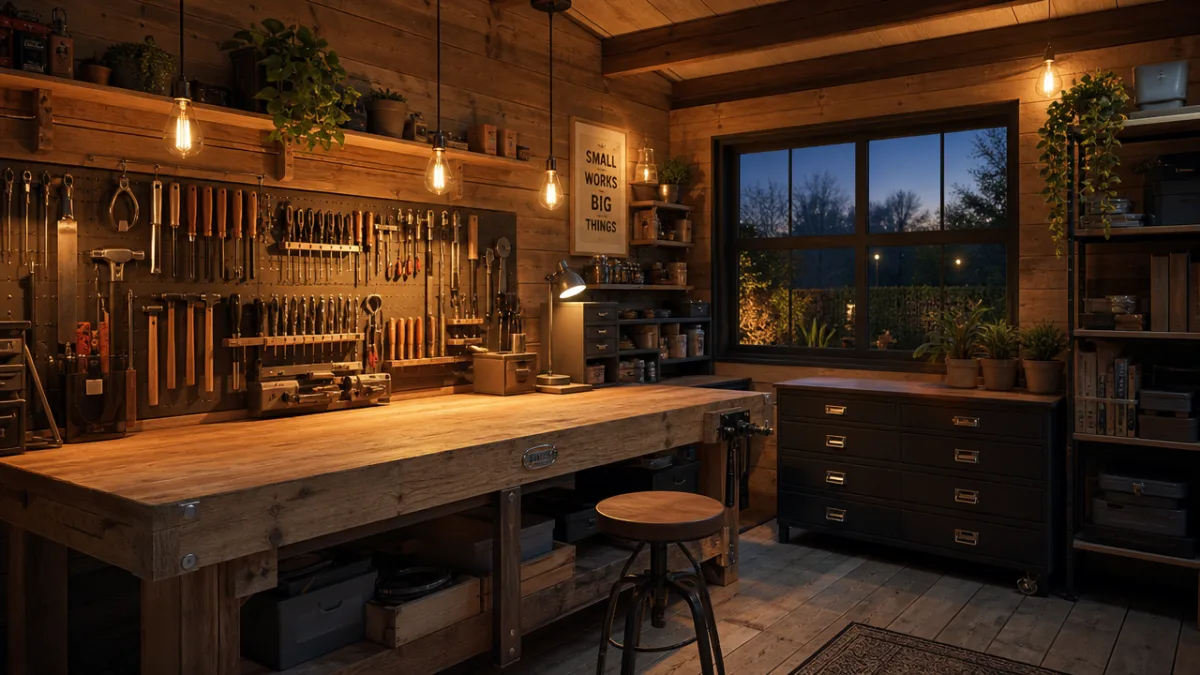
The workbench is the heart of any workshop and is worth building with care. A well-made bench is heavy, solid, and precisely level — it should not flex or rock when you plane, chisel, or hammer on it. The traditional workbench is made from solid hardwood, but a perfectly serviceable bench can be constructed from construction timber and MDF or plywood. Aim for a bench height that suits your working posture — for most people, this means the bench surface sitting at roughly knuckle height when standing with arms hanging relaxed at your sides. Incorporate a woodworking vice if your primary activity is woodworking, and consider a lower section of bench for sitting work such as electronics or model-making.
Storage is another area where thoughtful design pays dividends. A disorganised workshop wastes time and creates hazards — time spent searching for a drill bit or a specific clamp is time not spent making. Wall-mounted tool storage using pegboard, shadow boards, or magnetic strips keeps frequently used hand tools visible and immediately to hand. Deep drawer units under the bench accommodate larger items and consumables. Open shelving is ideal for storing finishes, adhesives, and workshop sundries. Consider installing a dedicated lumber storage area — either a wall-mounted rack or a floor-standing A-frame — to keep timber stock tidy, accessible, and properly supported to prevent warping.
The floor finish is often an afterthought but can significantly affect the comfort and functionality of the workshop. Bare OSB or concrete is functional but hard on the feet and cold in winter. Anti-fatigue matting in front of the main workbench makes a measurable difference to comfort during long working sessions. Interlocking rubber or foam floor tiles provide warmth and cushioning across a larger area and are easy to clean. Alternatively, painting the floor with a hard-wearing garage floor paint seals the surface, makes it easier to sweep, and gives the interior a clean, professional appearance. A darker colour helps disguise inevitable oil and finish stains.
Finally, take time over the small details that make the workshop feel finished and considered. Good quality door furniture, a coat of exterior paint or stain in a colour you love, a small window box or climbing plant to soften the building’s appearance in the garden, a simple verandah or covered porch area for tool storage and for those moments when you want to step outside — these finishing touches transform a functional building into a space you will genuinely look forward to spending time in. A garden room workshop built to a high standard is an investment that will reward you with pleasure, productivity, and added property value for decades to come.
Maintenance, Longevity, and Getting the Most from Your Workshop
A well-built garden room workshop, properly maintained, should easily last thirty to fifty years or more. The key to longevity is addressing minor issues before they become major ones — catching a small gap in cladding or a minor roof flashing failure before water ingress causes timber rot can save thousands of pounds and months of remedial work. Establish a simple annual maintenance routine: inspect the roof in autumn before the wet season begins, check all external joinery for signs of cracking paint or failed sealant, and treat any bare timber promptly. Check the gutters and downpipe are clear and that water is discharging well away from the building’s foundations.
Timber cladding requires the most regular maintenance of any common exterior material, particularly if it has been stained or painted rather than left to silver naturally. Most exterior finishes need refreshing every three to five years, depending on the exposure of the site. This is a manageable task for a small garden building and is best done on a dry day in late spring when the timber has fully dried out after winter. Lightly sand any areas where the finish has flaked, clean the entire surface, and apply a fresh coat of your chosen product. Keeping the finish in good condition is not just cosmetic — it is the primary defence against moisture penetration and the resulting decay that can compromise structural timber.
Over time, you will inevitably want to adapt and improve the workshop as your skills, projects, and equipment evolve. The beauty of a DIY-built structure is that you know it intimately and can modify it freely. Adding a new circuit for a dust extractor, installing an additional rooflight to improve natural illumination, fitting a solar panel to offset electricity costs, or adding a lean-to storage area for lumber and sheet materials — all of these improvements are readily achievable once the main structure is in place. Approach the workshop as a living project that can continue to develop alongside you, and it will reward you with a workspace that is perfectly tuned to the way you work and the things you love to make.
Beyond the practical, there is something profoundly satisfying about working in a space you have built with your own hands. Every joint, every board, every fitting reflects decisions you made and skills you developed throughout the build process. Many people find that the act of building the workshop itself teaches them skills — in carpentry, in construction, in problem-solving — that subsequently inform and improve the work they do within it. A garden room workshop is more than a building at the bottom of the garden. It is a commitment to craft, to making, and to the deep satisfaction of creating something of lasting value from raw materials and your own effort.








What do you think?
It is nice to know your opinion. Leave a comment.