










Build an Elevated Garden Bed This Weekend: A Complete Guide
Why Elevated Garden Beds Are Worth Every Effort
Elevated garden beds have transformed the way millions of home gardeners grow vegetables, herbs, and flowers. Unlike traditional in-ground planting, raised beds give you complete control over your soil quality, drainage, and planting density. Whether you are working with compacted clay soil, a sloped backyard, or simply bad knees that make bending down painful, an elevated garden bed solves nearly every common gardening frustration in one elegant, buildable weekend project.
The health benefits alone make the construction effort worthwhile. Gardening at a comfortable working height reduces strain on your back, hips, and knees, making it accessible for older adults, people with mobility challenges, and anyone who finds ground-level work exhausting. Studies from horticultural therapy programs consistently show that when gardening becomes physically comfortable, people do more of it — and the mental and physical benefits of regular time in a garden are well documented, from reduced cortisol levels to improved mood and better nutrition.
Beyond personal comfort, elevated beds produce dramatically better yields than comparable in-ground plots. The loose, well-amended soil inside a raised bed warms up faster in spring, drains perfectly after rain, and never gets compacted by foot traffic. Roots can expand freely in all directions, which means plants grow larger and produce more fruit. Many experienced gardeners report that a single four-by-eight-foot elevated bed outproduces twice the square footage of a traditional garden row, making this project one of the smartest investments you can make in your property and your kitchen table.
Choosing the Right Materials for Your Build
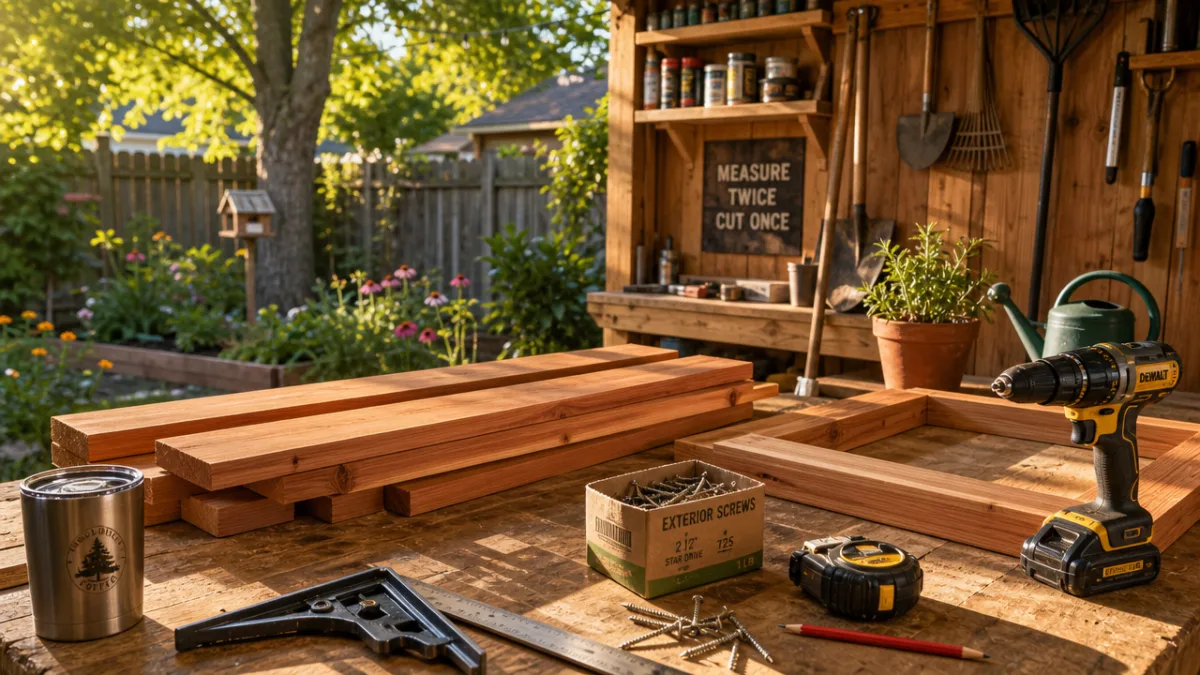
The materials you choose will determine how long your elevated garden bed lasts, how safe it is for growing edibles, and how much the finished project costs. The most popular choice for weekend builders is cedar lumber, and for good reason. Cedar contains natural oils that resist rot, repel insects, and hold up beautifully outdoors without any chemical treatment. A well-built cedar raised bed can last fifteen to twenty years, and because it requires no preservatives, it is completely safe for growing vegetables that your family will eat.
If cedar is not available in your area or falls outside your budget, Douglas fir and redwood are excellent alternatives. Douglas fir is widely available at most home improvement stores and, while it does not last quite as long as cedar, a properly built fir bed can still give you a solid eight to twelve years of use. Redwood offers similar natural rot resistance to cedar but tends to be more expensive and is less widely available outside the western United States. Whatever species you choose, always select boards labeled as untreated, and avoid pressure-treated lumber for beds where you plan to grow food, as older formulations contained arsenic compounds and newer ones still introduce copper into the surrounding soil.
For the hardware, you will want to invest in exterior-grade screws or bolts rather than standard interior nails. Galvanized or stainless steel fasteners will not rust when exposed to moisture and soil, keeping your joints tight and your bed structurally sound for years. Many builders also line the bottom of their beds with hardware cloth — a rigid wire mesh with half-inch openings — to keep out burrowing pests like gophers and voles while still allowing earthworms and beneficial soil organisms to move freely between the bed and the earth below. This inexpensive addition can save an entire season’s harvest from underground destruction.
Consider also the hardware and connector brackets available at most home centers. Metal corner brackets, L-brackets, and post anchors can make assembly faster and significantly stronger, especially if you are building a taller bed intended to sit at counter height. For beds taller than twelve inches, internal cross-supports or corner posts sunk into the ground will prevent the sides from bowing outward under the pressure of soil and moisture. A little extra structural planning at the material selection stage prevents expensive repairs and rebuilds later.
Planning Your Dimensions and Location
Before you cut a single board, spend time thinking carefully about where your elevated bed will live and how large it should be. The single most important rule of raised bed sizing is that you should be able to reach the center of the bed comfortably from either side without stepping into it. For most adults, this means a maximum width of four feet. If the bed will be accessible from only one side — placed against a fence or wall, for example — keep the width to no more than two feet. Ignoring this principle leads to compacted soil, damaged plants, and a frustrating gardening experience.
Length is far more flexible than width, and most beginner builders find that eight feet strikes the right balance between growing space and manageable construction. An eight-foot-long, four-foot-wide bed uses standard lumber dimensions efficiently, since most boards come in eight-foot lengths, minimizing waste and cutting time. If you want more growing space, build two separate eight-foot beds with a comfortable walking path between them rather than one very long single bed. Two smaller beds are easier to work around, easier to cover with frost cloth or bird netting, and structurally more stable over time.
Location deserves as much thought as dimensions. Most vegetables, herbs, and fruiting plants require a minimum of six hours of direct sunlight daily, with eight to ten hours producing the best results. Walk your yard at different times of day before committing to a spot, and pay attention to how shadows from trees, fences, and structures move across the space. Also consider proximity to your water source — dragging a heavy hose across the yard every day quickly becomes a chore that leads to under-watered plants. Placing your bed close to an outdoor spigot or planning a short drip irrigation run at the outset will pay dividends all season long.
Soil drainage beneath the bed is another location consideration often overlooked by first-time builders. If the ground where you plan to place the bed pools with standing water after heavy rain, the excess moisture will eventually wick up into your growing medium and cause root rot. Either choose a location with better natural drainage, amend the soil beneath the bed before construction, or build the legs of the bed tall enough to elevate the bottom above any potential water pooling. A slight slope away from the bed in all directions also helps shed water and keep the surrounding area navigable during wet weather.
Step-by-Step Construction Guide
Once your lumber is cut and your hardware is assembled, the actual construction of a standard four-by-eight-foot elevated garden bed moves surprisingly quickly. The basic process involves building two long side panels, two short end panels, connecting them at the corners with posts or brackets, adding any internal supports needed for taller builds, and then treating or finishing the exterior wood if desired. Even a first-time builder working alone can complete a basic ground-level bed in three to four hours on a weekend morning.
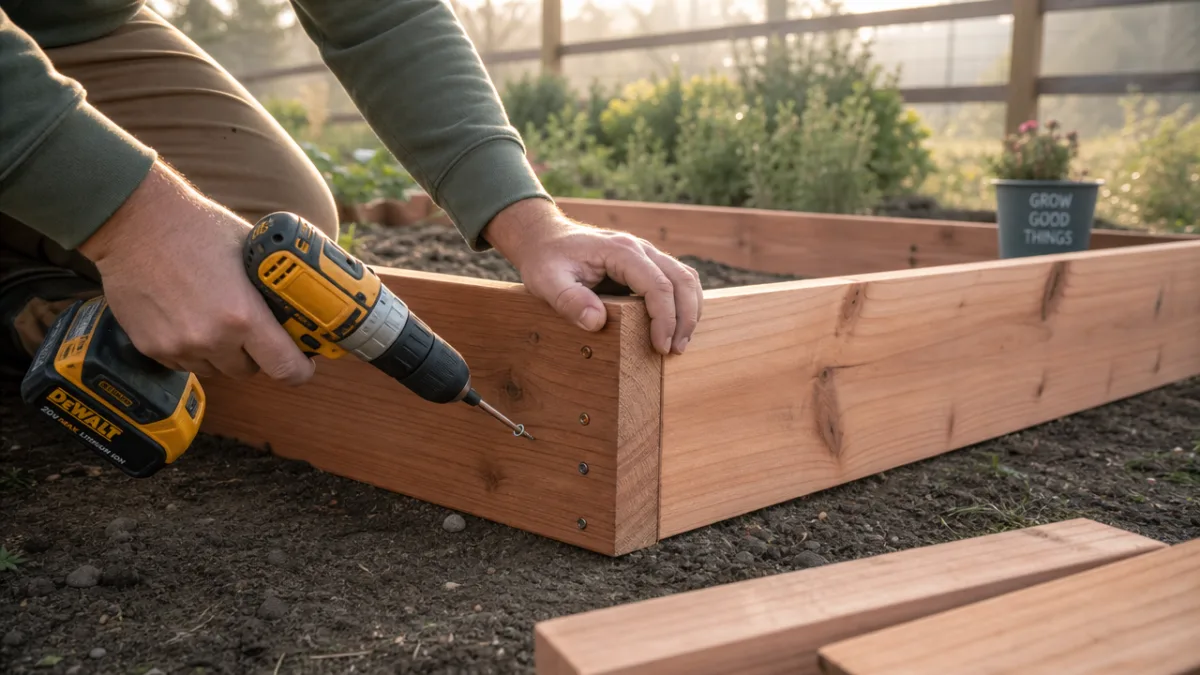
Begin by laying out your boards on a flat surface and doing a dry-fit assembly before driving a single fastener. Dry fitting lets you catch any measurement errors, warped boards, or missing hardware before you are committed. For a standard design, each long side will consist of one or two boards running the full eight-foot length, and each short end will consist of boards cut to the full interior width. Corner posts — typically four-by-four lumber — are cut to the full height of the bed and serve as the anchoring point where the side and end boards attach. Pre-drill all your holes to prevent the wood from splitting, especially near the ends of boards.
Follow these steps in order for a clean, sturdy build:
- Cut all lumber to final dimensions and label each piece before assembly begins.
- Pre-drill pilot holes at every fastener location, keeping holes at least one and a half inches from board ends.
- Attach side boards to corner posts first, keeping edges flush and using clamps to hold pieces while driving screws.
- Connect the two assembled long-side frames with the short end boards, checking for square as you go.
- Staple hardware cloth to the bottom interior of the frame if gopher or mole protection is desired.
- Level the assembled bed in its final location, shimming corners as needed before filling with soil.
- Optionally apply a food-safe wood sealant or linseed oil to the exterior surfaces to extend the life of the wood.
After the frame is complete and leveled in place, take time to check that all corners are genuinely square using a measuring tape from corner to corner diagonally. If both diagonal measurements match, your bed is perfectly square, and your boards and hardware cloth will fit cleanly. If the measurements differ, the frame is racked slightly and can be gently pushed back into square before the soil adds weight and locks everything in position. A square bed looks more professional, functions better with cover systems like cold frames and row covers, and ages more gracefully over years of use and seasonal movement.
Filling Your Bed with the Perfect Growing Medium
The soil you put inside your elevated garden bed is arguably more important than the bed itself, and it is also one of the areas where new builders most commonly cut corners and later regret it. Never fill a raised bed with soil dug directly from your yard. Native soil, even when it looks perfectly fine, is almost always too dense and too poorly structured to produce the loose, well-drained, nutrient-rich growing medium that plants in a raised bed need. Compacted native soil in a confined bed creates drainage problems, root stress, and disappointing plant performance right from the start.
The gold standard filling mixture for raised beds is often called “Mel’s Mix” after author Mel Bartholomew, who popularized the square-foot gardening method. It consists of equal parts coarse vermiculite, finished compost, and peat moss or coconut coir. This blend creates an extremely light, moisture-retentive, nutrient-rich medium that drains beautifully, never crusts over, and supports explosive plant growth. Coconut coir has largely replaced peat moss in modern formulations because it is a renewable byproduct of the coconut industry rather than a harvested wetland material, making it a more environmentally sound choice without any sacrifice in performance.
For builders working with a larger bed or a tighter budget, a simplified approach works well: fill the bottom third of the bed with wood chips, straw, or other bulky organic material that will break down slowly over several years, adding organic matter and carbon to the soil as it decomposes. This technique, sometimes called Hügelkultur, significantly reduces the amount of premium soil mix needed while building long-term soil fertility into the structure of the bed itself. Top the organic fill layer with at least ten to twelve inches of a high-quality soil blend, which is the depth where most plant roots will actively feed and grow.
Plan to top-dress your elevated bed with two to three inches of fresh compost each spring before the growing season begins. Unlike in-ground soil, which receives inputs from below through the activity of worms, soil microbes, and decomposing leaf litter, raised bed soil is a closed system that loses nutrients and structure over time as plants consume them and watering leaches them downward. Annual compost additions rebuild that structure and fertility, keeping your bed as productive in its fifth year as it was in its first. Many gardeners also add a balanced organic granular fertilizer at the start of each season and a mid-season liquid fertilizer boost for heavy-feeding crops like tomatoes and squash.
Planting Strategies and Seasonal Maintenance
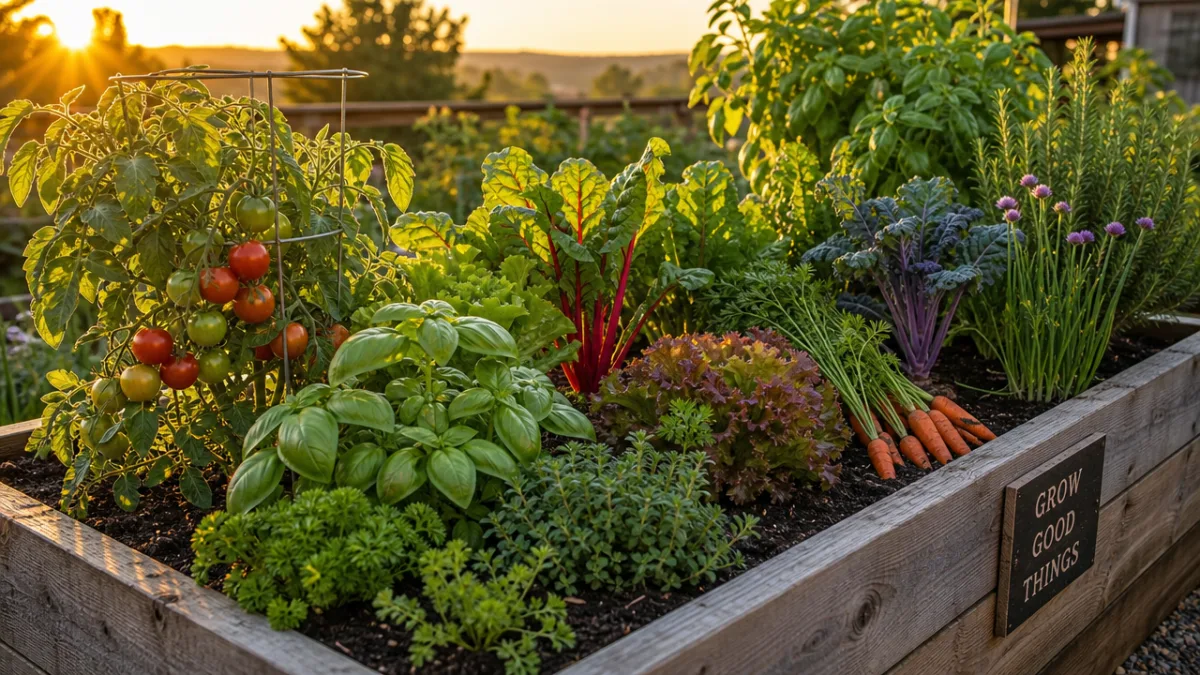
With a beautifully built, properly filled elevated garden bed in place, the next step is making the most of the growing space through smart planting strategies. The intensive planting approach works exceptionally well in raised beds because the loose, fertile soil allows you to space plants much more closely than traditional row gardening recommends. Rather than following the row spacing guidelines on seed packets — which were designed for tractor cultivation — space plants based on their mature canopy spread, placing each plant just far enough apart that its leaves will barely touch those of its neighbor when fully grown. This dense planting shades the soil, suppresses weeds, and dramatically increases yields per square foot.
Companion planting adds another layer of productivity and pest management to your elevated bed. Certain plant combinations have been shown through generations of gardening observation and more recent research to improve growth, deter pests, and make efficient use of vertical and horizontal space. The classic “Three Sisters” combination of corn, climbing beans, and sprawling squash developed by Indigenous North American farmers is one of the most efficient and beautiful companion plantings ever devised, with the three plants supporting one another structurally and nutritionally. Other proven pairings include tomatoes with basil, carrots with onions, and brassicas like cabbage and broccoli with aromatic herbs like dill and cilantro.
Succession planting extends your harvest season dramatically and keeps the bed productive from early spring through late fall. Rather than planting an entire packet of lettuce seed at once and then having more salad than you can eat for three weeks followed by nothing, plant a short row every two to three weeks through the cool season. As one planting bolts and goes to seed in summer heat, the next is just reaching peak harvest size. Apply the same logic to radishes, beans, cilantro, and other fast-maturing crops. The result is a continuous, manageable harvest of perfectly timed produce throughout the season rather than overwhelming gluts and frustrating gaps.
Watering discipline is the single most impactful maintenance habit you can develop as a raised bed gardener. Because raised beds drain more freely than in-ground soil and have more exposed surface area relative to their volume, they dry out more quickly, especially during hot weather. A consistent deep watering two to three times per week is far better for plant health than frequent shallow sprinkles, which encourage shallow root development and leave plants more vulnerable to heat stress. Installing a simple drip irrigation system with a timer is a weekend project in its own right that will save you time, reduce water use by up to fifty percent compared to overhead watering, and virtually eliminate the foliar moisture that encourages fungal diseases.
Extending the Season and Long-Term Care
One of the most underappreciated advantages of an elevated garden bed is how easily it integrates with season-extension tools that would be awkward or impossible to use in a traditional in-ground garden. Because the bed has defined, consistent edges, you can build simple hoop structures from PVC pipe or flexible metal conduit, anchoring them to the inside edges of the bed to support row cover fabric in spring and fall or shade cloth in midsummer. These low tunnels add weeks of growing time on either end of the season, protecting tender seedlings from late frosts in spring and keeping cool-season greens productive well into autumn cold.
For a more substantial investment in season extension, a cold frame lid built from old window sashes or polycarbonate glazing panels can sit directly on top of the bed’s edges, turning the entire structure into a miniature greenhouse during the coldest months. Many gardeners in temperate climates find they can grow spinach, kale, mâche, and Asian greens throughout the winter months using nothing more than a polycarbonate cold frame lid and a layer of frost cloth directly over the plants on the coldest nights. This turns a seasonal project into a year-round relationship with your garden, and the bed pays back its construction cost in fresh produce many times over across the years.
Long-term structural maintenance of a wooden elevated bed is straightforward and requires only a small investment of time each year. Before winter, remove all plant debris, top-dress with compost, and inspect all joints and fasteners for signs of rust, rot, or loosening. Tighten any screws that have worked loose as the wood expanded and contracted through the seasons, and replace any fasteners that have corroded. If the exterior wood looks dry and weathered, a light application of linseed oil or a food-safe timber sealant will restore its moisture resistance and slow the natural weathering process. These small annual tasks take under an hour but can add years of additional life to the structure.
After several years of productive growing, you may find that the soil in your elevated bed has settled significantly and lost some of its original loft and structure. This is completely normal — organic matter decomposes, roots extract nutrients, and the continuous cycle of planting and harvesting gradually exhausts the initial charge of fertility. When this happens, it is an opportunity to partially empty the bed, refresh the bottom layer with fresh wood chips or compost, and rebuild the top growing layer with new soil mix. Many gardeners undertake this renewal every four to five years, treating it as a chance to repair any structural issues with the frame at the same time. With consistent attention, an elevated garden bed built this weekend can be a productive and beautiful part of your outdoor space for decades to come.








What do you think?
It is nice to know your opinion. Leave a comment.