










Make Cement Paper Clay for Concrete Sculptures
Introduction to Cement Paper Clay
Cement paper clay is one of the most versatile and accessible sculptural materials available to artists and hobbyists today. By combining the structural strength of Portland cement with the lightweight, workable qualities of paper pulp, this hybrid medium opens up an extraordinary range of creative possibilities. Whether you are an experienced sculptor or just beginning your artistic journey, cement paper clay offers a forgiving texture and excellent adhesion that makes it ideal for building three-dimensional forms of almost any size or complexity.
Unlike traditional concrete, which is heavy, rigid, and difficult to manipulate once mixed, cement paper clay behaves more like a soft modeling clay while wet. It can be pressed into molds, hand-built into organic shapes, applied over armatures, or carved after it has partially set. The paper fibers interlocked throughout the mixture give it a surprising tensile strength that helps prevent cracking during the drying process — one of the most frustrating challenges artists face when working with straight cement mixes.
The history of combining cellulose fibers with cement is actually quite old, stretching back to early experiments in fiber-reinforced building materials. Modern artists have refined these principles into a studio-friendly recipe that can be made at home with minimal equipment. The resulting sculptures are durable enough to be displayed outdoors, resistant to frost in many climates, and capable of accepting paints, stains, sealers, and patinas with beautiful results. Understanding this material from the ground up is the first step toward making it work for your creative vision.
Materials and Ingredients You Will Need
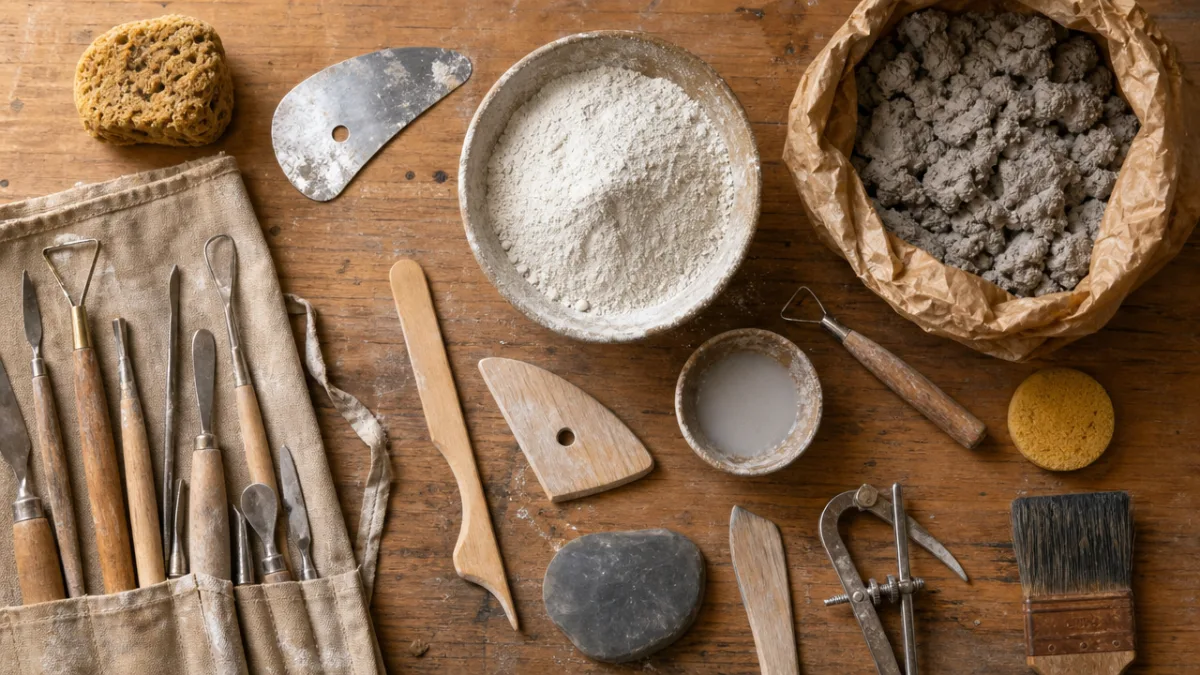
Gathering the right materials before you begin mixing is essential to achieving a consistent and workable cement paper clay. The quality of your ingredients directly affects the final texture, strength, and workability of the finished mixture. Fortunately, most of what you need is either readily available at hardware stores or can be made from everyday household materials. Taking time to source good-quality components will save you considerable frustration later in the process.
Portland cement is the backbone of this recipe and should not be substituted with premixed concrete products that contain sand or gravel, as these aggregates will interfere with the smooth, plastic quality you are trying to achieve. White Portland cement is especially popular among sculptors because it produces a lighter base color that is easier to paint or stain afterward, though grey Portland cement works equally well for pieces that will be painted over completely. You will also need some form of fine perlite or fine silica sand to add body to the mixture without introducing coarse texture.
The paper pulp component is what transforms ordinary cement into a pliable, sculptural medium. You can make your own pulp by soaking torn newspaper, paper towels, or toilet paper in water for several hours, then blending the wet paper until it forms a smooth, fiber-rich slurry. Some artists prefer to use commercial paper mache pulp or pre-dried cellulose fiber, both of which dissolve quickly and produce a very consistent result. Additional materials you will want to have on hand include:
- Plastic drop cloths or silicone mats to protect your workspace
- Rubber or nitrile gloves, as Portland cement is highly alkaline and can irritate skin
- A large mixing bucket or tub with a capacity of at least five gallons
- Measuring cups or a kitchen scale for consistent ratios
- A stiff palette knife, putty knife, or loop tools for shaping
- A spray bottle filled with water to keep surfaces moist during sculpting
- Wire armature materials such as galvanized steel wire or chicken wire for larger pieces
- A dust mask or respirator rated for fine particulates
Optional but highly recommended additives include acrylic polymer medium, which dramatically improves the adhesion and flexibility of the cured clay, and fine fiberglass or hemp fibers for extra reinforcement in thin sections. A small amount of white glue or PVA can also be worked into the mix to improve workability and reduce cracking. Having all of your tools and materials organized and within reach before you begin mixing makes the process much smoother, especially since cement begins to set once it has been hydrated and you will want to work efficiently without interruptions.
Mixing the Perfect Cement Paper Clay
The mixing process is where the magic of cement paper clay truly begins, and getting the proportions right is critical to producing a material that handles beautifully and cures without cracking. A widely used starting ratio by volume is one part Portland cement to one part paper pulp to one part perlite or fine sand, with enough water added gradually to bring the mixture to a smooth, lump-free consistency roughly comparable to thick peanut butter. This is not a rigid formula — experienced artists often adjust proportions based on the ambient temperature, the dryness of their pulp, and the specific application they have in mind.
Begin by placing your paper pulp in the mixing container and squeezing out as much excess water as possible. The pulp should be damp but not dripping wet, as too much water in the pulp will throw off your cement-to-water ratio and produce a weaker final material. Add your dry Portland cement and perlite to the pulp and begin combining them by hand or with a stiff stirring tool, working through the mixture thoroughly to break up any clumps of cement and distribute the fibers evenly. This initial dry-to-wet incorporation is important — rushing past it tends to leave dense pockets of unmixed cement in the finished clay.
Once the dry ingredients are well incorporated into the pulp, begin adding small amounts of clean water, kneading constantly between additions. If you are using acrylic polymer medium, substitute it for roughly half the water in your recipe for significantly improved results. Continue working the clay until it no longer sticks aggressively to your hands and holds a form when pressed into a ball without slumping. The ideal consistency is one where you can push a finger into the clay and the impression holds cleanly without the walls collapsing inward. If the mixture feels too stiff, add water in very small increments; if it feels too wet and sticky, knead in a little additional cement.
One important practice is to mix only as much cement paper clay as you can use within approximately two to three hours, as the cement begins to set during that window and the material becomes progressively less workable over time. In hot or dry conditions, the working window may be even shorter. You can extend the working life slightly by keeping the clay in a sealed plastic bag or covered with a damp cloth between sessions, but attempting to rehydrate cement clay that has already begun to cure will compromise its structural integrity significantly. Smaller, more frequent batches are nearly always preferable to one large batch that partially sets before you can use it.
Building and Sculpting Techniques
Once your cement paper clay is mixed to the right consistency, the real creative work begins. This material responds beautifully to a wide range of hand-building and sculpting approaches, many of which will feel immediately familiar to anyone who has worked with earthen clay or paper mache. Because it does not need to be fired in a kiln and sets through a chemical hydration reaction rather than heat, it opens up possibilities for very large-scale work, outdoor installation, and the incorporation of embedded objects or mixed media elements that would not survive traditional ceramic firing.
For small to medium sculptures, direct hand-building is the most intuitive approach. You can pinch, coil, or slab-build the clay much as you would with earthen clay, adding fresh clay to build up forms and using loop tools or palette knives to refine surfaces. Keeping a spray bottle nearby is essential — misting both your hands and the surface of the sculpture frequently prevents the outer layer from drying faster than the interior, which is the primary cause of surface cracking. Pay particular attention to thin areas like outstretched limbs or protruding details, which are most vulnerable to drying too quickly.
Larger sculptures almost always benefit from an internal armature that provides structural support during building and helps the piece maintain its shape while drying. A simple armature can be constructed from galvanized wire twisted into the rough outline of your intended form, then wrapped with crumpled aluminum foil or chicken wire mesh to create a surface for the clay to grip. Apply the cement paper clay in layers no more than about one centimeter thick, allowing each layer to firm up slightly before adding the next. This staged approach reduces slumping in complex overhanging forms and gives you the opportunity to refine your design as each layer reveals the emerging shape more clearly.
For those interested in texture and surface detail, cement paper clay is remarkably responsive to a wide variety of tools and techniques. Stamps, texture mats, found objects, and carved foam blocks can all be pressed into the surface while the clay is still soft to create rich patterns and marks. As the clay begins to firm but has not yet fully hardened — a stage sometimes called the leather-hard state — you can carve into it with knives, dental tools, or wire loop tools to create incised lines, subtract material from raised areas, or refine edges. This intermediate state, which typically arrives within a few hours of building depending on thickness and humidity, is one of the most satisfying windows of time to work in because the material holds detail crisply without tearing or smearing.
Curing, Drying, and Finishing Your Sculpture
Properly curing and drying your cement paper clay sculpture is just as important as the mixing and building stages, and many otherwise beautiful pieces are damaged at this point by impatience or improper conditions. Unlike earthen clay, which simply dries through water evaporation, Portland cement undergoes a chemical hydration reaction that requires moisture to complete. This means that paradoxically, keeping your sculpture slightly damp during the first several days of curing actually produces a stronger final result than letting it dry out as quickly as possible. The goal is a slow, even cure that allows the cement crystals to develop fully throughout the entire thickness of the piece.
Cover your finished sculpture loosely with plastic sheeting for the first two to three days after completion, misting it with water once or twice daily if it appears to be drying too quickly in a warm environment. After this initial curing period, allow the piece to continue drying slowly in a shaded, well-ventilated space away from direct sun or strong heat sources, which can cause the outer surface to cure faster than the interior and lead to surface cracking. Depending on the thickness of your sculpture, full curing and drying may take anywhere from one week to several weeks. You will know the piece is fully dry when it has lightened to a uniform pale grey or white throughout and feels genuinely hard when tapped.
Once your sculpture is fully cured and dry, a world of finishing options opens up. Because cement paper clay has a naturally porous surface, it accepts paint remarkably well — acrylic paints, latex house paints, and specialty concrete stains all perform well on this material. For a stone-like appearance, layering washes of grey, ochre, and black acrylic paint and then sanding lightly between coats produces a convincing faux-stone effect. Iron-based reactive paints can be applied and then treated with acids or vinegar to develop genuine oxidized rust patinas, creating surfaces of extraordinary richness and depth. Metallic powders mixed into a matte medium and burnished onto the high points of textured surfaces mimic cast bronze or hammered copper with impressive realism.
Sealing your finished and painted sculpture is strongly recommended, particularly for pieces intended for outdoor display. An exterior-grade concrete sealer or penetrating masonry sealant applied in two or three thin coats will significantly improve the piece’s resistance to moisture penetration, freeze-thaw cycles, UV fading, and biological growth such as moss and algae. Reapplying sealer every two to three years for outdoor pieces will extend their lifespan dramatically. For indoor sculptures, a simple coat of matte or satin varnish over the finished paint is generally sufficient to protect the surface from handling and dust accumulation while preserving the desired surface quality.
Troubleshooting Common Problems
Even experienced artists encounter challenges when working with cement paper clay, and understanding the most common problems and their causes makes them much easier to prevent or resolve. Cracking is by far the most frequently reported issue, and it nearly always has one of three root causes: too much water in the original mix, drying that occurs too quickly, or building up sections that are too thick without adequate armature support. Hairline surface cracks that appear during drying can often be repaired by wetting the area thoroughly and pressing in fresh clay, blending the patch carefully with a damp finger or tool before allowing it to re-cure slowly under plastic.
Weakness or crumbling in the finished piece usually indicates that the cement-to-pulp ratio was off during mixing, typically with too much paper and not enough cement to create adequate binding. It can also result from adding too much water during mixing, which dilutes the cement paste and produces a porous, weak matrix. If your finished sculpture feels surprisingly light and chalky rather than dense and stone-like when fully cured, it is a sign that future batches need less water and possibly a slightly higher proportion of Portland cement. Adding a small amount of acrylic polymer to the mix addresses this problem very effectively and is a worthwhile habit to adopt from the beginning.
Adhesion failures, where fresh clay refuses to bond properly to an existing layer or an armature surface, are another common frustration. Cement paper clay bonds best to surfaces that are slightly damp and have some texture for mechanical grip. If you are adding clay to a layer that has already begun to cure, thoroughly wet the existing surface with water or a diluted acrylic medium solution immediately before applying fresh clay. Scoring the surface with a fork or wire brush to create a rough texture before wetting it improves adhesion significantly. For armatures, wrapping bare wire with burlap soaked in diluted PVA glue provides an excellent base for the clay to grab onto.

Inspiration, Ideas, and Creative Applications
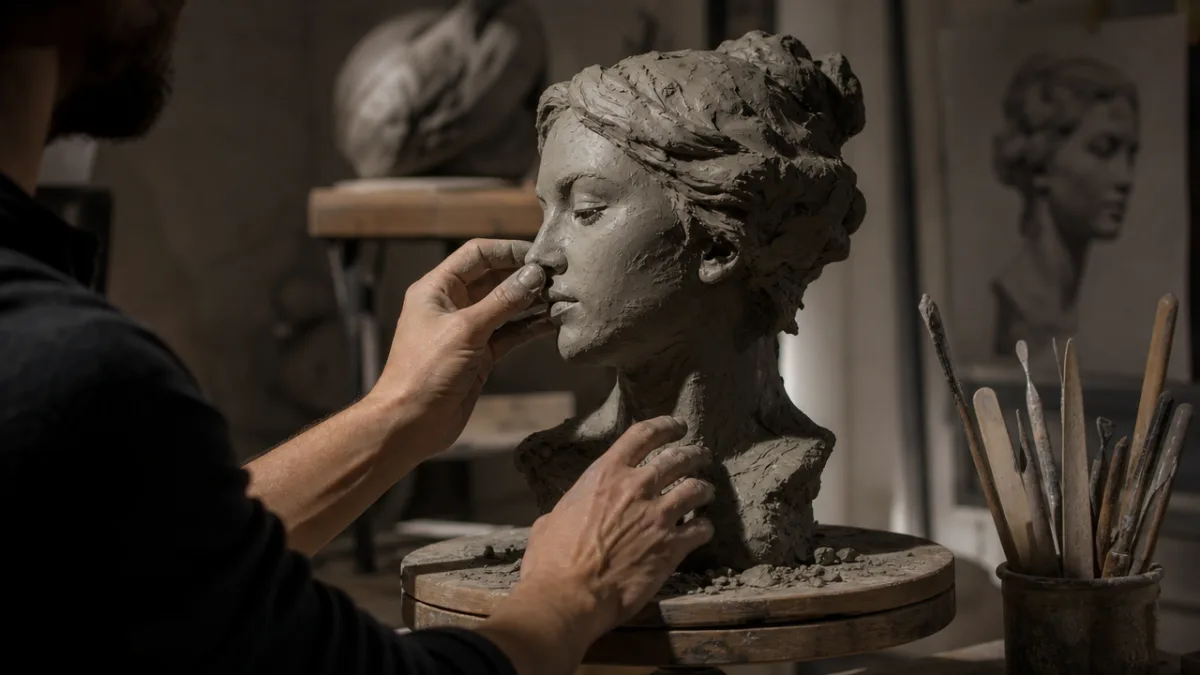
The creative potential of cement paper clay extends far beyond simple garden ornaments, though it certainly excels in that application. Artists working in this medium have produced everything from intimate portrait busts and figurative sculptures to large-scale abstract installations, architectural embellishments, functional vessels, and elaborate relief panels. The material’s ability to be worked slowly over multiple sessions, its compatibility with embedded objects, and its durability in outdoor environments make it uniquely well-suited to ambitious, long-term projects that would be impractical in more delicate media.
Garden and landscape sculpture is perhaps the most popular application, and for good reason. Cement paper clay weathers beautifully over time, gradually developing a patina of weathering that many artists feel actually improves the appearance of their work. Birdbaths, garden totems, decorative stepping stones, planter faces, and wall-mounted relief tiles are all well within reach even for beginners. The relative affordability of the ingredients means that large garden installations that would cost hundreds or thousands of dollars in cast bronze or carved stone can be made for a fraction of the price, opening up ambitious outdoor projects to artists at every budget level.
For those interested in exploring more conceptual or fine-art directions, cement paper clay offers an interesting tension between industrial material and handmade process that many contemporary artists find creatively productive. The roughness and weight of cement carries cultural associations with construction, infrastructure, and permanence, while the hand-building process and paper fiber component connect it to more intimate, domestic craft traditions. Work that exploits this tension — delicate organic forms rendered in a material that reads as structural and heavy, or domestic objects scaled up to monumental proportions — tends to be particularly compelling and thought-provoking.
Beyond purely decorative or fine-art applications, cement paper clay has genuine functional uses that are worth exploring. Lightweight planters, sculptural fountains, custom furniture accents, architectural details for theatrical set design, and one-of-a-kind signage are all practical applications where this material performs beautifully. The ability to cast it into molds or press it over forms means that once you have made a successful master sculpture, limited editions are entirely achievable by making flexible rubber or plaster molds from the original and pressing fresh clay into them. This replication capacity bridges the gap between unique handmade objects and affordable, producible work in a way that few other sculptural media can match.








What do you think?
It is nice to know your opinion. Leave a comment.