










Long Tool Organizer Cart Made With CNC-Cut Plywood: The Ultimate Guide to Garage Organization
Introduction: Why Your Garage Deserves a Proper Tool Storage Solution
If you’ve ever spent twenty minutes searching for a rake buried behind a collection of mismatched brooms, or tripped over a shovel leaning precariously against the wall, you already understand the frustration of a disorganized garage. Long-handled tools like brooms, rakes, shovels, hoes, and garden forks are among the most difficult items to store efficiently because their awkward length and varied head shapes make them nearly impossible to stack neatly. A dedicated tool organizer cart built from CNC-cut plywood offers an elegant, durable, and surprisingly affordable solution to this universal problem.
The appeal of a CNC-plywood tool organizer cart goes beyond mere functionality. When you combine the precision of computer-controlled cutting with the natural warmth and strength of quality plywood, you get a piece of shop furniture that looks intentional and professional rather than cobbled together from leftover lumber. Unlike pegboard systems that sag over time or plastic wall hooks that crack under the weight of heavy tools, a well-designed plywood cart can last decades and even become a cherished fixture of a well-organized workshop or garage.
This guide walks you through everything you need to know about planning, building, and outfitting your own long tool organizer cart. Whether you have access to a CNC router or plan to adapt the design for hand or power tools, the principles remain the same: thoughtful design, quality materials, and a clear organizational logic that makes your tools easy to grab and easy to return. The investment in time and materials pays off every single time you walk into your garage and find exactly what you need in seconds.
Understanding CNC-Cut Plywood as a Building Material
CNC, or Computer Numerical Control, machining has transformed woodworking by making it possible for even hobbyist makers to cut complex shapes and joinery with extraordinary accuracy. A CNC router follows digital design files — typically created in software like Fusion 360, VCarve, or even free tools like Easel — to cut, carve, and drill plywood with tolerances measured in fractions of a millimeter. For a tool organizer cart, this precision matters enormously because tight-fitting slots and dados create structural rigidity without the need for metal fasteners at every joint.
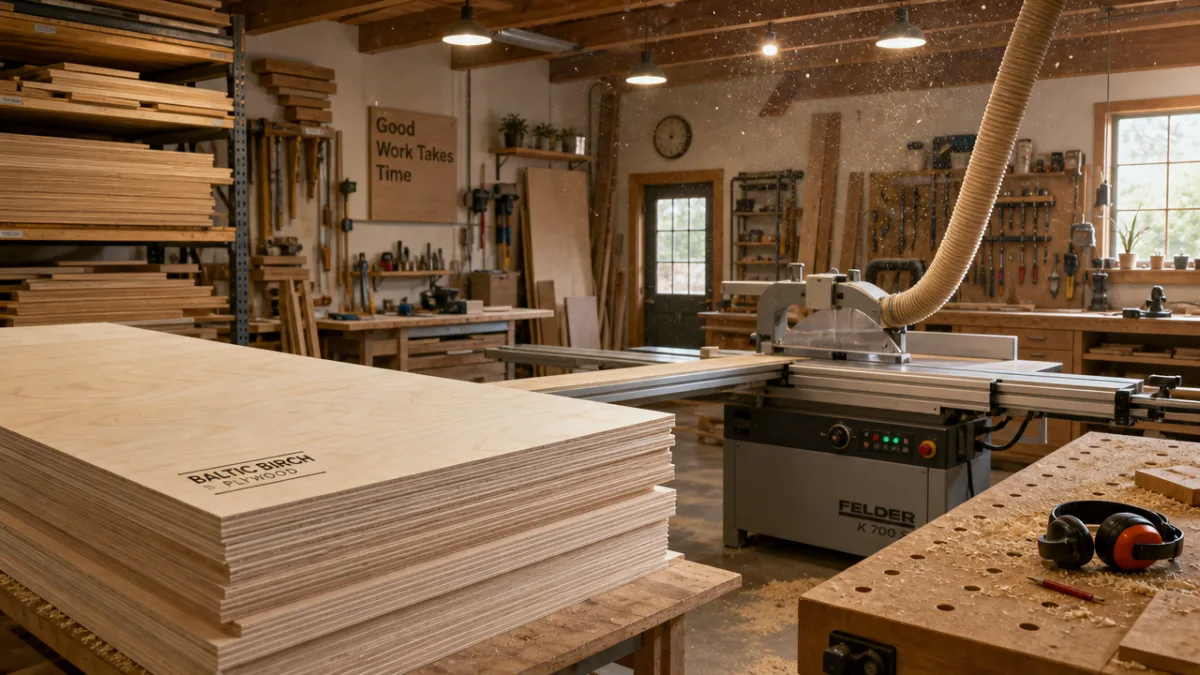
For this type of project, Baltic birch plywood is the material of choice among serious makers. Unlike construction-grade plywood, which can contain voids, knots, and delaminated layers, Baltic birch is made from thin, consistent veneers of birch throughout its entire thickness. This makes it exceptionally strong, stable, and beautiful when the edges are exposed — and in a CNC project, exposed edges are often a design feature rather than something to hide. Common thicknesses for a tool cart of this scale are 12mm and 18mm, with thicker panels used for structural members and thinner sheets for dividers and lightweight panels.
One of the greatest advantages of the CNC approach is repeatability. If you want to build a second cart for a friend or a neighbor, you simply run the same files again with fresh sheets of plywood. The digital design file also makes it easy to customize dimensions before cutting — perhaps you need a slightly taller cart to accommodate extra-long-handled tools, or a narrower footprint to fit a tight corner in your garage. Making those changes in software takes minutes, whereas modifying a traditionally built piece would require re-measuring and re-cutting every component by hand.
Before committing to a material purchase, it’s worth considering the finish you want. Raw Baltic birch sands beautifully and takes water-based polyurethane or hardwax oil finishes very well, resulting in a light, warm tone that brightens a garage space. For heavier-duty environments where moisture and grime are concerns, a coat of oil-based polyurethane or even exterior-grade varnish adds an extra layer of protection. Some builders also apply a light stain to give the piece more visual depth and to help it coordinate with other shop furniture they may already own.
Designing the Cart: Key Dimensions and Layout Considerations
Before a single line of code is sent to the CNC router, a successful build starts with a clear and thoughtful design. The first question to answer is how many tools you need to store and what their maximum handle length is. Standard garden tools like rakes and shovels typically have handles between 48 and 72 inches long. A cart that stands roughly 18 to 24 inches tall with an upper slot panel at that height and a lower base panel resting on casters will accommodate nearly all standard long-handled tools without requiring you to tilt them at an awkward angle.
The slot design at the top of the cart is where most of the engineering creativity lives. Individual slots cut with a CNC router can be sized precisely for different tool types — a wider, rounded slot for a heavy snow shovel, a narrower slot for a garden hoe, a split V-shaped channel for broom handles of varying diameters. By labeling each slot or color-coding them with a simple strip of paint or tape, you create an organizational system that makes returning tools to their correct place intuitive even after a long afternoon of yard work. Grouping slots by tool category — garden tools together, cleaning tools together, snow removal tools together — further streamlines the experience.
The base of the cart deserves as much attention as the slot panel. A wide, heavy base prevents the fully loaded cart from tipping when you pull out a single heavy tool from one side. Adding swiveling locking casters to the base is a game-changer: it transforms the cart from a static storage unit into a mobile tool caddy that you can wheel to the garden gate, the driveway, or wherever the work is happening that day. Four heavy-duty casters rated for at least 150 pounds each are typically sufficient for a cart of this type loaded with a full complement of tools.
Many designers also incorporate a secondary lower rail or crossbar that runs horizontally near the middle of the cart, creating a second point of contact for long tool handles. This prevents tools from swinging and clanging against each other as you move the cart and also adds structural stiffness to the uprights. Some versions of this design include small hooks or clips mounted to the uprights for storing shorter tools, coiled hoses, or bags of garden accessories, maximizing every square inch of available storage real estate.
Step-by-Step Build Process: From Digital File to Finished Cart
With your design finalized and your plywood sourced, the first step in the actual build is preparing your CNC files for cutting. Most CNC designs for furniture use a technique called dogbone or T-bone relief cuts at inside corners, compensating for the round bit’s inability to cut a perfectly square inside corner. These small circular notches are invisible in the finished piece but are critical for allowing mating parts to fit together flush. If you’re new to CNC woodworking, many community makerspaces and online forums offer pre-made files for tool carts that you can download and adapt to your specific dimensions.
Once the parts are cut, a typical dry-fit is essential before reaching for the glue. Lay all the pieces out on a flat surface, identify each component according to your design file, and assemble the cart without any adhesive to verify that everything fits correctly. CNC cutting is precise, but variables like bit deflection, material thickness variation, and file tolerances can occasionally result in parts that are slightly too tight or too loose. A few passes with a shoulder plane or a sheet of sandpaper wrapped around a flat block can fine-tune any joint that needs adjustment before glue-up makes everything permanent.
The glue-up stage is where having a helper makes a significant difference. Apply a thin, even coat of quality woodworking PVA glue to mating surfaces, assemble the joints, and clamp everything square. For a large cart, assembly in stages — gluing the two side frames first, letting them cure overnight, then joining them with the cross members — is more manageable than attempting a full single glue-up. Check for square by measuring the diagonals; if both diagonals are equal, the assembly is square and can be left to cure without further adjustment.
After the glue has cured fully, typically 24 hours for most PVA adhesives under moderate shop conditions, the surface preparation begins. Start with 120-grit sandpaper to remove any glue squeeze-out and level any minor misalignments between panels. Progress through 180-grit and finish with 220-grit for a surface that’s ready to accept your chosen finish. Pay special attention to the edges of the slot panel, where the plywood layers are exposed; a light chamfer on each slot edge not only looks refined but also prevents the slot edges from chipping or splintering as tool handles slide in and out over years of use.

Finishing, Customization, and Personalization Options
A plain natural plywood finish is perfectly functional and has a timeless, Scandinavian workshop aesthetic that many makers love. However, the finishing stage is also your best opportunity to add personality and make the cart uniquely yours. One popular approach is to apply a single bold accent color to the interior faces of the uprights — a deep navy blue, forest green, or matte black — while leaving the exterior and the slot panel in their natural plywood finish. The contrast creates a visually striking piece that stands out as a considered design object rather than a purely utilitarian fixture.
Labeling is an underrated aspect of tool storage design that dramatically improves usability. CNC routers can engrave text and simple graphics directly into the plywood surface during the cutting phase, creating permanent, tactile labels that never peel or fade. Engraved tool silhouettes or names next to each slot communicate instantly where each tool belongs. Alternatively, a label maker and clear adhesive tape applied after finishing works just as well for those who want the flexibility to rearrange their organizational system as their tool collection evolves over time.
Consider adding these optional enhancements to take your cart to the next level:
- A pegboard or slotted panel side wall for hanging smaller hand tools like trowels, pruners, and gloves
- A small shelf or tray mounted near the base for storing seed packets, work gloves, or kneeling pads
- Rubber-lined slots to protect delicate tool handles and reduce rattling noise when the cart is in motion
- A fold-down work surface attached to one side for quick potting or mixing tasks
- Integrated cord management hooks for extension cords or garden hose loops
- A magnetic strip mounted to an upright for storing metal-handled tools or small ferrous accessories
No two garages are identical, and the beauty of a custom-built solution is that it can be adapted to fit your specific space and workflow. If your garage has a low ceiling, the cart can be designed to roll under a workbench when not in use. If your tool collection skews heavily toward snow removal equipment for several months of the year, one side of the cart can be dedicated entirely to snow tools with extra-wide slots sized for heavy snow shovels and ice scrapers. The CNC file is just a starting point; every parameter is adjustable to suit your reality.
Maintenance, Safety, and Long-Term Care of Your Organizer Cart
A well-built plywood tool cart requires very little maintenance, but a few simple habits will extend its life significantly and keep it looking great for years. The most important practice is keeping the cart in a reasonably dry environment. Plywood is dimensionally stable compared to solid wood, but prolonged exposure to standing water or extreme humidity cycles can cause surface delamination or swelling at the edges over time. In garages that experience high humidity in summer, a coat of spar varnish on the underside of the base panel adds meaningful protection against moisture wicking up from the concrete floor.
Inspect the casters periodically, perhaps at the start of each season, to ensure that the wheel bearings are still rolling smoothly and that the mounting hardware remains tight. Casters on a heavily loaded cart experience significant stress, especially when the cart is rolled across the threshold between a garage and a driveway. Replacing worn or seized casters is inexpensive and takes only a few minutes with a screwdriver, and doing so proactively prevents the frustration of a cart that drags or wobbles at the worst possible moment.
Safety is worth addressing directly in any guide about storing long-handled tools. Even a well-designed cart can tip if you consistently overload one side with heavy tools while leaving the other side empty. Develop the habit of distributing weight evenly across the slot panel, alternating heavy and light tools from left to right. When the cart is parked in its storage position, engage the locking mechanism on at least two of the four casters to prevent it from rolling unexpectedly if someone bumps it or if the garage floor has a slight slope.
Finally, think about the long-term evolution of your tool collection and how the cart can grow with it. Because the design is modular by nature, it’s entirely feasible to build a second identical cart and connect the two side by side, effectively doubling your capacity as your collection of long-handled tools expands. Alternatively, the slot panel can be replaced with a redesigned version that accommodates new tool profiles without requiring you to rebuild the entire cart from scratch. This kind of forward-thinking design philosophy — building in adaptability from the beginning — is what separates truly excellent shop furniture from storage solutions that become obsolete within a few years.

Cost Analysis and Comparison With Commercial Alternatives
One of the most compelling arguments for building your own CNC-plywood tool organizer cart is the economics. A sheet of quality Baltic birch plywood typically costs between $70 and $120 depending on thickness and regional availability, and a cart of this type requires roughly two to three sheets of material. Add in a set of quality casters at $30 to $60, wood glue, sandpaper, and finish, and your total material cost lands somewhere between $200 and $350 for a cart that would retail for $400 to $800 or more if purchased as a finished commercial product — assuming you could even find a commercial equivalent of comparable quality and customization.
Commercial tool storage options for long-handled garden tools are frankly limited in both quality and design. Most mass-market solutions consist of thin-walled steel racks, flimsy plastic wall-mount organizers, or simple lumber frames that require assembly with hardware that quickly loosens under the weight of real tools. None of these options offer the clean aesthetic, the rolling convenience, or the built-to-measure sizing of a custom CNC cart. When you factor in the longevity of a properly finished plywood piece versus a powder-coated steel rack that begins to rust within a few seasons of garage life, the value proposition of the DIY approach becomes even clearer.
For makers who don’t own a CNC router themselves, the cost picture shifts slightly but remains favorable. Many community makerspaces charge between $10 and $30 per hour for CNC router time, and a project of this scope typically requires two to four hours of machine time. Alternatively, a growing number of online services — including those operated by major plywood suppliers — accept digital design files and ship pre-cut flat-pack parts directly to your door. These services democratize CNC woodworking for makers who don’t live near a makerspace, making a project like this accessible to virtually anyone with a design file, a few basic hand tools for assembly, and the motivation to build something lasting and genuinely useful.








What do you think?
It is nice to know your opinion. Leave a comment.