










How to Make Concrete Mushrooms: A Complete Craft Guide
Introduction to Concrete Mushroom Crafting
Concrete mushrooms have become one of the most charming and enduring garden craft projects for hobbyists and serious crafters alike. These whimsical sculptures bring a touch of fairy-tale magic to any outdoor space, from sprawling backyard gardens to modest apartment balconies. What makes them so appealing is the beautiful contradiction they represent — a material as industrial and heavy-duty as concrete shaped into something as delicate and playful as a forest mushroom. The finished pieces look as though they belong in an enchanted woodland, yet they’re tough enough to withstand rain, frost, and years of outdoor weathering.
The craft itself is surprisingly accessible to beginners. Unlike many sculptural techniques that require expensive tools, years of training, or specialized studio space, concrete mushroom making relies on simple household items and a handful of affordable materials. A bag of concrete mix, some basic molds, a little patience during the curing process, and you’re well on your way to creating something genuinely beautiful. The learning curve is gentle, and even your first attempt is likely to produce results you’ll be proud to display in your garden or give as a heartfelt handmade gift.
Beyond their aesthetic appeal, concrete mushrooms carry a satisfying permanence that many craft projects simply can’t match. Unlike painted wood or resin pieces that may fade or degrade over time, properly sealed concrete sculptures develop a beautiful patina as they age, often looking even more natural and organic after a season outdoors. Moss and lichen will sometimes take hold on their surfaces, blending them seamlessly into the garden landscape and making them look as though they’ve always been there. This longevity makes the time and effort invested in creating them feel especially worthwhile.
Why Concrete Is the Perfect Medium for Garden Sculptures
Concrete has been used in decorative arts for centuries, and for good reason. Its workability during the wet phase allows crafters to shape, texture, and detail their pieces with remarkable precision, while its strength once cured ensures those details are preserved for decades. For garden mushrooms specifically, the texture of concrete lends itself beautifully to mimicking the rough, earthy appearance of real fungi. You can stipple the surface with a sponge, press leaf textures into the cap, or carve subtle lines to replicate the gills beneath a mushroom’s umbrella — all while the mix is still pliable.
Another major advantage is concrete’s weight. While this might seem like a drawback at first, a heavy sculpture is actually a significant benefit in a garden setting. Lightweight decorations get knocked over by wind, displaced by curious animals, or even stolen. A concrete mushroom, once placed, stays exactly where you put it. This stability allows you to position your sculptures with precision, confident that they’ll remain exactly as arranged through seasons of weather and wildlife activity. Their heft also contributes to their sense of permanence and quality — these feel like real objects with substance and intention behind them.
Concrete also accepts paint, stains, and sealers extremely well, giving crafters enormous creative flexibility in the finishing stage. You can go naturalistic with earthy browns, reds, and creams, or lean into the whimsical with bright toadstools in classic red-and-white spotted patterns reminiscent of fairy tales and folklore. The surface can be left matte for a more organic look or sealed to a subtle sheen for pieces you want to display on a covered porch or indoors. This adaptability means that no two concrete mushroom projects need look alike, making each one a genuinely personal creative expression.
Materials and Tools You Will Need
Essential Supplies for Your Project
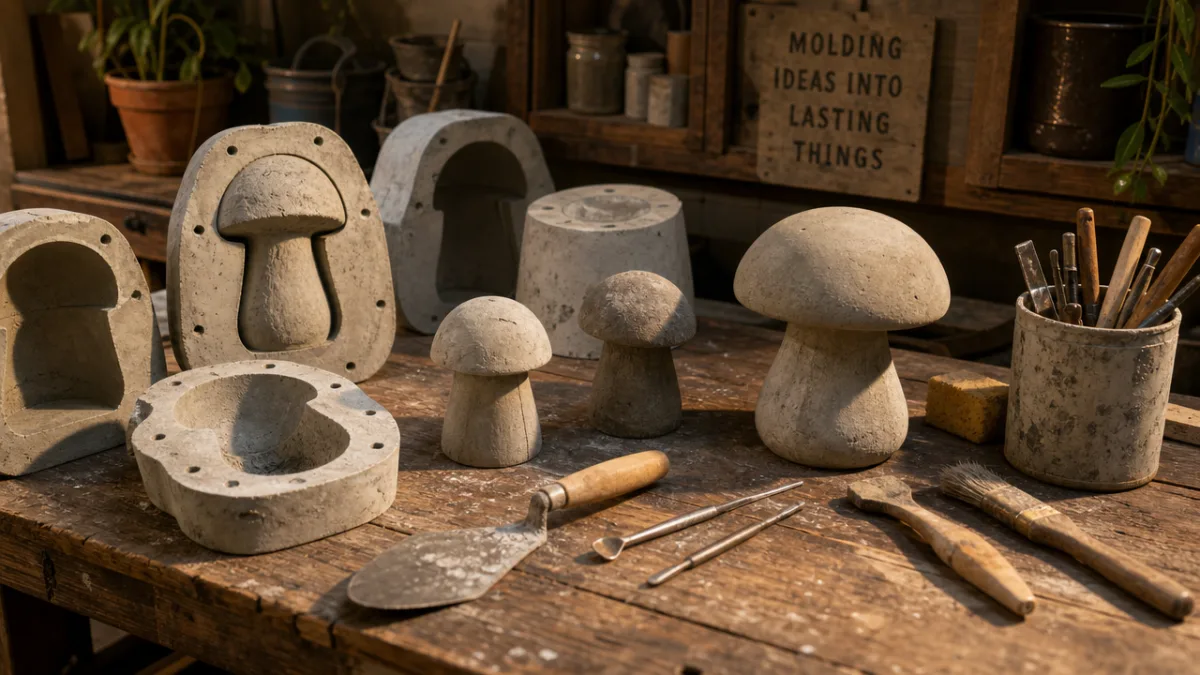
Gathering the right materials before you begin will make the entire process smoother and more enjoyable. The foundation of your supply list is, of course, concrete mix. For most decorative mushroom projects, a standard sand mix or a blended craft concrete works beautifully. These mixes have a finer aggregate than standard construction concrete, which allows for better detail and a smoother finish on smaller pieces. You can find these at most hardware stores, garden centers, or online craft suppliers. A small bag will be more than enough to make several mushrooms of varying sizes.
For molds, the options are wonderfully creative and largely free. Many crafters use everyday items found around the house to shape their mushroom caps and stems. The list of useful mold materials is surprisingly long and encourages a resourceful, waste-reducing approach to crafting. Before you buy anything specialized, take a look through your kitchen cabinets and recycling bin — you may already have everything you need.
- Plastic bowls, mixing bowls, and colanders in various sizes for mushroom caps
- PVC pipe sections or cardboard tubes for the stems
- Rubber gloves to protect your hands from alkaline concrete
- A stiff brush or sponge for texturing the surface
- Petroleum jelly or cooking spray to use as mold release agent
- Acrylic paints and outdoor sealant for finishing
- A plastic bucket or tub for mixing the concrete
- Wire mesh or fiberglass mesh for reinforcing larger pieces
- A spray bottle filled with water for misting during curing
- Sandpaper in medium and fine grits for smoothing finished surfaces
In addition to these basics, there are several optional materials that can elevate your results significantly. Concrete pigments allow you to color the mix itself rather than painting the surface later, creating richer, more integral color that won’t chip or peel. Fiber reinforcement additives can be mixed into your concrete to reduce cracking, which is particularly useful for the slender stems of taller mushrooms. If you plan to make a large number of mushrooms, investing in commercial silicone molds designed specifically for concrete garden ornaments is well worth the modest cost, as they produce consistently professional results.
Step-by-Step Instructions for Making Concrete Mushrooms
Preparing Your Molds and Mixing the Concrete
Before you mix a single gram of concrete, preparation is everything. Start by applying your mold release agent — petroleum jelly, cooking oil spray, or commercial mold release — generously to every interior surface that will come into contact with the wet concrete. Be thorough and get into every corner and curve. If you skip this step or apply it unevenly, you risk your mushroom bonding to the mold and breaking apart during demolding. Give the release agent a few minutes to settle, and then apply a second thin coat for extra insurance on any particularly detailed or textured surfaces.
Mixing the concrete to the right consistency is the single most important technical skill in this craft. Too dry and the mix will be crumbly, difficult to pack into molds, and prone to cracking as it cures. Too wet and it will slump, lose detail, and cure weak. The ideal consistency is often described as “peanut butter” — thick, workable, and sticky enough to hold its shape when you press it against the side of your mold without slumping back down. Add your water gradually, a little at a time, mixing thoroughly between additions. If you overshoot and the mix becomes too wet, you can add a small amount of dry mix to compensate.
Once your mix is ready, work efficiently but without rushing. Concrete begins to set within 30 to 45 minutes of mixing, so you don’t want to dawdle, but you also shouldn’t feel pressured to rush and make mistakes. Pack the concrete firmly into your cap mold, working it into all the curves and edges to eliminate air pockets, which can cause weak spots or surface voids in the finished piece. Tap the mold gently on your work surface several times after filling to help any trapped air bubbles rise and escape. For the stem, pack concrete tightly into your tube mold, ensuring it is evenly filled from top to bottom.
Curing, Demolding, and Assembling
Patience is perhaps the most important ingredient in successful concrete crafting. The curing process should not be rushed. Leave your filled molds undisturbed in a cool, shaded location for a minimum of 24 hours before attempting to demold. During this period, mist the exterior of the mold lightly with water every few hours if possible — this helps the concrete cure slowly and evenly, resulting in a stronger, less crack-prone finished piece. Concrete that dries too quickly in direct sunlight or dry heat is significantly weaker than concrete that is allowed to cure slowly and retain moisture.
After 24 hours, your pieces will be firm enough to handle but not yet fully cured. Gently remove the molds, working slowly and carefully. If a piece seems to be sticking, don’t force it — try flexing the mold gently if it is made of flexible plastic or rubber. Once demolded, continue the curing process by keeping the pieces in a shaded area and misting them with water twice daily for an additional 48 to 72 hours. After this extended cure, your pieces will have reached the majority of their final strength and will be ready for the next stage.
Assembling the cap and stem requires a strong bond. The most reliable method is to use a concrete bonding adhesive, available at any hardware store, applied to both surfaces before pressing them firmly together. Some crafters prefer to drill a small hole in the center of the cap and insert a threaded rod through the stem, securing the cap from above with a nut and a large washer, then filling the hole with concrete or epoxy. This mechanical connection is virtually indestructible and is recommended for larger, heavier mushrooms that will be handled frequently or placed in high-traffic garden areas.
Painting and Finishing Your Concrete Mushrooms
Choosing Colors and Painting Techniques
The finishing stage is where your concrete mushrooms truly come to life, and the color choices you make will define the entire character of the finished piece. For a naturalistic garden look, study reference photos of real woodland mushrooms — the varieties of browns, tans, creams, and oranges found in nature are surprisingly rich and varied. Layering these tones with a dry-brush technique, where you load a small amount of paint onto a stiff brush and then wipe most of it off before applying, creates an organic, dimensional look that mimics the subtle gradations of color found on real fungi.
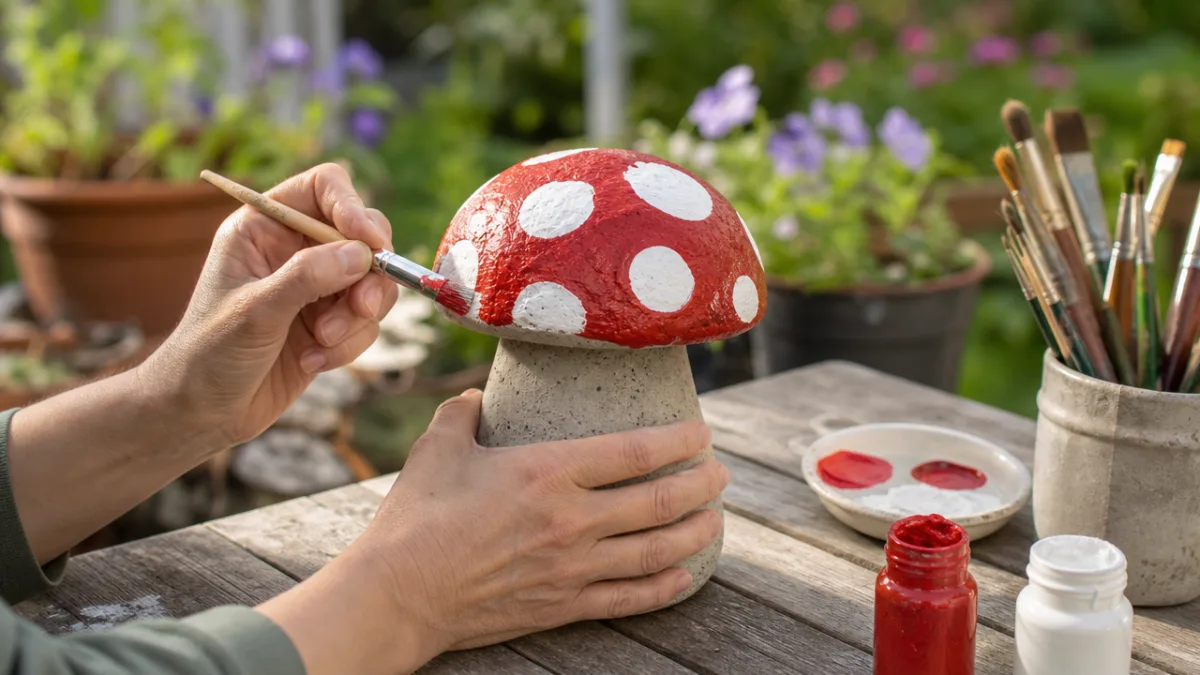
For more whimsical, storybook-style mushrooms, the classic red toadstool with white spots is always a crowd-pleaser and is actually quite simple to achieve. Start with a base coat of bright red on the cap, allowing it to dry fully before adding the spots. White spots can be painted freehand for a charmingly imperfect, hand-crafted look, or you can use circular stickers or cut sponge pieces as guides for more uniform, precise dots. The stem is typically painted in cream or pale ivory, and you can add subtle pink or lavender washes to the underside of the cap to suggest the delicate gills of a real mushroom.
Whatever color palette you choose, the key to a professional-looking finish is building up color in multiple thin layers rather than applying one heavy coat. Thin your acrylic paints slightly with water, and apply three to four light coats, allowing each to dry completely before the next. This approach builds depth and richness in the color and reduces the risk of brush marks and drips. Once you’re happy with the painted finish, protect your work with two to three coats of an exterior-grade sealer, which will guard against UV fading, moisture penetration, and the general wear and tear of outdoor life.
Advanced Finishing Techniques
For crafters looking to push their results further, there are several advanced finishing techniques that can produce truly stunning results. The antiquing or washing technique involves applying a thin, diluted wash of dark brown or black paint over a lighter base coat and then wiping most of it away before it dries. The dark pigment settles into the texture and crevices of the concrete surface, dramatically highlighting the surface detail and giving the piece an aged, weathered appearance that looks as though it has been sitting in a forest for years.
Another beautiful technique is dry-brushing with metallic or iridescent paints over a dark base coat. A light dry-brush application of bronze, gold, or soft silver paint over a dark brown or charcoal base creates a subtle shimmer that catches the light beautifully in an outdoor setting, particularly around dawn and dusk when low-angle sunlight rakes across garden surfaces. This technique works especially well on the gills and undersides of mushroom caps, suggesting a magical bioluminescence that feels entirely at home in a whimsical garden aesthetic.
Moss and lichen effects can also be created artificially for crafters who don’t want to wait for nature to colonize their pieces. A popular recipe involves blending yogurt or buttermilk with moss powder or dried crushed moss and brushing the mixture onto the concrete surface. Kept in a shaded, humid spot, this coating will encourage real moss growth over several weeks, creating a naturally overgrown appearance that is impossible to fake convincingly with paint alone. This living finish evolves continuously over time, ensuring your garden mushrooms always look fresh and organic.
Displaying and Caring for Your Concrete Mushrooms
Creative Display Ideas for Every Garden Style
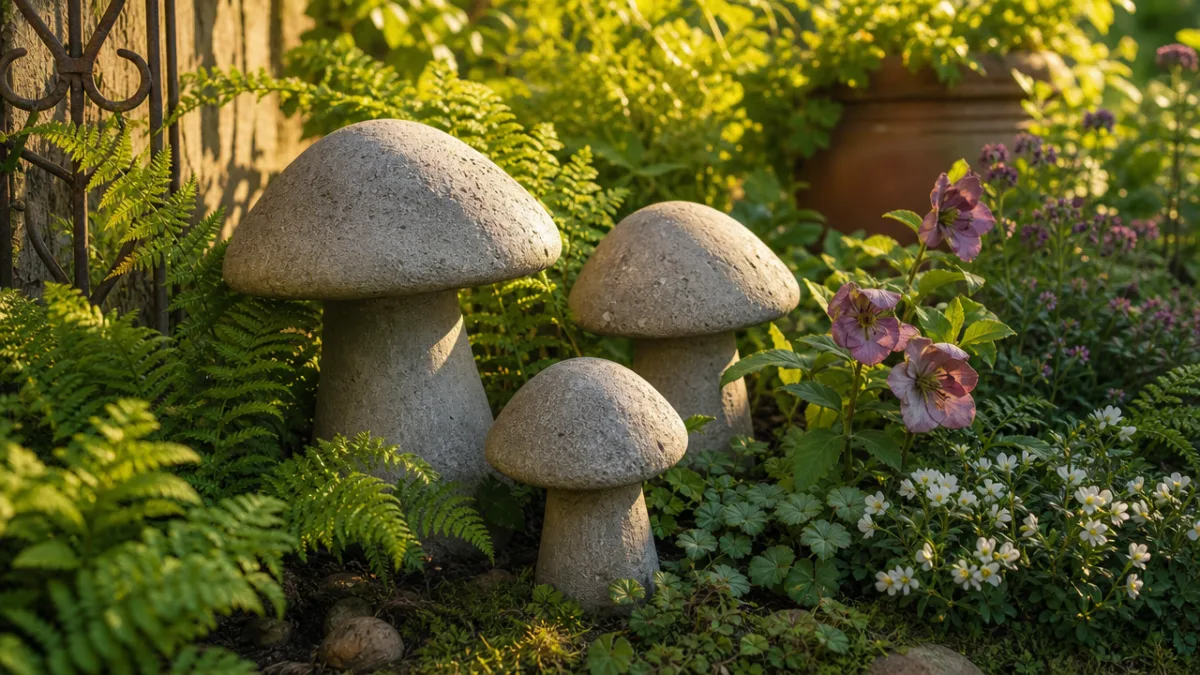
Placement is an art form in itself, and thoughtful positioning can transform individual concrete mushrooms into a truly magical garden feature. One of the most effective approaches is clustering mushrooms in odd-numbered groups of three or five, varying the sizes within each cluster to create a natural-looking colony. Real mushrooms rarely grow in isolation — they emerge in groups, and replicating this pattern lends an immediate authenticity to your display. Nestle your clusters at the base of trees, along the edges of garden beds, or tucked into corners where they’ll be discovered rather than immediately obvious.
For garden styles with a strong vertical element, consider creating a sequence of mushrooms along a garden path, as though they’re marking a fairy trail through your outdoor space. Start with larger specimens near the entrance and gradually reduce the size as they recede into the distance — this classic forced perspective technique makes even a short garden path feel longer and more mysterious. Combined with ground cover plants that spill over the path edges, this arrangement creates an immersive experience that delights both children and adults alike.
Concrete mushrooms also translate beautifully to container garden settings. A large terracotta pot planted with ferns, hostas, or woodland groundcovers and accented with one or two small concrete mushrooms creates a self-contained miniature woodland scene that works perfectly on a balcony, patio, or front doorstep. The weight of the concrete actually helps stabilize the container in windy conditions, and the neutral tones of unpainted or naturally finished concrete complement virtually any plant palette. This approach is ideal for urban gardeners who want to bring a touch of natural magic to small outdoor spaces.
Long-Term Care and Maintenance
One of the great joys of concrete garden art is its low-maintenance nature. Unlike painted wooden sculptures that require regular repainting, or metal pieces that may rust over time, properly sealed concrete mushrooms need only minimal attention to look their best year after year. An annual inspection of the sealant layer is a good habit to develop — look for any areas where the sealer appears to have worn thin, particularly on the top of the cap where sun and rain exposure is greatest. A quick clean with a soft brush and mild soapy water, followed by a fresh coat of sealer, is all that’s needed to keep your pieces looking vibrant.
In climates with hard winters, some additional care may be beneficial. While concrete is inherently weather-resistant, repeated freeze-thaw cycles can cause surface spalling over many years if water has penetrated a compromised sealant layer. If you live in a region with severe winters, consider bringing smaller mushroom pieces indoors or into a garage during the coldest months, or store them in a sheltered location where they won’t be directly exposed to freezing rain. Larger, heavier pieces can generally remain outdoors year-round if they’ve been well sealed, but placing them on a slight incline to prevent water from pooling on flat surfaces is a wise precaution.
Repairing minor cracks or chips, should they occur, is straightforward and satisfying. Small surface cracks can be filled with concrete repair caulk in a matching color, while larger chips can be patched with a small batch of fresh concrete mix tinted to match the original. Once the repair has cured and been sanded smooth, touching up the paint and resealing the repaired area will render the damage virtually invisible. The reparability of concrete is one of its most appealing qualities for the long-term crafter — these are not disposable objects but enduring pieces that can be maintained and cherished indefinitely, potentially becoming beloved features of your garden landscape for many years to come.








What do you think?
It is nice to know your opinion. Leave a comment.