










Fruit and Vegetable Bag Crochet Pattern: A Complete Beginner’s Guide to Free Market Totes
Introduction to Crochet Market Bags for Produce
Crochet market bags shaped like fruits and vegetables have taken the fiber arts world by storm, and honestly, it’s easy to see why. These cute, practical totes manage to be both actually useful and totally charming — the kind of thing that makes your weekly grocery run or farmers market trip feel a little more fun. Whether you’re drawn to a strawberry bag with tiny seed details, a bold watermelon slice in red and green, or a simple lemon-yellow drawstring pouch, don’t be surprised when strangers stop you to ask where you got it.
What makes these patterns so great for beginners is how approachable they actually are. You don’t need to tackle intricate lace or fiddly amigurumi to make something impressive — these bags really do rely on the basics. Single crochet, half double crochet, and a few simple increases and decreases are pretty much all you need. If you’ve figured out how to hold a hook and chain a foundation row, you’re already equipped to finish one of these. That high payoff for relatively little effort is exactly what makes them such satisfying first solo projects.
There’s also a genuinely good reason to make these beyond how adorable they are. Single-use plastic bags are a real problem, and a handmade cotton or hemp tote is a washable, durable, and sustainable swap. A lot of crafters find that making their own reusable bags gives them a stronger personal motivation to actually use them — it’s hard to forget your bag at home when you made it yourself. So you get a fun creative project and a small everyday win for the environment. Not a bad deal at all.
Essential Materials and Tools You Will Need
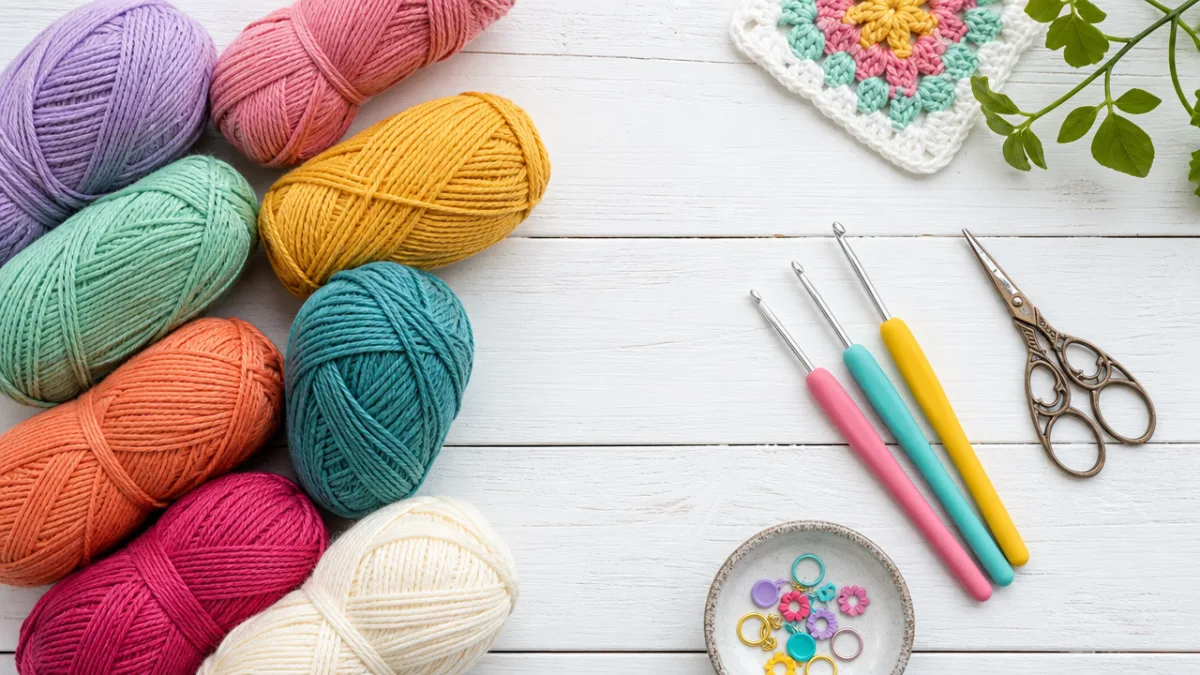
Before you dive in, having the right materials on hand will make the whole process a lot smoother. The biggest decision you’ll make upfront is your yarn. For bags that are actually going to hold produce and get regular use, cotton yarn is almost universally recommended by experienced crocheters. It’s durable, machine washable, doesn’t stretch out of shape under weight, and comes in enough colors to nail pretty much any fruit or vegetable you can think of. For most beginner patterns, worsted or DK weight cotton is the sweet spot — it works up quickly and is easy to see while you’re still learning your stitches.
Your hook size should match what your pattern calls for, but a 5mm or 5.5mm hook is a solid starting point for most worsted weight cotton bags. If you’re planning to crochet regularly, it’s worth considering an ergonomic hook with a soft rubber or silicone grip — your hands will thank you after a longer session. Beyond yarn and hook, you’ll want sharp scissors, a yarn needle for weaving in ends, stitch markers to keep track of your rounds, and a measuring tape to check your sizing as you go.
Color selection is genuinely one of the more enjoyable parts of planning a project like this. A strawberry bag, for instance, usually calls for a bright red main body, a cream or white for the little embroidered seeds, and a forest green for the leafy cap on top. A lemon bag might just need a cheerful yellow and a soft white for the rind. Most free patterns will suggest specific colors or brands, but any cotton yarn of the right weight will work fine. Laying your colors out together before you start is a great way to make sure you love the combination before you’ve committed to anything.
Understanding the Basic Stitches and Techniques
If you’re coming to this as a true beginner, a quick rundown of the core stitches will go a long way. Almost every beginner-friendly bag pattern starts with either a magic ring or a simple chain. The magic ring — sometimes called a magic circle — lets you start crocheting in the round with a tight, closed center, which is perfect for a circular bag base. It feels a little awkward the first time, but most people get the hang of it after a few tries, and there are tons of video tutorials online that walk you through it until it clicks.
Single crochet is your workhorse stitch here. It builds a dense, firm fabric that holds up well under the weight of groceries, which is exactly what you want in a market bag. Half double crochet adds a bit more height per stitch and gives a slightly softer feel, which some crafters prefer if they want a bag that folds up more compactly. Increases — where you work two stitches into one — are how you make the base grow outward in a circle, and decreases pull things together to shape the opening or form details like the leafy cap on a strawberry. Those four things: magic ring, single crochet, increase, and decrease — honestly cover the bulk of what most beginner bag patterns ask of you.
Working in continuous rounds is the standard method for most cylindrical or circular bag shapes, and it’s a technique worth getting comfortable with early on. Dropping a stitch marker into the first stitch of each round is a simple habit that saves a lot of frustration. As you get more confident, you might also run into joined rounds with a slip stitch, which gives a tidier seam and is commonly used when you’re switching colors for stripes. Clean color changes are one of those skills that feels fiddly at first but quickly becomes second nature — you just drop the old color, pick up the new one at exactly the moment the pattern says, and carry or cut the old yarn depending on the instructions.
Step-by-Step Overview of a Classic Strawberry Bag Pattern
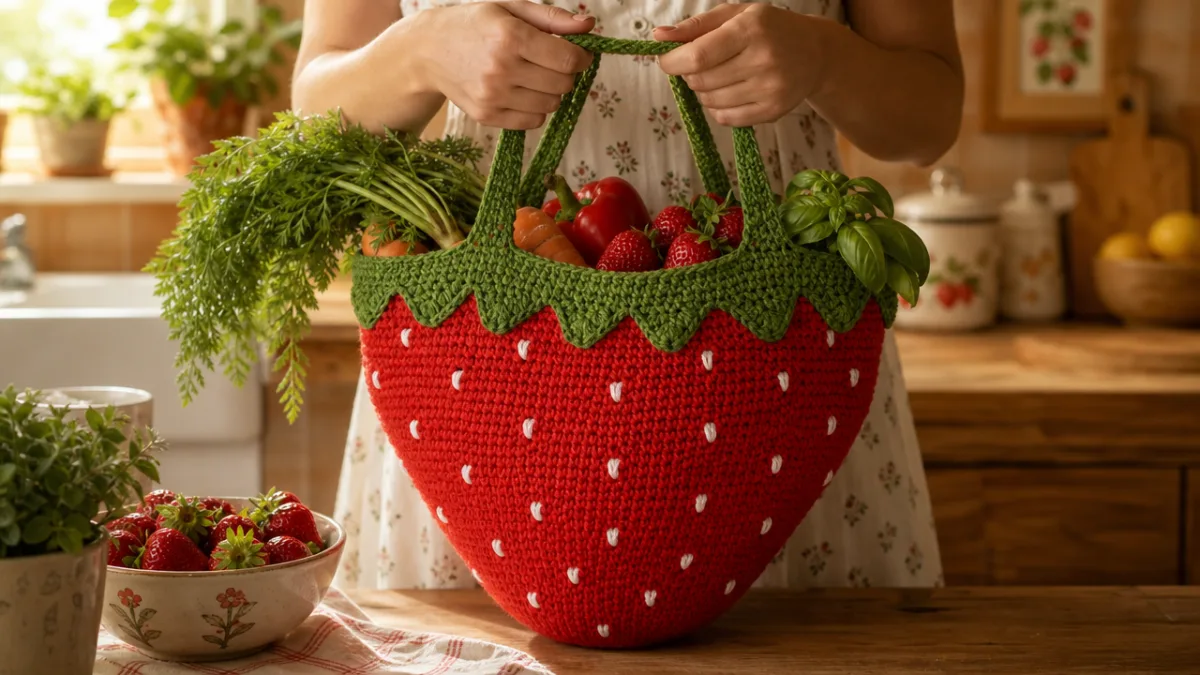
The strawberry bag has basically become the face of the fruit bag genre, and it’s not hard to understand why. That round, plump body with a little taper toward the base and a perky green leafy cap on top is immediately recognizable and pretty irresistible. Most free strawberry patterns either start at the top opening and work down, or start at the base with a magic ring and work up — both approaches work beautifully. Your pattern will tell you which direction you’re going right from the first line, so do yourself a favor and read through the whole thing before you pick up your hook.
A typical worked-in-the-round strawberry bag usually goes something like this: start with a magic ring, work six single crochets into it, then double the stitch count in round two by increasing into every stitch. Keep increasing at regular intervals over the next several rounds until your base reaches the right diameter. Then switch to working even rounds with no increases to build the sides up. Many patterns have you add small bobble stitches in cream or white yarn scattered across the red body at this stage — those are the seeds, and they add a great pop of texture that makes the whole thing look incredibly convincing. The bobble stitch is a step up from pure beginner territory, but it’s very learnable and absolutely worth it.
For the finish, the green strawberry cap is usually made separately as a flat circle or ring in green yarn and then sewn onto the top edge. Some designers skip the separate piece and just switch to green for the last few rounds, adding little picot points or leaf extensions to suggest the calyx. Handles come last — either simple chain handles reinforced with slip stitches, or crocheted cord handles attached at evenly spaced points around the opening. Once everything is assembled and your ends are woven in, give the bag a soak in cool water and let it dry flat. Blocking like this evens out your stitches and gives the whole thing a noticeably more polished, finished look.
Exploring Other Fruit and Vegetable Design Variations
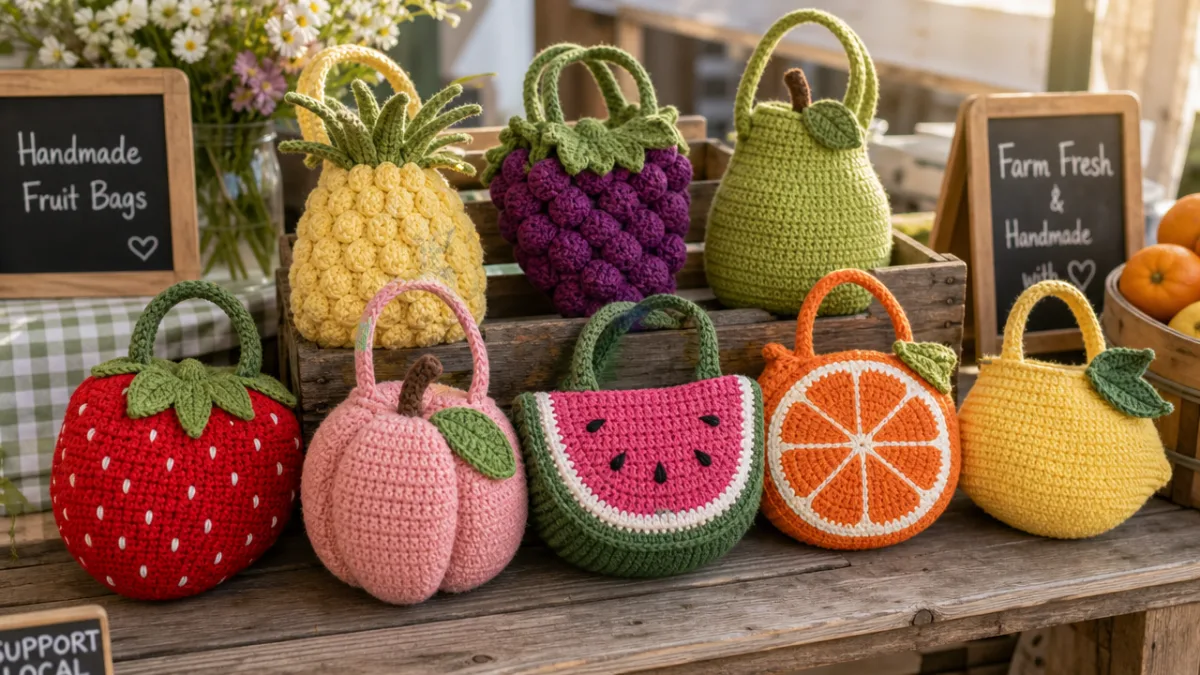
The strawberry might be the most popular, but the range of fruit and vegetable bag designs out there is genuinely impressive. Watermelon bags — with their alternating green and white rind stripes and red interior with little black seed embroidery — are another huge favorite that photographs beautifully and comes together faster than you’d expect using the jogless stripe technique. Lemon and orange bags in their respective citrus shades often feature subtle peel texture achieved through back-loop-only rows or surface slip stitch lines. And avocado bags in sage green with a brown oval center have had a real moment alongside the broader avocado design trend.
Vegetable designs are just as much fun to explore. A broccoli bag in forest green with a dense, bobbled texture on top is delightfully on-the-nose when you’re using it to carry actual vegetables home. Carrot bags in bright orange with a tapering base and a feathery green top made from chain loops are structurally interesting and really distinctive on a market shelf. Bell pepper bags in red, yellow, or green with simple ridged texture are a great next step for beginners who feel ready to practice some more intentional shaping. Each new design quietly teaches you something different — a new shaping approach, a texture technique, a way to handle color work — so working through a few of them in a row is a pretty organic way to build your skills.
A lot of designers now sell pattern bundles with instructions for a coordinated set of four to six designs that look great displayed together or given as a group gift. These sets have become especially popular for eco-minded friends and family, new homeowners who are building more sustainable routines, or for craft fair tables and farmers market vendor displays. And since most individual patterns are freely available on Ravelry, Pinterest, and crochet blogs, you can put together your own collection without spending anything beyond yarn and tools.
Tips for Success, Customization, and Care
Even with a beginner-friendly pattern, a few good habits applied consistently make a real difference in how things turn out. The most important one is checking your gauge before you start. Gauge just means how many stitches and rows fit into a four-inch square with your specific yarn and hook. If it matches the pattern, your bag will come out the right size. If it doesn’t — which is totally normal when you’re starting out — you just adjust your hook size up or down. A slightly bigger or smaller bag than intended is usually fine for a tote, but if the pattern calls for specific measurements for structural reasons, taking the time to check gauge upfront saves you a headache later.
Customization is one of the genuinely fun parts of making your own bags, and even beginners can explore it freely. Adding a fabric liner inside a strawberry bag gives it extra durability and stops small items from slipping through any gaps in the crochet. A magnetic snap or a big decorative button at the opening is an easy functional upgrade. You can adjust handle length, switch to a crossbody strap, or add wide tote-style handles to completely change how the bag is used. Embroidery details worked after the crocheting is done — small flowers on a pear bag, or a word on a lemon design — are a lovely personal touch that requires nothing more than a yarn needle and some contrasting thread.
Taking care of your finished bag properly will keep it looking great for years. Most cotton yarn bags can go in the washing machine on a gentle cycle in cool water, which is one of cotton’s biggest practical advantages. Reshape the bag while it’s still damp and let it air dry rather than putting it in the dryer, which can shrink cotton and throw off the bag’s shape. If it starts to look a little misshapen over time from carrying heavy loads, a quick hand wash and careful reshaping while wet will usually bring it right back. A well-made cotton crochet bag, properly cared for, can genuinely hold up through years of regular use — which makes the time you put into making it very much worth it.
- Always read your pattern fully before beginning — understanding the full construction sequence prevents confusion mid-project and helps you anticipate upcoming steps.
- Use locking stitch markers generously — marking the beginning of each round, any increase points, and color change locations saves considerable counting time and prevents frustrating errors.
- Keep consistent tension throughout — tension that is too tight creates a stiff, inflexible fabric while tension that is too loose results in a floppy bag that will not hold its shape under weight.
- Weave in ends thoroughly and securely — running your yarn tail through at least two inches of stitches in multiple directions before trimming will prevent ends from working loose during use and washing.
- Block your finished bag — soaking in cool water, gently squeezing out excess moisture, and drying flat dramatically improves the appearance of the stitches and evens out any inconsistencies accumulated during the making process.
- Join online crochet communities for support — groups on Ravelry, Reddit, Facebook, and Instagram provide encouragement, troubleshooting help, and inspiration from crafters working on identical or similar projects around the world.
Starting your first fruit or vegetable crochet bag is a genuinely rewarding decision on multiple levels. You’re picking up a skill that will carry you through countless future projects, making something that reduces plastic waste in your daily life, and ending up with a finished object that’s both beautiful and actually useful. With so many free patterns available on Pinterest, Ravelry, and crochet blogs, your only real investment is time and yarn — and both pay off in something you’ll be proud to carry around. Whether you kick things off with a sunny lemon bag or go straight for the classic strawberry, the fruit and vegetable bag community is warm, enthusiastic, and genuinely happy to celebrate your makes and help you work through any snags along the way.








What do you think?
It is nice to know your opinion. Leave a comment.