










How to Make a Living Wall: A Complete Step-by-Step Guide to DIY Your Own Living Wall System
What Is a Living Wall and Why You Should Build One
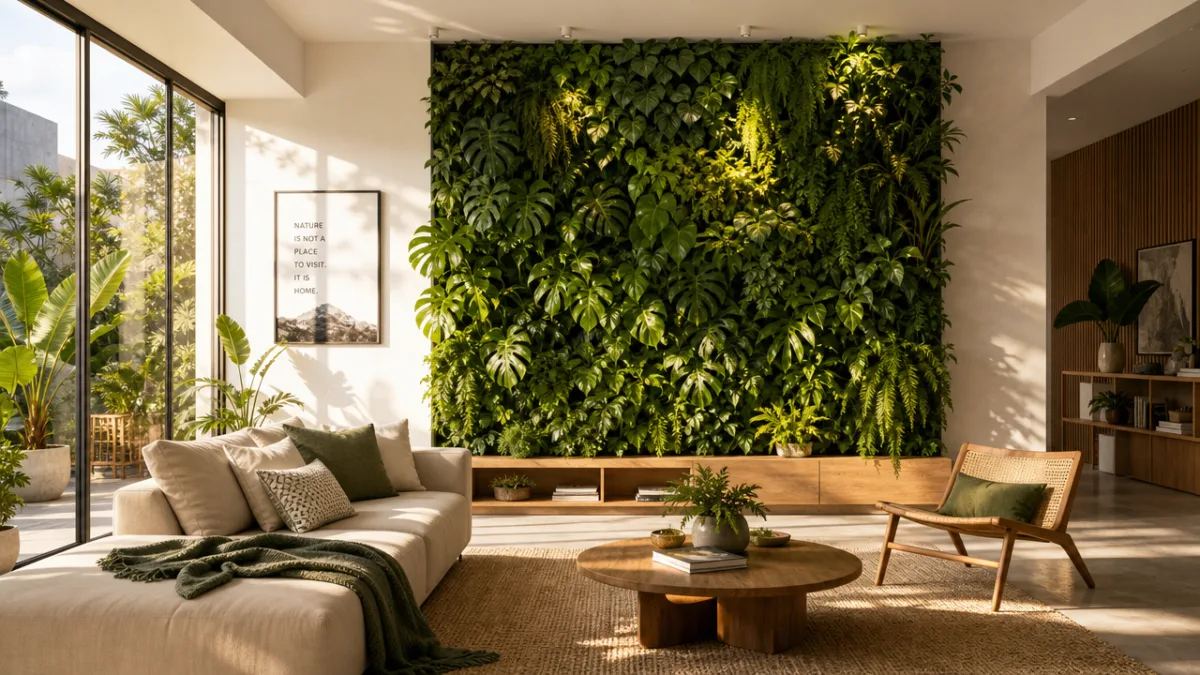
A living wall — you might also hear it called a vertical garden or green wall — is basically a self-contained planting system that grows vertically on a structure attached to, or standing near, a wall. It’s a completely different approach from traditional container gardening because instead of spreading out across the ground, you’re going upward. That means even a tiny urban balcony or a narrow backyard fence can suddenly become a productive growing space for herbs, flowers, ferns, or even vegetables, using a fraction of the floor space a regular garden would eat up.
And the benefits go well beyond just looking gorgeous. Research has consistently shown that indoor green walls can actually improve air quality by filtering out toxins like formaldehyde and benzene. Outside, they can help reduce the urban heat island effect, buffer wind and noise, and even add a little insulation to the wall they’re mounted on. When you throw in the well-documented mood-boosting effects of having greenery around you, building one starts to feel less like a weekend project and more like a genuinely worthwhile investment.
Here’s the thing though — it’s really not as daunting as it looks. You don’t need specialist horticultural training, a garage full of professional tools, or a big budget to end up with something beautiful and functional. With decent planning, a weekend of hands-on work, and a fairly modest spend on materials, a complete beginner can put together a living wall that’ll be going strong years from now. This guide will take you through the whole process step by step, from picking your spot all the way through to keeping it healthy long-term, so you can get started with confidence.
Planning Your Living Wall: Choosing the Right Location and Style
Before you buy a single plant or panel, the most important decision you’ll make is where your living wall is actually going to go. Light is the dominant factor here — how much direct and indirect sun a spot gets will shape almost every other choice you make, from which plants you can grow to whether you’ll need supplemental grow lights. South-facing outdoor walls and south- or west-facing interior walls generally get the most light and give you the widest range of plant options. North-facing spots are more limiting, but they’re far from impossible; shade-tolerant plants like ferns, mosses, and certain tropical foliage species can do really well in lower light as long as the rest of your system is set up correctly.
You also need to think seriously about structural integrity. A living wall gets heavier than you’d expect once the growing medium is saturated with water, and a badly anchored system is a genuine safety hazard. For indoor builds, you should ideally be mounting into wall studs, or using heavy-duty anchors that are rated for well above your expected system weight. Outdoors, think about wind exposure too — strong gusts can stress both the plant roots and the mounting hardware, so you may need extra reinforcement in exposed spots. If you’re renting, have a conversation with your landlord before you start drilling, and consider a freestanding frame system as a non-invasive alternative.
There are a few distinct system styles to choose between, and picking the right one for your space, budget, and skill level makes a real difference to how the project goes. Fabric pocket panels — felt or horticultural fabric with rows of sewn-in planting pockets — are the most beginner-friendly and typically the most affordable. Modular panel systems, usually made from interlocking plastic or recycled trays, are more flexible and easy to repair or replant one section at a time. Pallet gardens repurpose wooden shipping pallets into rustic outdoor planters and are a popular low-cost option. And custom-built timber or metal frame systems with individual pot holders give you the most creative freedom, though they involve the most upfront construction work.
Materials and Tools You Will Need
Getting all your materials together before you start is one of those things that sounds obvious but genuinely makes the whole build much less stressful. The exact list depends on which system you’ve chosen, but there’s a core set of components that almost every living wall project will need in some form. It’s worth spending a little extra on the quality of your growing medium and irrigation supplies in particular — these are the foundations everything else depends on, and cutting corners here tends to only show up months later when your plants start struggling.
For a fabric pocket panel system — which is what I’d recommend if you’re new to this — here’s what you’ll typically need for a standard 1m x 1.5m installation:
- Heavy-duty felt or fabric pocket panels (purpose-made horticultural fabric is ideal for drainage and root breathability)
- Stainless steel or galvanized mounting screws and wall anchors rated for at least twice your expected system weight
- A wooden or aluminium backing frame to hold the panel slightly away from the wall surface and allow air circulation
- High-quality lightweight potting mix designed for vertical applications, or a mix of perlite, coco coir, and compost
- A drip irrigation kit with timer, pressure regulator, and micro-emitter tubing sized to your number of pockets
- A shallow drip tray or gutter system at the base to collect excess water, particularly important for indoor walls
- A spirit level, power drill with suitable bits, tape measure, and pencil for marking
- Slow-release granular fertilizer to incorporate into your growing medium at planting time
If you’re going the pallet route for an outdoor wall, the list looks quite different. You’ll need a sturdy wooden pallet that’s been heat-treated rather than chemically treated — always check for the HT stamp, because chemically treated pallets can leach harmful compounds into edible plants. You’ll also need landscape fabric to line three sides, a staple gun and heavy-duty staples, potting mix, and your plants. One optional but genuinely useful addition is a water-retaining gel mixed into your growing medium; it helps keep moisture levels steadier and cuts down how often you need to water during hot weather. Having everything laid out and ready before your build day really does make the whole experience more enjoyable.
Step-by-Step Construction: Building Your Living Wall Frame and System
With everything assembled and your location confirmed, you’re ready to actually build the thing. Start by giving the wall surface a thorough clean — remove any dirt, loose paint, or debris that might interfere with your mounting hardware. If you’re working on an exterior masonry wall, take a careful look for damp patches or structural cracks and sort those out before you go any further. Moisture problems hiding behind a living wall are genuinely nasty to diagnose and fix once the system is in place, so a few minutes of checking now can save you a serious headache later.
Next up is building or preparing your backing frame. For a fabric panel system, you’re constructing a simple rectangular frame from 50mm x 25mm timber or aluminium angle, sized to match your panel with a 30–40mm gap to allow airflow between the panel and the wall. Drill your pilot holes at stud positions or using appropriate masonry anchors, mount the frame securely, and use a spirit level to make sure everything is properly plumb and level. A frame that’s even slightly off will result in uneven watering distribution once the irrigation is running — so yes, it’s worth taking your time here. Once the frame is up, attach your fabric panel using stainless steel staples or panel clips, pulling it taut but not so tight that you distort the pocket shapes.
Installing the irrigation system is the next critical step, and it’s much better to do this before you add any plants so you can test everything properly without disturbing roots. Run your main supply tube along the top of the panel, then branch micro-emitter tubes down to feed each row of pockets. Position the emitters so water drips into the growing medium of each pocket rather than onto the foliage — wet leaves encourage fungal disease. Set your timer for short, frequent cycles rather than long infrequent soaks; two to three minutes, two or three times a day is a good starting point for most systems. Run several test cycles before you plant anything to check for leaks and make sure every single emitter is working as it should.
Once the irrigation is tested and reliable, you can start filling pockets and planting up the wall. Fill each pocket roughly two-thirds full with your growing medium, set your plant in with the root ball centred, then firm more medium around the roots to hold it securely. Work from the top of the wall downward so you’re not accidentally knocking lower plants as you go. After planting, run the irrigation again and check that water is genuinely reaching every pocket. Also give the whole wall a good hand-watering on that first day to make sure all the growing medium is evenly moistened and to help your plants settle in from the transplanting stress.

Choosing the Best Plants for Your Living Wall
Choosing your plants is probably the most enjoyable part of this whole project — but it’s also where a lot of first-timers go wrong. The golden rule is to match your plants to your actual light conditions rather than just picking whatever catches your eye at the garden centre. A plant that’s fundamentally incompatible with your light levels will struggle no matter how good your irrigation and growing medium are, and a wall full of stressed, dying plants is the last thing you want after all this effort. Be honest with yourself about how much sun your chosen spot actually gets across the day and across the seasons before you commit to anything.
If you’ve got a sunny outdoor wall with at least six hours of direct sunlight a day, you have a really lovely range of options. Culinary herbs like thyme, oregano, basil, chives, and mint are perennial favourites because they look great and you’ll actually use them in the kitchen. Succulents — sedums, sempervivums, echeverias — are brilliant for very sunny or potentially dry conditions because their water-storing leaves make them naturally tough. Trailing plants like nasturtiums, lobelia, and bacopa add gorgeous movement and help soften the edges of the installation. For something more structured and formal, small ornamental grasses and compact lavender varieties provide beautiful textural contrast while staying pretty low-maintenance.
Shadier walls have their own distinct and equally beautiful plant palette. Ferns are among the most reliable performers in low light — hart’s tongue fern, soft shield fern, and Japanese painted fern all adapt well to pocket planting. Mosses can fill gaps and create that lush, forest-floor feel that works particularly well with natural timber frames. For indoor walls with limited natural light, pothos, philodendron, peperomia, and peace lily are all solid choices that handle indirect light well and don’t demand constant watering. Mixing different foliage textures and shades of green — deep forest green against bright lime or yellow-green — creates real visual depth and interest even without a single flower in sight.
Maintenance, Watering, and Keeping Your Living Wall Thriving Long-Term
Maintaining a living wall requires a slightly different mindset than a regular garden, mostly because the limited volume of growing medium in each pocket means plants have less of a buffer when water or nutrients fluctuate. The good news is that once your irrigation is properly calibrated and you’ve got a feeding routine in place, the day-to-day upkeep of a well-designed system is genuinely manageable. The key is building a habit of regular inspection early on, so small problems — a blocked emitter, early signs of disease, a pocket that’s draining poorly — get caught and dealt with before they turn into bigger ones.
Watering is the most important ongoing task, and an automated irrigation system is strongly recommended for anything larger than a few square feet. The exact frequency and duration you’ll need depends on your climate, the time of year, and what you’re growing, so expect to tweak your settings as the seasons change. A good rule of thumb is that the growing medium in each pocket should feel consistently moist but never waterlogged — think of how a well-wrung sponge feels. During summer heat waves or dry spells, you may need to top up with extra hand-watering. In winter, most outdoor living walls need significantly less irrigation, and if you’re somewhere that regularly drops below freezing, you may need to dismantle and store the system until spring.
Feeding is non-negotiable because all that regular watering also flushes nutrients out of the growing medium fairly quickly. A balanced liquid fertilizer applied through the irrigation system every two to three weeks during the growing season will keep things in great shape. Or, if you’d rather set it and mostly forget it, slow-release granular fertilizer pressed into the surface of each pocket every three to four months works well too. Keep an eye out for early signs of deficiency — yellowing older leaves usually means a nitrogen shortage, while a purplish tinge to the foliage often points to phosphorus deficiency. Catching and adjusting these things early stops a minor issue from becoming a real problem.
Over time, you’ll inevitably need to swap out individual plants that decline, outgrow their pockets, or just stop fitting the look you’re going for. One of the real advantages of pocket and modular systems is that replacing a single plant takes minutes and doesn’t disturb anything around it. It’s worth keeping a few suitable plants in regular pots so you always have something ready to fill a gap. A couple of times a year, do a more thorough check of the whole system: look at the mounting hardware for corrosion or any sign of loosening, check the irrigation tubing for splits or blockages, and think about whether the overall planting scheme could do with a refresh. Give your wall that level of attention, and it’ll be a genuinely thriving, beautiful part of your home or garden for years to come.








What do you think?
It is nice to know your opinion. Leave a comment.