










How I Built My DIY Greenhouse: A Complete Guide From Planning to First Harvest
Why I Decided to Build My Own Greenhouse
For years, I had been watching my garden plants struggle against unpredictable weather, early frosts, and the relentlessly short growing season in my region. Every spring, I would start seedlings on a cramped windowsill, lose half of them to temperature swings, and spend far too much money replacing plants that simply couldn’t survive the transition from indoor warmth to outdoor cold. I knew there had to be a better way, and after stumbling across dozens of inspiring builds online, I finally committed to constructing my own DIY greenhouse from scratch.
The decision wasn’t made lightly. I spent several months researching different greenhouse styles, materials, and construction methods before settling on a plan that matched my budget, my available yard space, and my actual gardening goals. I wanted something sturdy enough to last at least a decade, large enough to be genuinely useful, yet simple enough for a single person with modest carpentry skills to build over a few weekends. That combination of practicality and ambition drove every decision I made from the very beginning of this project.
What surprised me most during the planning phase was how many people had done exactly what I was attempting and had documented their experiences in detail. The DIY greenhouse community is generous, technical, and full of hard-won wisdom. I absorbed as much as I could, adapted the designs that resonated with my situation, and came up with a hybrid approach that drew from timber-frame construction, polycarbonate glazing, and passive solar principles. This article is my attempt to pass that knowledge forward in a clear, usable format for anyone considering a similar build.
Planning, Measuring, and Choosing the Right Design
Before buying a single piece of lumber or a single screw, I spent considerable time with graph paper, a measuring tape, and a lot of patience. The first question every aspiring greenhouse builder must answer is: how big does it actually need to be? I made the classic beginner mistake of initially planning something modest, only to realize after sketching out my planting beds, potting bench, and walking paths that my original 8×10 foot idea would feel cramped almost immediately. I ultimately settled on a 10×14 foot footprint, which gave me enough room to work comfortably without overwhelming my yard or my budget.
Site selection turned out to be just as important as size. A greenhouse depends entirely on sunlight, so I walked my yard at different times of day across several days, noting where shadows fell from the house, the fence, and a large oak tree near the property line. The ideal location received full sun from mid-morning through late afternoon, was reasonably sheltered from the prevailing north wind, and was close enough to the house that running a water line and an electrical extension wouldn’t be a logistical nightmare. Fortunately, the southeast corner of my backyard checked all of these boxes.
For the structural design, I chose a simple gable-roof style with vertical sidewalls rather than a curved or lean-to design. Gable roofs shed rain and snow efficiently, allow for good ventilation at the ridge, and are straightforward to frame with basic carpentry skills. I drew up a simple set of plans, cross-referenced them with several online resources, and had a knowledgeable friend review them before I committed to purchasing materials. Taking this extra step caught a few structural oversights early and saved me from expensive corrections later in the build.
Key planning decisions that shaped the entire project included:
- Orientation: running the ridge east to west to maximize southern sun exposure along the longest wall
- Foundation type: pressure-treated lumber on compacted gravel, avoiding the cost and complexity of a concrete slab
- Roof pitch: a 4-in-12 pitch, steep enough to shed snow but gentle enough to keep the interior ceiling height manageable
- Door placement: a single wide door centered on the south-facing gable end for easy wheelbarrow access
- Ventilation: two roof vents and two lower sidewall vents to allow cross-ventilation during summer heat

Gathering Materials and Tools
Once my plans were finalized and dimensioned, I built a detailed materials list that included every piece of lumber, every fastener, every square foot of glazing material, and every miscellaneous item I could anticipate needing. This upfront investment of time paid dividends when I arrived at the lumber yard, because I was able to purchase almost everything in a single trip rather than making the multiple return visits that seem to plague every DIY project that skips this step. My total materials cost came in at just under eight hundred dollars, which felt very reasonable given the size and permanence of the structure I was building.
For the framing, I used pressure-treated 2×4 lumber throughout, including the base plates that would be in closest contact with the ground and any potential moisture. Standard untreated dimensional lumber would have worked for the upper framing, but I chose to use pressure-treated stock everywhere for uniformity and added durability. All structural connections were made with exterior-rated screws rather than nails, which allowed me to make adjustments during assembly without destroying framing members and also produced a more solid, rattle-free structure once everything was complete.
The glazing material I selected was twin-wall polycarbonate panels in the 8mm thickness. I considered glass seriously before ultimately deciding against it for a first build. Glass is heavier, more fragile, more difficult to cut cleanly, and significantly more expensive than polycarbonate. Twin-wall polycarbonate, by contrast, is lightweight, impact-resistant, offers good thermal insulation due to its air channel structure, and transmits approximately 80 percent of available light, which is entirely adequate for growing vegetables, herbs, and seedlings. It does yellow somewhat over time with UV exposure, but high-quality panels carry a ten-year UV warranty that provides reasonable protection against premature degradation.
The essential tools I used throughout this project were:
- A circular saw with a fine-tooth blade for clean lumber cuts
- A miter saw borrowed from a neighbor for precise angle cuts on the roof rafters
- A cordless drill with a full set of bits and driver heads
- A framing square and a speed square for maintaining accurate right angles
- A long level for checking walls and the base frame
- Tin snips and a scoring knife for cutting the polycarbonate panels
- Clamps in various sizes for holding pieces in position during assembly
- A chalk line for marking long straight cuts on glazing panels
Building the Foundation and Floor
A greenhouse foundation does not need to be elaborate, but it does need to be level, square, and stable. I began by clearing the site of all grass and organic material down to a depth of about four inches, then filled and compacted the area with crushed gravel. The gravel serves multiple purposes simultaneously: it provides excellent drainage so that excess water never pools under the structure, it discourages weed growth from beneath the floor, and it creates a firm, compacted base that resists settling over time. I spent nearly a full Saturday morning just getting this base layer right, and the care I took here made every subsequent step easier.
The perimeter base frame consisted of doubled 2×6 pressure-treated lumber arranged in a rectangle and fastened together at the corners with structural screws. Getting this frame perfectly square was absolutely critical, because any error at the foundation level would be amplified and compounded as the walls and roof were built upward. I checked squareness by measuring diagonals: when the two diagonal measurements from opposite corners match exactly, the frame is square. I used this check repeatedly throughout the foundation work, nudging the frame into perfect alignment before anchoring it to the ground with long galvanized spikes driven at regular intervals.
For the interior floor, I chose to leave the central aisle as compacted gravel topped with a layer of pea gravel for comfort underfoot, while the two side growing beds were filled with a deep mixture of topsoil, compost, and perlite. This in-ground bed approach meant I could grow plants directly in the soil rather than relying exclusively on containers, which reduces watering frequency and supports deeper root systems. The growing beds were separated from the gravel aisle by simple edging boards screwed to stakes, creating a clean visual division that also made it easy to add or refresh soil in the beds without contaminating the walking surface.

Framing the Walls and Roof
With the foundation solid and square, wall framing proceeded quickly and with tremendous satisfaction. I built each wall section flat on the ground before raising it into position, a technique borrowed from conventional house framing that makes the work much easier and more accurate than trying to assemble vertical walls in place. Each wall consisted of a bottom plate, a double top plate, corner posts, and intermediate studs spaced at 24 inches on center. This spacing was deliberately chosen to align with the standard 48-inch width of the polycarbonate panels, so that panel edges would always land on a supporting stud rather than spanning unsupported between framing members.
Raising the walls solo required some creative problem-solving. I built temporary braces from scrap lumber and screwed them to the foundation to hold each wall upright while I moved to the next section. Once all four walls were standing, I could connect them at the corners and feel the structure begin to take on real rigidity and presence. There is a genuinely exciting moment in any construction project when a pile of flat materials suddenly becomes a three-dimensional enclosure, and raising those greenhouse walls delivered exactly that feeling. I stood inside the skeletal frame for several minutes, simply appreciating the space and imagining it full of growing things.
The roof framing was the most technically demanding part of the entire build. Each pair of rafters had to be cut to a precise angle at the ridge and at the heel where they met the top plate of the wall. I cut a test rafter first, checked its fit carefully, then used it as a template for all subsequent cuts. This approach saved significant time and ensured consistency across all rafter pairs. The ridge board was installed first, supported temporarily by a central prop, and then the rafters were added symmetrically from each end toward the middle, keeping the ridge straight and the load balanced throughout the process.
At each gable end, I filled in the triangular space between the top wall plate and the roof rafters with shorter vertical studs following the same 24-inch spacing pattern. These gable studs would eventually support the glazing panels on the end walls, so their alignment needed to be consistent and plumb. The completed frame, standing in the yard on a clear afternoon before any glazing was installed, looked remarkably like a small barn or garden shed, and several neighbors stopped by to ask what I was building and offer encouraging words. That community aspect of a visible building project was something I hadn’t anticipated and genuinely enjoyed.
Installing the Polycarbonate Glazing
Installing the polycarbonate panels was methodical, satisfying work that transformed the skeletal frame into something that actually looked and felt like a greenhouse. The panels arrived in 4×8 foot sheets, which I handled carefully to avoid scratching the UV-protective coating on the outer face. Each panel needed to be cut to fit its specific location, and I quickly developed an efficient workflow: measure, mark with a chalk line, score repeatedly with a sharp utility knife, then snap cleanly along the score line in the same motion used for cutting drywall. The cut edges were covered with aluminum tape to seal the channels against moisture and insect intrusion.
Each panel was attached to the framing using special polycarbonate roofing screws that include a large rubber washer under a metal cap. These screws are designed to be driven firmly but not over-tightened, because polycarbonate expands and contracts significantly with temperature changes and needs a small amount of freedom to move. I learned this lesson on the first panel I installed, which I had fastened too rigidly, and which developed a slight buckle when the afternoon sun heated it. Backing off the screws by a quarter turn resolved the issue immediately and reminded me to stay mindful of thermal expansion for every subsequent panel.
The roof panels required an additional layer of care because they needed to be properly lapped and sealed to prevent water infiltration at the joints. I used a foam closure strip designed specifically for polycarbonate roofing at the ridge and eave lines, and applied a bead of clear silicone sealant at each horizontal overlap between panels. The roof went on in a single long afternoon with the help of a friend who held the upper end of each panel in position while I secured the lower end. Working with a helper for this phase made the job vastly easier and safer than attempting it alone, and the completed roof looked clean, professional, and genuinely waterproof.
Adding Ventilation, Heating, and Finishing Details
A greenhouse without adequate ventilation is a liability rather than an asset. Summer temperatures inside an unventilated greenhouse can reach lethal levels for plants within an hour of sunrise on a clear day, and even in cooler weather, stagnant air encourages fungal diseases and discourages the robust growth that a greenhouse is supposed to promote. I installed two automatic roof vent openers that use a heat-sensitive wax cylinder to push the vent open as temperatures rise and allow it to close as temperatures fall, requiring no electricity or manual intervention. These simple, inexpensive devices have proven to be among the best investments in the entire project.
For supplemental heating during the shoulder seasons of early spring and late autumn, I installed a small electric ceramic heater with a built-in thermostat, connected via a weatherproof extension cord routed from the house. This heater is not intended to maintain tropical temperatures in the dead of winter, but rather to prevent frost on nights when outdoor temperatures dip below freezing while the days remain warm enough for active plant growth. Combined with the passive solar gain from the polycarbonate glazing and the thermal mass of the soil beds, the heater keeps the greenhouse above freezing with relatively modest energy consumption even on moderately cold nights.
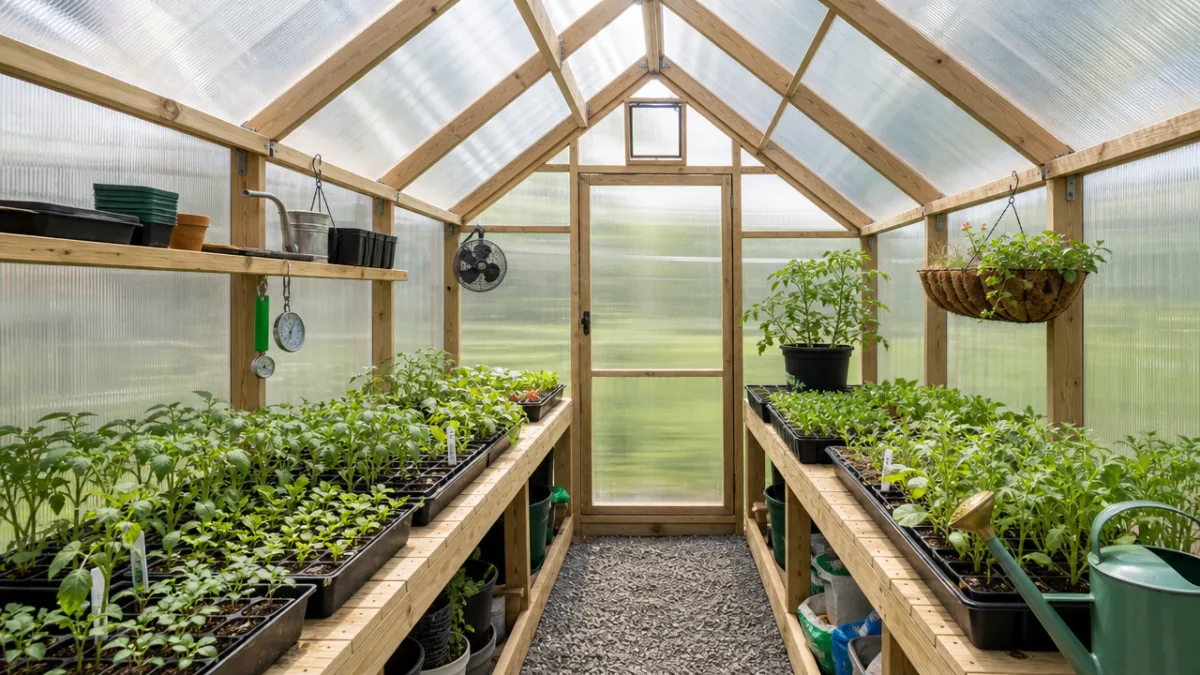
The finishing details that make a greenhouse genuinely pleasant to work in took several additional weekends to complete. I built a potting bench along the north wall from leftover lumber, installed a simple drip irrigation system with a battery-powered timer, added shelving above the potting bench for tools and supplies, and hung a thermometer and hygrometer near the center of the space to monitor growing conditions at a glance. A rubber doormat at the entrance keeps the gravel paths cleaner, and a simple hook rack beside the door holds gloves, pruners, and other frequently used tools within easy reach. These small refinements collectively transformed a functional structure into a genuinely enjoyable workspace.
First Growing Season: Results and Lessons Learned
The first full growing season in my new greenhouse exceeded my expectations in almost every respect. I started tomatoes, peppers, and cucumbers six weeks earlier than I could have outdoors, and by transplanting well-established root systems rather than fragile seedlings, I achieved my best vegetable harvest in years. The controlled environment also allowed me to experiment with crops I had previously considered impossible in my climate, including a small citrus tree overwintered in a container and a collection of Thai basil plants that thrived in the warm, humid microclimate created by the growing beds. Growing these varieties felt genuinely transformative compared to my pre-greenhouse gardening experience.
Not everything went perfectly, and honesty about the challenges is just as important as celebrating the successes. I underestimated how quickly humidity would rise on warm, overcast days when the vents were barely cracking open, and I lost a few squash plants to powdery mildew before I began opening the door proactively during the day to supplement the roof vent ventilation. I also discovered that my gravel floor, while excellent for drainage, made kneeling work uncomfortable during long sessions in the growing beds, a problem I partially solved by keeping a foam kneeling pad hanging on the wall near each bed. These are small problems easily corrected, but worth noting for anyone planning a similar build.
The cost savings compared to purchasing transplants and replacing frost-damaged plants accumulated meaningfully over the season. I also found unexpected benefits that had nothing to do with productivity: the greenhouse became a genuinely pleasant retreat during grey, damp days when outdoor gardening felt miserable, and the simple act of stepping into its warm, humid, plant-filled interior had a noticeable positive effect on my mood throughout the late-winter months when the beds were being prepared but the outdoor landscape remained brown and dormant. This psychological benefit may be the one I least anticipated and most value.
If I were to build another greenhouse — and I very well might — the changes I would make based on this first season include making it at least two feet longer to accommodate the potting bench more comfortably within the growing space, adding a second door on the opposite gable end to allow better through-ventilation on calm summer days, investing in automated drip irrigation from the very beginning rather than retrofitting it partway through the season, and pouring a narrow concrete path down the center aisle rather than using gravel, which migrates underfoot and creates an uneven surface over time. Every build teaches lessons that the next one can absorb, and that ongoing improvement is a large part of what makes projects like this so rewarding to undertake.








What do you think?
It is nice to know your opinion. Leave a comment.