










Garden Trellis Tutorial: How to Build a Woven Bamboo Trellis
Introduction to Woven Bamboo Trellises
If you’re looking for something to add real character to your garden while actually being useful, a woven bamboo trellis is hard to beat. It gives climbing roses, sweet peas, cucumbers, and all kinds of vining vegetables the vertical support they need to stay healthy, get good airflow, and turn an otherwise flat bed into something with genuine visual depth. Bamboo has been the material of choice in Asian garden traditions for centuries, and it’s easy to see why — it’s surprisingly strong, it looks completely at home outdoors, and it ages beautifully.
What really sets the woven style apart from a basic lashed grid is how the interlocking horizontal and vertical canes work together to create something genuinely rigid and resilient. Rather than putting all the strain on individual binding points, the weaving spreads tension across the whole structure. That means the trellis flexes in the wind instead of snapping at its joints — and a well-made one can handle the full weight of a mature cucumber plant loaded with fruit without any drama.
This tutorial walks you through the whole process from start to finish: picking the right bamboo, getting your tools together, weaving the panel, and anchoring everything securely in the ground. You don’t need any prior experience with bamboo to pull this off. Most gardeners knock out a standard four-by-five-foot trellis in a single afternoon, and what you end up with is a handmade garden feature that’ll hold up for several seasons without much fuss.
Materials and Tools You Will Need
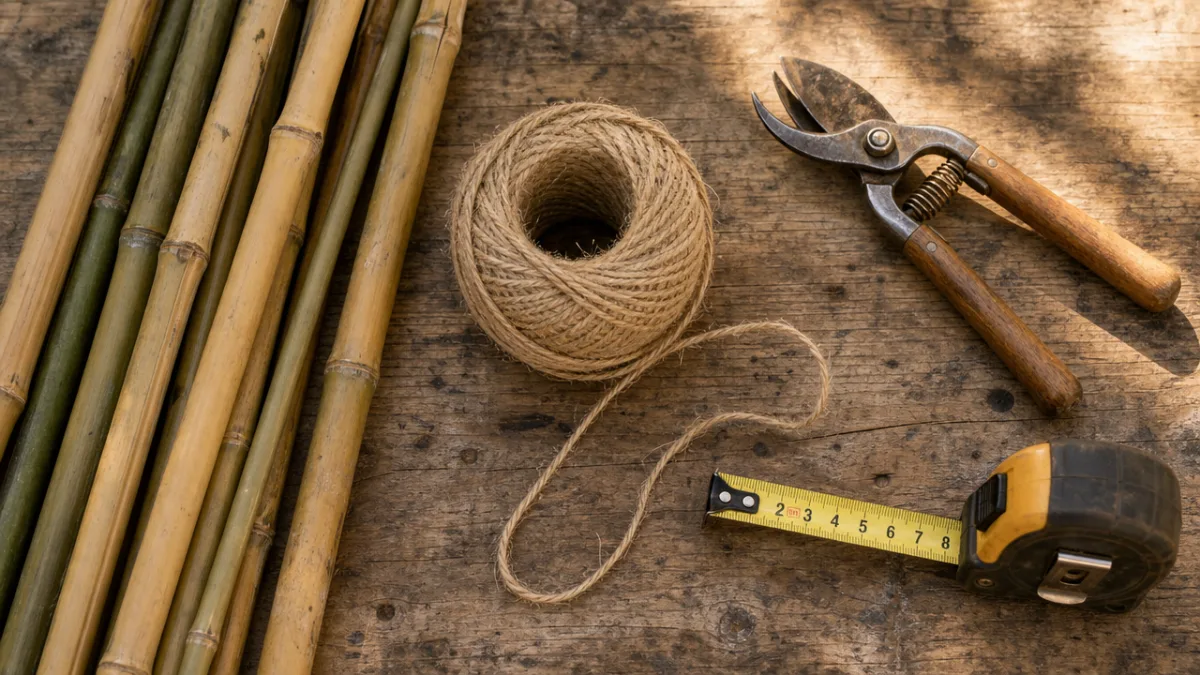
Before you dive in, it’s worth spending a little time finding good bamboo rather than just grabbing whatever’s at the nearest garden center. For your uprights — the canes that go into the ground and carry the weight of the whole structure — you want something at least three-quarters of an inch in diameter and six to eight feet long. The horizontal weaving rods can be thinner, around half an inch, since they need a bit of flex to them. Tap the canes as you shop: a solid sound is what you want. Avoid anything with visible cracks, mold, or patchy discoloration.
Your twine choice matters more than you might expect. Natural jute or garden twine grips bamboo fibers really well and won’t slowly saw into the cane surface the way synthetic string can. A medium-weight three-ply jute is the sweet spot — get at least a hundred feet for a standard trellis, and honestly buy more than you think you need. If you want to go even more traditional, pre-soaked willow withies or thin strips of bamboo skin work beautifully as binding material too.
You don’t need a workshop full of tools, but having the right few things on hand before you start makes everything go much more smoothly. Here’s what to gather:
- A sharp pruning saw or hacksaw for clean cuts that won’t splinter the cane
- Pruning shears for trimming twine ends and tidying up nodes
- A tape measure and carpenter’s pencil for marking consistent spacing
- A rubber mallet for driving uprights into firm ground
- A bucket of water for soaking your horizontal weaving canes before bending
- Work gloves — bamboo splinters and twine friction are both unpleasant
- A level or plumb line to make sure your uprights go in straight
A couple of optional extras worth considering: a drill with a small bit for pre-boring lashing holes at connection points, and some linseed oil or wood sealant to treat the cut ends of your canes and squeeze a few extra seasons out of the finished trellis. Having a second person around when you’re setting the uprights is genuinely helpful for holding things in position, though the weaving and lashing are easy enough to handle on your own.
Preparing and Measuring Your Bamboo
Most beginners rush past the preparation stage, which is a shame because it’s honestly where the quality of the finished trellis is decided. Start by laying everything out on a flat surface — a lawn or driveway is perfect — and sorting your canes by diameter. Pull out your thickest, straightest ones for the uprights, then set aside enough medium canes for the horizontals. Roll each cane along the ground to check for warping. A slightly curved horizontal is fine, since the weaving process tends to pull it straight, but a warped upright will make the whole trellis lean, and that’s much harder to fix later.
For a standard woven trellis, space your vertical uprights about eight inches apart across the width. On a four-foot-wide trellis that works out to roughly six uprights. Horizontal weaving rods are typically spaced anywhere from six to ten inches apart vertically, and the right choice really depends on what you’re growing. Clematis and other fine-tendrilled climbers do better with the tighter six-inch spacing since they need more grab points. Beans, cucumbers, and tomatoes are perfectly happy at ten inches, which also means fewer rods and less material.
Before you cut anything, soak your horizontal weaving canes in water for at least two hours — overnight is better. This step isn’t optional if you want to avoid splitting. Dry bamboo snaps; wet bamboo bends. Even canes that feel really stiff will become surprisingly cooperative after a good soak. Your uprights don’t need soaking since they won’t be bent, but it’s worth treating the bottom eight inches of each one — the section that’ll be buried — with undiluted white vinegar or a wood preservative. That contact with damp soil is what causes bamboo to break down first, and a quick treatment now can significantly slow that process.
Building the Frame and Driving the Uprights
Once your bamboo is prepped and ready to go, the first thing to do is mark out the trellis footprint on the ground with stakes and string. It sounds like an unnecessary extra step, but it keeps everything lined up from the start and saves you from having to correct wonky uprights halfway through. Take a moment to measure both diagonals of your marked rectangle — if they match, you have a perfect square, and your frame will be true. It takes thirty seconds and makes a real difference.
Drive your first upright into a corner of the marked area using your rubber mallet, sinking it at least twelve inches for a trellis under five feet, or eighteen inches if you’re going taller. Check it with your level before moving on. Even a small lean at the base looks exaggerated by the time you get to the top. Work your way along, placing each upright at your measured intervals and checking each one for plumb as you go. Don’t rush this part — the whole structure’s geometry depends on getting it right.
Once all the uprights are in, connect them at the top with a horizontal ridge pole. This is the single most structurally important piece of the whole trellis. Lash it firmly to each upright using a clove hitch followed by several tight wrapping turns and a square knot to finish off. The ridge pole does two things at once: it locks all the uprights into their correct positions, and it gives the top edge of your woven panel something solid to tie into. Spend extra time on the two corner connections, since those bear the most sideways stress when the trellis is full of plants and getting pushed around by wind.
It’s also worth adding a second horizontal pole along the very bottom of the uprights, just above ground level. It’s not strictly essential for the weaving to work, but it adds a lot of rigidity down low where soil movement and animal activity can otherwise gradually nudge uprights out of alignment. Lash it the same way as the ridge pole and your frame is solid and ready for weaving.

Weaving the Bamboo Panel
This is the most satisfying part of the whole project, and once you get into the rhythm of it, it’s genuinely meditative. Pull your first soaked horizontal cane out of the water and start at the bottom of the frame. Feed it over the first upright, under the second, over the third, and so on all the way across. Leave about two inches overhanging each outer upright on both sides — you’ll trim everything to a tidy consistent length once all the weaving is done. Don’t force the cane into a perfectly rigid straight line; just let it find its natural path through the uprights.
For the second rod, reverse the pattern completely — wherever the first cane went over an upright, this one goes under, and vice versa. That alternating over-under rhythm is what gives the panel its strength. Every horizontal is locked in place by the uprights on either side of it, and every upright is held straight by the horizontal canes passing alternately in front and behind it. The whole thing becomes noticeably more rigid with each row you add. Press each new rod firmly down against the previous one before moving on, which keeps your spacing consistent as you work your way up.
Keep going upward, alternating the direction with each new rod, until you reach the ridge pole. On warm days you may find that some of the horizontal canes start to dry out and stiffen up mid-project. Keep a spray bottle of water within reach and mist any rod that starts to feel brittle or shows surface cracking. Once the weaving is done, let the whole panel dry in place before you start lashing — the bamboo shrinks very slightly as it dries, which actually pulls the weave tighter. That’s a good thing.
Lashing, Finishing, and Long-Term Care
The woven panel will already look great at this point, but lashing the key connection points is what takes it from good-looking to genuinely durable. Concentrate on the intersections where the horizontal weaving rods meet the two outer uprights on each side, and on any interior upright where you want to add extra reinforcement. The technique is straightforward: start with a clove hitch around the upright, wrap diagonally around the joint four or five times in each direction to form an X, then add a frapping turn — a tight wrap around the middle of the X — and finish with a square knot. Pull each stage firm and the joint will barely move.
Trimming the overhanging ends of the horizontal rods to a consistent length is a small finishing detail that makes the whole thing look much more intentional and polished. Use your pruning saw and cut each end cleanly at roughly one inch past the outer uprights, with a slight angle so rainwater runs off the cut face rather than sitting on it. Smooth any rough edges with coarse sandpaper. Then wipe the entire trellis down with linseed oil — apply it with a cloth, let it soak in for an hour, and wipe away the excess. It deepens the color of the bamboo, helps repel moisture, and genuinely adds a season or two to the life of the structure.
You can start planting right away. Guide the leading stems of young climbers toward the lower weaving rods and loosely tie them in with soft twine or plant clips for the first few weeks, just until they get the idea. After that, most vigorous climbers will take care of themselves. The dense weave gives them so many attachment points that you tend to get fuller, more even coverage than you’d ever get from a simple grid trellis.
At the end of each growing season, give the trellis a quick once-over before winter. Check the lashing on the ridge pole and outer uprights and re-tie anything that’s worked loose. When pulling away dead plant material, do it gently rather than cutting — cutting can nick the bamboo surface and invite moisture in. In heavy snow areas, a simple lean-to of boards over the trellis will shed the weight and keep the horizontal rods from being pushed down by accumulation. A trellis that gets a little attention at the start and end of each season can realistically last five years or more before needing any real repair.
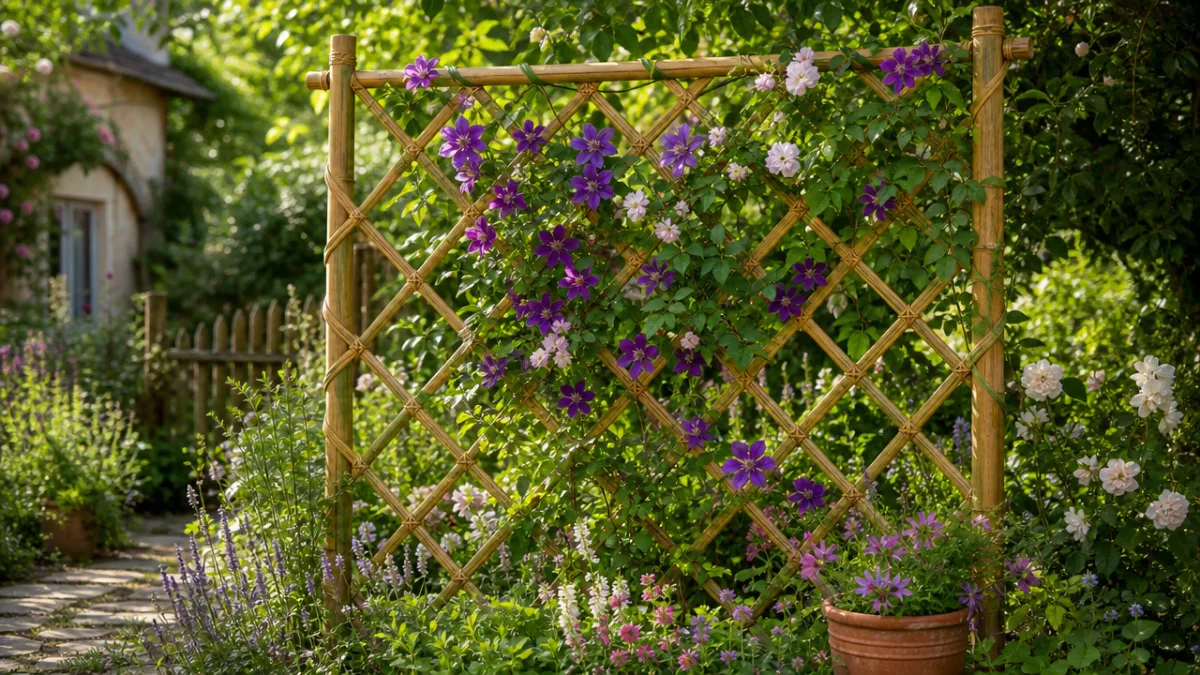
There’s something about building a woven bamboo trellis that goes beyond just making a support structure. It’s a way of paying close attention to your garden — investing real time and care into something that’ll give back season after season. The things you pick up along the way, like learning to read a cane for straightness, knowing when bamboo is ready to bend, tying a knot that’ll hold through a storm, are the kind of quiet, hands-on knowledge that makes you feel more connected to the space you’re tending. Build one, and you’ll almost certainly start thinking about where to put the next.








What do you think?
It is nice to know your opinion. Leave a comment.