










DIY Multi-Pocket Tote Bag: A Stylish Everyday Essential
Introduction: Why Every Sewer Should Make a Multi-Pocket Tote Bag
There is something deeply satisfying about carrying a bag you made with your own hands. A multi-pocket tote bag is one of those projects that sits at the perfect intersection of practicality and personal style. Whether you are heading to the farmers market, the office, or a weekend getaway, a well-constructed tote with thoughtfully placed pockets keeps your belongings organized and your look put-together. Best of all, making one yourself means you can customize every detail to match your personality and needs.
The beauty of a DIY tote bag project is that it is accessible to sewers at nearly every skill level. If you have mastered basic straight-stitch sewing and have a working knowledge of how to insert a simple zipper, you already have most of the technical know-how required. The multi-pocket design does add a few extra steps compared to a simple tote, but each step builds logically on the last, making this an excellent project for anyone looking to level up their sewing skills without diving into something overwhelming or discouraging.
Beyond the skill-building opportunity, there is also a compelling economic argument for making your own tote bag. High-quality multi-pocket totes from well-known brands can easily cost sixty to one hundred dollars or more. By sourcing your own fabric and notions, you can create something equally beautiful and far more durable for a fraction of that cost. More importantly, you will know exactly what materials went into your bag, so there are no unpleasant surprises when it comes to longevity or quality. This article will walk you through everything you need to know to create your own stylish, functional multi-pocket tote bag from start to finish.
The Growing Popularity of Handmade Bags
Handmade accessories have seen a remarkable resurgence over the past decade, driven in part by a cultural shift toward intentional consumption and away from fast fashion. Platforms like Pinterest and Instagram have made it easier than ever for crafters to share their work, discover new techniques, and find inspiration from makers around the world. The DIY bag-making community in particular has flourished, with countless tutorials, patterns, and video guides available for sewers of all backgrounds and experience levels. This abundance of shared knowledge has lowered the barrier to entry considerably, welcoming a new generation of makers into the fold.
There is also something to be said for the mental health benefits of a project like this. Sewing, like many craft practices, engages the mind in a focused, meditative way that many people find genuinely restorative. The repetitive motion of guiding fabric through a machine, combined with the satisfaction of watching a bag take shape piece by piece, offers a kind of mindful engagement that is increasingly rare in our digitally saturated daily lives. Many sewers report that time spent at the machine feels like a genuine mental reset, offering a productive escape from screens and stress.
Materials and Tools You Will Need
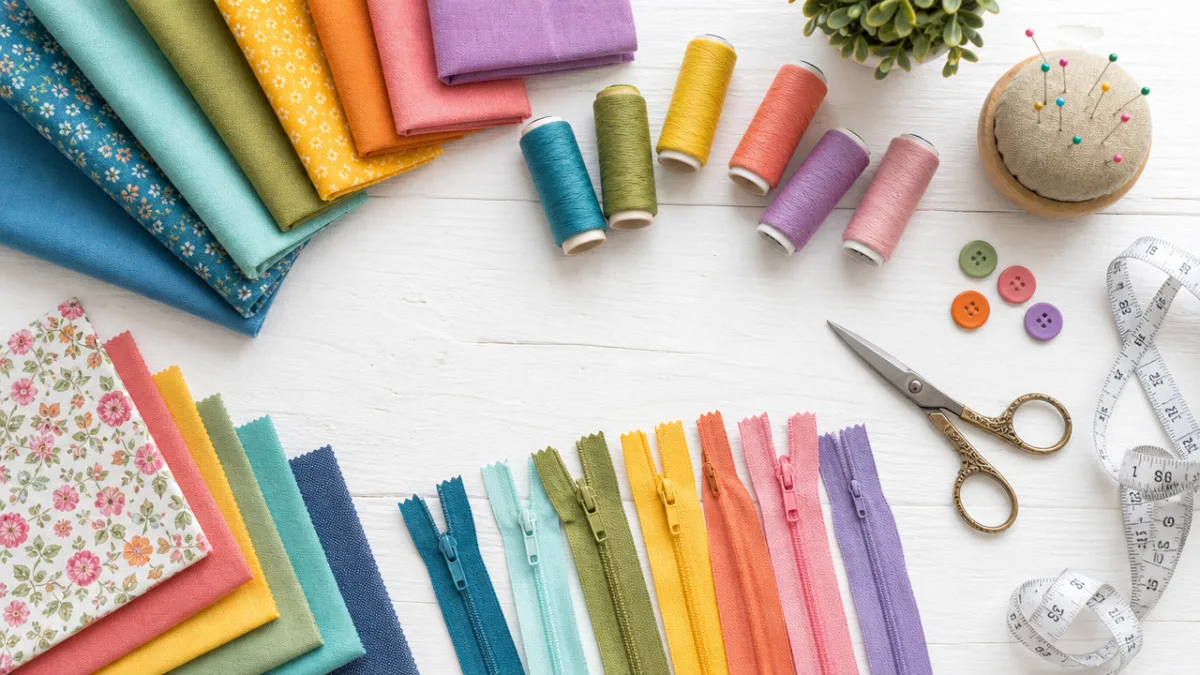
Before you cut a single piece of fabric, it pays to gather all your materials and lay them out on your work surface. Working with everything on hand prevents the frustrating interruptions that come from mid-project supply runs, and it also gives you a chance to double-check that your fabric choices work well together in terms of color, weight, and texture. For a bag that will hold up to daily use, fabric selection is one of the most important decisions you will make, and it deserves thoughtful consideration rather than a rushed last-minute choice.
For the exterior of your tote, look for a medium-to-heavyweight woven fabric such as canvas, denim, twill, or sturdy cotton. These materials have enough body to hold the bag’s shape when filled and will resist the wear and tear of daily use far better than lightweight quilting cotton. For the lining, you have a bit more freedom to choose something lighter and perhaps more visually interesting, since it will be visible every time you open the bag. A cotton print or a smooth poly-cotton blend works beautifully and adds a delightful surprise of color when the bag is open.
Interfacing is a material that many beginner sewers overlook, but it makes an enormous difference in the final look and durability of a bag. Fusible fleece or woven fusible interfacing applied to your exterior fabric panels gives the bag structure and a professional, polished appearance. Without interfacing, even a heavy canvas can look droopy and unfinished once the bag is loaded with your daily essentials. Take the time to press your interfacing on carefully and evenly, and you will immediately see how much it elevates the entire project.
Complete Materials List
- 1 yard of exterior fabric (canvas, denim, or heavy cotton twill recommended)
- 1 yard of lining fabric (quilting cotton or poly-cotton blend)
- 1 yard of woven fusible interfacing or fusible fleece
- Two 24-inch lengths of cotton webbing or leather handles (1.5 inches wide)
- One 12-inch or 14-inch zipper for the top closure
- Two 9-inch zippers for interior or exterior zippered pockets
- Thread in coordinating colors for exterior and lining
- Fabric scissors or a rotary cutter and self-healing mat
- Quilting ruler and fabric marking pen or chalk
- Sewing machine with a zipper foot attachment
- Iron and pressing cloth
- Pins or fabric clips
- Hand-sewing needle for finishing
In addition to these core supplies, a few optional but highly recommended tools can make your sewing experience significantly smoother. A seam ripper is an absolute must for any sewing project, and bag-making is no exception. Even experienced sewers need to unpick the occasional seam, and having a sharp ripper on hand saves enormous frustration. A wooden or bone folder is useful for pressing crisp corners and edges, and a point turner helps push out those sharp bag corners without poking through the fabric. These small investments in quality tools pay dividends across every project you undertake.
Cutting and Preparing Your Fabric Panels
Accurate cutting is the foundation of a bag that goes together smoothly and looks professional when finished. Even small inaccuracies in cutting can compound through the sewing process, resulting in misaligned seams, pockets that sit crookedly, or a bag that is uneven on one side. Before you make a single cut, press your fabric thoroughly to remove any wrinkles or folds that might cause distortion. Wash and dry your fabric first as well, especially if it is cotton, to account for any shrinkage that might otherwise affect your finished dimensions.
For a standard-sized tote that measures approximately fifteen inches wide by fourteen inches tall by four inches deep, you will cut two exterior panels and two lining panels at fifteen by fourteen inches each. You will also cut two side and bottom gusset strips at four by thirty-three inches for the exterior, and the same for the lining. These gusset strips are what give the bag its boxed-out three-dimensional shape, allowing it to stand upright and hold significantly more than a flat tote of the same dimensions. If you prefer a simpler construction without a separate gusset, you can box the corners of the flat panels instead, though the separate gusset method tends to produce a cleaner result.
Your pocket panels will require additional cutting. For a zippered exterior pocket, cut two pieces at ten by eight inches. For slip pockets on the lining interior, cut rectangles measuring twelve by ten inches, which will be folded in half and stitched down to create a clean, finished top edge. If you plan to add a divided interior pocket to keep smaller items like pens, lip balm, or a phone charger neatly separated, cut one larger panel at twelve by fourteen inches and mark the divider stitch lines with your fabric pen before sewing. Having all your pieces cut and labeled before you sit down at the machine is one of the most effective habits you can develop as a sewer.
Applying Interfacing Correctly
With all your fabric panels cut, the next step is applying interfacing to the exterior pieces. Lay each exterior panel wrong-side up on your ironing board, then position the interfacing on top with the glue side facing down against the fabric. Following the manufacturer’s instructions for temperature and press time, use a firm, steady iron to fuse the interfacing in place, working in sections rather than dragging the iron across the surface. Dragging can shift the interfacing before it has properly bonded, leaving you with bubbles or edges that peel away during sewing.
Once the interfacing is applied and the panels have cooled completely, give each one a final press from the right side using a damp pressing cloth. This step helps the fibers of the fabric and interfacing fully bond together and gives your panels a smooth, flat surface that is much easier to sew accurately. You will notice immediately that the interfaced panels have a satisfying firmness and body that makes handling them at the machine feel clean and controlled. This is the moment when many sewers feel their project start to come to life, and it is a genuinely motivating milestone in the process.
Constructing the Pockets: The Heart of the Design
The multi-pocket design is what sets this tote apart from a basic carry-all, and the pockets deserve careful attention during construction. There are generally two types of pockets you will be working with: exterior zippered pockets that provide quick-access storage for items you reach for frequently, and interior slip or zippered pockets that keep things organized and secure inside the bag. The order in which you construct and attach these pockets matters, since the lining pockets must be sewn to the lining panels before the lining is assembled, and the exterior pockets must be attached before the exterior shell comes together.
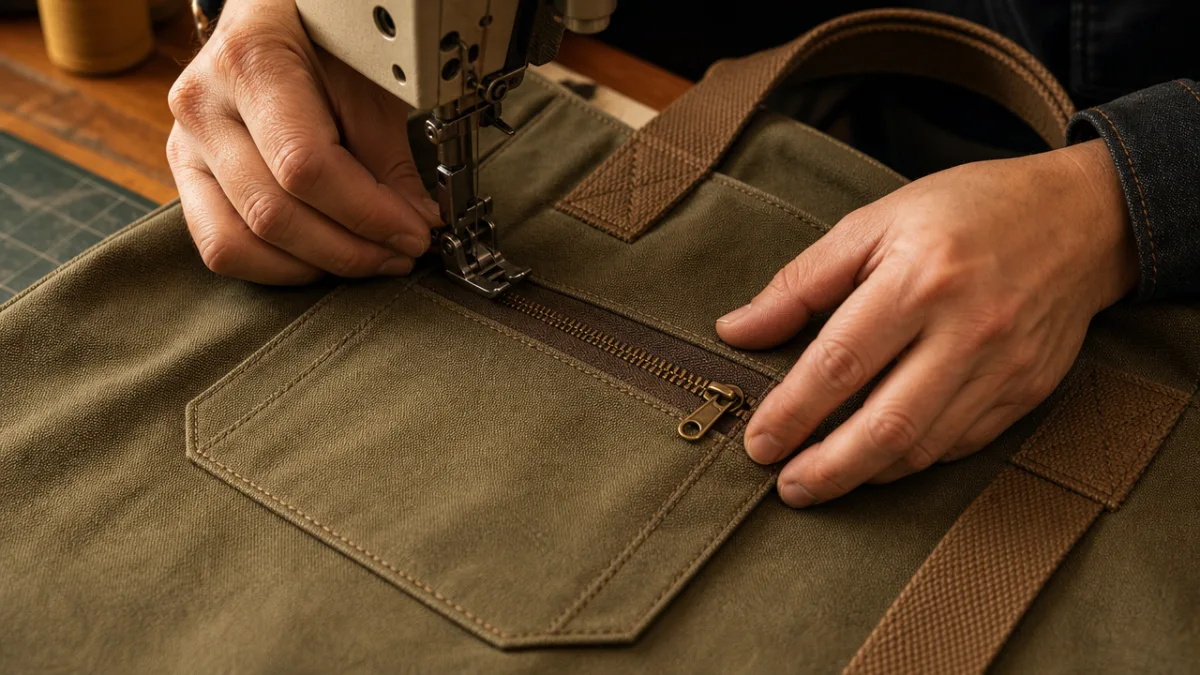
To make a zippered exterior pocket, begin by centering your zipper on the right side of one pocket panel and stitching it in place using your zipper foot. Then lay the second pocket panel over the first, sandwiching the zipper between them, and stitch the other side of the zipper tape. When you open the zipper and turn the panels right-side out, you should have a clean zip opening with no visible raw edges. Press this unit carefully, then topstitch along both sides of the zipper for a polished, professional look. The finished pocket is then positioned on the exterior panel and stitched around the three remaining sides, with a bartack at each upper corner for reinforcement.
Interior slip pockets are considerably simpler to construct but no less important in terms of function. Take your pocket rectangle, fold it in half with right sides facing, and stitch across the top edge. Turn it right-side out and press so the folded edge forms a clean finished top. Position this pocket on your lining panel with the finished edge facing up, pin or clip it in place, and stitch around the remaining three sides close to the edge. To create divided sections within the pocket, simply stitch one or more vertical lines through the pocket at measured intervals, backstitching firmly at the top edge to secure the division. These simple pockets are endlessly customizable in size and configuration.
Tips for Clean Zipper Installation
Zipper installation intimidates many sewers, but with the right approach it becomes a satisfying and manageable skill. The single most important tip is to use your zipper foot consistently and to keep the needle positioned as close to the zipper teeth as possible without hitting them. A line of stitching that wanders away from the teeth looks uneven and can cause the zipper pull to catch on the fabric when opening and closing. Take your time on these seams, using a slow machine speed and pausing to reposition as needed. The extra care pays off in a result that looks like it came from a professional atelier rather than a home sewing room.
Another common pitfall with zippers is failing to move the zipper pull out of the way before stitching past it. As you approach the pull during sewing, stop with your needle down in the fabric, lift the presser foot, and carefully slide the pull to the other side of the needle. Lower the foot and continue stitching. This simple maneuver prevents the awkward bump in the stitching line that results from trying to sew around the pull without moving it, and it is one of those small techniques that immediately marks the difference between a beginner and an intermediate sewer.
Assembling the Bag and Adding the Finishing Touches
With all your pockets constructed and attached to their respective panels, you are ready to assemble the bag shell. Begin with the exterior by joining the gusset strips to the main exterior panels, pinning or clipping carefully around the corners and using a reduced stitch length at the curves and angles to prevent stress points. If your gusset is a single continuous strip, you will need to clip into the seam allowance at the corners to allow the fabric to pivot cleanly. Press all seams open where possible to reduce bulk, particularly in the bottom corners where multiple layers of fabric converge. This pressing step makes the finished bag look significantly cleaner and allows the corners to sit flat and square.
The lining is assembled in the same way as the exterior, but leave a six-to-eight-inch gap in the bottom seam of the lining. This opening is how you will turn the entire bag right-side out after the exterior and lining are joined at the top. Before joining the two shells, attach your handles to the exterior panels by folding each webbing length in half, positioning the ends at your marked points on the top edge of the exterior, and stitching a box with an X through the center for maximum strength. The handles should be securely anchored since they bear the entire weight of the bag and its contents every single day.
To join the exterior and lining, slip the lining inside the exterior with right sides facing, aligning the top raw edges and matching the side seams carefully. Pin or clip generously around the entire top opening, then stitch all the way around using a generous half-inch seam allowance. Reach through the gap in the lining bottom, grasp the exterior base, and pull the entire bag through the opening until it is right-side out. Give it a moment to fully unfurl, then press the top edge carefully so the lining rolls just slightly to the inside, not peeking out above the exterior. Topstitch around the top opening to hold everything in place and give the bag a finished, structured look.
Final Finishing Steps
Close the turning gap in the lining by folding the raw edges in by a half inch on each side and stitching the opening closed either by machine or with a neat slip stitch by hand. Tuck the lining down into the bag, give the entire piece a thorough final press, and step back to admire what you have created. At this stage, many sewers are genuinely astonished by how professional and polished the finished bag looks compared to what they imagined when they started cutting fabric. The transformation from flat panels of cloth to a structured, functional, beautiful bag is one of the most rewarding moments in all of sewing.
Consider adding a few personalized finishing details that make the bag uniquely yours. A small key clip or D-ring sewn into the interior seam gives you a place to hook your keys so they are never lost in the bottom of the bag. A magnetic snap closure, installed before assembly, provides an additional security layer beyond the top zipper. You might also add a woven label with your name or a meaningful word, sewn discreetly into an interior seam or displayed proudly on the exterior. These small details collectively elevate the bag from a craft project to a genuine handmade heirloom.
Care, Customization, and Making It Your Own
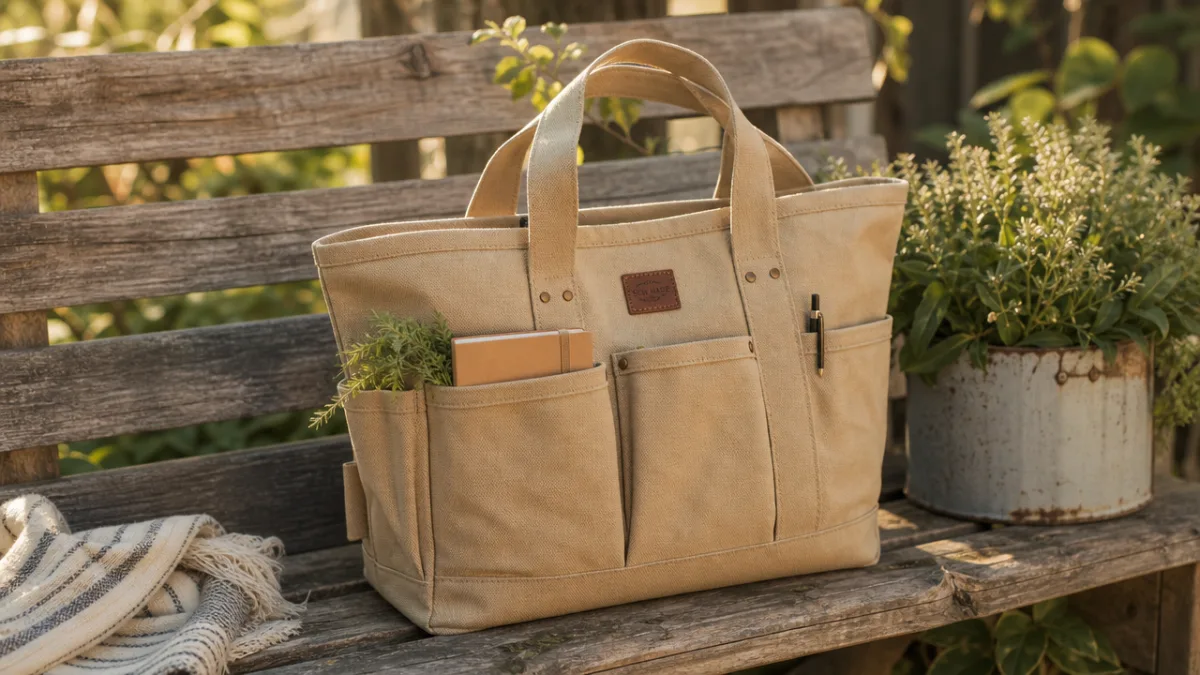
One of the greatest advantages of a handmade bag is that you know exactly what materials it contains, which means you can care for it properly and confidently. Most canvas or cotton tote bags can be spot-cleaned with a damp cloth for minor marks and surface dirt. For a more thorough cleaning, remove any leather accents or embellishments first, then wash the bag on a gentle cycle in cool water. Reshape it while damp and allow it to air dry fully before using it again, as machine drying can cause shrinkage and distort the interfacing. Storing the bag stuffed with tissue paper when not in use helps it retain its shape between outings.
Customization is where the real creative joy of bag-making comes into play. The basic construction described in this article is a framework, not a rigid prescription, and there is enormous room to personalize every element of the design. Consider using a bold wax print or a Japanese selvedge fabric for the exterior instead of plain canvas. Experiment with contrasting lining fabrics that create a delightful visual surprise when the bag is opened. Swap the standard cotton webbing handles for braided leather or a wide macrame cord for a boho aesthetic, or add a decorative tassel to the zipper pull for a pop of personality. The bag is a blank canvas, quite literally, and it rewards creative experimentation enthusiastically.
If you find yourself wanting to expand beyond this design, the skills you have developed in making this tote transfer directly to a wide range of other bag projects. The zipper installation technique you practiced on the pockets is the same fundamental skill required for a zippered clutch, a makeup bag, or a crossbody pouch. The gusset construction translates to tote bags of different sizes, messenger bags, and structured handbags. Each new project builds on the last, and before long you may find yourself with an impressive repertoire of handmade bags for every occasion and season, along with the skills and confidence to tackle even more ambitious makes.
Gifting and Sharing Your Makes
A handmade multi-pocket tote bag makes an extraordinarily thoughtful and personal gift for nearly anyone in your life. Unlike a purchased item, a handmade gift carries with it the unmistakable message that you valued the recipient enough to invest your time, skill, and creativity specifically for them. Choose fabrics that reflect the recipient’s personality or color preferences, configure the pockets to suit their lifestyle, and perhaps add a monogram or a hand-embroidered motif to make it truly one of a kind. Gift recipients routinely report that handmade items are among their most treasured possessions precisely because of the care and intention embedded in every seam.
Sharing your finished makes on social media or within your local sewing community is another way to extend the joy of this project beyond your own workroom. Photos of your bag can inspire other sewers to try the project themselves, and the feedback and encouragement from a community of fellow makers is genuinely motivating. Consider writing a short post about what you learned, what you would change next time, and any modifications you made to the original design. This kind of reflective sharing not only helps others but also deepens your own understanding of the craft and helps you articulate the skills you have developed. The sewing community is remarkably generous and welcoming, and your contribution to it is always valued and appreciated.








What do you think?
It is nice to know your opinion. Leave a comment.