










Flat Garden Bridge Plans: A Complete Guide to Building Your Own DIY Landscape Bridge
Introduction to Garden Bridges and Their Landscape Value
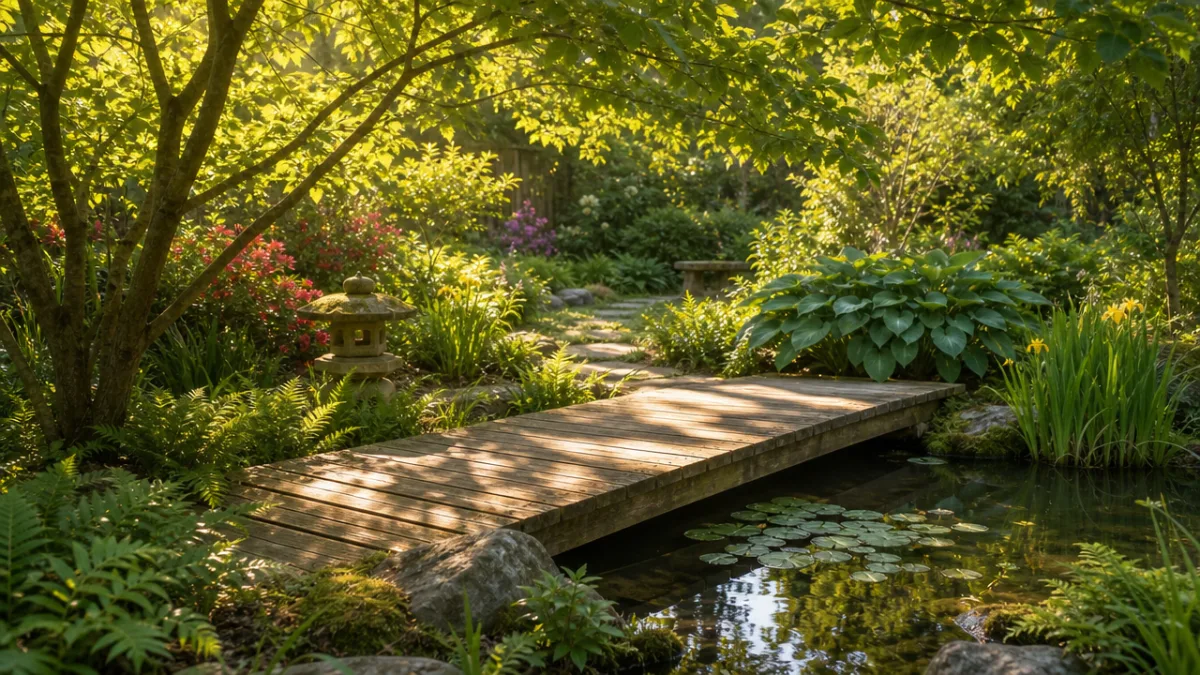
A flat garden bridge is one of the most rewarding DIY projects a homeowner or landscape enthusiast can undertake. Unlike more complex architectural garden features, a flat bridge offers a straightforward construction process while delivering an extraordinary visual and functional impact on your outdoor space. Whether you are spanning a dry creek bed, crossing a small pond, or simply adding a decorative focal point to your backyard, a well-built flat garden bridge can transform an ordinary landscape into something truly special and memorable.
Garden bridges have been used in landscape design for centuries, originating in Japanese, Chinese, and English garden traditions where they served both practical and philosophical purposes. In classical Japanese gardens, bridges were symbolic structures representing the journey between two worlds or states of being. In English country gardens, they provided elegant crossings over water features while adding a sense of romance and grandeur. Today, the flat garden bridge has evolved into a versatile DIY project that homeowners can adapt to suit virtually any aesthetic, from rustic and naturalistic to modern and minimalist.
Beyond their beauty, flat garden bridges serve genuine functional purposes that can solve real problems in your landscape. If your yard has a low-lying area that collects water, a dry creek bed you have designed for drainage, or a natural water feature that divides your usable outdoor space, a bridge provides safe and attractive passage. Even in yards without water features, a bridge placed over a gravel channel or planted area can create visual interest and direct foot traffic in ways that improve the overall flow and usability of the garden space.
Why Choose a Flat Bridge Design?
The flat bridge design is particularly popular among DIY builders because it eliminates the engineering complexity associated with arched or suspension bridge designs. There are no complex curves to cut, no tension calculations to worry about, and no specialized skills required beyond basic carpentry. The flat profile means all your lumber cuts are straight, your structural elements are simple rectangles and columns, and the entire project can be completed using standard tools that most homeowners already own or can easily rent for a weekend.
From an aesthetic standpoint, flat bridges also complement a wider variety of garden styles than arched alternatives. A flat bridge with clean lines fits naturally into contemporary and modern garden designs where geometric forms and horizontal planes are celebrated. When built with weathered wood or natural timber, the same flat structure can feel completely at home in a rustic cottage garden or naturalistic woodland landscape. This adaptability makes the flat design the most universally appealing choice for first-time bridge builders working across different property styles.
Cost is another significant advantage of the flat garden bridge. Because the design requires fewer materials and less labor than more complex bridge styles, you can build a genuinely beautiful and structurally sound bridge for a fraction of what a professional installation would cost. Depending on the span and width you choose, a typical DIY flat garden bridge can be completed for between two hundred and eight hundred dollars in materials, making it one of the highest-value landscape improvements available to budget-conscious homeowners.
Materials, Tools, and Planning Your Build
Before you purchase a single piece of lumber or pick up a single tool, spending adequate time in the planning phase will determine whether your bridge project succeeds beautifully or frustrates you at every turn. The first and most critical measurement you need is the span, meaning the distance your bridge must cross from one bank or edge to the other. For residential garden bridges, spans typically range from four feet to twelve feet, with six to eight feet being the most common range for backyard applications. Once you know your span, you can calculate the lumber dimensions you need for structural integrity.
For the primary structural components, pressure-treated lumber is almost universally recommended for garden bridge construction. Pressure treatment protects the wood against rot, insects, and moisture damage, which is essential for any structure that will sit close to water or damp soil. For most residential flat bridges, you will use 2×8 or 2×10 boards for the main support beams that run the length of the bridge, and 2×6 boards for the decking planks that form the walking surface. The posts or vertical supports at each end should be 4×4 or 4×6 posts depending on the load requirements of your specific design.
Hardware selection is just as important as lumber selection and is an area where inexperienced builders sometimes cut corners with costly consequences. All fasteners, brackets, joist hangers, and connectors used in a garden bridge should be rated for outdoor and pressure-treated lumber use. Standard interior-grade screws and nails will corrode rapidly when exposed to the chemicals in pressure-treated wood and outdoor moisture, causing structural failure long before the lumber itself deteriorates. Look for hardware labeled as hot-dipped galvanized, stainless steel, or specifically rated for ACQ pressure-treated lumber.
Essential Tools for the Project
The good news for DIY builders is that a flat garden bridge requires only a modest toolkit that most hobbyist carpenters will already have on hand. A circular saw is the primary cutting tool you will use throughout the project, handling the straight cuts needed for your beams, decking boards, and posts. A power drill with a variety of bit sizes will handle all your fastening work, and a level is absolutely essential for ensuring your bridge sits flat and true rather than developing an inconvenient and potentially dangerous tilt after installation.
Additional tools that will make your build significantly easier include a tape measure, a square for checking right angles, a chalk line for marking long straight lines across your lumber, and clamps for holding pieces together while you fasten them. If your bridge design includes handrails, a router can help you create rounded edges on the rail caps for a more polished and comfortable finish. For setting posts into the ground or into concrete footings, you may also need a post hole digger or auger, which can typically be rented from a local equipment rental company for a modest daily fee.
Safety equipment deserves equal attention during your planning phase. Safety glasses should be worn whenever you are cutting or drilling lumber, as sawdust and wood chips can cause serious eye injuries. Work gloves protect your hands from splinters and from the chemicals present in pressure-treated lumber, which should never be handled for extended periods without protection. A dust mask is advisable when cutting pressure-treated wood, as the preservative chemicals can be harmful when inhaled as fine particulate matter. Keep a first aid kit nearby and never work alone on projects involving power tools.
Calculating Lumber Quantities
Once you have finalized your bridge dimensions, creating a detailed materials list before you go to the lumber yard will save you both time and money. For a typical six-foot-span, four-foot-wide flat garden bridge, you will generally need two 2×10 boards cut to your span length for the main beams, approximately eight to ten 2×6 boards for decking depending on the spacing you choose between planks, four 4×4 posts for the end supports, and additional lumber for any handrail components. Always purchase ten to fifteen percent more lumber than your calculations suggest to account for waste, bad cuts, and any boards that turn out to have defects.
- Main support beams: 2×10 pressure-treated lumber, quantity based on span length
- Decking boards: 2×6 pressure-treated lumber, spaced approximately one-quarter inch apart for drainage
- End posts: 4×4 or 4×6 pressure-treated posts, minimum 24 inches for stable footing
- Handrail components: 2×4 rails and 2×2 balusters if included in your design
- Hardware: Structural screws, joist hangers, post bases, and carriage bolts rated for outdoor use

Step-by-Step Construction Process
The construction of a flat garden bridge follows a logical sequence that begins with the foundation and works upward through the structural frame to the finished walking surface. Starting with a solid, level foundation is not optional — it is the single most important factor in determining whether your bridge will remain stable, attractive, and safe for years to come. If your bridge will span an actual water feature or creek, the footings or support structures on each bank must be set into ground that is firm and stable enough to bear the combined weight of the bridge structure and the people who will use it.
Begin by marking your bridge location precisely and excavating or preparing the soil at each end where your footings will be placed. For lighter bridges intended primarily as decorative features, you may be able to rest the main beams on flat concrete paving slabs or precast concrete footings set at grade. For bridges that will receive heavy use or span longer distances, pouring concrete tube footings that extend below the frost line in your climate provides far superior stability and longevity. The footings must be perfectly level with each other across the span for the bridge deck to sit flat and true.
With your footings in place and fully cured if concrete was used, the next step is installing the main structural beams. These beams, your 2×10 or 2×12 boards, run parallel to each other along the full length of the bridge and carry all the load from the decking and the users above. The beams should be positioned so they overhang the footings by approximately six to twelve inches on each end, which creates a cleaner visual appearance and allows for the attachment of end trim boards that finish the bridge’s appearance. Use appropriate post bases or beam brackets to secure the beams to your footings rather than relying on gravity alone.
Installing Decking and Cross Bracing
Once your main beams are in place, secured, and verified to be level, decking installation can begin. Lay your 2×6 decking boards perpendicular to the main beams, starting from one end and working toward the other. Using a consistent spacer between each board — a quarter-inch to three-eighths-inch gap is standard — ensures uniform drainage gaps and gives your finished bridge a professional appearance. Pre-drilling each fastener location before driving screws is strongly recommended, as it prevents the wood from splitting and makes driving screws flush to the surface significantly easier.
Cross bracing between the main beams significantly improves the rigidity and load-bearing capacity of your bridge, and is particularly important for spans longer than six feet. Cross braces are typically cut from the same 2×8 or 2×10 lumber as your main beams and are installed perpendicular to them at the midpoint of the span and near each end. These blocking pieces prevent the main beams from twisting or bowing under load, which would cause the decking surface to become uneven and could eventually lead to structural failure if left unaddressed over multiple seasons of use.
The decking installation process is also the right time to consider any special features you want to incorporate into the walking surface. Some builders choose to orient their decking boards at a forty-five-degree angle to the main beams for a distinctive herringbone or diagonal pattern that adds visual interest. Others incorporate contrasting wood species or use routed grooves along each board to improve traction in wet conditions. Whatever your preference, these design decisions are easiest to implement during the initial installation rather than as modifications after the fact.
Building and Attaching Handrails
Handrails are not strictly necessary for low bridges spanning short distances, but they add both safety and aesthetic value to virtually any garden bridge design. For bridges where the deck sits more than twelve inches above the ground or water below, handrails become a genuine safety feature rather than purely decorative. A standard residential handrail system for a garden bridge consists of vertical posts attached to the outside face of the main beams, horizontal rails connecting those posts at top and mid height, and a flat cap rail along the top for a finished, comfortable look.
Post spacing for handrails should not exceed six feet and is typically closer to four feet for a sturdy, visually balanced appearance. The posts should be attached to the bridge structure using through-bolts rather than screws alone, as the lateral forces that people put on handrails when grabbing them for balance require a fastening method that resists pulling and shearing forces equally well. Carriage bolts with nuts and washers tightened from the inside of the beam provide excellent holding power and a clean appearance from the outside of the bridge.
The cap rail that runs along the top of the handrail system deserves particular attention because it is the element people will touch most frequently and the element most visible from a distance. Using a wider board, typically a 2×4 or even 2×6 laid flat, creates a comfortable resting surface and provides a generous visual element that gives the bridge a finished and intentional appearance. Routing a roundover profile along all exposed edges of the cap rail eliminates sharp corners, improves comfort, and reduces the tendency for the wood to check and crack along its edges as it weathers over time.

Finishing, Sealing, and Weather Protection
The work you put into finishing and protecting your completed bridge will directly determine how many years of beauty and service it provides before requiring significant maintenance or replacement. Even pressure-treated lumber, which resists rot and insects far better than untreated wood, benefits enormously from the application of a quality exterior wood sealer or stain. The UV radiation from sunlight is the primary enemy of outdoor wood structures, breaking down the wood fibers at the surface and causing the graying, cracking, and checking that makes untreated wood look weathered and neglected within just a few years of outdoor exposure.
Before applying any finish, allow your pressure-treated lumber to dry adequately if it was recently purchased and still contains significant moisture from the treatment process. Freshly treated lumber often has a high moisture content that prevents finishes from penetrating properly, leading to peeling and failure of the coating long before it should need replacement. A simple test is to sprinkle a few drops of water onto the wood surface — if the water beads up and sits on the surface, the wood is too wet to finish. If the water absorbs into the wood within a few seconds, the wood is ready for finishing.
For garden bridges, a semi-transparent penetrating stain in a natural wood tone provides an excellent combination of protection and appearance. Unlike solid-color paints and stains that sit on the surface of the wood, penetrating stains soak into the wood fibers and protect from within while allowing the natural grain and texture of the wood to remain visible. This type of finish also tends to wear gradually and gracefully rather than peeling or flaking, making maintenance reapplication easier because you do not need to strip or sand extensively before applying a fresh coat every two to three years.
Moss, Algae, and Ongoing Maintenance
In moist garden environments near water features or in shaded areas of the yard, moss and algae growth on wood surfaces is a common and persistent challenge. While moss gives garden structures a charming aged appearance in some landscape styles, it also creates a slippery surface that can be genuinely dangerous underfoot, particularly when the bridge deck is wet from rain or dew. Regular light scrubbing with a stiff-bristled brush and a diluted solution of oxygen bleach effectively removes biological growth without damaging the wood or harming surrounding plants the way chlorine bleach products can.
Inspect your bridge at least once per year, ideally at the beginning of each spring season, checking for signs of structural movement, fastener corrosion, wood decay, and any loosening of the handrail components. Pay particular attention to the areas where the main beams rest on or connect to the footings, as these transition points between wood and ground or concrete are where moisture tends to concentrate and where decay most often begins. Catching and addressing minor issues during annual inspections prevents them from developing into major structural problems that require extensive and expensive repairs.
Fastener maintenance is an often-overlooked aspect of bridge upkeep that can have significant structural implications if neglected. Even galvanized and stainless-steel fasteners can develop surface rust staining in very wet environments, and screws or bolts can work loose over time as the wood expands and contracts through seasonal moisture and temperature changes. Tighten any loose fasteners you discover during your inspections, replace any that show signs of significant corrosion, and add additional fasteners in areas where wood movement has created small gaps or looseness in the connections between structural members.
Design Variations and Customization Ideas
One of the most enjoyable aspects of building your own flat garden bridge is the freedom to customize the design in ways that make it uniquely suited to your landscape and personal taste. The basic structural principles described in this guide can accommodate a remarkable range of aesthetic variations, from the simple and purely functional to the elaborate and highly decorative. The bridge you build does not need to look exactly like any plan or example you have seen — in fact, the most memorable garden bridges are those that clearly reflect the personality and vision of the people who built and use them.
Width is one of the first and most impactful customization decisions you will make. Standard flat garden bridges are often built to a width of three to four feet, which comfortably accommodates a single person and allows for handrails on each side. However, if you want your bridge to feel more generous and social — a place where two people can stand side by side and enjoy the view of the garden — consider widening your design to five or even six feet. The additional material cost is relatively modest, but the experiential difference between a narrow functional crossing and a wide, inviting garden destination is substantial.
The choice of decking pattern offers another significant opportunity for customization without complicating the structural aspects of the build. In addition to the standard parallel decking layout, consider the visual impact of diagonal decking, which runs the boards at a forty-five-degree angle to the bridge’s length and creates a dynamic, energetic pattern that draws the eye along the structure. For a more traditional or formal aesthetic, a picture-frame pattern that uses a border of boards running perpendicular to the field decking creates an elegant, crafted appearance that reads as intentional and refined from any vantage point in the garden.
Integrating Lighting into Your Bridge Design
Low-voltage landscape lighting integrated into a garden bridge transforms the structure from a purely daytime feature into a magical nighttime element that extends the enjoyment of your outdoor space well into the evening hours. The most elegant approach involves recessing small LED fixtures into the underside of the handrail cap or into the vertical face of the handrail posts, casting a soft downward glow that illuminates the deck surface without creating glare. This type of indirect, downward-directed lighting is both beautiful and practical, making the bridge safe to use after dark while creating a warm, inviting atmosphere in the surrounding garden.
Solar-powered lighting options have become increasingly capable and affordable in recent years, making them a particularly attractive choice for garden bridges where running electrical wiring from the house would be impractical or overly expensive. Quality solar-powered deck lights and post cap lights can provide adequate illumination for safe nighttime use while eliminating the need for trenching, conduit, and electrical connections entirely. When selecting solar fixtures, choose products with lithium-ion batteries rather than older nickel-metal-hydride types, as lithium-ion batteries maintain better performance in cold weather and have significantly longer service lives.
For a more dramatic lighting effect that showcases the bridge as a deliberate landscape focal point, consider adding low-profile spotlights positioned in the planting beds or ground cover surrounding the bridge ends. These fixtures can be aimed to wash across the bridge structure from the side, creating shadows that emphasize the texture of the wood and the structure of the handrail components. Combined with the subtle glow of integrated deck lights, this layered approach to lighting creates a level of visual sophistication in your garden that is typically associated with professionally designed landscapes.
Landscaping Around Your New Bridge
The plants and landscaping elements you choose to surround your completed bridge will ultimately determine whether it feels like an integrated part of a cohesive landscape design or an isolated structure that sits awkwardly in the yard. The most successful garden bridge installations are those where the bridge appears to emerge naturally from its surroundings, with planting on each approach that frames the structure, guides visitors toward it, and softens the transition between the hard materials of the bridge and the organic forms of the garden.
Ornamental grasses are particularly effective companions for garden bridges because their movement in the breeze creates a dynamic, living quality around the structure that changes with every visit to the garden. Varieties such as Japanese forest grass, blue oat grass, and maiden grass provide different heights, textures, and seasonal characteristics that can be layered together for a planting composition that looks interesting in every season. Planting grasses near the base of the bridge end posts visually anchors the structure to the ground and softens the hard line where the wood meets the soil or gravel below.
If your bridge spans an actual water feature, the planting opportunities expand dramatically to include moisture-loving species that thrive at the water’s edge and create the lush, naturalistic setting that makes water garden bridges so evocative and atmospheric. Iris, ligularia, rodgersia, and various ferns all perform beautifully in consistently moist soil and provide a succession of foliage textures and seasonal color that frames the bridge beautifully throughout the growing season. The combination of moving water, living plants, and handcrafted wood creates a multi-sensory garden experience that is genuinely difficult to achieve through any other landscape feature.








What do you think?
It is nice to know your opinion. Leave a comment.