










DIY String Light Planters: A Complete Guide Inspired by Jenna Sue Design
Introduction to String Light Planters
String light planters are one of those DIY projects that somehow manage to be both useful and genuinely beautiful at the same time. The idea, popularized by the folks over at Jenna Sue Design, pairs the warm glow of string lights with the natural charm of potted plants to create something that works just as well on a patio as it does in a living room corner or on a bedroom windowsill. Once you have one of these glowing little planters in your space, it is hard to imagine the room without it.
What makes this project so approachable is that you really do not need special skills or an elaborate toolkit. Most of what you need is already sitting in hardware stores, garden centers, or craft shops near you, and the cost per planter can be surprisingly low. The real payoff comes at dusk, when the lights flicker on through the foliage and turn an ordinary pot of plants into something that feels a little magical — like a nightlight that is also alive.
What sets Jenna Sue Design’s take on this project apart is the attention to detail behind the material and plant choices. This is not just about wrapping a pot in fairy lights and calling it a day. The method encourages you to think about texture, color, and how a plant’s natural growth habit will interact with the lights over time. The finished planter actually gets better as the plants fill in and the lights settle into their arrangement — it is genuinely living decor in the truest sense.
Materials and Tools You Will Need
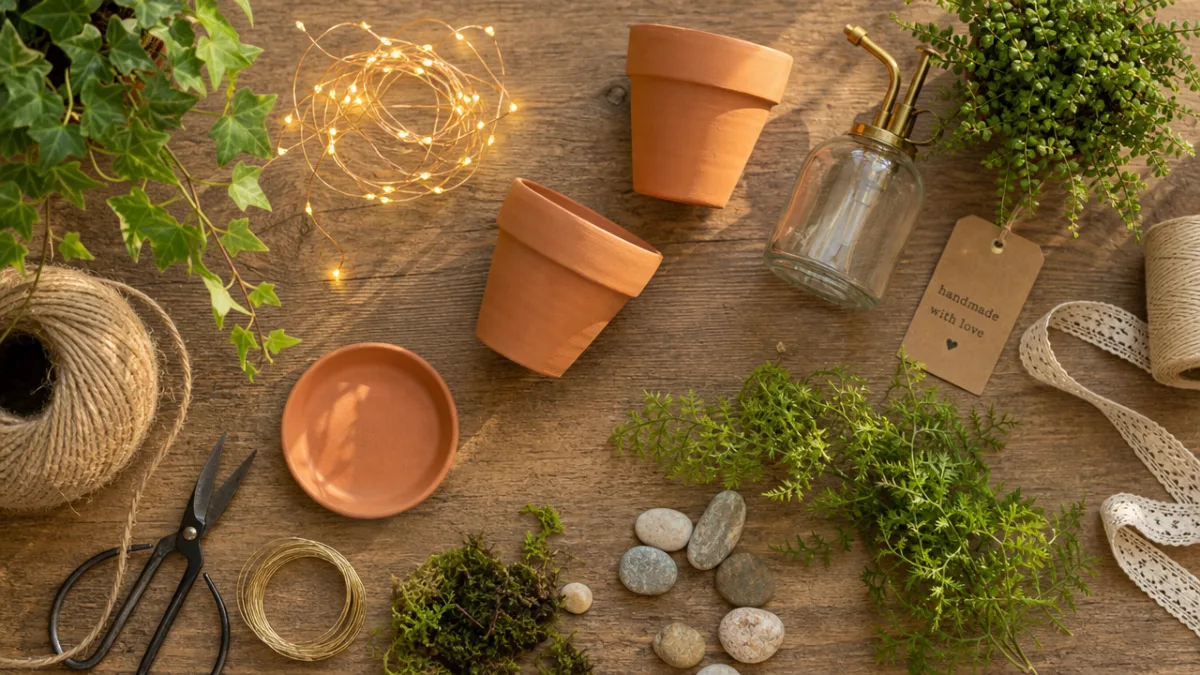
Before you start getting creative, it helps to have everything gathered and ready to go. At the heart of every string light planter is, of course, the planter itself. Terra cotta pots are a classic choice — their warm, earthy tones play beautifully off the golden glow of warm-white lights. That said, concrete planters, wooden crates, woven baskets with liner inserts, and galvanized metal buckets all look fantastic depending on your style and space.
For the lights, battery-operated LED fairy lights are the way to go over plug-in versions because they give you so much more freedom in where you place things. You are not hunting for a nearby outlet or hiding a cord across the floor — you can just put the planter exactly where it looks best. Aim for a warm white color temperature around 2700K to 3000K, which has that soft, candlelit quality that pairs so nicely with green foliage. Copper-wire fairy lights are a particular favorite because the wire is so thin it practically disappears during the day, making the lights look like they are just floating through the plant when they are on.
Beyond the planter and the lights, you will want to have the following items on hand before you begin:
- Potting mix suited to your chosen plants
- Small stones or gravel to layer at the bottom for drainage
- Wire cutters and small pliers for wrangling the light strand
- Floral wire or small clips to hold the lights in place
- A selection of plants that match your light conditions
- Optional: moss, decorative stones, or driftwood for a polished top dressing
- Waterproof sealant if you are working with wooden or paper-based containers
Having everything laid out before you start saves you from that frustrating mid-project scramble to find something you forgot. Take a few minutes to arrange your materials on a clean surface, and consider doing a quick dry run by loosely draping the lights around an empty planter before any soil or plants enter the picture. It is a small step that makes a big difference — you get a clear sense of how the lights will wrap, and adjustments are much easier to make when nothing is rooted in yet.
Choosing the Right Plants
Plant selection is honestly where the most important creative decision gets made, and it is worth taking your time here. The plants you pick will shape the visual personality of the whole thing, determine how much upkeep it needs, and have a lot to say about how long your planter stays looking great. The general idea is to find varieties that will not swallow the lights entirely in a matter of weeks, while still having enough presence to make the planter feel genuinely lush.
Trailing plants are where the magic really happens. As their vines cascade and weave through the light strands, the whole arrangement starts to look less like a craft project and more like something that grew that way on purpose. String of pearls, pothos, creeping jenny, ivy, and trailing succulents are all wonderful options. As the vines grow longer and drape over the sides of the pot, they create a living curtain effect that makes the whole thing feel increasingly romantic and whimsical. If you are working with outdoor planters in warmer months, sweet potato vine in deep purple or bright chartreuse brings a real punch of color to the mix.
If you prefer something with a bit more structure, compact ornamental Grasses, small ferns, lavender, rosemary, or dwarf ornamental cabbages are excellent picks. Their upright, architectural forms create a nice contrast against the soft, diffuse glow of the lights. And if you are making a version for the kitchen windowsill, herbs like thyme and basil are a brilliant choice — you get the decorative effect of the glowing planter plus fresh herbs within arm’s reach while you cook.
One thing that is easy to overlook but really matters: make sure the plant you choose is actually suited to the spot where the planter will live. A sun-loving succulent is going to struggle on a dim apartment balcony, and a shade-loving fern will scorch quickly in a south-facing window. Getting the light match right is the single biggest factor in whether your planter thrives for months or starts declining within a few weeks. If you are unsure, it is always worth asking someone at your local nursery — they tend to be genuinely helpful with exactly this kind of question.
Step-by-Step Construction Process
With everything gathered and your plants chosen, it is time to put it all together. Start by prepping your planter. If you are working with a terra cotta or ceramic pot, cover the drainage hole with a small piece of mesh or a flat stone so the soil stays put while still letting water through. Then add a one- to two-inch layer of small stones or horticultural gravel to the bottom — this simple step makes a real difference in preventing root rot, especially for succulents and other plants that do not like sitting in soggy soil.
Add enough potting mix to bring the soil level to about two inches below the rim of the pot. That gap matters — it gives you working room for the lights and keeps soil from washing over the edge every time you water. Remove your plant gently from its nursery container, loosen the roots a bit if they are tightly packed, and settle it into the center of the pot. Fill in around the roots with more potting mix, pressing lightly to close up any air pockets, and give everything a good thorough watering to help the plant settle into its new home.
Now for the best part: arranging the lights. Start at the base of the plant near the soil and wind the strand upward through the foliage in a loose, gentle spiral. The word “loose” is doing a lot of work in that sentence — wrapping too tightly can stress the plant and also makes the whole thing look stiff and unnatural. The goal is for the lights to look like they are drifting organically through the plant, not cinched to it. For trailing varieties, let some strands follow the vines down over the outside of the pot. It looks really lovely.
Once you are happy with the overall shape, use small floral wire clips to anchor any sections that keep slipping out of place. Then step back and look at it from a few different angles — including from above — to check that the lights are spread evenly and there are no awkward clumps or bare patches. Tuck the battery pack behind the plant or along the inner rim of the pot where it will stay out of sight but still within easy reach when it is time to swap out batteries.
Creative Styling and Display Ideas
Once your planter is finished, there are so many fun ways to work it into your space. One of the most popular approaches is grouping three planters in different heights and sizes together on a shelf, mantel, or side table. When their individual glows combine, the cluster actually produces enough warm ambient light to change the feel of a room in the evening — it is genuinely atmospheric. Mixing planter materials within the group makes it even better: a terra cotta pot next to a concrete vessel next to a woven basket creates a really satisfying variety of textures.
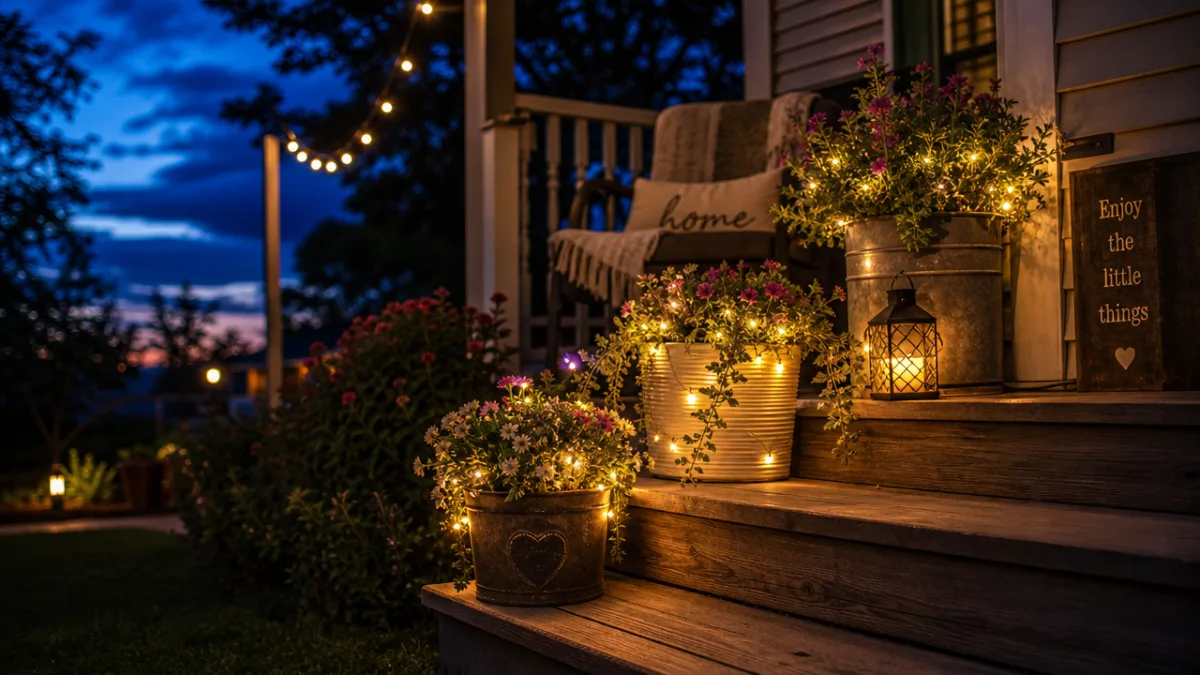
Outdoors, these planters are absolutely lovely. Line them along a porch railing, flank a front door with a pair of them, or cluster a few on a patio table as a centerpiece — any of these arrangements creates a warm, welcoming atmosphere that is honestly hard to achieve with more expensive outdoor lighting. They have the added bonus of being completely portable, so you can bring them inside when the weather turns or when you just want a change of scenery. Layer them with a few lanterns, some candles, or a strand of overhead patio lights and you have an outdoor lighting setup that feels genuinely special after dark.
Vertical displays are another direction worth exploring. Mounting a row of small wall planters with fairy lights threaded through them creates a living wall installation that you simply cannot find in any store. This works especially well in dining rooms, home offices, or bedroom accent walls, where the mix of greenery and soft light creates a calming atmosphere that is genuinely good for your wellbeing. Arrange them in a neat grid for something more polished, or let them scatter more loosely across the wall for a bohemian feel.
Seasonal swaps are a fun dimension of this project that a lot of people do not think about at first. Over the winter holidays, pull out the usual plants and replace them with small evergreen cuttings, rosemary trimmed into a little cone shape, or arrangements of pine cones and holly — then swap the warm-white lights for amber or multi-colored strands for a festive look. Come autumn, ornamental kale, mums, and miniature pumpkins paired with orange or deep red lights make a cozy seasonal display. The planter itself stays the same while the contents evolve with the seasons, giving you a really versatile decorating framework that keeps things feeling fresh all year.
Care, Maintenance, and Troubleshooting
Looking after a string light planter is not much different from caring for any container plant, but there are a couple of extra things to keep in mind. The most important one is watering carefully to avoid soaking the battery pack or the light connections. Use a narrow-spouted watering can and aim for the soil surface rather than pouring broadly over the whole plant — this protects the electronics and also sidesteps the fungal issues that overhead watering can cause with some plants.
As your plants grow, you will find yourself making small adjustments to the light arrangement from time to time. Trailing plants especially grow quickly and will naturally carry the lights along with them as new vines extend outward. Honestly, this often looks beautiful and feels serendipitous, but occasionally a strand will wander too far from the main arrangement and need guiding back. Just unhook the clip, reposition the strand, and clip it back in place. While you are at it, check the battery level — if the lights are looking a little dim, it is probably time for fresh batteries, which typically happens every four to eight weeks depending on how many hours a day you run them.
If your plant starts showing signs of stress — yellowing leaves, leggy growth, wilting in spite of regular watering — it is worth considering whether the lights might be part of the problem. LED fairy lights produce very little heat compared to older incandescent bulbs, but strands wound too closely around stems can still make it harder for the plant to breathe and create small pockets of higher humidity that can encourage rot in certain species. If you suspect this is happening, loosen the arrangement a bit, create more space between the light strand and the stems, and keep an eye on how the plant responds over the next couple of weeks.
With a bit of care, a well-made string light planter can genuinely be a long-term feature in your home rather than a temporary craft project. The keys are using quality LED lights rated for long life, choosing plants that are well suited to their spot, and repotting when the plant outgrows its container. When repotting time comes, treat it as a chance to refresh the soil, clean up the planter, and rethink the light arrangement to suit the plant’s new, larger form. It is one of those projects that actually gets better with time the more you invest in it.
Budget Considerations and Where to Source Materials
One of the nicest things about this project is how affordable it can be when you approach it thoughtfully. A basic planter using a standard six-inch terra cotta pot, a set of battery-operated fairy lights, and a small plant can come together for well under fifteen dollars in most places. Even a larger, more elaborate version with a statement planter, premium copper-wire lights, and a few plants can typically land between thirty and fifty dollars — a fraction of what you would spend on something comparable at a home goods store.
For the most budget-friendly route, look for planters at thrift stores, yard sales, or simply repurpose containers you already have around the house. Old colanders, wooden wine boxes, vintage enamelware, and large tin cans can all become really charming planters with minimal prep. For fairy lights, dollar stores and craft supply chains often have great deals, and online marketplaces sell multi-packs of LED fairy lights at very competitive prices. Buying in bulk is a smart move if you are planning to make several planters or just want a few spare strands tucked away.
Plant costs are easy to keep low by propagating cuttings from plants you already have or asking friends and neighbors if they have anything to divide or share. Pothos, ivy, succulents, and most herbs propagate easily in water or moist soil and can be ready to go into a new planter within a few weeks of taking a cutting. There is also something genuinely satisfying about that approach — when you know the plant came from a cutting off the pothos on your bookshelf or from a division of a neighbor’s garden, the finished planter feels less like a purchased item and more like something with a real story behind it.








What do you think?
It is nice to know your opinion. Leave a comment.