










DIY Raised Garden Beds: Build & Fill on a Budget
Why Raised Garden Beds Are Worth Every Penny
Raised garden beds have exploded in popularity over the last decade, and honestly, it’s not hard to see why. They give you real control over your soil, your drainage, and how you space your plants — and those three things can make or break a whole growing season. Whether you’ve got a big backyard or a tiny urban patio, a well-built raised bed can turn just about any spot into a productive little garden that more than pays for itself in fresh vegetables and herbs.
There’s also a huge practical bonus that doesn’t get talked about enough: raised beds are so much easier on your body. Traditional in-ground gardening means constant bending and kneeling, which adds up fast and is genuinely rough on your back and knees over time. Build your bed at a comfortable height and you can tend your plants while standing upright or even sitting. That makes gardening accessible for people of all ages and physical abilities — and for a lot of folks, that ergonomic advantage alone is reason enough to make the switch.
And then there’s the satisfaction of building the whole thing yourself. A DIY raised bed is a project the whole family can get involved in, from sketching out the plan and cutting the lumber to filling it with soil and picking out what to grow. When you finally bite into a tomato from a bed you built with your own hands, it really does taste sweeter — partly because of the rich soil, and partly because you did that.
Choosing the Right Materials Without Overspending
The material you pick for your bed walls shapes the whole project, both in terms of looks and cost. Cedar and redwood are the top choices because they naturally resist rot and can last ten to twenty years without any chemical treatment. The catch is they’re pricey. If your budget is tighter, construction-grade pine or spruce can work beautifully for five to eight years, especially if you brush the interior walls with a food-safe wood preservative or line them with landscape fabric.
If you want to spend as little as possible, there are some genuinely creative options out there. Old wooden pallets, concrete blocks, galvanized metal stock tanks, and reclaimed bricks can all become sturdy, good-looking raised beds for next to nothing. Check Facebook Marketplace, Craigslist, Habitat for Humanity ReStores, and local demolition sites — you’d be surprised what people give away. With a bit of scrounging, you can build a great raised bed for under twenty bucks.
One material worth approaching carefully is pressure-treated lumber. Older versions used arsenic-based preservatives that can leach into soil and contaminate your food — not great. Modern pressure-treated wood uses safer compounds, but plenty of organic gardeners still prefer to skip it for growing beds. If you do go that route, line the inside with a thick polyethylene sheet or heavy-duty landscape fabric to keep the wood from touching your soil directly. It really comes down to your own comfort level and how long you want the bed to hold up.
Step-by-Step: Building Your Raised Bed
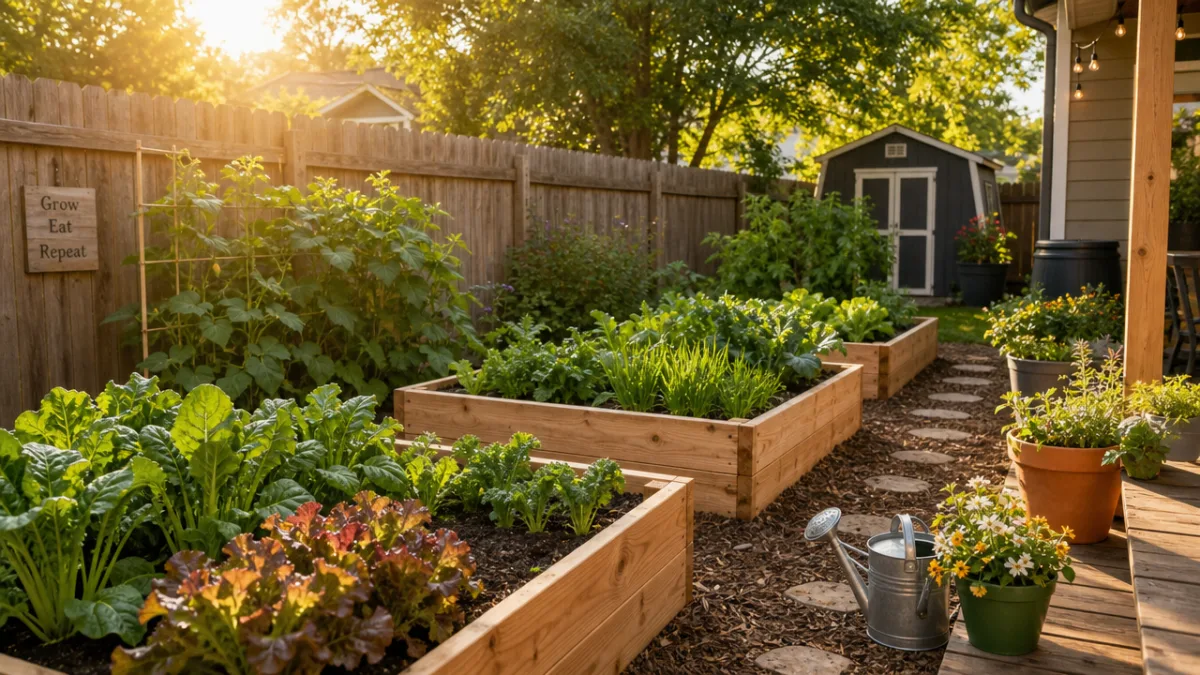
Before you grab a single board, spend a few minutes thinking through your dimensions. The most important rule is that you should be able to reach the center of the bed from either side without having to step into it. That means keeping your width to four feet or less if you can access it from both sides, or two feet if you’re only working from one side. Length is really up to you and your space, though most people find twelve feet is about the practical limit before things start to feel unwieldy. For height, six inches works fine for shallow-rooted crops, while twelve to twenty-four inches gives deep growers like carrots and beets room to do their thing.
Once you’ve nailed down your dimensions, round up your tools and materials. For a standard four-by-eight-foot bed built from two-by-ten lumber, you’ll need two eight-foot boards, two four-foot boards, four corner posts cut from two-by-four stock, exterior wood screws, a drill, a saw, and a measuring tape. Cut your boards to length, then screw the corner posts to the inside corners of the frame — at least three screws per board into each post, on both sides. Before you move on, check that the whole frame is level and square. A few extra minutes here saves a lot of frustration later.
With the frame built, set it in place and think about what’s underneath. If you’re putting it on grass or weeds, lay down several layers of cardboard inside the frame first. It’ll smother whatever’s growing there, break down over time, and actually invite earthworms up into your growing space — which is a good thing. Skip the landscape fabric on the bottom though; it blocks root growth and earthworm activity in ways that cardboard simply doesn’t. If slugs or gophers are a problem in your yard, staple a layer of hardware cloth to the bottom of the frame before you set it down.
Tools and Materials Checklist
- Two 8-foot lengths of 2×10 lumber (side boards)
- Two 4-foot lengths of 2×10 lumber (end boards)
- Four 12-inch corner posts cut from 2×4 stock
- Box of 3-inch exterior wood screws
- Cordless drill with bit set
- Hand saw or circular saw
- Measuring tape and carpenter’s square
- Level
- Cardboard or hardware cloth for the base
- Sandpaper or sander for smoothing edges
The Budget Soil Mix That Grows Everything
Ask any experienced raised bed gardener what their biggest ongoing cost is, and most will tell you it’s soil. Filling a four-by-eight-foot bed that’s twelve inches deep takes about thirty-two cubic feet of growing medium — that’s more than a cubic yard. If you buy pre-bagged potting mix from a garden center to fill that volume, you could easily spend over two hundred dollars. The good news is that a simple homemade mix can do just as well — often better — at a fraction of that cost.
The well-known “Mel’s Mix,” developed by square foot gardening legend Mel Bartholomew, uses equal parts compost, peat moss or coconut coir, and coarse vermiculite. It’s lightweight, drains beautifully, and holds just enough moisture without getting waterlogged. For a more wallet-friendly version, try sixty percent topsoil, thirty percent compost, and ten percent coarse sand or perlite. Buy your topsoil and compost in bulk from a local landscape supplier — buying by the cubic yard is dramatically cheaper than hauling bags from the hardware store. Many cities and towns also offer free or heavily discounted compost through yard waste programs, so it’s worth checking what’s available near you.
Don’t underestimate how much compost matters in all of this. Rich, finished compost is genuinely the most important ingredient in a productive raised bed. It feeds your plants, introduces beneficial microorganisms, and creates a loose, spongy structure that manages both moisture and airflow in the root zone. If you’re not already composting your kitchen scraps and yard waste, now is a great time to start. Within three to six months you’ll have a steady supply of what gardeners like to call “black gold” — and it costs you nothing but a little time.
Budget Soil Mix Formula (per cubic yard)
- 0.6 cubic yards of bulk topsoil — approximately $30–$50 from a landscape supplier
- 0.3 cubic yards of finished compost — often free from municipal programs
- 0.1 cubic yards of coarse perlite or sand — roughly $15–$25 per bag at a garden center
Planting Smart: Getting the Most From Your Space
Once the bed is built and filled, it’s tempting to just head to the garden center and grab whatever looks good. Try to resist that urge, at least for a few minutes. A little planning before you plant makes a real difference throughout the season. Start with your climate zone and the average dates of your last spring frost and first fall frost — those dates define when you can safely grow cool-season crops like lettuce, spinach, and broccoli versus warm-season ones like tomatoes, peppers, and squash. Your local cooperative extension service usually offers a free planting calendar for your specific region, and it takes all the guesswork out of timing.
Square foot gardening is the method that works best in raised beds, and it’s a bit of a revelation if you’re used to traditional row planting. The idea is simple: divide your bed into a grid of one-foot squares and plant each square with the right number of plants based on how big they get. A single four-by-eight bed managed this way can realistically grow sixteen different types of vegetables at the same time. Big plants like tomatoes and peppers get one square each, medium ones like lettuce get four per square, and small ones like carrots and radishes can fit sixteen per square. It sounds almost too efficient, but it works.
Companion planting is another trick worth learning. Certain plants genuinely seem to help each other out when grown close together. Basil near tomatoes is said to repel aphids and whiteflies. Marigolds around the edges of the bed deter a surprising variety of soil-dwelling pests. Tall plants like trellised beans or cucumbers can cast afternoon shade over heat-sensitive lettuce, stretching your cool-season harvest further into summer. You’ll pick up more of these relationships every season, and over time that knowledge becomes one of the most useful tools in your gardening toolkit.
Maintaining Your Raised Bed Through the Seasons
A raised bed isn’t totally hands-off — but the upkeep is genuinely lighter than you might expect, especially compared to in-ground gardening. Because nobody walks on the soil, it stays loose and aerated on its own without any annual tilling. Your main seasonal jobs are adding a few inches of compost to the top each spring, refreshing the mulch around your plants to hold moisture and keep weeds down, and pulling the occasional weed that sneaks in. Most raised bed gardeners find they’re spending no more than thirty minutes a week on maintenance during the growing season, which is pretty reasonable for the amount of food you get in return.
Watering does require a bit more attention than with in-ground gardens. Because the soil sits up above ground level and is surrounded by air on all sides, it dries out faster — especially during a hot stretch. A consistent watering routine, ideally early in the morning to cut down on evaporation and reduce the risk of fungal problems, is important for keeping your plants happy. One of the best upgrades you can make is a simple drip irrigation kit with a timer. A basic setup for a four-by-eight bed runs about thirty to fifty dollars and can genuinely save your garden during a heat wave without you having to think about it.
At the end of the growing season, it’s worth taking a little time to set your bed up well for next year. Pull spent plants out by the roots, and if anything looks diseased, throw it in the trash rather than the compost pile. Then spread two to four inches of compost across the whole surface and let it sit through winter. You can also sow a cover crop like winter rye or crimson clover, which protects the soil from erosion, crowds out weeds, and adds nitrogen back in when you turn it under come spring. These small end-of-season habits keep your soil biology healthy year after year — and each season really does tend to be a little better than the one before it.
Scaling Up: Expanding Your Garden on a Shoestring
Once you’ve had one productive raised bed, you’re almost certainly going to want more. And here’s the good news: each bed you build after the first gets cheaper and faster as you get a feel for the process and figure out where to source your materials. A lot of experienced raised bed gardeners add one or two new beds per year, slowly building out their growing space without blowing their budget or taking over their weekends. Think of your garden as something that grows alongside you, not a project you need to finish all at once.
As you add more beds, it’s worth thinking about giving each one a specific purpose. A deeper bed — eighteen to twenty-four inches — becomes your dedicated root vegetable bed for carrots, parsnips, and beets. A shallower one with sandier soil becomes your strawberry patch. A bed tucked in a shadier corner of the yard becomes your lettuce and herb garden, where the lower light intensity actually improves the flavor of leafy greens. That kind of intentional setup lets you fine-tune the soil and sun conditions for each crop, and you’ll notice the difference in your harvests.
Finally, don’t overlook the community side of all this. Local gardening groups, seed libraries, neighborhood plant swaps, and online spaces like Reddit’s r/vegetablegardening are full of free seeds, plant starts, compost, and genuinely useful advice from people who’ve already figured out what works. Experienced gardeners are often delighted to share extra seedlings, divisions of perennial herbs, or a bag of homemade compost with someone who just asks. Building those connections cuts your costs and brings you into a warm, generous community of people who love growing things just as much as you do — and honestly, that might be the best part of the whole hobby.








What do you think?
It is nice to know your opinion. Leave a comment.