










DIY Concrete Fountain: Build a Stunning Water Feature for Your Garden
There is something undeniably magical about the sound of water trickling through a garden. A well-placed fountain transforms an ordinary outdoor space into a serene retreat, adding movement, sound, and visual interest that plants and static decor simply cannot match. The good news is that you do not need to spend hundreds of dollars at a garden center to enjoy this luxury. With a bag of concrete, a few basic tools, and a weekend afternoon, you can create a beautiful, custom fountain that looks like it came straight from a high-end landscaping catalog. DIY concrete fountains have become one of the most rewarding home improvement projects for gardeners and crafters alike, and once you understand the process, you will wonder why you ever considered buying one instead.
Stacy Risenmay, the creative mind behind the popular home decor blog Not Just a Housewife, popularized this approachable concrete fountain project and inspired countless homemakers to try their hand at working with concrete for the first time. Her design is elegant in its simplicity, using stacked concrete elements and a hidden pump to create a multi-tiered water feature that suits patios, garden beds, and entryways with equal grace. What makes her approach so appealing is that it does not require specialized masonry skills or expensive equipment. If you can mix concrete and follow straightforward instructions, you have everything it takes to complete this project successfully.
This guide will walk you through everything you need to know to build your own DIY concrete fountain from scratch, including the materials you will need, the step-by-step construction process, tips for finishing and sealing, and ideas for personalizing your design. Whether you are a seasoned crafter or picking up a DIY project for the very first time, this fountain build is achievable, affordable, and enormously satisfying. By the end of this article, you will have all the knowledge and confidence you need to add a one-of-a-kind water feature to your outdoor space.
Materials and Tools You Will Need
Before you begin any DIY project, gathering your materials and tools is the most important preparatory step. For a concrete fountain, the shopping list is surprisingly short and relatively inexpensive. The total cost for a finished fountain typically falls between thirty and sixty dollars, depending on the size you choose and whether you already own some of the basic tools. This makes it a fraction of the price of comparable store-bought fountains, which can easily run into the hundreds of dollars for anything with a similar aesthetic.
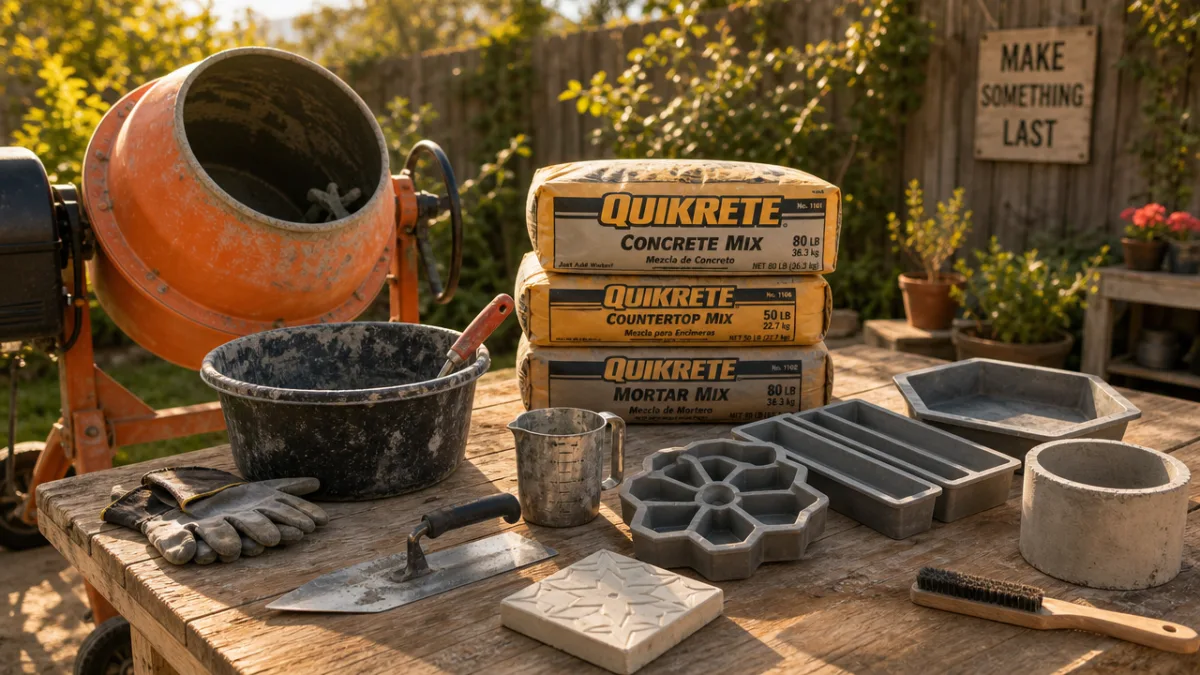
The centerpiece of this project is, of course, concrete. You will want to use a quick-setting concrete mix, which is widely available at hardware stores under brand names like Quikrete. Quick-setting concrete is ideal because it reduces your waiting time between steps, allowing you to complete the project in a single day if desired. You will also need molds to shape your fountain bowls. Plastic planters, mixing bowls, rubber buckets, and even cardboard boxes lined with plastic work beautifully as molds. The key is to choose molds in graduating sizes so that water can cascade from the smallest bowl at the top down through progressively larger bowls beneath.
Here is a complete list of what you will need to assemble before starting:
- One or two bags of quick-setting concrete mix (such as Quikrete 5000)
- Three plastic planters or bowls in graduated sizes (small, medium, and large)
- A small submersible water pump with tubing
- PVC pipe or flexible vinyl tubing sized to fit your pump output
- Cooking spray or petroleum jelly (for releasing concrete from molds)
- A large mixing container and stirring tool
- Rubber gloves and safety glasses
- Concrete sealer or waterproof sealant
- Sandpaper (80 to 120 grit) for smoothing rough edges
- A drill with a masonry or tile bit for making drainage and pump holes
- Decorative stones, pebbles, or plants for finishing touches
Having everything assembled before you start mixing concrete is critical. Once the mixing process begins, you will be working against the clock as the concrete sets. Quick-setting mixtures can begin to harden in as little as twenty to forty minutes, so any delays caused by hunting for a missing tool or running to the store mid-project can compromise the quality of your pour. Lay everything out on your work surface beforehand and review each step of the process so that you can move efficiently from one stage to the next without hesitation.
Preparing Your Molds and Mixing the Concrete
Mold preparation is a step that many beginners overlook, but it is absolutely essential for achieving clean, professional-looking results. Before you pour a single drop of concrete, you must coat the interior of your molds with a release agent. Cooking spray, petroleum jelly, or commercial mold release spray all work well for this purpose. Apply a generous, even coat over every surface that will come into contact with concrete, paying special attention to corners, ridges, and any textured areas where the concrete might grip more tightly. A well-lubricated mold means your cured concrete piece will pop out cleanly without cracking or chipping.
For the tiered bowl design, you will be creating a concrete shell rather than a solid block, which conserves material and keeps the finished fountain lightweight enough to reposition easily. To create this shell, you will pour a layer of concrete into the bottom of your largest mold, place a smaller mold on top (also greased), and fill the space between the two molds with concrete. This negative-space technique is what gives you that elegant hollow bowl shape. The smaller inner mold can be weighted down with rocks or water to prevent it from floating upward as the concrete fills the surrounding space.
Mixing concrete to the right consistency is a skill that comes quickly with practice. Add water to your dry concrete mix gradually, stirring continuously, until you achieve a texture similar to thick oatmeal or peanut butter. The mixture should hold its shape when you scoop it up but still be workable enough to pour and smooth. Too much water weakens the finished concrete and leads to cracking; too little makes the mix difficult to work into the mold and can create air pockets that compromise structural integrity. Always add water incrementally rather than all at once, and err on the side of slightly drier rather than overly wet.
Casting, Curing, and Demolding Your Fountain Bowls
Once your concrete is mixed and your molds are prepared, it is time to pour. Work steadily and confidently, filling the space between your inner and outer molds in even layers if possible. As you pour, use a stick, skewer, or gloved finger to gently poke and work the concrete into any corners or crevices, eliminating air bubbles that could create weak spots or unsightly voids in the finished surface. Tapping the outside of the mold lightly against your work surface also helps bubbles rise and escape. Do not rush this step; taking care during the pour pays dividends in the quality of your finished bowl.
At this stage, you also need to create the hole through which your pump tubing will pass. Insert a piece of PVC pipe or a plastic straw vertically through the center of your concrete, positioning it so that it runs from the bottom of the bowl upward. This will become the channel for your water pump’s output tube. Make sure the pipe extends slightly above the surface of the pour so you can locate it easily after demolding. For the lowest tier of your fountain, the pump itself will sit in the water reservoir, and the tubing will thread upward through each successive bowl to release water at the very top.
Curing time is one of the most important factors in producing a durable fountain. Even with quick-setting concrete, you should allow the cast bowls to cure for a minimum of twenty-four hours before demolding, and ideally forty-eight hours for maximum strength. Resist the temptation to peek by pulling the mold away early; premature demolding is one of the leading causes of cracked or broken concrete castings among beginners. Keep your cast pieces in a shaded area during curing, as direct sunlight can cause the surface to dry too quickly relative to the interior, which leads to surface cracking. A light misting of water during the curing period, known as wet curing, actually produces a stronger finished product.
When you are ready to demold, work slowly and gently. Flex the sides of plastic molds inward to break the seal between the mold and the concrete. For the inner mold, you may need to twist and wiggle it free. If a piece feels stuck, do not force it; instead, try tapping the outside of the mold with a rubber mallet or soaking the area briefly with water to help release the grip. Once demolded, use sandpaper to smooth any sharp edges or rough patches on your bowls. Wet sanding works particularly well on concrete, producing a smooth, stone-like finish without generating clouds of concrete dust.
Assembling the Fountain and Installing the Pump
With your bowls cast, cured, and sanded, you are ready for the most exciting part of the project: assembly. Begin by selecting the location for your fountain. Concrete is heavy, and a multi-tiered fountain filled with water becomes heavier still, so choose a spot with a stable, level surface. A patio, garden bed with compacted soil, or a large flat stone all make excellent bases. If you plan to place your fountain on a wooden deck, consider adding a waterproof tray or basin beneath it to protect the wood from moisture over time.
Stack your bowls from largest to smallest, threading the pump tubing up through the central holes you created during casting. The submersible pump should sit in the lowest bowl or in a separate reservoir basin hidden beneath the largest bowl. Most small submersible pumps come with adjustable flow settings, which allows you to control the speed and volume of water flow to achieve exactly the look and sound you want. A gentle trickle is meditative and quiet, while a stronger flow creates a more dramatic visual effect and a louder, more energetic sound. Experiment with the settings once you have water running to find your preferred balance.
Sealing your concrete is a non-negotiable step before adding water. Untreated concrete is porous and will absorb water, which leads to efflorescence (a white mineral deposit on the surface), moss growth, and eventual structural deterioration. Apply two to three coats of a waterproof concrete sealer, allowing each coat to dry fully before applying the next. Pay special attention to the interior surfaces of your bowls where water will sit continuously. Once sealed, your fountain will be far more resistant to weathering and will maintain its appearance for years with minimal maintenance.

After sealing, fill your fountain with water and plug in the pump to test the flow. Watch the water travel from the pump up through the tubing, emerge from the top bowl, and cascade down through each tier. Adjust the pump flow rate as needed, and check all joints and seams for any leaks. If water seeps through a joint between tiers, a small amount of waterproof silicone caulk can seal the gap without affecting the appearance of the fountain. Allow everything to run for an hour or two before declaring the assembly complete, since some slow leaks only become visible after extended operation.
Finishing Touches, Maintenance, and Personalization Ideas
A concrete fountain fresh from the mold is a beautiful thing, but the finishing touches are what transform a craft project into a true garden focal point. One of the simplest and most effective ways to enhance your fountain is to surround the base with decorative river stones or pebbles. These serve the dual purpose of concealing the pump cord and any visible tubing while adding a natural, polished look to the overall composition. Arrange the stones loosely so they can be removed easily when you need to access the pump for cleaning or adjustment.
Concrete takes paint and stain beautifully, and this opens up a wide world of personalization options. Concrete stains, which penetrate the surface rather than sitting on top, create a rich, mottled effect that mimics the look of aged stone or natural slate. Water-based concrete paints allow for bolder color choices if you want your fountain to serve as a bright, eye-catching accent in your garden rather than a neutral backdrop. Many crafters choose to leave their fountains in their natural gray concrete finish, which weathers gradually into a lovely aged patina that looks increasingly beautiful over time.
You might also consider adding plants to your fountain design. Small aquatic plants like water hyacinths, dwarf papyrus, or water lettuce can float in the lower basin, adding greenery and helping to naturally filter the water. Potted herbs or trailing plants arranged around the base of the fountain soften its edges and integrate it seamlessly into the surrounding garden. Miniature figurines, glass gems placed in the water bowl, or even small solar-powered lights nestled among the stones can add whimsical personality that makes your fountain uniquely your own.

Maintenance for a DIY concrete fountain is straightforward and requires only occasional attention to keep it running beautifully. The most important regular task is keeping the water level topped up, particularly in hot summer months when evaporation is rapid. Running the pump without adequate water can burn out the motor quickly, so check the water level every few days. Every few weeks, remove the pump and rinse it under clean water to remove any accumulated algae or mineral deposits. The pump impeller, which is the small spinning component that drives water flow, should be cleared of debris to maintain optimal performance.
To prevent algae growth in your fountain water, you can add a few drops of food-grade hydrogen peroxide or a small amount of white vinegar to the water periodically. These gentle treatments discourage algae without harming birds, insects, or nearby plants. Some fountain owners choose to add a small amount of Mosquito Dunks, which are biological mosquito control tablets that prevent mosquito larvae from developing in standing water without using harsh chemicals. If you live in a climate with freezing winters, drain your fountain completely before the first hard frost and store it in a garage or shed to prevent the concrete from cracking as trapped water expands during the freeze cycle.
The beauty of the DIY concrete fountain project pioneered by Stacy Risenmay lies not only in its accessibility and affordability but in the profound satisfaction that comes from building something functional and lovely entirely with your own hands. Every time you sit in your garden and hear the gentle sound of water moving through the tiers you created, you will feel a quiet pride that no store-bought fountain can replicate. This project is proof that with a little patience, the right materials, and a willingness to try something new, anyone can create a professional-quality garden feature that enhances their outdoor space for years to come. Start this weekend, and discover for yourself why concrete crafting has become one of the most beloved trends in DIY home improvement.








What do you think?
It is nice to know your opinion. Leave a comment.