










DIY Chicken Wire Cloche: A Complete Guide to Making Beautiful Garden Cloches
What Is a Chicken Wire Cloche and Why Every Gardener Needs One
A chicken wire cloche is one of those garden accessories that manages to be both genuinely useful and genuinely pretty at the same time. Made from flexible galvanized wire mesh and shaped into a bell or dome, these little structures have been a garden staple for centuries — the word “cloche” actually comes from the French for bell. At their most basic, they put a physical barrier between your tender seedlings and everything that wants to eat or freeze them, from the neighbourhood rabbits to a surprise late frost.
What makes the DIY version especially appealing is how well it breathes. Unlike glass or solid plastic cloches, chicken wire lets air move freely, which means plants stay cool, rain gets through without a second thought, and you are not out there lifting covers every time you want to water. That open structure makes them a particularly good fit for temperate climates and those in-between seasons when temperatures are unpredictable but not extreme.
And then there is just how good they look. There is a warmth and cottage-garden charm to a handmade wire cloche that a plastic dome cannot come close to matching. Whether you are tucking one over your strawberries to fend off the birds, sheltering herb seedlings through the last cool nights of spring, or simply adding a bit of personality to a raised bed, they never look out of place. Fair warning: once you make your first one, you will almost certainly end up making a whole collection in different shapes and sizes.
Materials and Tools You Will Need Before You Begin
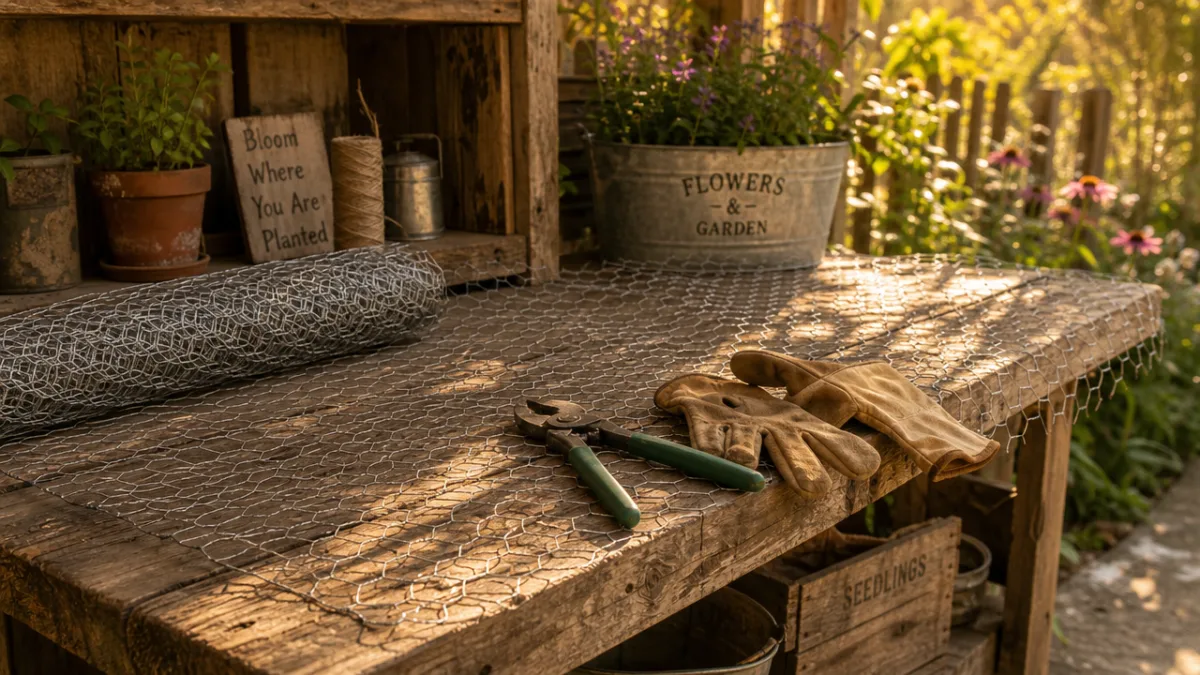
Getting your materials together before you start makes the whole thing go much more smoothly. The main ingredient is chicken wire — also called poultry netting — and for this project you want one with a fairly small hex mesh, somewhere between half an inch and one inch. That size holds its shape well and keeps out even the smallest pests. A standard roll of galvanized chicken wire from your local hardware or garden store is exactly what you need.
Beyond the wire itself, the list is short. Having everything laid out before you begin means you are not stopping halfway through to hunt for something. And do not skip the gloves — cut wire ends are sharp and they have a way of catching you when you least expect it.
- One roll of half-inch or one-inch hexagonal chicken wire mesh (galvanized for rust resistance)
- Wire cutters or tin snips for cutting the mesh to size
- Thick garden or leather gloves to protect your hands throughout the process
- A cylindrical form to shape the wire around, such as a large bucket, pot, or cardboard tube
- Thin floral wire or zip ties to secure the edges and close the top of the cloche
- Optional: decorative elements such as a wooden finial, a cork, a small knob, or vintage drawer pull for the top handle
- Optional: pliers for bending wire ends and creating a neater finish
The nice thing about this project is that you may already have most of what you need rattling around the garage or garden shed. Leftover wire from old projects works perfectly, and anything rounded can double as a shaping form. When you consider that a single roll of chicken wire can yield several cloches, the cost is remarkably low — especially compared to the decorative ready-made versions, which can be surprisingly pricey in garden boutiques and home décor shops.
Step-by-Step Instructions for Making Your Chicken Wire Cloche
Start by thinking about how big you want your cloche to be, because that determines how much wire you will cut. A small cloche for covering a single plant or herb pot tends to be around twelve inches across and ten to fourteen inches tall. If you want to cover more ground — a wider section of a raised bed, say — aim for something closer to eighteen to twenty-four inches in diameter. Once you have a size in mind, unroll the wire on a flat surface, measure out what you need, and leave a little extra for the overlap at the seam.
Cut carefully with your wire cutters or tin snips, and keep those gloves on — freshly cut chicken wire is sharp and can spring back in a way that catches you off guard. Try to cut along a straight line of hexagons so your piece stays tidy. Then comes the fun part: bend the wire around your cylindrical form — a bucket or large pot works great — to shape the body of the cloche. Work gradually, coaxing the wire into a smooth curve, and secure the overlapping seam by folding the protruding wire ends over each other or twisting them together with pliers. It does not need to look perfectly seamless; a slightly handmade seam is part of what makes these cloches so appealing.
Once your cylinder is formed and the seam is secured, gather the top opening and pinch it closed, working around the circumference and folding the edges inward toward the centre. Use floral wire or zip ties to bind everything tightly into that characteristic bell shape. If you want a nice finishing touch — and honestly, it makes a real difference — thread a short piece of wire through a decorative wooden bead, a vintage drawer pull, or a cork and twist it securely to the gathered top. That one small detail is what takes your cloche from purely functional to something you would actually want to display.
- Measure and cut a rectangle of chicken wire to your desired dimensions.
- Bend the wire around a cylindrical form to create a curved cylinder shape.
- Secure the overlapping side seam by twisting wire ends together or using floral wire.
- Remove the form and gently gather the top of the cylinder closed.
- Bind the gathered top tightly with floral wire or zip ties.
- Attach your decorative finial or handle to the top for a polished finish.
- Trim any sharp protruding ends with wire cutters and press edges inward with pliers.
Once you are done, stand it upright and take a look. If it tilts slightly or one side bulges a bit more than the other, just work it gently with your hands — chicken wire is quite forgiving and easy to reshape without losing its structure. Most people’s first cloche is not a perfect bell, and that is completely fine. After a couple of attempts the process starts to feel intuitive, and the slight imperfections in each one actually add to the handmade character rather than taking away from it.
Creative Variations and Customization Ideas
Once you have the basic bell shape down, the fun really begins. The classic dome is just the starting point — with a few adjustments to how you shape and size things, you can make low, flat covers for ground-level plantings or protecting bulbs, taller cylinders for tomato seedlings or young climbers, or elongated tunnel shapes that cover an entire row in a vegetable bed. Playing around with different proportions keeps the project interesting and helps you build up a collection that actually fits your garden’s specific needs.
Decorative additions are where you can really let loose. Try weaving thin strips of jute twine or raffia through the hexagons in a spiral pattern for a bohemian, woven look. Tuck in sprigs of dried lavender, small eucalyptus branches, or a bit of preserved moss for something that feels more naturalistic and foraged. For a whimsical evening look — especially if the cloche is more decorative than functional — thread tiny fairy lights through the wire. It creates a genuinely magical effect at dusk, whether on a table centrepiece or a porch display.
The finial at the top deserves some real thought, because it is where you can inject the most personality. Antique markets and thrift shops are brilliant for this — look for old wooden spools, ceramic furniture knobs, smooth river stones with a hole drilled through, or small glass bottles. Painted wooden beads in faded, weathered tones look lovely against the silver of galvanized wire, and copper wire finials will develop a beautiful verdigris patina over time. If you are making a set of cloches as a gift or to style a particular garden space, choosing the same finial across all of them gives the collection a cohesive, intentional feel.
Practical Uses in the Garden Throughout the Seasons
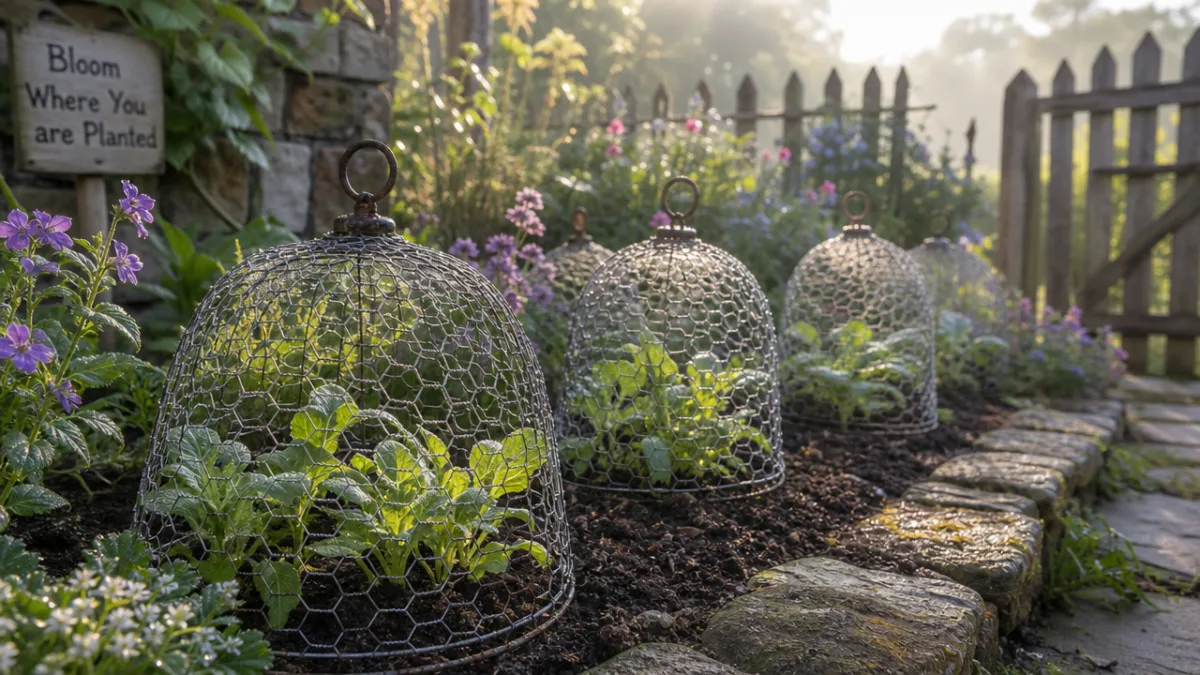
One of the best things about a chicken wire cloche is that it earns its keep year-round. In early spring, when seedlings are at their most fragile and a late frost is still a real possibility, a cloche placed over them traps just enough warmth close to the soil to buffer against a light freeze. It is not a cold frame — it will not replace one in a serious cold snap — but it can be the difference between losing or saving plants you have been nursing from seed indoors for weeks. That is no small thing.
Through the growing season, pest deterrence takes over as the main job. Rabbits, squirrels, and birds can do a remarkable amount of damage in a remarkably short time, and a cloche puts a physical barrier between them and whatever you are trying to protect — newly sown seeds, young brassica starts, or a punnet of ripening strawberries. Most animals will not bother trying to get through when there are easier pickings elsewhere. And because the wire is open, pollinators can still reach your flowering plants, which is something a solid glass or plastic cloche simply cannot offer.
Come autumn, cloches are great for squeezing a few extra weeks out of cool-weather crops like lettuce, spinach, and kale by softening those first early frosts. They are also handy for marking and protecting fall-planted bulbs from squirrels who seem to have an uncanny ability to find and dig up exactly what you just planted. And even in winter, when the garden is mostly dormant, a cloche left in place can add real visual interest — particularly lovely when there is a dusting of snow, or when dressed up with pine cones and winter greenery.
- Spring: Protect seedlings and transplants from late frosts and ground-level cold
- Summer: Deter birds, rabbits, and other pests from vegetables and fruiting plants
- Autumn: Extend the harvest season for cold-tolerant crops and protect newly planted bulbs
- Winter: Serve as a garden ornament or protect evergreen groundcovers from wind and ice
Displaying Chicken Wire Cloches Beyond the Garden
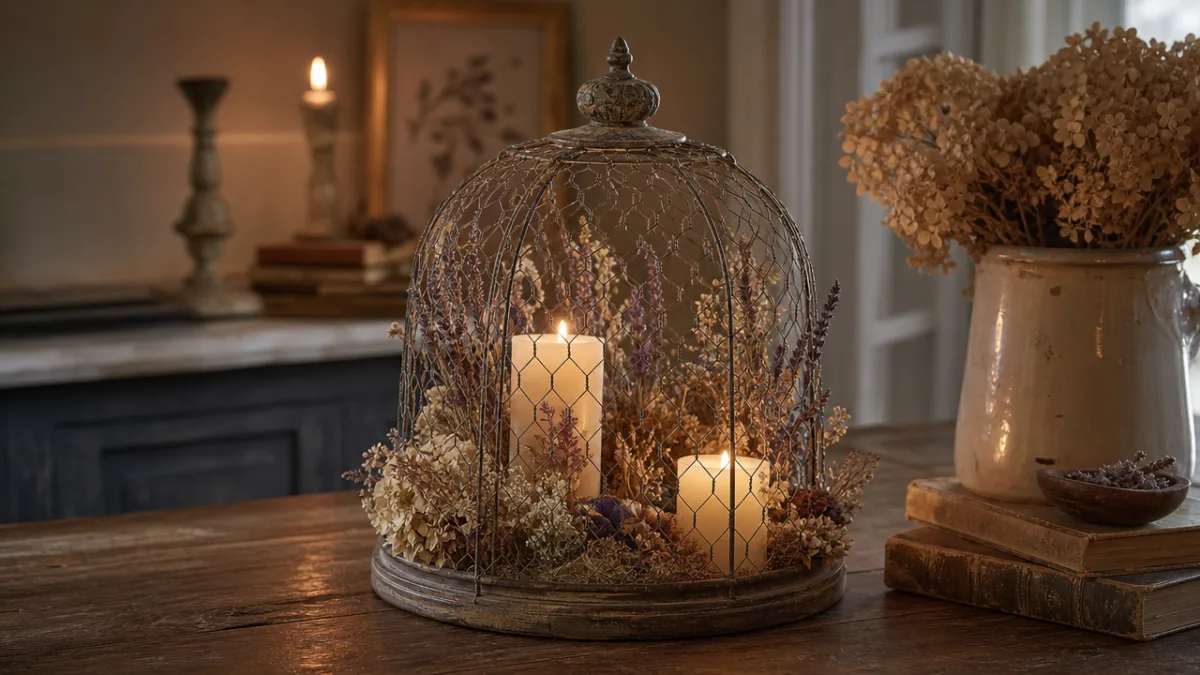
The chicken wire cloche has long since found a life beyond the garden, and it is not hard to see why. That airy, open structure displays beautifully indoors without feeling heavy or intrusive, and the mix of industrial wire with natural materials fits right into farmhouse, cottagecore, and Scandi-inspired interiors. Set one over a small succulent arrangement, a candle, or a curated handful of natural objects and you have an instant vignette that feels considered and styled without a lot of effort or expense.
For entertaining and tablescaping, they are endlessly adaptable. A large cloche filled with pillar candles and surrounded at the base with fresh seasonal greenery makes a genuinely dramatic dining table centrepiece. For a spring gathering, nest one over a cluster of small terracotta pots planted with herbs and add hand-lettered clay tags. At a rustic wedding or outdoor celebration, cloches filled with flowers, moss, and soft fairy lights are the kind of decoration that guests notice and remember — and often ask about taking home at the end of the night.
They also make wonderful gifts. A nicely shaped cloche tucked into a kraft paper bag alongside a packet of heirloom seeds and a handwritten card is a thoughtful, personal present for a gardening friend, a new homeowner, or really anyone who appreciates something handmade with real practical value. Once you get the hang of the process, you can knock out several in an afternoon, and the materials cost very little — so it is the kind of gift where the effort and care genuinely show, in a way that something bought off a shelf rarely does.
Whether you have a sprawling country garden, a modest backyard raised bed, or just a few pots on a sunny balcony, a chicken wire cloche will find its place and pull its weight. This is a project that asks for no special skills and rewards a little patience and creativity in equal measure. One afternoon, a roll of wire, and a handful of basic tools — and you end up with something both beautiful and genuinely useful. That, honestly, is the best kind of making there is.








What do you think?
It is nice to know your opinion. Leave a comment.