










Creating a Vertical Herb Garden: A Step-by-Step Guide for Fresh, Home-Grown Flavors
Why Vertical Herb Gardens Are Worth Your Time and Space
Vertical herb gardens have taken off for a reason — they’re one of the most practical things you can do with a sunny wall or fence, whether you’re working with a tiny apartment balcony or just want to stop wasting that south-facing exterior wall. There’s something genuinely satisfying about snipping fresh basil or rosemary straight into the pan that a dusty jar from the grocery store will never come close to matching.
And the benefits add up fast. A single well-tended vertical planter can seriously cut your grocery bill over a growing season. Herbs like mint, chives, and parsley are almost aggressively productive — the more you harvest, the more they give you. By the end of summer, you’ll have gotten back far more than you put in for soil, planters, and seedlings.
There’s also a quieter benefit that doesn’t get talked about enough: tending a vertical herb garden is genuinely good for you. Research in horticultural therapy has found that caring for plants brings down stress hormones, lifts mood, and nudges you toward mindfulness. Having your garden at eye level makes it part of your daily environment in a way that something down at ground level never quite is. It’s living decor that also feeds you — and that combination is pretty hard to beat.
Choosing the Right Location and Structure for Your Garden
Before you buy a single seedling, spend some time watching how light moves across your space. Most culinary herbs need at least six hours of direct sun a day, so getting this right sets the tone for everything that comes after. If you’re in the northern hemisphere, a south-facing wall is almost always your best bet — it catches sun from morning through afternoon, which is exactly what Mediterranean herbs like thyme, oregano, and sage were made for.
Once you’ve found your sunniest spot, you’ll need to decide on a structure. The options range from modular felt pocket planters that hang flat against a wall, to tiered wooden pallet frames, stacked terracotta pots on a steel frame, and purpose-built vertical garden towers. Each one has its own trade-offs in terms of weight, drainage, how easy it is to replant, and how it looks. If you’re just starting out, a repurposed wooden pallet is hard to beat — they’re cheap, easy to find, and you can make them work almost however you want.
One thing that catches people off guard: a fully planted vertical garden loaded with damp soil is much heavier than it looks when it’s empty. Wall anchors, fence posts, and freestanding frames all need to be rated and set up for the actual weight they’ll be carrying. Take a few extra minutes at this stage to use proper anchors, check that your fence posts are solid, and make sure any freestanding structure has a wide enough base that it won’t tip. It’s a lot less work than cleaning up a collapsed garden later.
Selecting the Best Herbs for a Vertical Growing System
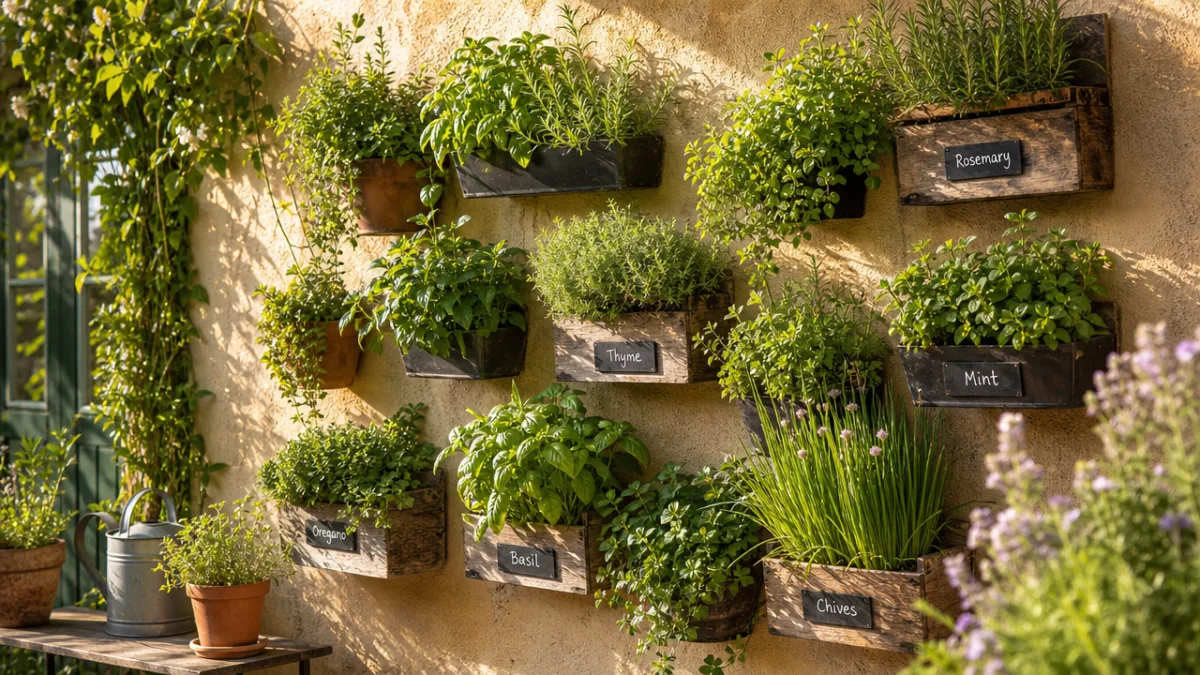
Not all herbs take well to the tighter root space and faster drainage of a vertical planter, so it pays to choose wisely. Shallow-rooted varieties are your friends here — they don’t need deep soil columns to establish themselves and tend to thrive in these conditions. Basil, chives, cilantro, parsley, mint, thyme, and oregano all do really well in vertical systems and will produce more than you can use through most of the growing season.
Rather than just planting whatever looks good together, try grouping your herbs by water and light preferences. Mediterranean herbs — thyme, rosemary, sage, oregano — like it on the drier side and don’t appreciate consistently wet soil. Mint, basil, and parsley, on the other hand, want more regular watering. If you keep these groups in separate sections of your structure, you can water each area the way it actually needs without stressing out the plants next to it. It sounds like a small thing, but it makes a big difference over time.
It’s also worth thinking practically about what you actually cook. If Italian food is a regular thing in your kitchen, load up on basil, oregano, and flat-leaf parsley. If you make a lot of Thai dishes, Thai basil and lemongrass deserve a prominent spot. A garden full of herbs you use all the time is one you’ll actually stay motivated to maintain. Let your cooking habits lead the way.
Some particularly recommended varieties for vertical systems include:
- Genovese Basil — the classic for pesto and pasta, loves warm weather and plenty of sun
- French Thyme — compact and drought-tolerant, a natural fit for the drier sections of your planter
- Spearmint — vigorous and wonderfully fragrant, but give it its own contained section or it’ll start crowding everything else
- Curly or Flat-Leaf Parsley — a reliable producer that handles partial shade better than most herbs
- Chives — incredibly hardy and fast-growing, great for filling in the edges of your arrangement
- Nasturtium — technically an edible flower rather than an herb, but the peppery leaves and bright blossoms add color and flavor, and they naturally deter aphids too
Building and Planting Your Vertical Garden Step by Step
With your location locked in, your structure sorted, and your herb list ready, it’s time to actually build the thing. If you’re working with a pallet frame, start by stapling weed-barrier fabric or landscape cloth across the back and sides to create a soil pocket between each slat. This keeps soil from washing out the back while still letting water drain and air circulate through the root zone. Use a heavy-duty staple gun and overlap the edges generously — soil has a way of finding even the smallest gaps over time.
The growing medium you choose matters more than almost anything else. Regular garden soil is a bad idea in vertical planters — it’s too dense and heavy, it compacts quickly, and it puts real stress on your mounting hardware. Instead, go with a premium lightweight potting mix blended with perlite at about a four-to-one ratio. Perlite improves drainage dramatically, prevents compaction, and keeps the whole structure lighter. Many experienced vertical gardeners also mix in a small amount of slow-release granular fertilizer at planting time to give new roots a head start.
When you’re ready to plant, work from the bottom of your structure upward so you’re not disturbing freshly planted sections as you go. Make a pocket in the growing medium, gently loosen the root ball without breaking it apart, set the seedling at the same depth it was growing in its nursery pot, and firm the soil around it to close any air pockets. Give each section a good gentle watering right after planting to settle the soil. If you’re starting from seed rather than transplants, just know that germination can be a little slower in vertical planters because moisture evaporates faster — so keep the surface consistently moist until things get going.
The step-by-step planting process in summary:
- Prepare your structure with appropriate backing material and confirm all mounting hardware is secure
- Mix lightweight potting medium with perlite and slow-release fertilizer in a wheelbarrow or large container
- Fill the lowest tier or pockets first with growing medium, leaving space for root balls
- Plant seedlings or sow seeds from the bottom of the structure upward
- Water gently but thoroughly immediately after planting each section
- Label each herb clearly using waterproof plant markers to track placement as plants establish
- Hang or mount the completed structure in your chosen location, double-checking all anchor points

Watering, Feeding, and Maintaining Your Vertical Herb Garden
Watering is where most beginners hit their first real challenge, and it makes sense — vertical planters hold less soil than traditional containers or in-ground beds, so they dry out much faster, especially during hot weather or in a full-sun spot. In the peak of summer, daily watering isn’t unusual. The most reliable way to tell if your plants need a drink is to push a finger about an inch into the growing medium: if it feels dry at that depth, it’s time to water.
A lot of dedicated vertical gardeners eventually set up a simple drip irrigation system or run a soaker hose through the upper section of their planter. Gravity does the work, distributing water slowly and evenly across all the tiers — something that’s surprisingly hard to achieve consistently when you’re watering by hand from the top. Drip systems also cut down on water waste and keep foliage dry, which lowers the risk of fungal problems. Add a timer, and you can stop thinking about it entirely, which is a real quality-of-life upgrade for busy households or when you’re away from home.
Feeding your herbs regularly is just as important as watering. Because vertical planters have limited soil volume and get watered so frequently — which gradually washes nutrients out of the medium — your herbs will need supplemental feeding every two to three weeks through the active growing season. A balanced liquid fertilizer at half the recommended strength works well, delivering nutrients directly to the root zone without the risk of burning. One thing to avoid: over-fertilizing with high-nitrogen products. They’ll push a lot of leafy growth, but at the cost of the essential oils that give herbs their flavor and fragrance, which rather defeats the purpose.
Harvesting, Troubleshooting, and Keeping Your Garden Thriving Long-Term
How you harvest matters just as much as how you plant and water. The golden rule is simple: never take more than a third of a plant’s total growth in a single session. Cut back more than that and the plant will struggle to recover, sometimes for the rest of the season. Instead, harvest little and often — snip stems just above a leaf node or branching point and the plant will send out two new shoots where you had one. That’s the compounding effect working in your favor.
Bolting is one of the most common frustrations, particularly with basil and cilantro when the weather heats up. Once a plant shifts into flowering mode, the leaves get smaller, more bitter, and less fragrant as the plant puts its energy into reproduction rather than growth. The fix is simple but requires staying on top of it: remove flower buds the moment you spot them forming. Keeping plants consistently harvested and well-watered also delays bolting, since heat stress and drought are two of its main triggers.
Pest pressure in a vertical herb garden tends to be lighter than in a traditional bed, partly because the elevated position means better airflow and fewer soil-dwelling insects to worry about. That said, aphids, spider mites, and whiteflies can still show up, especially during dry spells. A strong spray of water directed at the undersides of leaves — where these insects like to hide — is often all you need. For anything more persistent, diluted neem oil applied in the early morning or evening is a natural, effective solution that won’t leave anything harmful on plants you’re about to cook with.
As autumn approaches and temperatures start to fall, you don’t necessarily have to call it a season. Perennial herbs like thyme, rosemary, chives, and sage can often be overwintered with a little care. In mild climates, they may keep going outdoors year-round. In colder regions, you can move portable structures under cover, bring individual plants inside near a bright window, or drape frost cloth over them to extend the season. Annual herbs like basil won’t survive a frost, so harvest them hard before it arrives. Their perennial companions, meanwhile, will rest through winter and come back strong the following spring. With a bit of seasonal planning, your vertical herb garden can become a genuine long-term fixture in your home — and your cooking.








What do you think?
It is nice to know your opinion. Leave a comment.