










Building Concrete Outdoor Steps for Landscaping: A Complete Guide
Why Concrete Steps Are the Right Choice for Your Landscape
When it comes to outdoor landscaping, few additions make as immediate and lasting an impact as a well-constructed set of concrete steps. Whether you are connecting different levels of your yard, creating an inviting path from the driveway to your front door, or carving a graceful descent into a garden terrace, concrete offers a combination of durability, versatility, and visual appeal that is difficult to match. Unlike wood, which rots and warps, or natural stone, which can be prohibitively expensive, concrete gives homeowners a practical and cost-effective solution that can last for decades with minimal maintenance.
Concrete steps also offer tremendous design flexibility. They can be cast in virtually any shape or configuration, textured to mimic natural stone, stamped with decorative patterns, stained in a wide range of colors, or left in their natural gray finish for a clean, modern look. This adaptability means that whether your home is a rustic farmhouse or a contemporary suburban build, you can design steps that complement and enhance the existing aesthetic. The material also integrates seamlessly with other landscaping elements like retaining walls, garden borders, and concrete pathways.
Beyond aesthetics, safety is a compelling reason to choose concrete. Properly built concrete steps are stable, non-flexing underfoot, and can be finished with a broom texture that provides excellent traction even when wet. For families with children or elderly members, this stability is invaluable. Concrete steps also resist pest infestations, do not produce splinters, and do not become slippery with mold or mildew the way wooden steps sometimes do when shaded by trees or shrubs. Simply put, concrete is one of the most reliable materials you can choose for outdoor steps that need to perform year after year.
Planning and Measuring Your Outdoor Steps
Good planning is the foundation of any successful concrete project. Before you mix a single bag of cement, you need to carefully assess the site where your steps will be built. Start by measuring the total rise — the vertical distance from the bottom of the slope to the top — and the total run, which is the horizontal distance you have available. These two measurements will determine how many steps you need and the dimensions of each individual step. Skipping this planning phase is one of the most common mistakes DIY builders make, and it leads to steps that are awkward to climb, unsafe, or simply look wrong in the landscape.
The standard dimensions for comfortable, code-compliant outdoor steps are a riser height between 6 and 8 inches and a tread depth of at least 11 inches, though 12 to 14 inches is even more comfortable for outdoor use. To calculate the number of steps you need, divide your total rise by your desired riser height. For example, if the ground rises 36 inches over your slope and you want 7-inch risers, you will need approximately five steps. Always round to a whole number and then recalculate your riser height accordingly to ensure all steps are equal in height, which is critical for safe footing and visual uniformity.
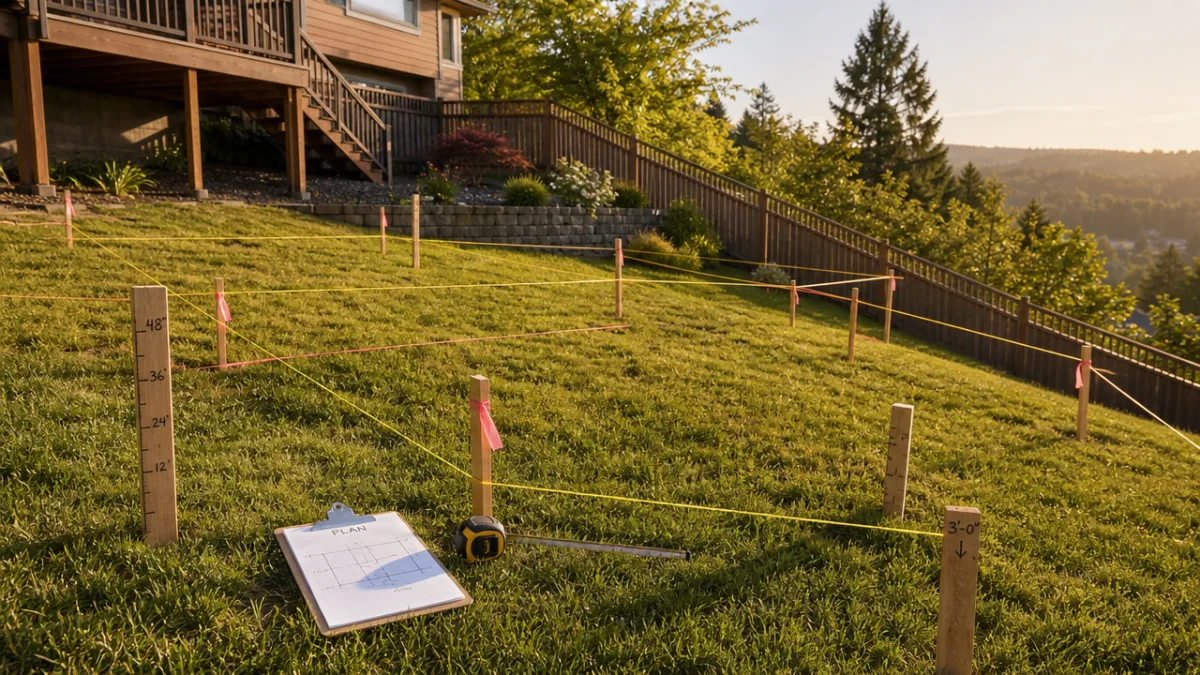
You will also want to consider the width of your steps during the planning phase. A minimum width of 36 inches is generally recommended for functional outdoor steps, but wider steps — 48 to 72 inches or more — create a more welcoming, grand appearance suited to front entrances or decorative garden features. Sketch your design on paper or use a basic landscaping software tool to visualize the finished product before breaking ground. Mark the layout on the ground using stakes and string lines, and take time to check that the positioning works with drainage patterns, nearby plantings, and existing hardscape features.
Gathering Materials and Tools
Having the right materials and tools assembled before you begin will make the construction process far more efficient and reduce the chances of costly interruptions midway through the pour. Concrete work is time-sensitive — once mixed, you have a limited working window before the material begins to set — so knowing exactly what you need and having it on hand is essential. For a typical set of four to six outdoor steps, you will need ready-mix concrete bags or bulk concrete delivery, lumber for forming, rebar or wire mesh for reinforcement, gravel for the base, and a range of hand and power tools.
For materials, plan on using concrete mix rated at a minimum of 4,000 psi for outdoor steps exposed to freeze-thaw cycles. In northern climates especially, lower-strength concrete can develop surface scaling and cracking after repeated freezing and thawing. You will also need crushed gravel or compactable base material to a depth of at least 4 to 6 inches to prevent frost heave and settling. Rebar in a 3/8-inch or 1/2-inch diameter should be used to reinforce the interior of each step, tied in a grid pattern to add tensile strength that concrete alone cannot provide.
Your tool list should include the following essentials:
- Shovel and spade for excavation and mixing
- Wheelbarrow or mortar tub for transporting concrete
- Circular saw or hand saw for cutting form lumber
- Drill and screws or hammer and duplex nails for assembling forms
- Level and tape measure for accurate layout
- Rebar cutter and tying wire with pliers
- Concrete float and edging tool for finishing
- Stiff-bristle broom for applying a non-slip texture
- Plastic sheeting or burlap for curing the finished concrete
If your project is large or involves more than eight steps, consider renting a concrete mixer to ensure consistent batches. Mixing large quantities of concrete by hand is physically exhausting and can result in inconsistent water-to-cement ratios that compromise the final strength. Alternatively, ordering a ready-mix delivery is the most efficient approach for larger pours, though it requires having all forms set and reinforcement in place before the truck arrives. Whichever mixing method you choose, quality materials and a complete tool setup will set you up for a far smoother build.
Excavating and Building the Forms
Excavation is the first hands-on phase of your project, and doing it correctly will make every step that follows easier and more accurate. Begin by removing all sod, roots, and organic material from the build area — organic matter will decompose over time and cause settlement that can crack your steps. Excavate to a depth that allows for at least 4 to 6 inches of compacted gravel base material plus the thickness of your concrete steps. Use a plate compactor or hand tamper to compact the soil subgrade before adding gravel, and then compact the gravel in layers to create a stable, non-shifting foundation.
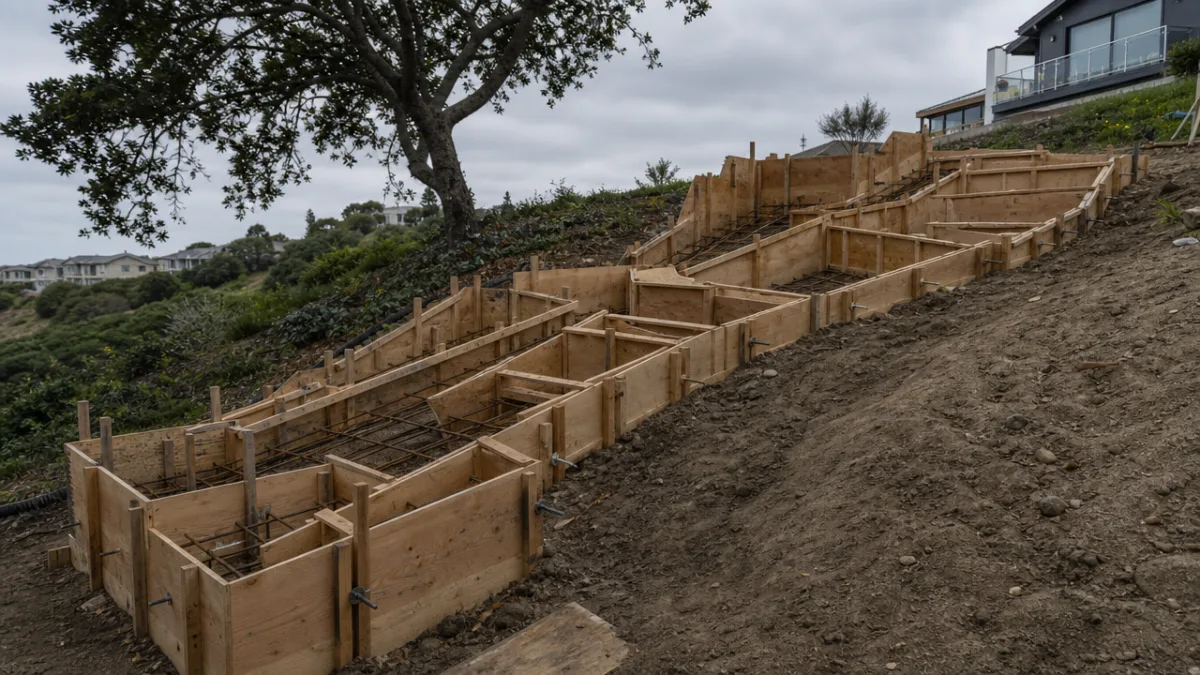
Building your forms correctly is arguably the most skill-demanding part of the project. Forms are the wooden molds that hold the wet concrete in shape until it cures. Use 2×8 or 2×10 lumber for the risers and thicker boards or plywood for the side walls, depending on the geometry of your steps. Cut each riser board to the exact width of your steps and attach them to the side forms at the correct height intervals, checking with a level as you go. All forms must be plumb, level, and firmly staked or braced against the pressure the wet concrete will exert — a poorly supported form that shifts or blows out during a pour can ruin hours of work.
Once your forms are assembled, install your rebar reinforcement before the pour. Place horizontal rebar runs about 2 inches up from the bottom of each step tread and tie them to vertical bars with wire ties. In areas subject to heavy frost or where steps span a larger horizontal distance, consider a double layer of rebar in a grid pattern for added strength. You may also want to coat the inside faces of your forms with a form-release agent or used motor oil to prevent the wood from bonding to the cured concrete, which will make stripping the forms much easier once the concrete has hardened.
Pouring and Finishing the Concrete
The pour is the most exciting — and most stressful — part of building concrete outdoor steps. If you are using bagged mix, prepare each batch carefully according to the manufacturer’s directions, aiming for a consistency that is workable but not soupy. Concrete that is too wet may seem easier to work with, but it will result in a weaker finished product with a greater tendency to crack and scale. Pour the concrete starting from the bottom step and working upward, filling each form in layers and using a rod or shovel to consolidate the mix and eliminate air pockets that could create weak spots or surface voids.
Use a concrete float to smooth each tread surface, working the tool in a circular and then sweeping motion to bring a thin layer of cream to the surface. Be careful not to over-work the surface at this stage — excessive floating brings too much water and fine particles to the top, which weakens the surface layer. Once the concrete has lost its sheen and begun to stiffen slightly, use a stiff-bristled broom to brush the tread surfaces in a single direction, perpendicular to the direction of travel. This broom finish creates fine grooves that dramatically improve traction and give your steps a professional, finished appearance.
Pay special attention to the edges and corners of each step during finishing. A concrete edging tool run along the front lip of each tread creates a slightly rounded, attractive edge that is far less prone to chipping than a sharp corner. Once finishing is complete, cover the steps immediately with plastic sheeting or dampened burlap to begin the curing process. Concrete gains most of its strength during the first seven days of curing, and keeping it moist during this period is critical. In hot or windy weather, you may need to rewet the burlap periodically to prevent the surface from drying too quickly and developing hairline cracks.
Stripping Forms, Curing, and Finishing Touches
Wait a minimum of 24 to 48 hours after the pour before stripping your forms, and longer in cool weather when curing is slower. When you do remove the forms, work carefully to avoid gouging or chipping the edges of the still-curing concrete. Any surface voids or honeycombing — areas where the concrete did not fully consolidate — can be patched immediately using a cement and sand mixture or a commercial concrete patching compound. Allow patched areas to cure along with the rest of the structure, keeping everything moist under cover for a full seven days before allowing foot traffic.
After the initial curing period, consider applying a concrete sealer to protect your steps from moisture intrusion, freeze-thaw damage, and staining. Penetrating sealers soak into the concrete matrix and repel water without changing the surface appearance, making them ideal for textured or broom-finished steps where slip resistance is a priority. Film-forming sealers create a surface coating that can enhance color and give a wet or glossy look but may reduce traction and require periodic reapplication. In either case, sealing is an investment that meaningfully extends the life of your concrete and keeps it looking its best for years to come.
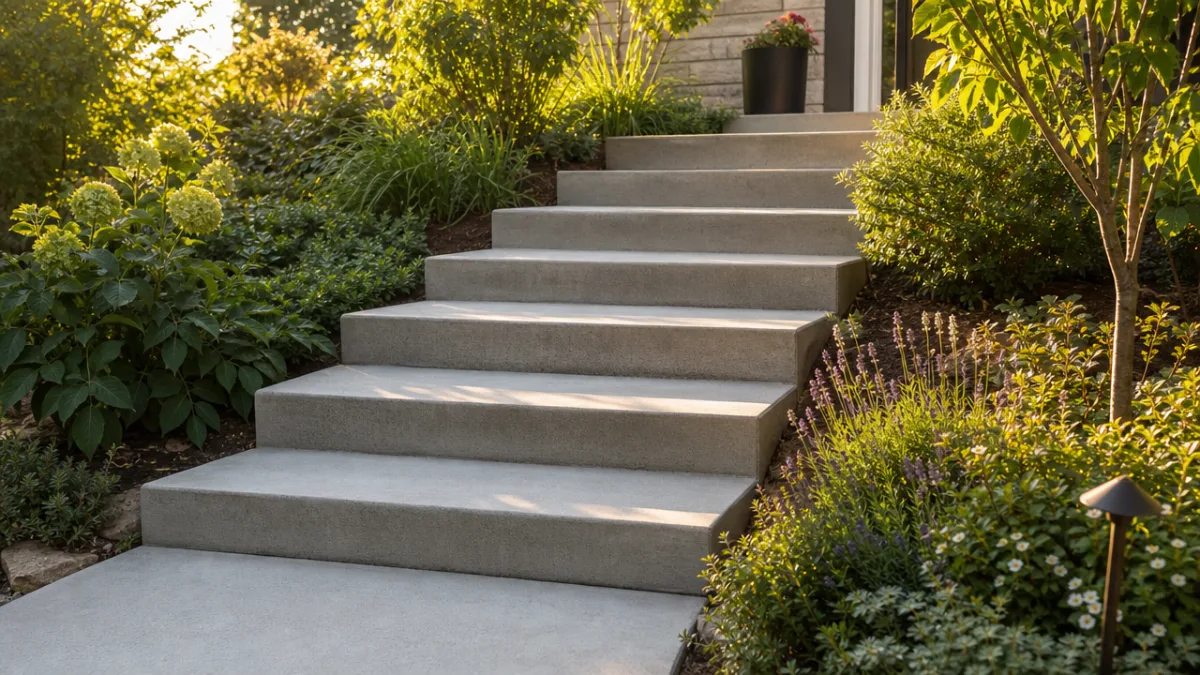
With the structural work complete and the concrete fully cured, you can turn your attention to the landscaping details that will integrate your steps into the broader yard design. Consider planting low-growing perennials or ornamental grasses along the sides of the steps to soften the hard edges and add seasonal color and texture. Lighting fixtures recessed into the side walls or mounted on adjacent posts greatly improve safety and nighttime curb appeal. Handrails fabricated from wrought iron, steel cable, or powder-coated aluminum can be anchored into the concrete with anchor bolts and add both safety and a polished, architectural finish to the overall installation.
Maintenance Tips to Keep Your Concrete Steps Looking Great
One of the most attractive qualities of concrete outdoor steps is how little maintenance they require compared to alternatives like wood or brick. However, a small amount of regular attention will significantly extend their life and keep them looking sharp. At least once or twice a year, sweep the steps thoroughly to remove leaf debris, dirt, and organic material that can hold moisture against the surface and promote surface scaling over time. A garden hose and stiff brush are usually sufficient for routine cleaning, though for stubborn stains, a diluted mixture of water and white vinegar or a commercial concrete cleaner will do the job without damaging the surface.
In climates that experience hard freezes, be thoughtful about the de-icing products you use on your steps. Rock salt and many commercial ice melts contain chloride compounds that can penetrate concrete and corrode the embedded rebar over time, leading to rust staining and structural cracking. Sand is a safer and equally effective option for providing traction on icy steps, and calcium magnesium acetate-based products are a concrete-safe alternative if a chemical de-icer is necessary. Avoid using metal shovels or ice chippers on the concrete surface, as these tools can scratch and chip the surface layer.
Inspect your steps each spring after the freeze-thaw season for surface scaling, cracking, or settlement issues. Small hairline cracks can be filled with a flexible polyurethane caulk or concrete crack filler before water infiltrates and worsens the damage over subsequent freeze-thaw cycles. If surface scaling is apparent, a fresh application of penetrating sealer after thorough cleaning and drying can help stabilize the surface and prevent further deterioration. Addressing minor issues promptly and consistently is far less costly and labor-intensive than allowing small problems to develop into structural failures that require significant repair or full replacement of your steps.








What do you think?
It is nice to know your opinion. Leave a comment.