










Build a Garden Archway: A Complete Guide to Creating a Stunning Entrance for Your Outdoor Space
Introduction: Why a Garden Archway Transforms Your Outdoor Space
A garden archway is one of the most rewarding projects a home gardener or DIY enthusiast can undertake. It serves as a natural focal point that draws the eye, frames a path, and creates a sense of arrival and transition in your outdoor space. Whether you are dividing two garden areas, marking an entrance to a vegetable patch, or simply adding architectural interest to a plain yard, a well-built archway has the power to completely transform how your garden looks and feels throughout the seasons.
Beyond pure aesthetics, a garden arch provides a living framework for climbing plants such as roses, clematis, wisteria, and honeysuckle. These plants not only add color and fragrance but also create an immersive, almost magical tunnel effect as they mature and spread across the structure. The combination of solid craftsmanship and flourishing plant life gives your garden a sense of depth and permanence that few other features can match. Over time, the arch becomes inseparable from the plants growing over it, blending human design with natural beauty.
Many homeowners assume that building a garden archway is a project reserved for experienced woodworkers or landscape professionals, but the reality is quite different. With the right materials, a clear plan, and a weekend or two of focused effort, almost anyone with basic DIY skills can construct a durable and attractive arch. This guide walks you through every step of the process, from selecting your materials and planning your design to digging foundations and finishing the structure so it stands beautifully for years to come.
Planning Your Garden Archway: Design Choices and Measurements
Good planning is the foundation of any successful building project, and a garden archway is no exception. Before you buy a single piece of timber or mix any concrete, you need to make several key decisions about the design, size, and placement of your arch. Start by walking your garden and identifying the most natural location for the structure. Is it going over an existing path? Will it frame a gate? Is it meant to be a standalone ornamental feature? The intended function will shape almost every other decision you make during the planning phase.
Standard garden archways are typically around 200 to 220 centimeters tall and between 90 and 120 centimeters wide, which is comfortable for an adult to walk through without feeling cramped, even when plants have started to grow inward from the sides. However, if you want to drive a wheelbarrow or garden cart through the arch, or if you plan to hang a gate inside it, you should increase the width accordingly. Height is also important if you are planning to train tall climbers or want an imposing, dramatic structure. Sketch your preferred dimensions on paper before committing to cuts and purchases.
The style of your arch should complement the broader aesthetic of your garden. Rustic gardens suit arches made from rough-sawn timber or even natural branches and poles lashed together. Formal or cottage gardens pair beautifully with painted timber arches featuring lattice side panels. Contemporary gardens might call for powder-coated steel or aluminium arches with clean, geometric lines. Consider also whether you want a curved top, a flat top, or a pointed gothic top, as each gives a distinct character. Take photographs of garden arches you admire online or in books and use them as reference when drawing up your own design.
- Determine the primary purpose of the arch: decorative, functional gateway, or plant support.
- Measure the path or opening to establish minimum width and height requirements.
- Choose a style that harmonizes with your existing garden design and home exterior.
- Decide on the top profile: rounded, flat, or pointed, based on your preferred aesthetic.
- Research climbing plants you intend to grow to ensure the structure can support their weight.
Choosing the Right Materials for a Lasting Structure
The longevity and appearance of your garden archway depend heavily on the materials you choose. Timber is by far the most popular choice for DIY garden arches because it is relatively affordable, easy to work with using standard tools, and blends naturally into garden settings. For outdoor use, you should choose timber that is either naturally rot-resistant or pressure-treated to withstand moisture, soil contact, and the elements. Species such as Western Red Cedar, larch, and oak are excellent naturally durable choices, while pressure-treated softwood such as pine is a more economical alternative that performs well when properly finished.
For the main upright posts, which will be partially buried in the ground, you need timber that is rated for ground contact. Typically, 75mm by 75mm or 100mm by 100mm posts are used, as they provide sufficient strength and stability without looking overly bulky. The horizontal crossbars and arched top sections can be made from thinner timber, usually 50mm by 50mm or even 38mm by 38mm, as they bear less structural load. For the curved top sections, you have several options: you can use flexible thin strips of timber bent and laminated together, cut curves from wide boards using a jigsaw, or purchase pre-formed curved timber sections from a timber merchant.
Metal arches offer a different set of advantages. They are extremely durable, require minimal maintenance, and are available in kit form from garden centers and online retailers in a wide variety of styles. Galvanized steel, wrought iron, and powder-coated aluminium are the most common metals used. While pre-made metal arches are convenient, they may not always match your exact size requirements or aesthetic preferences, and they can be harder to customize than timber. For a truly bespoke garden feature, timber remains the preferred material for most DIY builders, though combining a timber frame with metal fixings and connectors is an excellent approach that uses the best qualities of both materials.
Do not overlook the importance of fixings and fasteners. Use only galvanized, stainless steel, or specifically outdoor-rated screws, bolts, and brackets. Standard zinc-plated screws will rust quickly when exposed to outdoor moisture and soil, weakening the joints and staining the timber with rust marks. Post base brackets or post spikes made from hot-dipped galvanized steel are ideal for anchoring your uprights securely. If you are setting posts directly into concrete, buy posts that have been rated and treated for ground contact use, as the concrete-soil interface is the most aggressive environment for timber decay.
Step-by-Step Construction: From Posts to Finished Arch
Once your design is finalized and your materials are assembled, you are ready to begin construction. The first step is marking and digging the post holes. Use stakes and string lines to mark the exact positions of your four upright posts, checking that the corners are square by measuring diagonally from corner to corner — both diagonal measurements should be equal. Post holes should be at least 45 to 60 centimeters deep to ensure the structure is stable, especially if you live in an area with strong winds or plan to support heavy climbing plants. A post hole digger or an electric auger makes this job considerably easier than using a standard spade.
With the holes dug, place the posts and check them for vertical alignment using a spirit level. Pour a dry concrete mix around each post, tamping it down firmly, then add water as directed or use a ready-mixed post-fix product that sets rapidly without needing water to be mixed in separately. Temporarily brace the posts with angled timber supports to hold them perfectly plumb while the concrete cures, which typically takes at least 24 hours. Rushing this stage risks a leaning, unstable arch, so patience here pays dividends for the lifetime of the structure.
Once the posts are set and the concrete is fully cured, you can begin attaching the horizontal rails and crossbars that connect the two sides of the arch at both the top and midpoint. These rails stiffen the structure and provide the framework from which the curved or flat arch top will be hung. Use timber connectors or notched joints wherever possible for maximum strength, then reinforce with galvanized screws or coach bolts. The arch top itself, whether curved or flat, is usually assembled on the ground and then lifted into position and fixed to the tops of the posts, a task that is much easier with a second pair of hands.
- Mark and dig four post holes to a depth of at least 45 to 60 centimeters.
- Set posts in concrete and brace them vertically while the concrete cures for 24 hours.
- Attach horizontal side rails at mid-height and top height between the paired posts on each side.
- Assemble the arch top section on the ground, then lift and fix it to the post tops.
- Add optional decorative lattice panels to the sides for extra support and visual detail.
- Sand all exposed timber surfaces and apply a weatherproof finish such as exterior paint, stain, or preservative oil.
If you are adding lattice or trellis side panels — which are highly recommended for climbing plants — these can be attached to the inner faces of the post and rail framework using staples or screws. Pre-made trellis panels from the garden center save time, or you can construct your own from strips of timber nailed or screwed into a diagonal diamond or square grid pattern. Install the panels before you plant anything nearby, as reaching in among established plants to fix panels later is awkward and risks damaging the growth you have worked hard to establish.

Finishing and Weatherproofing Your Garden Archway
With the structure assembled, the finishing stage is where your archway transforms from a raw timber construction into a polished garden feature. Start by going over every surface with medium-grit sandpaper to remove any rough edges, splinters, and mill marks. Pay particular attention to the end grain of any cut timber, as this is where moisture enters most readily and where decay begins if the wood is left unprotected. A well-sanded arch also takes paint, stain, or oil much more evenly, resulting in a smoother, more professional final appearance that will last considerably longer between maintenance treatments.
The choice of finish depends on the look you want to achieve and the timber species you are using. White or cream gloss paint gives a classic cottage garden appearance and reflects light, making the arch a striking landmark even in winter. A wood stain in a natural oak or teak tone allows the timber grain to show through while still offering protection against UV rays and moisture. Clear exterior timber oil is the most natural-looking option and is especially beautiful on premium timber species such as cedar or oak, though it generally requires more frequent reapplication than paint. Whatever product you choose, read the manufacturer’s guidance carefully and apply at least two coats for adequate protection.
Do not forget to treat the cut ends of any timber that were not treated before purchase, and apply extra product to any areas where two pieces of timber meet, as these joints can trap moisture. Many builders apply a generous brush-coat of end-grain preservative before assembly and then follow up with the chosen decorative finish once the arch is standing. This belt-and-braces approach adds very little time to the project but can add years to the lifespan of the structure. Reapply your chosen finish every two to three years, or as soon as you notice the wood beginning to look dry or the paint beginning to peel.
Planting and Training Climbers on Your New Arch
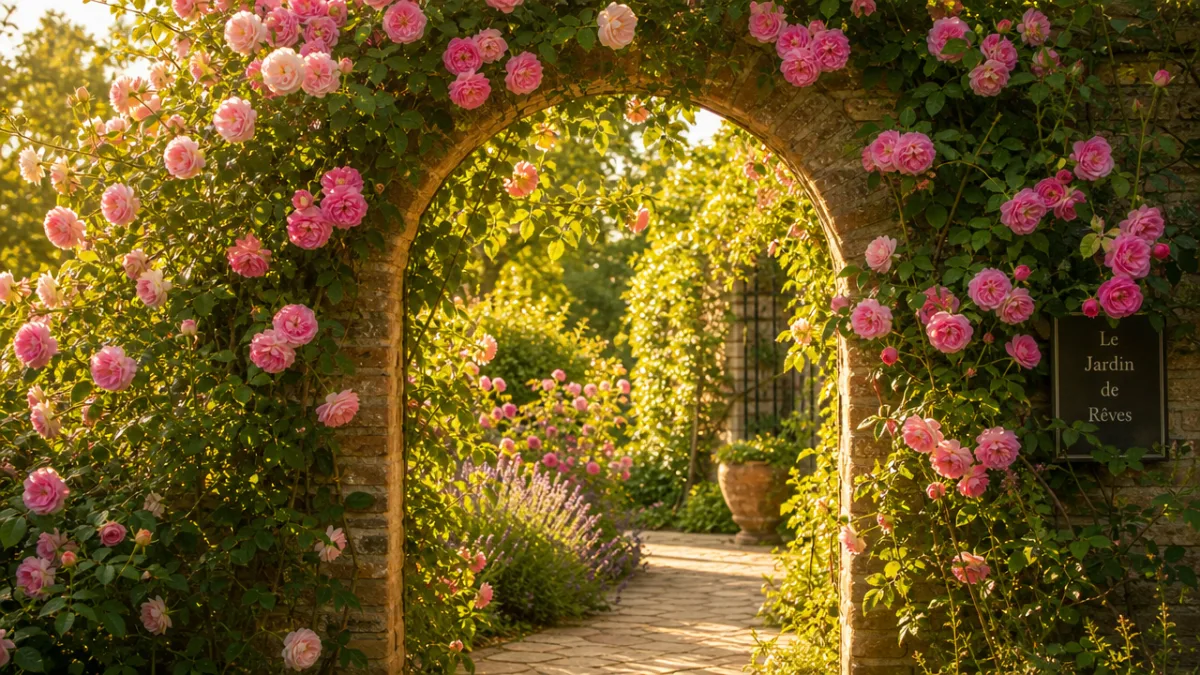
A garden arch only truly fulfils its potential when clothed in beautiful climbing plants, and choosing the right plants for your arch is almost as important as building the structure itself. The most popular choice by far is the climbing rose, which offers spectacular blooms in early summer and again in autumn for repeat-flowering varieties, along with gorgeous fragrance that drifts through the garden on warm days. Varieties such as ‘New Dawn’, ‘Zéphirine Drouhin’, and ‘Climbing Iceberg’ are classic choices that are well suited to arch growing, producing long flexible stems that can be trained and tied to the trellis panels with soft garden twine.
Clematis is another outstanding companion for a garden arch, and it pairs particularly well with climbing roses, flowering at different times to extend the season of color. Large-flowered hybrids such as ‘The President’ or ‘Nelly Moser’ provide spectacular blooms in late spring and early summer, while species such as Clematis viticella flower abundantly through mid and late summer. Unlike roses, clematis attach themselves to supports using their leaf stalks, but they still benefit from the open mesh of a trellis panel to wind through. For a truly sensational summer display, plant one climbing rose and one complementary clematis on each side of your arch and allow them to intertwine as they grow.
In the first season after planting, resist the temptation to let your climbers race upward and over the arch as quickly as possible. Instead, train the main stems outward horizontally along the lower rails during the first spring. This technique, well established among rose growers, encourages the plant to produce flowering shoots from along the full length of each stem rather than concentrating all its energy in a cluster of flowers at the very top. Tie in new growth regularly using soft twine or purpose-made plant ties, checking that the ties are not cutting into thickening stems as the season progresses.
- Climbing roses: fragrant, long-flowering, available in a huge color range, ideal for sunny positions.
- Clematis: light and delicate, self-clinging, excellent for pairing with roses or growing alone in shadier spots.
- Wisteria: dramatically beautiful but vigorous, best suited to large, robust arches with very solid fixings.
- Honeysuckle: wonderfully fragrant, fast-growing, tolerates shade, attracts bees and butterflies throughout summer.
- Jasmine: delicate white or yellow flowers with an intense fragrance, excellent for warm sheltered positions.
Maintenance of your climbing plants is an ongoing commitment that ensures the arch always looks its best and that the plants remain healthy and productive. At the end of the growing season, remove any dead or damaged stems, check and replace any ties that are becoming too tight, and give the timber a chance to dry out before winter by cutting back excess growth that is trapping moisture against the wood. In early spring, feed your climbers generously with a balanced slow-release fertilizer to fuel the new season’s growth, and apply a layer of mulch around the base of each plant to retain moisture and suppress competing weeds. With this level of care, your garden arch and its climbing plants will reward you with a spectacular seasonal display for many years to come.
Maintenance, Troubleshooting, and Long-Term Care
Even a well-built garden archway requires regular attention to remain structurally sound and visually attractive over many years. The most vulnerable parts of any timber arch are the post bases, where the wood meets the soil or concrete. At least once a year — ideally in spring before the growing season begins in earnest — inspect each post base carefully for signs of softening, discoloration, or fungal growth. Prod the timber firmly with a screwdriver and pay attention to whether it penetrates easily, which would indicate rot has begun. Catching decay at an early stage allows you to treat the affected area with a timber hardener and preservative, potentially extending the life of the post by several more years.
The joints and fixings of your arch deserve the same annual scrutiny. Timber expands and contracts with changes in temperature and moisture throughout the year, and over time this movement can loosen screws, open up gaps at joints, and allow water to pool in crevices where it accelerates decay. Tighten any loose screws, replace any that have corroded, and fill any opened gaps with an exterior-grade wood filler or flexible sealant before repainting or restaining the affected area. Keeping the timber surface sealed and intact is the single most effective thing you can do to extend the life of your archway without major structural work.
If you notice that one of the upright posts has begun to lean despite being set in concrete, the likely cause is either insufficient post depth when originally installed or movement of the surrounding soil. In many cases, you can stabilize a slightly leaning post by digging around its base, packing in additional dry concrete mix, and bracing the post back to vertical while the new concrete cures. If the post base has rotted and there is no sound timber left below ground level, you have two options: remove and replace the post entirely, or use a metal post repair spike that can be driven into the ground alongside the old post and then bolted to the sound timber above the decay line. The second option is quicker and often sufficient for arches that are still largely sound above ground.
Over the very long term — ten years or more — even the best-maintained timber arch will eventually need significant renovation or full replacement. This is not a failure of the build but simply the nature of outdoor timber structures. The good news is that by this stage your climbing plants will be large and established, and if you plan the replacement carefully, you can do much of the work while keeping the plants in place, cutting them back temporarily, and retying them to the new structure as it goes up. Many gardeners find that replacing an ageing arch gives them the opportunity to upgrade the design, improve the foundations, or choose a higher-quality timber species, resulting in a structure that surpasses the original in both beauty and longevity.








What do you think?
It is nice to know your opinion. Leave a comment.