










5 Tips to Boost Humidity for Plants in Heated Rooms
If you’ve ever noticed your beloved houseplants looking a little sad during winter — leaves curling at the edges, brown tips forming, or soil drying out faster than usual — you’re not imagining things. Heated rooms are one of the most challenging environments for tropical and subtropical plants, which make up the vast majority of popular houseplants. Central heating systems, radiators, and forced-air furnaces all work by warming the air, and warm air holds moisture differently than cool air. The result is a dramatic drop in relative humidity that can stress even the hardiest of indoor plants.
Understanding why humidity matters is the first step toward solving the problem. Most popular houseplants — including pothos, monsteras, ferns, calatheas, orchids, and peace lilies — originate from tropical rainforests where humidity levels regularly hover between 60% and 90%. The average heated home in winter can drop to somewhere between 20% and 30% relative humidity, which is drier than many desert environments. This gap between what plants need and what they actually receive leads to slow growth, increased susceptibility to pests like spider mites, and general decline in plant health over time.
The good news is that raising humidity for your plants doesn’t require expensive equipment or major home renovations. With a few targeted strategies, you can create a microclimate around your plants that keeps them lush and thriving even in the depths of a cold, dry winter. This article walks you through five practical, proven tips for boosting humidity in heated rooms, so your plant collection can continue to flourish no matter the season. Each method can be used independently or in combination with others for even better results.
1. Group Your Plants Together to Create a Humid Microclimate
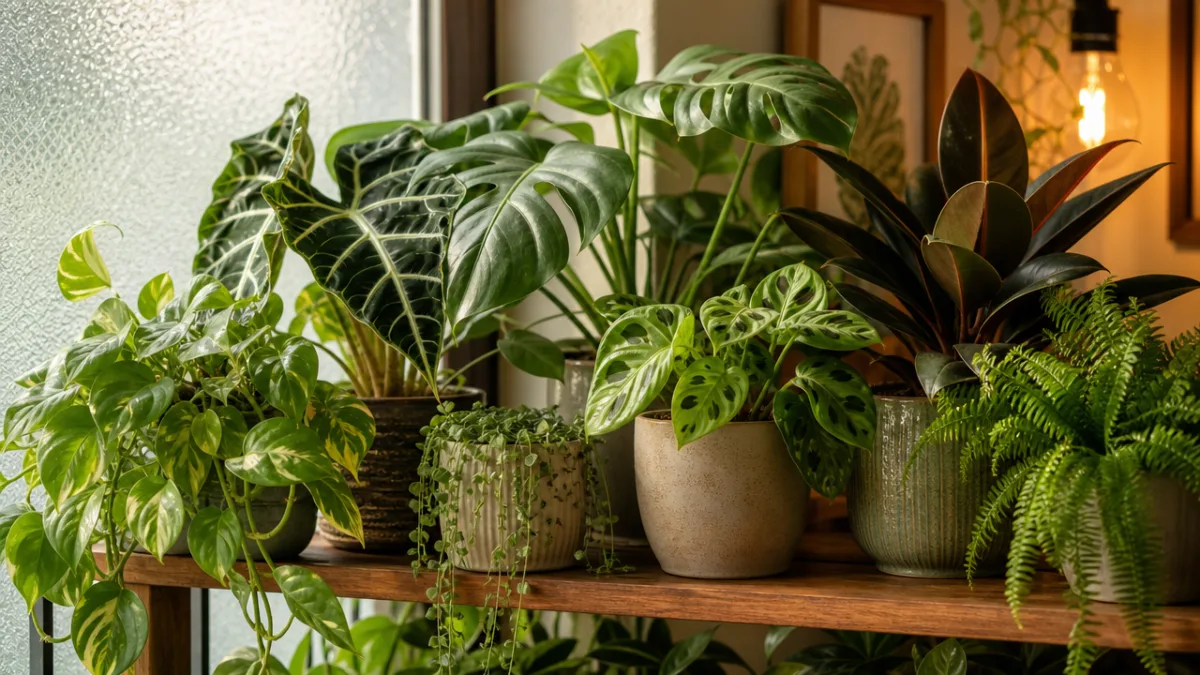
One of the simplest and most cost-free methods for raising humidity around your plants is to cluster them together in groups. Plants naturally release water vapor through a process called transpiration — essentially, they breathe out moisture through tiny pores in their leaves called stomata. When you group multiple plants in close proximity, each plant contributes to the moisture in the air surrounding it, and the collective effect creates a noticeably more humid microenvironment that benefits all the plants in the group. This is a method used by professional growers and botanical gardens alike, and it works remarkably well even in dry, heated spaces.
To make the most of plant grouping, consider arranging your plants on a large tray, a plant stand with multiple tiers, or a dedicated shelf unit. The key is to allow the plants to be close enough that their leaf canopies slightly overlap or at least come within a few inches of each other, maximizing the moisture-sharing effect. Be mindful not to crowd them so tightly that air circulation is completely blocked, as stagnant air can promote fungal diseases. A gentle balance between closeness and airflow is the ideal goal when designing your plant cluster.
Another benefit of grouping plants is the aesthetic impact it creates. A well-arranged cluster of plants can serve as a striking visual feature in any room, transforming a corner or windowsill into something that resembles a mini jungle. You can play with varying heights, textures, and leaf shapes to create a visually dynamic display. Taller plants like dracaenas or fiddle-leaf figs can anchor the back of a grouping, while trailing plants like pothos or string of pearls can drape over the edges of shelves, creating a layered, lush effect that looks intentional and beautiful.
It’s also worth noting that grouping plants near a window with good natural light amplifies the benefits. Plants in bright, indirect light transpire more actively, which means they release more water vapor and contribute more meaningfully to the humid microclimate. North and east-facing windows tend to offer softer light that suits humidity-loving tropical plants particularly well during the winter months when southern and western exposures can still produce intense heat through glass that dries plants out even further.
2. Use a Pebble Tray with Water Beneath Your Pots
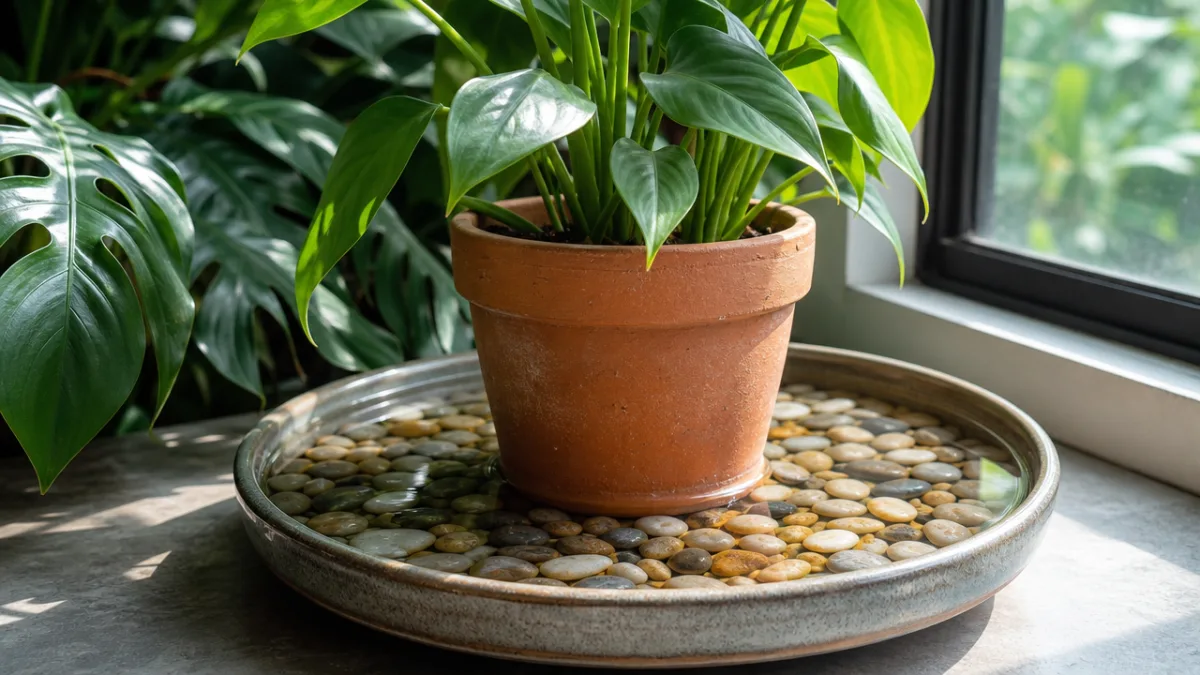
The pebble tray method is a classic humidity-boosting technique that has been used by houseplant enthusiasts for generations, and for good reason — it’s simple, inexpensive, and surprisingly effective as a passive humidity source. The concept involves filling a shallow tray or saucer with a layer of pebbles, gravel, or decorative stones, adding water to just below the top of the pebble layer, and then setting your plant pots on top of the stones. As the water in the tray slowly evaporates, it rises as water vapor directly around the base and lower leaves of the plant, increasing the local humidity in that immediate zone.
The critical detail that makes this method work correctly — and safely — is ensuring that the plant pot itself is sitting on top of the pebbles and not in the water. If the pot sits in standing water, the roots can become waterlogged, leading to root rot, one of the most common and deadly problems for indoor plants. The pebbles serve as a physical barrier that keeps the pot elevated above the waterline while still allowing evaporation to occur beneath and around it. You should check the water level every few days and refill as needed, especially in very dry or warm rooms where evaporation happens quickly.
Pebble trays can be made from almost any shallow dish or tray you have at home. Baking trays, casserole dishes, plastic plant saucers, and even decorative ceramic trays all work well. If you want a more polished look, nurseries and home goods stores sell purpose-built humidity trays in a variety of sizes and finishes. Larger trays that hold multiple pots are particularly effective, as the greater surface area of water means more evaporation and a more substantial increase in humidity across a wider plant grouping.
Some gardeners enhance their pebble trays by adding a small piece of aquarium charcoal to the water, which helps prevent algae and bacteria from growing in the standing water. Others use colored glass pebbles or smooth river stones to make the trays a decorative element in their own right. Whichever materials you choose, be sure to clean the tray and replace the water every week or two to prevent stagnation, which can become a breeding ground for fungus gnats and other unwanted pests that can then migrate to your plant’s potting mix.
3. Invest in a Humidifier for Consistent, Reliable Results
While pebble trays and plant grouping provide passive humidity increases, they often aren’t sufficient for plants with particularly high moisture demands, such as calatheas, maidenhair ferns, orchids, and anthuriums. For these moisture-hungry species, or for anyone managing a larger plant collection in a consistently dry environment, investing in a dedicated humidifier is by far the most effective and reliable solution. A humidifier actively pumps moisture into the air, allowing you to maintain a steady, measurable level of humidity that passive methods simply cannot match, especially in rooms with powerful central heating systems.
There are several types of humidifiers to consider, each with different advantages. Ultrasonic humidifiers use high-frequency vibrations to create a fine cool mist and are among the most popular options for plant rooms because they operate quietly and efficiently. Evaporative humidifiers work by blowing air through a wet wick filter, releasing moisture more gradually and naturally. Warm mist humidifiers heat water to produce steam, which is effective but uses more energy and may not be ideal for rooms where you also spend time. For plants specifically, an ultrasonic cool mist humidifier is generally the recommended choice, as it provides consistent humidity without significantly raising room temperature.
When placing a humidifier in a plant room, position it so the mist disperses broadly across the plant collection rather than pointing directly at one plant, which could cause excess moisture on leaves and potentially encourage mold or mildew. A central location in the room or near a fan that can help circulate the moisture evenly is ideal. Pair your humidifier with a hygrometer — an inexpensive device that measures relative humidity — so you can monitor the actual humidity levels and adjust the humidifier’s settings accordingly. Most tropical houseplants thrive at 50% to 60% relative humidity, which is a realistic target even in heated rooms with a mid-range humidifier running a few hours each day.
Maintenance is an important consideration with humidifiers. The water reservoir should be emptied, rinsed, and refilled with fresh water daily if possible, or at least every other day, to prevent the growth of bacteria and mold that can then be dispersed into the air of your living space. Using distilled or filtered water rather than tap water reduces mineral deposits and white dust that ultrasonic models can produce. Some humidifiers also have built-in hygrostats that automatically turn the unit on and off to maintain a target humidity level, making them especially convenient for consistent plant care without constant manual adjustments.
4. Mist Your Plants Strategically — and Correctly
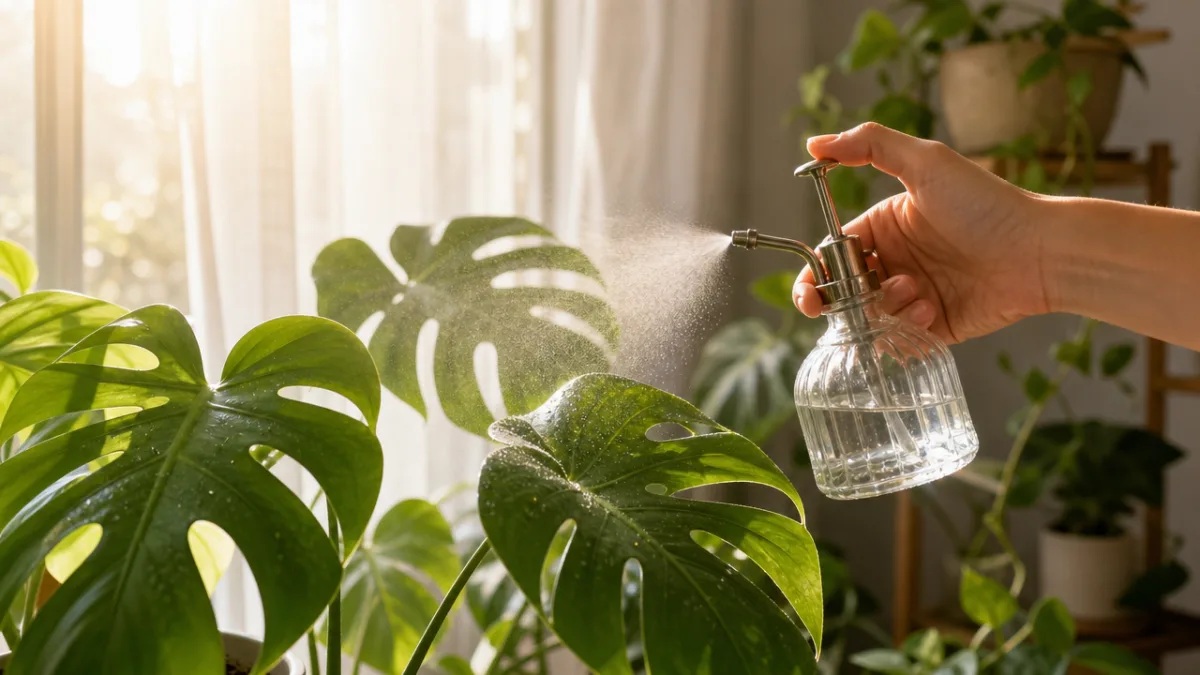
Misting plants is perhaps the most widely practiced humidity-related plant care technique, and it’s also the most misunderstood. While the act of misting is beneficial when done correctly, it comes with some important caveats that, if ignored, can actually harm your plants rather than help them. The core idea behind misting is simple: by spraying a fine mist of water directly onto plant leaves, you temporarily raise the humidity level in the immediate leaf environment and provide a cooling, refreshing effect. For plants that absorb moisture through their leaves as well as their roots — including many ferns and bromeliads — misting is particularly beneficial.
Timing is everything when it comes to misting. The best time to mist your plants is in the morning, so that the water on the leaves has plenty of time to evaporate throughout the day before temperatures drop in the evening. Misting at night leaves moisture sitting on leaves in cooler, less evaporative conditions, which significantly increases the risk of fungal diseases like powdery mildew, botrytis, and various leaf spot diseases. Mist in the morning when the room is warming up and air circulation is naturally higher, and the benefits will be maximized while the risks stay low.
Not all plants benefit equally from misting, and some should be avoided altogether. Succulents, cacti, and other drought-adapted plants don’t need or want additional moisture on their foliage. Fuzzy-leaved plants like African violets and begonias should never be misted, as the trapped moisture in their leaf hairs promotes rot and disease. On the other hand, ferns, calatheas, bromeliads, orchid foliage (not the blooms), and large-leafed tropicals like monstera and philodendron generally respond very positively to regular misting. When in doubt, research the specific preferences of each plant in your collection before adding misting to its care routine.
The quality of the water you use for misting matters more than many people realize. Tap water in many areas contains high levels of chlorine, fluoride, and dissolved minerals that, when sprayed onto leaves and left to evaporate, leave behind unsightly white mineral deposits. These deposits can block stomata and interfere with the plant’s ability to photosynthesize and transpire effectively over time. Using distilled water, rainwater, or tap water that has been left to sit uncovered overnight (which allows some chlorine to dissipate) will keep your plant leaves cleaner and healthier with consistent misting.
5. Place Plants in Naturally Humid Rooms Like Bathrooms and Kitchens
One of the most elegantly simple solutions to the dry heated room problem is to think strategically about where in your home you place your plants. Not all rooms in a house are equally dry — kitchens and bathrooms, in particular, naturally generate significant amounts of humidity throughout the day from cooking steam, dishwashing, showering, and bathing. A bathroom that receives daily showers can sustain humidity levels of 50% to 70% or even higher, which is perfectly within the preferred range for most tropical houseplants without any additional equipment or effort on your part.
Bathrooms with windows are ideal plant havens during winter. The combination of regular steam from hot showers and natural light from a window creates conditions that closely mimic the warm, bright, humid canopy environments where so many popular houseplants evolved. Plants that are particularly well-suited to bathroom environments include ferns of all varieties, pothos, spider plants, peace lilies, orchids, and philodendrons. If your bathroom doesn’t have a window, you can still keep plants there using a grow light, as the humidity advantage alone makes it worth the effort for moisture-loving species.
Kitchens offer a different but equally viable set of conditions. Cooking generates steam, washing up creates moisture, and the general activity in a kitchen tends to keep the air circulating more than in a closed bedroom or living room. Placing plants on kitchen windowsills, on top of refrigerators (which generate a small amount of heat and vapor from the condenser), or on open shelving near the sink can all provide modest but consistent boosts in humidity. Herbs like basil, mint, and chives are obvious kitchen plant choices, but smaller tropical plants and trailing pothos also thrive beautifully in well-lit kitchen environments.
If you’re particularly passionate about your plant collection and have the space, creating a dedicated plant room or plant corner in a bathroom or kitchen allows you to concentrate humidity-loving plants in the room where they’ll naturally do best, rather than fighting the dry conditions in your living areas. Some dedicated plant enthusiasts even install a small portable greenhouse shelf unit — a metal shelving frame with a clear plastic zipper cover — in a bathroom or near a laundry area, creating a fully enclosed, highly humid grow space that mimics a greenhouse environment right inside the home. This can be a transformative setup for growing notoriously difficult humidity-lovers that might otherwise struggle through the dry winter months.
Bringing It All Together: Building a Humidity Strategy for Your Home
The five tips outlined in this article — grouping plants together, using pebble trays, running a humidifier, misting strategically, and placing plants in naturally humid rooms — are most powerful when used in combination. Think of them as layers of a comprehensive humidity strategy rather than isolated fixes. For example, grouping your humidity-loving plants in the bathroom (where baseline humidity is already higher), placing them on pebble trays, and misting them in the morning creates a three-layer approach that can sustain humidity levels close to what those plants would experience in their native environments, even on the driest and coldest days of winter.
Monitoring your efforts with a hygrometer will help you understand which combinations are working and where adjustments might be needed. These small, affordable devices — available from garden centers, hardware stores, and online retailers — can be placed among your plant collection to give you real-time readings of the relative humidity in that specific microclimate. Many modern hygrometers also record temperature, which is another important factor in plant health, especially during winter when nighttime temperatures near windows can drop significantly and stress tropical plants that are sensitive to cold drafts.
It’s also worth evaluating which plants in your collection genuinely need high humidity and which are more tolerant of dry conditions. Grouping plants by their moisture needs is not only a practical approach to care but also makes managing humidity much more efficient. Your succulents, cacti, snake plants, and ZZ plants can happily live in the drier parts of your home, while your calatheas, ferns, orchids, and monsteras get placed in the high-humidity zones you’ve created. This kind of thoughtful plant placement reduces effort while dramatically improving outcomes for every plant in your care.
Finally, remember that improving humidity for your plants is a seasonal challenge that requires a different approach at different times of year. In summer, when windows are open and natural humidity is higher, you may find that you need little to no intervention at all. It’s the winter months — when heating systems run continuously and outdoor air is cold and moisture-poor — that demand the most attention. Building the habits described in this article into your winter plant care routine will pay dividends not just in plant health, but in the overall atmosphere and air quality of your home, since healthy, well-hydrated plants also contribute to the humidity of the surrounding air in a gentle, natural cycle of benefit for both plants and people.
- Group plants together to create a shared transpiration microclimate that raises humidity passively and costs nothing.
- Use pebble trays filled with water beneath pots to provide a steady, localized source of evaporative moisture throughout the day.
- Run a humidifier — ideally an ultrasonic cool mist model — to achieve consistent, measurable humidity levels for demanding moisture-loving plants.
- Mist strategically in the morning using distilled or filtered water, focusing on plants that genuinely benefit from foliar moisture.
- Relocate plants to kitchens and bathrooms where naturally occurring steam and moisture create a more hospitable baseline environment during dry winter months.
With these strategies in place, your indoor garden can remain vibrant, lush, and healthy throughout even the longest, driest winter. The key is consistency — small, regular efforts to maintain humidity add up to a significant difference in plant health over the course of a season. Your plants will reward the care with robust new growth, glossy leaves, and the kind of thriving vitality that makes houseplant keeping one of the most satisfying and rewarding hobbies there is.








What do you think?
It is nice to know your opinion. Leave a comment.