










21 Unique Garden Ideas for Growing Microgreens in Any Space
What Are Microgreens and Why Should You Grow Them?
Microgreens are essentially baby plants — the young seedlings of vegetables, herbs, and edible flowers that you harvest right after those first little leaves appear, usually somewhere between seven and fourteen days after they sprout. They’ve genuinely taken off in recent years, showing up everywhere from fancy restaurant plates to people’s kitchen counters at home. And don’t let their size fool you — these tiny greens are absolutely loaded with vitamins, minerals, and antioxidants, often packing in far more nutrients than the full-grown versions of the same plant.
Research has found that microgreens can contain up to forty times more nutrients by weight than their mature counterparts — which is pretty remarkable. Red cabbage microgreens, for example, are particularly rich in vitamin C, vitamin K, and various phytonutrients that support immune health and help protect your cells. If you’re trying to get more nutrition out of your meals without piling on the calories, microgreens might just be the most efficient and tasty solution in the whole world of home gardening.
They’re also wonderfully versatile in the kitchen. You can scatter them over salads, pile them into sandwiches, toss them into smoothies, or use them as a gorgeous finishing touch on soups and main dishes. The flavor range is surprisingly wide — from the peppery kick you get from arugula and radish microgreens to the sweet, grassy freshness of pea shoots and sunflower greens. And when you grow your own, you’re always cutting them at peak flavor and nutrition, without any of the pesticides or preservatives that tend to sneak into store-bought produce.
Getting Started: Essential Tools and Materials
One of the best things about growing microgreens is how little you actually need to get going. At its most basic, you’re looking at a shallow tray, some good growing medium, seeds, water, and a light source. Unlike traditional gardening — which can quickly become an expensive hobby with all the tools and soil amendments involved — microgreens are genuinely accessible to pretty much anyone with a bit of counter space and a curiosity to try different varieties.
Your growing medium is one of the first big decisions you’ll make, and it matters more than you might expect. A lot of growers love a good potting mix or seed-starting mix because it drains well and lets the roots breathe. Others go with coco coir, which is a sustainable byproduct of coconut processing that holds moisture really nicely without getting soggy. Hydroponic growing pads made from natural fibers like jute or hemp are another solid option, especially if you want a cleaner, soil-free experience that’s tidier to work with and makes harvesting a breeze.
Choosing your seeds can feel a little overwhelming at first, given how many options are out there — but don’t stress it. Great beginner varieties include sunflower, peas, radish, broccoli, and wheatgrass, all of which sprout quickly and reliably and are ready to harvest within a week or two. Once you get comfortable, you can start exploring more interesting varieties like amaranth, basil, beet, or even edible flowers like nasturtium and borage. Just make sure you’re buying from a reputable supplier that sells seeds specifically intended for microgreens — you want untreated seeds with solid germination rates.
- Shallow growing trays (1020 trays or repurposed food containers)
- High-quality potting mix, coco coir, or hydroponic growing mats
- Untreated microgreen seeds from a reputable supplier
- A spray bottle or gentle watering can for moisture management
- A grow light or access to a bright south-facing windowsill
- A sharp, clean pair of scissors or a harvest knife
Creative Space-Saving Ideas for Indoor Microgreen Gardens
Living in a small apartment or urban home doesn’t have to mean giving up on growing your own food. Microgreens are honestly one of the most space-efficient crops you can grow — they thrive in spots where full-size plants wouldn’t stand a chance. A single standard 10×20 inch tray can keep you in fresh greens for an entire week, and if you stagger your plantings across a few small trays, you can keep a continuous supply going without ever needing more than a few square feet of dedicated space.
Vertical growing systems are one of the smartest ways to make the most of indoor space. If you set up a tiered wire shelving unit near a bright window or under grow lights, you can multiply your growing surface without taking up any additional floor space. A unit that’s just two feet wide and six feet tall can hold four to six trays at once, giving you a great variety of greens from a surprisingly small footprint. These shelves are inexpensive at most home goods stores, or you can repurpose an old bookshelf — either way, it’s a really budget-friendly option for urban growers who want serious output from minimal space.
Good old windowsill gardens are still a favorite for a reason — they need zero extra equipment beyond the trays themselves. South-facing windows in the Northern Hemisphere get the most consistent light and work well for most varieties, though east- and west-facing windows are perfectly fine for less light-hungry species like peas and sunflowers. If your home doesn’t get much natural light, a simple LED grow light mounted under a shelf or inside a cabinet can turn an otherwise dead space into a productive little growing station — and they run on just a few watts of electricity per day, so the cost is minimal.
Unique and Unconventional Container Ideas
One of the genuinely fun parts of growing microgreens is how creative you can get with containers. Because the root systems are so shallow, basically any vessel that can hold an inch or two of growing medium and drain properly will do the job. That opens up a whole world of possibilities for repurposing things you already have around the house — which is both satisfying from a sustainability standpoint and a great way to give your garden some real visual personality.
Vintage wooden crates and salvaged drawer inserts make incredibly charming microgreen planters when you line them with a bit of breathable fabric or landscape cloth to keep the growing medium in place. Old baking pans, pie dishes, and roasting trays picked up from thrift stores are perfectly sized for microgreens and look surprisingly beautiful arranged on a kitchen counter or dining table as a kind of living centerpiece. Clear glass or acrylic containers add a really cool bonus — you can actually watch the roots develop through the sides, which turns the whole growing process into something almost decorative in itself.
For something even more unexpected, think about upcycling colanders, wooden cigar boxes, vintage tin cans, or sections of guttering mounted horizontally on a sunny wall. Each one brings its own visual character to the space while doing the job just fine. The main thing to keep in mind when using anything that wasn’t designed for plants is drainage — either drill a few small holes in the bottom or find a way to elevate the container so excess water can escape. Poor drainage is one of the most common reasons microgreens fail, so it’s worth getting that part right from the start.
- Repurposed wooden crates lined with burlap for a rustic farmhouse aesthetic
- Vintage baking pans and pie dishes arranged on open kitchen shelving
- Clear acrylic boxes that showcase root development as a living art installation
- Sections of PVC or wooden guttering mounted on a sunny wall or fence
- Upcycled tin cans and colanders grouped together for a whimsical kitchen display
- Old dresser drawers repurposed as deep, wide growing beds for dense plantings
- Mason jars used for sprouting varieties such as alfalfa and lentils
Outdoor and Balcony Microgreen Garden Concepts
Most people think of microgreens as strictly an indoor thing, but they actually do really well outside during mild weather and in temperate climates. Growing on a balcony, patio, or small outdoor terrace gives you the added bonus of real sunlight, which tends to produce noticeably more robust, flavorful growth than artificial lighting. Even a modest balcony with a few railing-mounted trays or a small potting bench can turn out impressive amounts of fresh greens from spring through early autumn.
Balcony railing planters — the kind typically used for herbs and flowers — can be easily adapted for microgreens by filling them with coco coir or potting mix and planting densely. A south- or west-facing balcony that gets at least four to six hours of direct sun a day is a great setup for most fast-growing varieties. Some growers put a simple cold frame or mini greenhouse cover over their outdoor trays when the weather cools down, which can push the growing season well into autumn and even through mild winters in warmer areas — making year-round outdoor microgreens a realistic goal for a lot of urban growers.
If you don’t have private outdoor space, community gardens are worth looking into. Raised beds, tabletop growing stations, and dedicated microgreens sections within shared plots let neighbors pool their resources, swap seeds, and share harvests while actually connecting with the people around them over something meaningful. Some community gardens have even launched specific microgreens programs with beginner workshops and communal growing space for apartment dwellers — which is a wonderful way to build skills and confidence in a supportive environment.
Harvesting, Storing, and Maximizing Your Microgreen Yields
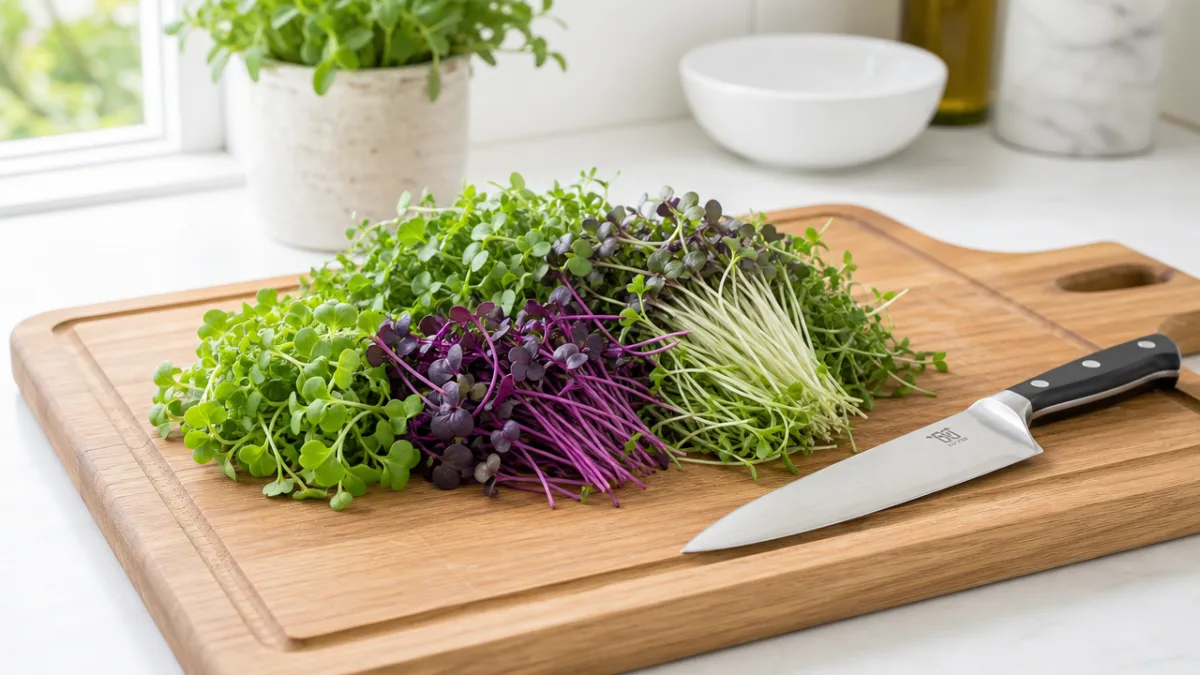
Learning when and how to harvest is one of the most satisfying parts of the whole process. Most varieties are ready when the cotyledons — those first seed leaves — have fully opened and the very first set of true leaves is just starting to show. That’s the sweet spot: the greens are at their most tender, flavorful, and nutritionally packed. Grab a sharp pair of scissors or a harvest knife and cut the stems just above the soil line in one clean stroke, then get them into a bowl or container right away to lock in that freshness.
Storing your harvest properly makes a real difference in how long they stay good. Ideally, you’d harvest just what you need right before a meal — but when you do need to harvest a larger batch, the trick is to store the greens unwashed in a sealed container lined with a dry paper towel in the fridge. That’ll keep them fresh and vibrant for up to seven days. Whatever you do, don’t wash the whole batch before storing — moisture speeds up wilting and spoilage significantly. Just give them a gentle rinse right before you eat them.
To keep a steady supply going, try setting up a succession planting schedule where you sow a new tray every three to five days. That way, as one tray hits peak harvest, the next one is right behind it and ready to go. Keeping simple notes on germination times, harvest windows, and how different varieties taste will quickly take you from casual experimenter to genuinely confident grower — someone who can keep their household stocked with fresh, nutrient-rich greens all year long. Between the low cost, the minimal space requirements, and how fast everything grows, microgreens really are one of the most rewarding things you can grow, no matter your experience level or how much space you’re working with.








What do you think?
It is nice to know your opinion. Leave a comment.