










Cinnamon Roll Candle DIY: Cozy Gourmet Glow
The Magic of Homemade Scented Candles
There is something undeniably comforting about the warm, spiced aroma of freshly baked cinnamon rolls drifting through a home. Candles that capture this cozy bakery scent have become a beloved staple in interior design and home wellness, transforming any room into a sanctuary of warmth and nostalgia. The craft of candle making has evolved far beyond simple wax and wick combinations, and today’s DIY enthusiasts are creating remarkable gourmet-inspired pieces that rival anything found in high-end boutiques.
Making your own cinnamon roll candle is not only a deeply satisfying creative endeavor but also a practical one. Store-bought candles with complex fragrance profiles can carry steep price tags, often ranging from twenty to sixty dollars per jar. When you craft your own, you control every element — the quality of the wax, the strength of the scent throw, the color, and the aesthetic of the finished product. This means you can create something truly personalized and meaningful, whether for your own home or as a thoughtful handmade gift for someone special.
Beyond economics, candle making connects us to an ancient tradition of craft and intentional living. The act of melting wax, blending fragrance oils, and pouring a candle by hand carries a meditative quality that many people find genuinely therapeutic. In a world dominated by digital screens and hurried schedules, the slow and sensory process of DIY candle making offers a welcome pause — a chance to create something beautiful with your own hands and fill your living space with warmth that you built yourself.
Gathering Your Supplies and Ingredients
Before you begin your cinnamon roll candle project, assembling the right materials is essential to achieving a professional, long-burning result. The foundation of any good candle is quality wax, and for this particular project, soy wax is widely regarded as the best choice. Soy wax burns cleaner and longer than paraffin, produces minimal soot, and holds fragrance oils exceptionally well. It also has a lower melting point, making it safer and more beginner-friendly for home crafters. Look for flaked soy wax designed specifically for container candles, as it adheres smoothly to jar walls and produces an even, attractive finish.
The fragrance is the soul of this candle, and choosing the right scent blend makes all the difference. To achieve an authentic cinnamon roll aroma, you will want to layer complementary fragrance oils rather than relying on a single note. A combination of cinnamon bark, sweet vanilla, brown sugar, and a hint of warm dough or butter creates a rich, bakery-fresh scent profile that is intoxicating without being overwhelming. Look for fragrance oils specifically formulated for candle making, as these are designed to bind properly with wax and release scent safely when burned.
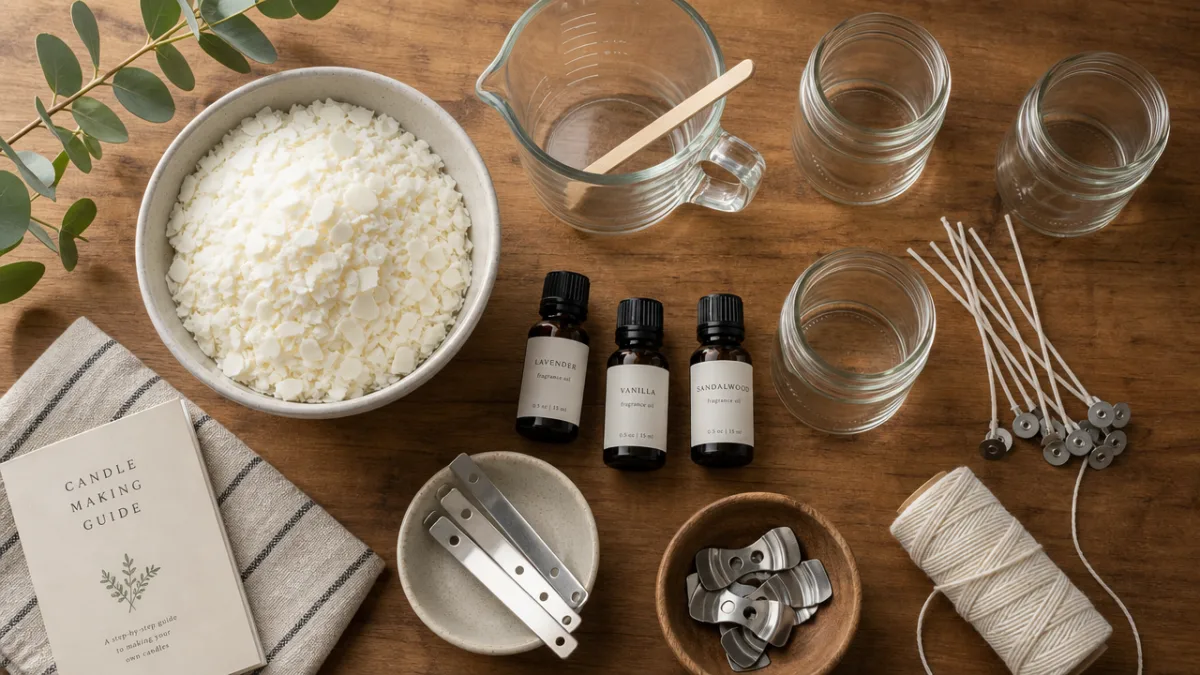
Here is a complete list of everything you will need to get started:
- Soy wax flakes (approximately 1 pound for a medium jar candle)
- Cinnamon bark fragrance oil
- Vanilla and brown sugar fragrance oil
- Pre-tabbed cotton wicks sized for your container diameter
- A clean glass jar or ceramic container with a lid
- A double boiler or heat-safe pouring pitcher and pot
- A digital thermometer
- Candle dye in warm amber, cream, or cinnamon tones
- Wick centering tool or two pencils and tape
- A silicone spatula and stirring sticks
- Decorative toppings such as cinnamon sticks, star anise, or dried orange peel
Choosing your container is also a creative opportunity. Wide-mouth mason jars give the candle a rustic, farmhouse charm that suits a cinnamon roll aesthetic perfectly. Ceramic mugs, vintage teacups, or amber glass apothecary jars all lend different personalities to the finished product. Whatever vessel you choose, ensure it is heat-safe and has straight or slightly tapered sides to allow for easy wax adhesion and clean burning. Avoid containers with narrow necks, as these restrict airflow and can cause uneven burns and excessive tunneling.
Preparing Your Wax and Fragrance Blend
The process of preparing your wax is where science and craft intersect, and paying careful attention to temperature is the key to a beautiful finished candle. Begin by measuring your soy wax flakes using a kitchen scale, accounting for approximately ten percent shrinkage as the wax cools and sets. Place the flakes into your double boiler or heat-safe pouring pitcher set over a pot of simmering water. Heat the wax slowly and steadily, stirring occasionally, until it reaches a melting temperature of between 170 and 180 degrees Fahrenheit. Never rush this process with direct high heat, as this can scorch the wax and destroy its ability to bind fragrance properly.
Once your wax has fully melted and reached a clear, liquid consistency, it is time to add your colorant. For a cinnamon roll candle, warm earthy tones work beautifully. Candle dye chips or liquid dyes in shades of creamy ivory, warm caramel, or soft amber all evoke the look of fresh-baked pastry. Add dye sparingly and stir thoroughly, remembering that the color will appear significantly lighter once the wax cools and solidifies. Test a small amount on a white surface by letting a drop cool before committing to a shade — this trick saves many batches from turning out too dark or muddy.
The critical moment for adding fragrance is when the wax has cooled slightly from its melting peak to around 140 to 150 degrees Fahrenheit. This temperature window is important: too hot, and the fragrance oils can flash off or lose their complexity before the candle even cures; too cool, and the oils will not bind evenly with the wax, potentially causing scent pockets or separation. Add your fragrance blend at a rate of about one ounce per pound of wax as a starting point, though experienced makers often push this to 1.5 ounces for a stronger hot and cold scent throw. Stir slowly and thoroughly for at least two full minutes to ensure complete incorporation.
Blending your own signature fragrance combination for this candle is genuinely one of the most enjoyable steps in the whole process. Start with a base ratio of about sixty percent cinnamon and spice to forty percent sweet vanilla and brown sugar, then adjust according to your personal preference. Some crafters also love adding a small percentage of a warm sandalwood or tonka bean note, which adds depth and a slightly woody undertone that makes the scent feel more complex and sophisticated — less like a candle aisle and more like a high-end patisserie on a cold winter morning.
Pouring and Setting Your Candle
With your wax fragrant and colored, it is time to prepare your container and execute the pour. Begin by securing your pre-tabbed wick to the bottom center of your jar using a small drop of hot glue or a wick sticker. This step matters more than it might initially seem — a wick that shifts even slightly off-center will cause the candle to burn unevenly, tunneling down one side and wasting wax along the other. Once the wick is anchored, thread it through a wick centering tool or lay two pencils across the top of the jar and tape the wick between them, keeping it taut and perfectly vertical.
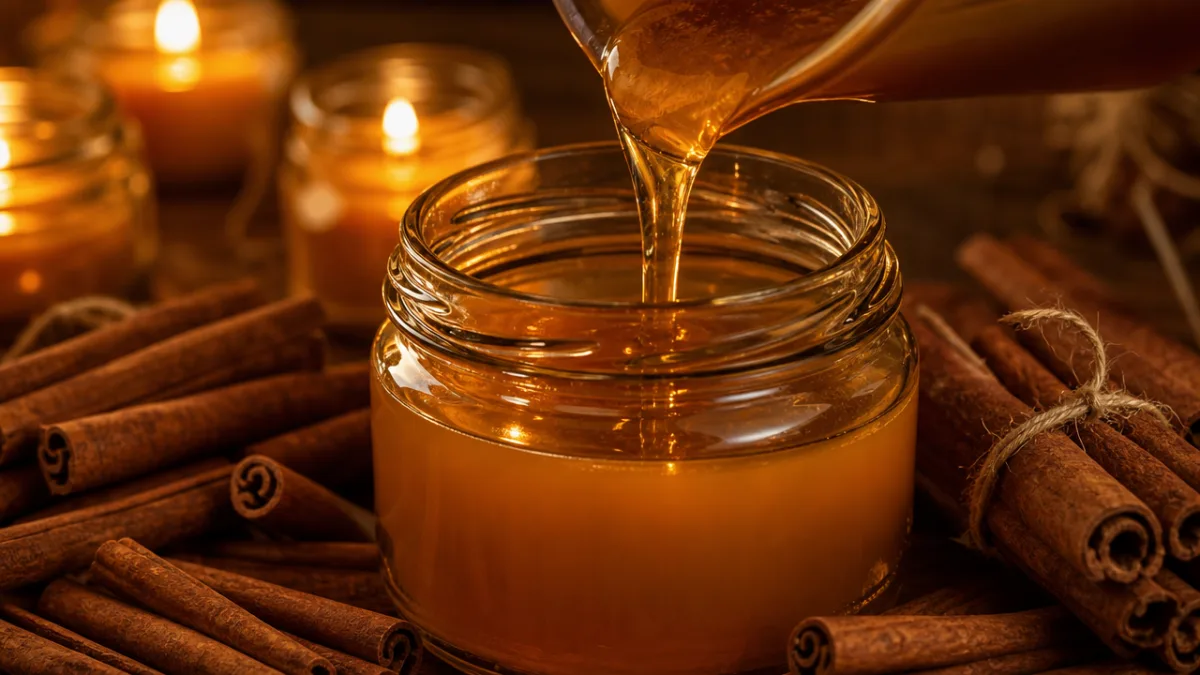
Allow your prepared wax to cool to a pouring temperature between 120 and 135 degrees Fahrenheit before filling the container. Pouring at this slightly lower temperature reduces the likelihood of air bubbles forming in your candle and helps the wax adhere cleanly to the sides of the glass without cracking or pulling away. Pour slowly and steadily from a low height to minimize turbulence, filling the container to about half an inch below the rim. At this stage, you can gently tap the jar against your work surface a few times to release any trapped air bubbles before the wax begins to firm up.
As soy wax cools, it often sinks slightly in the center, creating a small depression around the wick area. This is completely normal and is easily remedied with a second pour. Reserve a small amount of wax at the same pour temperature to use as a top-up. Once your first pour has cooled for several hours and developed a thin crust on its surface, gently reheat your reserved wax and carefully pour a thin layer to level the top of the candle. This second pour produces the smooth, professional surface that makes the final product look polished and deliberate rather than homemade in the lesser sense of the word.
Decorating Your Cinnamon Roll Candle
The decorative finishing touches are what transform a simple scented candle into a genuinely gourmet-inspired art object, and this is where your creativity can truly flourish. The most iconic embellishment for a cinnamon roll candle is, naturally, real cinnamon sticks arranged around the perimeter of the jar or pressed gently into the surface of the wax before it fully sets. You can tie a bundle of cinnamon sticks to the exterior of the jar with twine or raffia for a beautiful presentation, or embed a single stick upright near the edge of the candle surface as a visual accent that echoes the scent within.
Beyond cinnamon, consider incorporating other elements that reinforce the bakery and spice aesthetic. Whole star anise adds a graphic, almost sculptural quality to the candle surface. Dried orange peel spirals introduce a citrus brightness that complements the warm spice notes beautifully. Small dried rose buds or chamomile flowers pressed into the wax surface create an elevated, artisanal look that photographs stunningly for gifting purposes. A light dusting of cinnamon powder across the top surface of a fully set candle creates the illusion of a freshly sugared pastry, though this should be used only for aesthetic display and removed before the candle is lit for safety.
The container itself can be further embellished with labels, tags, and packaging that tell the story of the candle inside. Consider designing a simple kraft paper label that lists the fragrance notes, the burn time, and any personalized details like a date or message. Tying a small handwritten tag around the neck of the jar with the words “Cinnamon Roll Candle — Hand Poured with Love” adds a warmth and authenticity that mass-produced products simply cannot replicate. For gifting, nestle the finished candle in a small wooden crate, a brown paper box filled with tissue, or a woven basket alongside a box of matches and a small bag of cinnamon tea for a complete sensory gift set.
Burning, Safety, and Candle Care
Once your cinnamon roll candle has cured for a full forty-eight hours — ideally seventy-two for soy wax — it is ready to use, and this patience pays off in a noticeably stronger and more even fragrance throw. Before lighting your candle for the very first time, trim the wick to approximately a quarter of an inch above the wax surface using wick trimmers or small scissors. This is one of the most important yet frequently skipped steps in candle care, and it makes a significant difference in how cleanly and safely the candle burns. A wick that is too long will produce excessive smoke and soot, create a large unruly flame, and burn through your wax far too quickly.
The first burn is particularly important and sets the behavioral pattern for the candle going forward. On the initial lighting, allow the candle to burn long enough for the entire top surface of wax to melt into a full, even melt pool that reaches the edges of the container. For a standard medium jar, this typically takes between two and three hours. Extinguishing the candle before a complete melt pool forms creates a phenomenon called tunneling, where the wax burns only in a column down the center and the outer edges never melt, wasting a significant portion of your beautifully scented creation.
Candle safety should always be observed, especially when working with aromatic botanical decorations on the wax surface. Follow these essential guidelines every time you burn your candle:
- Always trim the wick to a quarter inch before each use
- Never leave a burning candle unattended or within reach of children and pets
- Keep the candle away from drafts, which can cause uneven burning and excessive smoke
- Burn on a heat-safe surface and never on or near flammable materials
- Remove any dried botanical decorations from the candle surface before lighting
- Discontinue use when approximately half an inch of wax remains in the container
- Allow the candle to cool completely before replacing the lid or moving it
When your candle has finally burned down to its last half inch, do not discard the jar. Clean it out with warm soapy water, remove the wick tab from the bottom, and you have a charming reclaimed vessel ready for reuse. Former candle jars make wonderful small planters for succulents, organizers for cotton balls and stationery, or the perfect container for your next batch of homemade candles. This circular approach to crafting aligns beautifully with the sustainable ethos that draws so many people to the DIY candle-making community in the first place.
Gifting, Variations, and Creative Extensions
One of the greatest pleasures of mastering a DIY cinnamon roll candle is the creative world it opens up for gifting and seasonal variation. A single recipe can be adapted endlessly to suit different occasions and aesthetics simply by adjusting the fragrance ratios, color palette, and decorative elements. For an autumn harvest version, deepen the color to a rich burnt sienna and add notes of clove, nutmeg, and apple alongside your cinnamon and vanilla base. For a winter holiday edition, shift toward creamy white wax and blend in hints of cardamom, ginger, and sweet cream to create a snickerdoodle or eggnog-inspired variation on the original recipe.
As gifts, handmade cinnamon roll candles carry a warmth and personal quality that store-bought items simply cannot match. They are appropriate for virtually every occasion — housewarming parties, holiday exchanges, teacher appreciation gestures, wedding favors, or simply a thoughtful token for a friend going through a difficult time. A small basket containing two or three candles in complementary fragrance variations, tied with a ribbon and accompanied by a handwritten note about their making, represents a level of care and intention that resonates deeply with recipients in an era of increasingly impersonal gifting.
If you enjoy the process of making your cinnamon roll candle, consider expanding your practice into a small home business or an Etsy-style craft venture. The market for artisan, small-batch candles with unique fragrance profiles and beautiful presentation is genuinely robust, and many candle makers have built meaningful cottage businesses starting from exactly this kind of beginner project. As your skills develop, you might explore advanced techniques such as layered pours with gradient color effects, embed candles where decorative wax shapes are visible inside the finished candle, or signature tin and ceramic vessel collections that create a cohesive brand identity around your work.
Ultimately, the cinnamon roll candle DIY project is more than a craft tutorial — it is an invitation to slow down, engage your senses, and create something genuinely beautiful and useful with your own hands. The warm glow of a candle you have made yourself, filling your home with the irreplaceable scent of cinnamon, vanilla, and sweet baked warmth, delivers a satisfaction that no purchased product can quite replicate. Whether you make one for yourself or a hundred to share with the people you love, every pour is a small act of creativity, care, and connection to the cozy, sensory pleasures that make a house feel like a home.








What do you think?
It is nice to know your opinion. Leave a comment.