










Very Easy! How to Crochet Alphabet Letters: A Complete Beginner’s Guide
Introduction to Crocheting Alphabet Letters
Crocheting alphabet letters is one of the most rewarding and versatile skills you can add to your fiber arts repertoire. Whether you want to personalize a baby blanket, create custom wall art, spell out a child’s name for their bedroom, or craft heartfelt handmade gifts, knowing how to crochet individual letters opens up an enormous world of creative possibility. The best part is that despite how impressive the finished results look, the process is genuinely accessible even for beginners who have only recently picked up a crochet hook for the first time.
Many crafters assume that crocheting letters must be complicated — after all, each letter has its own unique shape and structure. But in reality, most alphabet letters are constructed using just a handful of basic crochet stitches that you likely already know or can learn within a single afternoon. Chain stitches, slip stitches, single crochets, and half double crochets form the foundation of nearly every letter in the alphabet. Once you understand these building blocks and how they translate into shapes, you will find yourself moving through the alphabet with surprising speed and confidence.
This guide will walk you through everything you need to know to get started, from selecting the right materials and understanding foundational techniques, to working through specific letter construction methods and finishing your pieces beautifully. We will also explore the many creative applications for your finished letters, because knowing how to use your work is just as important as knowing how to make it. By the time you finish reading, you will have all the knowledge you need to begin your very first crocheted alphabet project with confidence and excitement.
Why Crocheted Letters Make Perfect Handmade Gifts
There is something uniquely touching about a handmade gift that incorporates a person’s name or initials. Crocheted letters carry that warmth and intentionality in a way that store-bought items simply cannot replicate. A crocheted name banner above a nursery crib, a personalized pillow spelling out a couple’s initials, or a cheerful set of letters on a child’s bookshelf all communicate the same message: someone took time and care to create something specifically for you. This personal dimension makes crocheted letter projects among the most requested handmade gifts in the crafting community.
Beyond sentimental value, crocheted letters are also remarkably practical gifts. They are durable, washable, soft, and safe for children of all ages. Unlike painted wood letters or plastic decorations, yarn letters pose no sharp edges or toxic finish concerns, making them ideal for nurseries and children’s rooms. They can be made in any color scheme to match existing decor, resized easily by adjusting hook size or yarn weight, and even stuffed lightly to create dimensional, three-dimensional standing letters that double as soft toys or display pieces.
Materials and Tools You Will Need
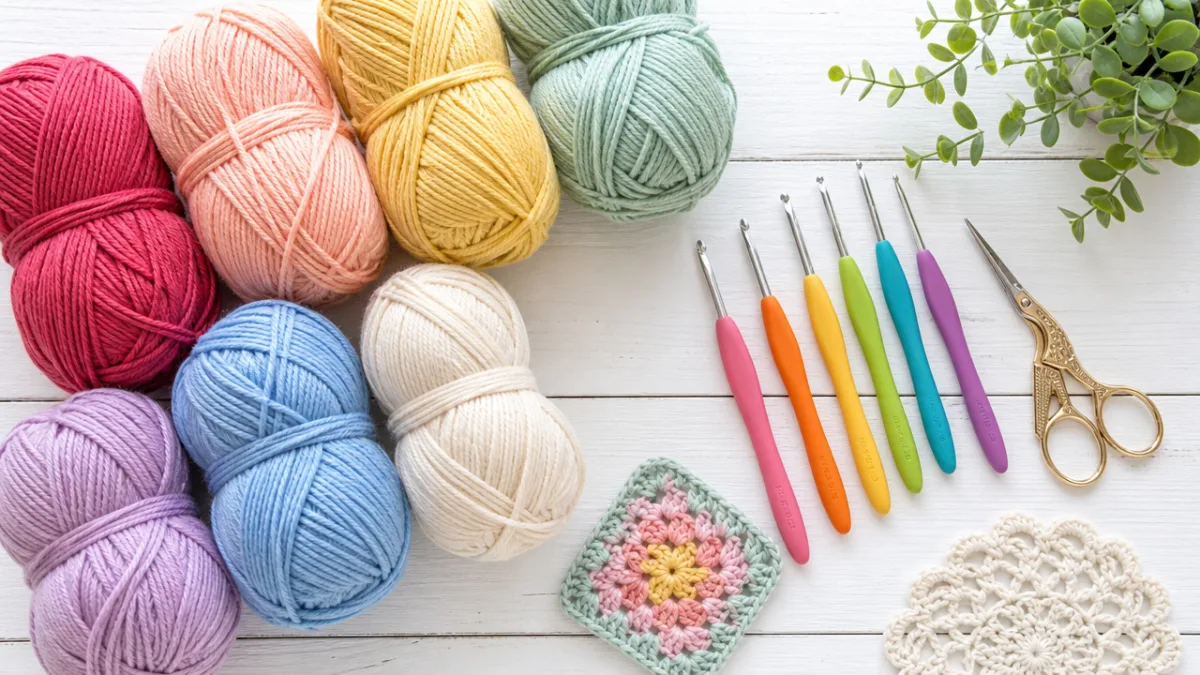
Before you begin crocheting alphabet letters, gathering the right materials will make your experience significantly smoother and more enjoyable. The good news is that this type of project requires very little investment. Most crafters find they already have the basic tools on hand, and the yarn quantities needed for individual letters are small enough that you can often complete several letters from a single skein. Starting with quality materials, even on a budget, will produce noticeably better results and make the actual crocheting process feel more pleasant.
For yarn selection, a medium weight yarn — commonly labeled as worsted weight or size 4 — is the most forgiving and versatile choice for beginners working on alphabet letters. It is thick enough to show stitch definition clearly, making it easy to see your work and count stitches, yet not so bulky that the letters become stiff or difficult to shape. Cotton yarn is particularly popular for this application because it holds its shape well, has a clean stitch definition, and comes in an enormous range of vibrant colors. Acrylic yarn is another excellent option, offering softness, affordability, and easy care instructions.
Here is a complete list of materials you will need to get started:
- Worsted weight yarn in your chosen colors (approximately 50 yards per letter for standard sizing)
- Crochet hook sized 5.0mm or 5.5mm, matching your yarn weight
- Yarn needle or tapestry needle for weaving in ends
- Scissors
- Stitch markers (optional but very helpful for beginners)
- Fiberfill stuffing if you plan to create three-dimensional letters
- A printed or digital alphabet letter pattern or chart
- Ruler or measuring tape to check sizing consistency
Choosing the right hook size is worth a moment of extra attention. The hook size you use in relation to your yarn weight will directly affect the density and drape of your crocheted fabric. For letters specifically, you generally want a slightly tighter gauge than you might use for garments or blankets. A tighter stitch creates a firmer letter that holds its shape better and looks crisper when displayed. Try working a small test swatch with your chosen hook and yarn before committing to a full letter, and adjust your hook size up or down until you achieve a fabric that feels firm but not stiff.
Understanding Basic Crochet Stitches for Letter Construction
If you are new to crochet or simply need a refresher before diving into alphabet letters, understanding the core stitches will make the entire process feel far less intimidating. The vast majority of beginner-friendly letter patterns rely on just three or four stitches, which means your learning curve is much gentler than you might expect. Taking a little time to practice these stitches in isolation, before you attempt your first letter, will pay dividends in the quality and consistency of your finished work.
The chain stitch is the foundation of virtually everything in crochet, and letter patterns are no exception. When you create a chain, you are essentially making a flexible spine that your other stitches will build upon. For many letter patterns, you will begin with a foundation chain of a specified number of stitches, then work rows or rounds of additional stitches on top of that foundation. Learning to create chains with even, consistent tension is one of the most important skills you can develop as a beginner, and fortunately it improves rapidly with practice.
Single crochet and half double crochet are the workhorses of letter construction. Single crochet creates a tight, dense fabric that is perfect for the bodies of letters — it holds its shape well and gives clean, defined edges. Half double crochet adds a little more height per row, which can be useful for creating letters that need more vertical dimension without requiring as many rows to achieve the desired size. Most letter patterns will specify which stitch to use throughout, but understanding the difference allows you to make informed adjustments when needed.
Reading Crochet Patterns and Charts for Letters
Crochet patterns for alphabet letters come in several formats, and learning to read each type will expand the range of patterns available to you. Written patterns describe each step in text form using standardized abbreviations such as ch for chain, sc for single crochet, and sl st for slip stitch. These are often the easiest format for absolute beginners because they spell out every action in sequence without requiring you to interpret a visual diagram. Many free patterns in this format are available on platforms like Pinterest, Ravelry, and craft blogs.
Chart-based patterns use symbols on a grid to represent stitches, giving you a visual map of the finished letter. These can be especially helpful for alphabet letters because you can literally see the shape of the letter emerging in the chart as you study it. Once you become comfortable reading basic symbols — a dot for a chain space, an X for a single crochet, a T for a double crochet — charts become an incredibly efficient way to work because you can glance at your position in the pattern at a glance rather than reading through paragraphs of text instructions.
Step-by-Step Method for Crocheting Individual Letters
Now that you have your materials ready and your stitches practiced, it is time to begin actually constructing letters. The method described here focuses on the flat letter approach, which is the most beginner-friendly technique and produces letters suitable for appliqué, banner strings, framing, or laying flat on a surface. This approach works beautifully for all 26 letters of the alphabet and can be scaled up or down simply by adjusting your yarn weight and hook size proportionally.
Begin with a letter that has mostly straight lines, such as the letter I, L, or T. These letters help you build confidence because their shapes are predictable and forgiving of minor tension variations. Start by creating your foundation chain according to your chosen pattern. For a standard letter approximately 4 inches tall worked in worsted weight yarn, you will typically chain somewhere between 12 and 20 stitches for the base row. Always count your chains carefully before proceeding — one missed chain at this stage can throw off the entire letter’s proportions.
Work your rows of single crochet across the foundation chain, turning your work at the end of each row and chaining one before turning. As the rectangular block of fabric grows, you will begin shaping the letter by increasing, decreasing, or leaving sections unworked according to your pattern. For letters like E or F, you will create horizontal arms by working partial rows. For curved letters like C, O, or S, you will work in rounds or use strategic increases and decreases to create smooth arcs. Each letter has its own logic, and once you work through a few, you will begin to intuitively understand how flat crochet shapes translate into letterforms.
Tips for Achieving Neat, Consistent Letters
Consistency is the hallmark of professional-looking crocheted letters, and achieving it comes down to a few key habits. First and most importantly, work at a consistent tension throughout each letter and across your entire alphabet set. Tension refers to how tightly or loosely you hold your yarn as you work, and it directly affects the size and density of your stitches. If your tension varies significantly from one letter to the next, your finished alphabet will look mismatched when displayed together. Many crafters find that their tension naturally stabilizes after the first few rows of a project as they settle into a rhythm.
Blocking is another technique that can dramatically improve the appearance of crocheted letters. Blocking involves lightly dampening your finished letter, shaping it carefully by hand, pinning it to a foam mat or folded towels in the correct shape, and allowing it to dry completely. This process relaxes the fibers and sets the shape, resulting in letters with crisper edges, more defined curves, and an overall more polished appearance. Cotton yarn responds particularly well to wet blocking. Even a simple pressing with a damp cloth and a warm iron (on an appropriate setting for your fiber) can make a significant difference.
Creative Applications and Display Ideas for Crocheted Letters
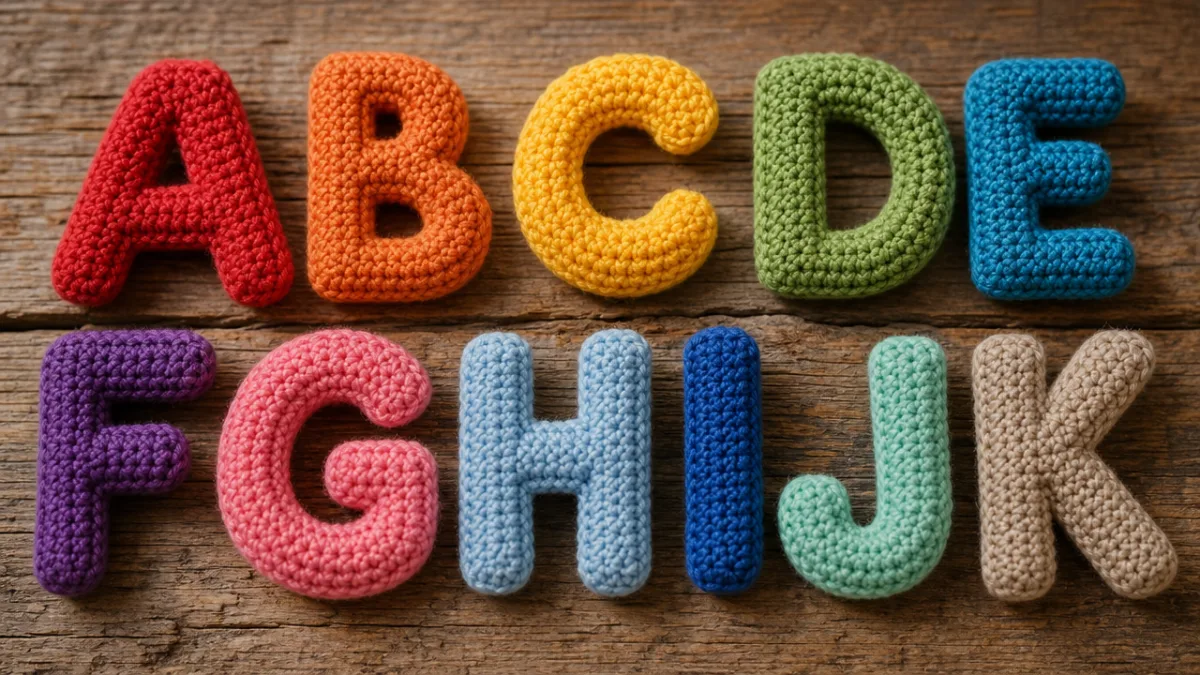
Once you have mastered the technique of crocheting individual letters, the creative possibilities become genuinely exciting. The applications for handmade yarn letters extend far beyond what most beginners initially imagine, spanning home decor, children’s education, special events, fashion accessories, and personalized gifts. Having a repertoire of crocheted letters at your fingertips means you are always ready to add a custom, handmade touch to any occasion or space. This is one of those skills that keeps giving long after you first learn it.
Banner strings and garlands are perhaps the most popular application for crocheted letters. Spelling out a name, a greeting such as WELCOME or HELLO, or a seasonal phrase like JOY or LOVE and stringing the letters together creates an instant decorative focal point for any room. You can attach individual letters to a length of twine, ribbon, or yarn using small loops crocheted directly into the tops of the letters, making assembly quick and easy. These banners are particularly beloved for nurseries, birthday parties, wedding celebrations, and holiday decorating because they are lightweight, easy to store, and completely customizable.
For children, crocheted letters serve a wonderful dual purpose as both toys and learning tools. Soft, tactile letters are ideal for early literacy activities — children can sort them, arrange them into words, feel their shapes with their hands, and engage with the alphabet in a way that flat printed materials simply cannot replicate. Because crocheted letters are soft and washable, they are safe for very young children and easy to keep clean. Consider making a complete set in bright primary colors for a child’s play area, or in softer pastels for a nursery display that can transition into a learning toy as the child grows.
Incorporating Letters Into Larger Crochet Projects
Crocheted letters do not have to stand alone — they can be integrated into larger textile projects as appliqués, creating personalized pieces that are truly one of a kind. A plain crocheted baby blanket becomes an heirloom when you attach a child’s name in coordinating letters across one corner. A simple tote bag transforms into a personalized accessory when a monogram is stitched to its front. Even plain clothing items like cardigans or hats can be elevated with a carefully placed crocheted initial. The key to successful appliqué is securing each letter firmly with a yarn needle and matching thread, stitching around all edges to prevent curling or lifting with wear and washing.
You can also incorporate letters into mixed-media projects that combine crochet with other craft disciplines. Attaching crocheted letters to a painted canvas creates a textured piece of wall art with wonderful dimensional interest. Combining letters with crocheted flowers, stars, hearts, or other motifs creates decorative arrangements that feel more like artwork than traditional craft projects. The tactile quality of yarn combined with visual shapes makes for displays that draw the eye and invite touch in equal measure, making them particularly effective in children’s spaces and cozy home environments.
Troubleshooting Common Mistakes and Building Your Skills
Even experienced crocheters encounter challenges when working with alphabet letters for the first time, and understanding the most common pitfalls will help you navigate them gracefully rather than becoming frustrated. The most frequent issue beginners report is letters that do not lie flat — they curl at the edges or buckle in the middle instead of lying smooth. This curling is almost always caused by tension that is too tight, and the solution is simply to loosen your grip on the yarn slightly and use a hook size one step larger than your yarn label recommends. Blocking, as discussed earlier, can also correct mild curling after the fact.
Another common challenge is letters that look inconsistent in size when you compare them side by side after completing your full alphabet. Some letters will naturally be wider than others due to their shapes — W and M will always be wider than I or L — but significant height variations between letters suggest that your tension has shifted between sessions. To prevent this, always try to complete a full letter in a single sitting when possible, and if you must put your work down mid-letter, note the hook position and yarn tension you were using so you can resume consistently. Keeping a simple project notebook where you record your gauge, hook size, and yarn details for each letter set will help you maintain consistency across projects.
As you grow more comfortable with basic letter construction, challenge yourself by exploring more advanced techniques that add depth and interest to your work. Tapestry crochet, which involves carrying multiple yarn colors simultaneously to create colorwork designs, allows you to add patterns, gradients, or contrasting borders directly into the body of each letter. Bobble stitches, puff stitches, and surface slip stitch embellishments can add decorative texture. And once you master flat letters, three-dimensional stuffed letters — worked in continuous rounds like amigurumi — open up an entirely new level of creative expression, producing chunky, huggable letters that work beautifully as children’s room decor or novelty gifts.
Resources and Inspiration for Continuing Your Journey
The crochet community is extraordinarily generous with knowledge, patterns, and encouragement, and tapping into its collective wisdom will accelerate your learning and keep your creative inspiration flowing. Pinterest is an exceptional resource for discovering free alphabet letter patterns across a wide range of styles, from simple and graphic to elaborate and ornate. Simply searching for terms like “free crochet alphabet pattern,” “crochet letter tutorial,” or “crochet appliqué letters” will return thousands of results spanning every skill level and aesthetic. Saving patterns that appeal to you into organized boards will help you build a personal pattern library you can return to again and again.
YouTube tutorials offer another invaluable learning format, particularly for visual learners who benefit from watching stitches being formed in real time. Many talented crochet educators have created detailed video series walking viewers through every letter of the alphabet one by one, with close-up footage of hand positioning, stitch construction, and shaping techniques. Watching even a single tutorial all the way through before beginning a new letter can prevent confusion and save significant time troubleshooting problems after the fact. Look for creators who film from an overhead angle, as this perspective makes stitch details easiest to follow.
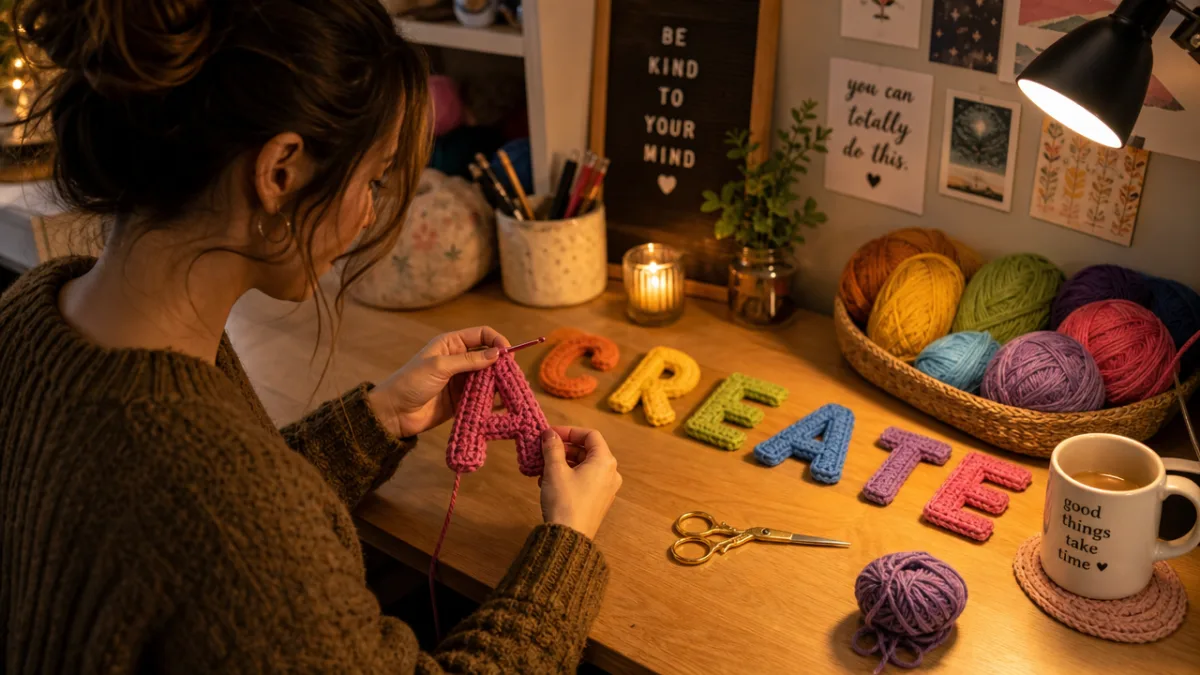
Finally, consider joining an online crochet community or local crafting group to share your progress and learn from others working on similar projects. Platforms like Ravelry, Reddit’s crochet communities, and Facebook crafting groups host thousands of members who are actively working on alphabet projects and are eager to share tips, pattern recommendations, and encouragement. Sharing photos of your finished letters — even your very first, imperfect attempts — invites feedback and connection that makes the crafting journey far more enjoyable. Every expert crocheter started exactly where you are right now, and the path from beginner to confident crafter is shorter and more joyful than you might expect when you walk it in good company.








What do you think?
It is nice to know your opinion. Leave a comment.