










DIY Cricut Signs: The Complete Guide to Creating Beautiful Custom Decor
Introduction to Cricut Sign Making
If you have ever walked through a home decor store and admired a beautifully lettered wooden sign, only to wince at the price tag, you are not alone. The good news is that with a Cricut cutting machine, you can create stunning, personalized signs for a fraction of the cost. Cricut machines have revolutionized the DIY crafting world by making it possible for anyone, regardless of artistic skill level, to cut intricate letters, shapes, and designs from vinyl, heat transfer material, cardstock, and more. Whether you want a rustic farmhouse sign for your entryway or a sleek modern piece for your home office, Cricut makes it achievable.
The appeal of DIY Cricut signs goes far beyond cost savings. When you make your own signs, you have complete creative control over the message, font, color palette, size, and material. You can match your existing decor perfectly, create something that holds personal meaning, or craft a one-of-a-kind gift that no store could ever replicate. Many crafters discover that sign making with their Cricut becomes not just a hobby but a genuine passion, and some even turn it into a small business selling custom pieces at craft fairs or through online marketplaces like Etsy.
Getting started with Cricut sign making does not require years of experience or a studio full of expensive tools. In fact, once you understand a few core concepts — how to use Design Space software, how to apply vinyl correctly, and how to choose the right materials for your project — you will be producing professional-looking signs in no time. This comprehensive guide walks you through everything you need to know, from selecting your materials to finishing your piece like a seasoned pro, so you can dive in with confidence and creativity.
Essential Materials and Tools You Will Need
Before you can cut your first letter, you need to gather the right supplies. The most important item is, of course, a Cricut machine. For sign making, the Cricut Maker 3 and the Cricut Explore Air 2 are both excellent choices, though any Cricut model will work for basic vinyl projects. The Cricut Maker series offers more cutting force and material versatility, which becomes important if you want to cut thicker materials like chipboard or specialty craft foam. However, if you are primarily working with adhesive vinyl, the Explore models are perfectly capable and often more budget friendly for beginners.
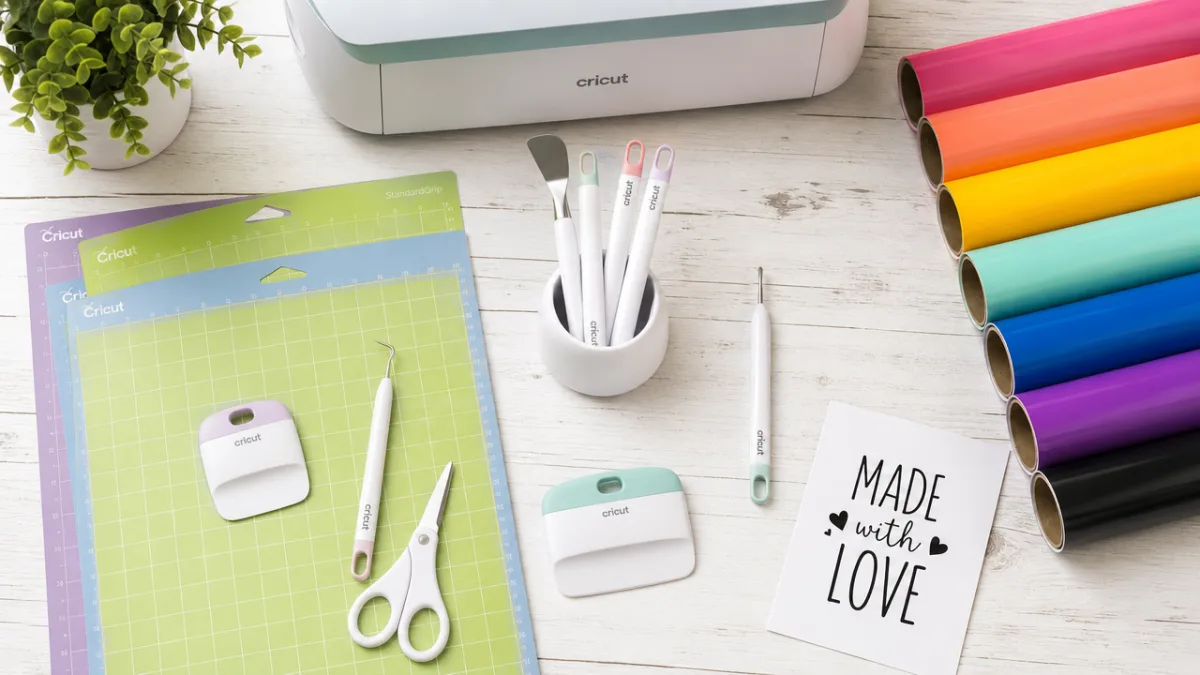
Beyond the machine itself, your materials list will depend on the type of sign you want to create. For most beginner projects, you will need adhesive vinyl in your chosen colors, transfer tape to move your vinyl design onto your surface, a weeding tool to remove the excess vinyl around your design, and a brayer or scraper tool to smooth everything down without bubbles. For the sign base itself, popular options include raw wood plaques (available at most craft stores), pre-painted MDF boards, canvas, slate tiles, and even glass. Each surface offers a different aesthetic and requires slightly different application techniques.
A few additional tools will make your sign-making experience significantly smoother and more enjoyable. A good cutting mat in the correct grip level for your material is essential — standard grip works for most vinyl, while light grip is better for delicate papers. A pair of sharp scissors helps with trimming and cleanup. A ruler or measuring tape ensures your design is centered on your surface. And if you are working with wood, sandpaper, wood stain, paint, and brushes may also be on your list depending on whether you want a raw, painted, or stained background for your sign.
- Cricut Machine: Any model works for vinyl signs; Maker series offers more material versatility for advanced projects.
- Adhesive Vinyl: Available in permanent, removable, holographic, glitter, and matte finishes for different looks and uses.
- Transfer Tape: Essential for moving multi-piece designs from their backing to your sign surface in one clean motion.
- Weeding Tools: A fine-tipped hook tool makes removing tiny negative spaces from intricate lettering much easier.
- Sign Base: Wood, MDF, canvas, glass, slate, or acrylic — each creates a completely different finished aesthetic.
- Brayer and Scraper: Ensures vinyl adheres smoothly without air bubbles or lifting edges.
Designing Your Sign in Cricut Design Space
Cricut Design Space is the free software that connects your creative vision to your cutting machine, and learning to navigate it is one of the most rewarding parts of the Cricut journey. The platform is available as a desktop application and a mobile app, and it works with both Mac and PC. When you open a new project, you are greeted with a canvas where you can add text, upload your own images, or browse the extensive library of pre-made designs and fonts available through Cricut Access, their subscription service. For sign making specifically, the text tool and the image upload feature are the two functions you will use most frequently.
Typography is arguably the most important design decision you will make for your sign. The font you choose sets the entire tone of the piece. Serif fonts like classic Roman styles evoke a traditional, elegant atmosphere, while clean sans-serif fonts create a modern, minimal look. Script and brush fonts are incredibly popular for farmhouse-style signs because they mimic hand-lettering beautifully. In Design Space, you can browse hundreds of fonts, and if you have fonts installed on your computer, those will also appear in your font list. One important tip: always check that the letters in a script font are properly connected, or “weld” them together in Design Space before cutting so they come out as one piece.
Sizing your design correctly is critical, and it is a step many beginners overlook until they have already cut their vinyl. Always measure your sign base before you start designing, and build your layout with those dimensions in mind. In Design Space, you can lock the proportions of your text or image and type in exact measurements to ensure a perfect fit. It is also good practice to use the “Align” tools to center your design elements both horizontally and vertically, which saves you from trying to eyeball placement when you are applying the vinyl later. Before sending your design to cut, use the preview function to double-check that everything looks exactly as you intend.
Once you are happy with your design, select your material setting on the machine — most standard vinyl projects use the “Vinyl” or “Permanent Vinyl” setting — load your mat with the vinyl face up, and let the machine do its precise work. When the cut is complete, your design will be cut out of the vinyl while the backing sheet remains intact, making it easy to weed and transfer. Take your time in this design phase, because a well-planned layout in Design Space translates directly into a polished, professional-looking finished sign that you will be proud to display or gift.
Step-by-Step Process for Creating Your Sign
Once your design is cut and your materials are assembled, the real hands-on crafting begins. Start by preparing your sign base. If you are working with raw wood, sand it smooth with 220-grit sandpaper, wipe away the dust with a tack cloth, and apply your background treatment — whether that is paint, stain, whitewash, or a combination of techniques. Allow everything to dry completely before moving on to the vinyl application step. Rushing this stage is one of the most common beginner mistakes, and wet or tacky paint will cause your vinyl to lift and fail to adhere properly, ruining both the vinyl and your paint job.
Weeding your vinyl comes next, and it requires patience and a steady hand, especially with intricate or script lettering. Use your weeding tool to lift and remove the vinyl from all the negative spaces — the areas around and inside your letters and design elements. For example, the center of the letter “O” and both open areas of the letter “B” must be weeded out so only the actual letter shapes remain on the backing sheet. Working under a bright light or a lightbox makes it much easier to see the cut lines, which can be very fine and hard to spot in dim conditions. Take breaks if your eyes tire, as weeding mistakes on intricate designs can be difficult to fix.
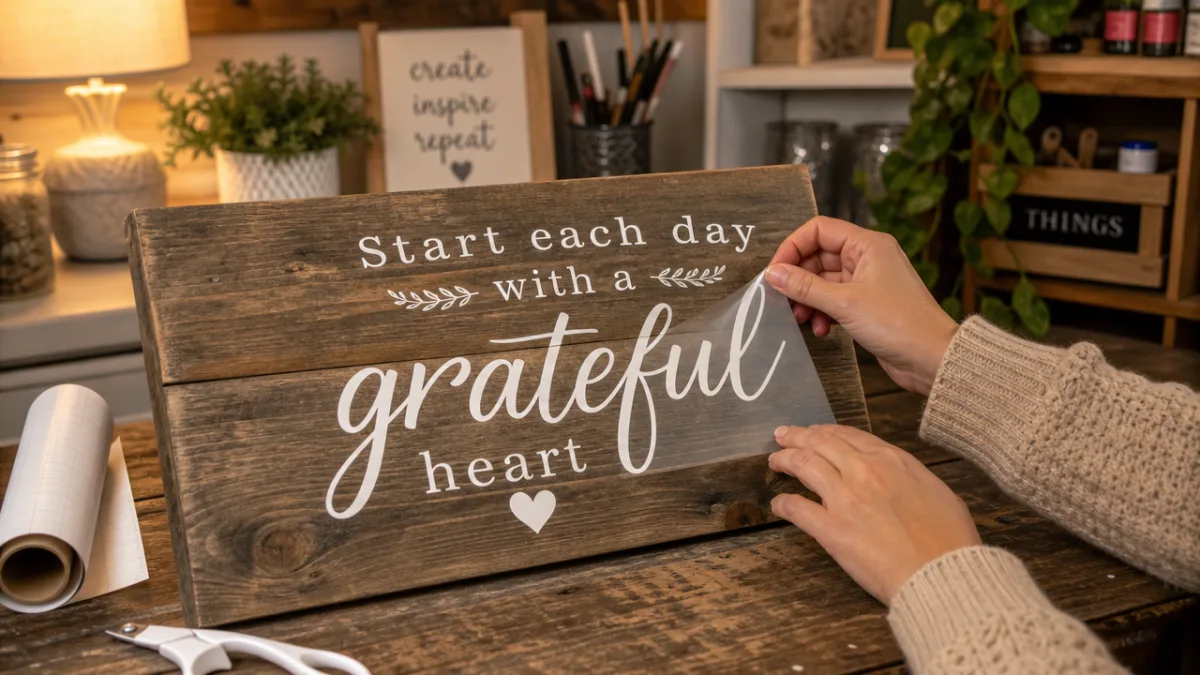
Applying the transfer tape is the bridge between your finished vinyl design and your sign surface. Cut a piece of transfer tape slightly larger than your design, peel the backing, and lay it sticky side down over your weeded vinyl. Use your brayer to firmly burnish the tape onto the vinyl, pressing out any air pockets and ensuring the tape adheres to every piece of the design. Then slowly peel the vinyl’s paper backing away, checking that all parts of the design are lifting with the transfer tape. If a piece of vinyl stays behind, press the tape back down and burnish more firmly before trying again.
Positioning and applying the vinyl to your sign base is the most satisfying and nerve-wracking step, especially for large or single-attempt designs. Use a ruler and a light pencil mark to find the center of your sign, then align your design accordingly. Starting from the center and working outward, press the vinyl down gently first, then burnish it firmly with your scraper or brayer in long, smooth strokes. Once the entire design is adhered, slowly peel the transfer tape back at a very low angle — almost parallel to the surface — watching carefully to ensure that all your vinyl letters and shapes remain on the sign and do not lift with the tape. Any edges that lift can be pressed back down and given another firm burnish before you try removing the tape again.
- Prepare and paint or stain your sign base; allow it to dry fully before proceeding.
- Weed your cut vinyl design carefully using a hook tool under bright lighting.
- Apply transfer tape over the weeded vinyl and burnish firmly to capture all design elements.
- Peel the backing paper from the vinyl, keeping everything adhered to the transfer tape.
- Center and position the design on your sign base, then press it down from center outward.
- Burnish the vinyl firmly through the transfer tape, then slowly peel the tape back at a low angle.
- Inspect the finished design, pressing down any lifted edges, and allow to set for 24 hours.
Creative Ideas and Style Inspiration for DIY Cricut Signs
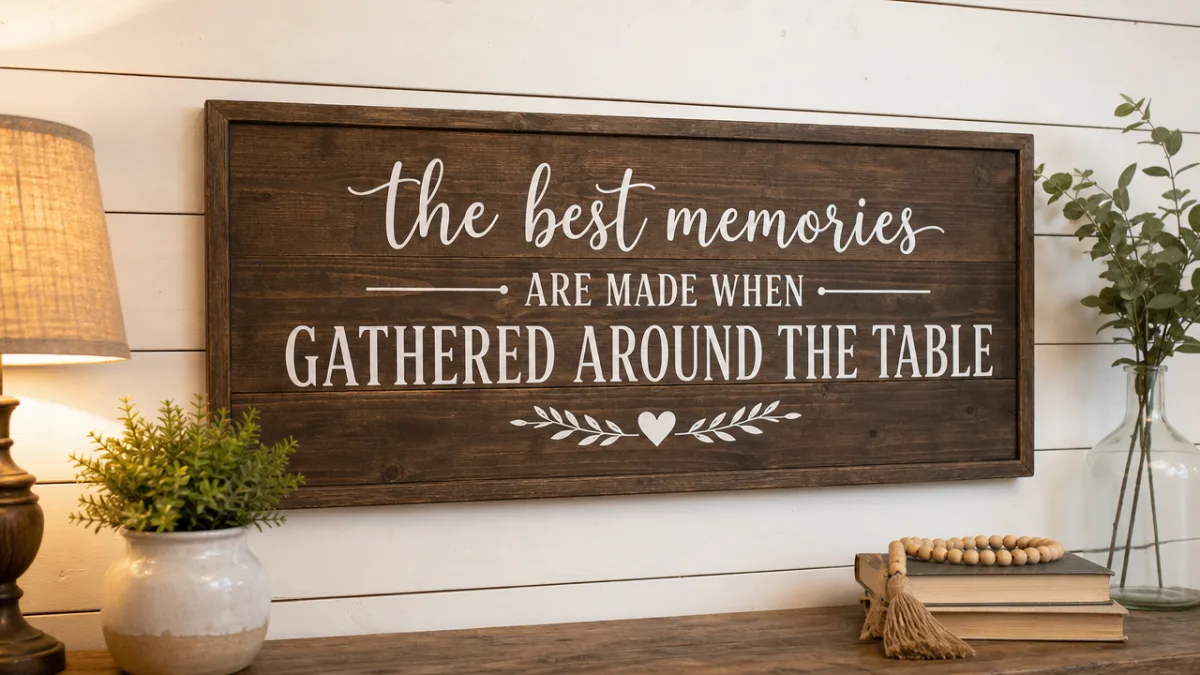
One of the most exciting aspects of Cricut sign making is the sheer variety of styles, themes, and occasions you can create for. Farmhouse and rustic aesthetics remain perennially popular, typically featuring shiplap-style wood backgrounds, white or neutral vinyl lettering, and phrases like “Gather,” “Home Sweet Home,” or family last names with an established date. These signs look beautiful in entryways, kitchens, and living rooms, and they complement a wide range of existing decor styles from country cottage to modern farmhouse. A distressed wood background paired with matte white vinyl creates this effect effortlessly and inexpensively.
Holiday and seasonal signs are another incredibly popular category, and they represent a great opportunity to use your Cricut throughout the year rather than just for occasional home decor projects. Think Halloween signs with spooky fonts and ghost or pumpkin accents, Christmas signs with script lettering and plaid vinyl details, spring signs with floral elements and pastel colors, and summer signs with beachy themes and bright hues. Because vinyl is relatively inexpensive and interchangeable, some crafters create a reusable painted board and simply swap out the vinyl design with each season, making this a very economical approach to seasonal decorating.
Personalized gifts are perhaps where Cricut sign making shines its brightest. Custom wedding signs with the couple’s names and wedding date, baby nursery signs with the new arrival’s name and birth details, housewarming gifts with the new homeowners’ family name, memorial signs honoring a loved one — these are all projects that carry deep emotional meaning and are deeply appreciated by their recipients precisely because of the personal effort involved. When someone knows that you designed and crafted something specifically for them, it elevates the gift far beyond anything that could be purchased from a store, no matter the price.
Beyond traditional vinyl on wood, experienced Cricut crafters experiment with a wonderful range of techniques to create unique sign effects. The faux chalkboard look uses a black-painted surface with white vinyl and mimics the appearance of real chalk lettering. The reverse canvas technique involves peeling the canvas from its frame and applying it to the back of the frame with the painted surface facing outward, creating a gallery-wrapped look. Layered vinyl signs use multiple colors of vinyl stacked or placed precisely to create dimensional, multicolor designs. Acrylic signs made by cutting vinyl to reverse-apply to clear acrylic sheets create a sleek, modern look that is incredibly popular for weddings and upscale events.
Tips, Troubleshooting, and Leveling Up Your Skills
Even experienced Cricut crafters encounter challenges, and knowing how to troubleshoot common problems will save you a great deal of frustration. One of the most frequent issues is vinyl that will not adhere properly to the sign surface. This is almost always caused by one of three things: the surface was not fully dry before application, the surface has a texture that prevents full contact with the vinyl adhesive, or the vinyl was not burnished firmly enough. For textured surfaces, try using a softer cloth to press the vinyl into the texture rather than a hard scraper. Warming the surface slightly with a heat gun or hair dryer on a low setting can also help vinyl conform to imperfect surfaces.
Weeding problems with intricate script lettering are another common stumbling block. If your letters are tearing or falling apart during weeding, your machine may not have cut all the way through the vinyl, which happens when the blade is dull, the pressure is too low, or the mat is not gripping the material firmly enough. Always do a test cut before starting a full project. If the letters in your script font are not welding together properly in Design Space, select all the text elements and use the Weld function to merge them into a single unbroken cut shape — this is essential for connected script fonts and prevents the machine from cutting each letter as a separate piece.
As you grow more confident with basic vinyl signs, there are several skills and techniques worth exploring to expand your creative repertoire significantly. Learning to use the Print Then Cut feature allows you to print full-color images or designs on your home printer and then have the Cricut cut around them precisely, opening up possibilities for illustrated signs and multicolor elements without layering vinyl. Experimenting with specialty vinyl materials like holographic, glow-in-the-dark, brushed metal, and glitter finishes adds a dimension of texture and visual interest that sets your signs apart from standard designs. You can also explore reverse weeding techniques, where you cut your design from vinyl and apply the surrounding material rather than the design itself to create a window-frame effect.
Building your skills in Cricut Design Space itself is just as valuable as any physical crafting technique. Learning to use the Slice and Weld tools lets you combine and subtract shapes to create completely original design elements rather than relying solely on pre-made images from the library. The Contour tool allows you to hide individual cut lines within a design, giving you granular control over exactly what the machine cuts. If you develop a design you love, save it as a template in Design Space so you can return to it easily and adapt it for future projects. The more fluent you become in Design Space, the faster and more creatively you can work, and the more truly custom your finished signs will become.
- Keep blades sharp: Replace your Cricut blade regularly; a dull blade causes incomplete cuts and torn designs during weeding.
- Clean your mats: Lint and debris reduce grip; clean standard grip mats with a lint roller and light grip mats with a baby wipe.
- Mirror for HTV: If you ever use heat transfer vinyl instead of adhesive vinyl, always mirror your design before cutting.
- Use app tutorials: Cricut’s YouTube channel and Design Space tutorial library are invaluable free resources for learning new techniques.
- Join crafting communities: Facebook groups and Reddit communities dedicated to Cricut crafters are excellent places to share tips and get troubleshooting help.
- Start with simpler fonts: As a beginner, choose bold, clearly separated letterforms before tackling ultra-fine script designs.
Sharing, Selling, and Growing Your Cricut Sign Craft
Once you have created a few signs you are proud of, it is only natural to want to share them — and many crafters discover that their work generates tremendous interest from friends, family, and the broader online crafting community. Sharing your projects on social media platforms like Instagram, Pinterest, and TikTok can be both a way to connect with fellow crafters and an organic way to build an audience if you are considering selling your work. High-quality photographs of your finished signs are essential: photograph them styled in a real room setting with good natural or ring-light lighting, and include the sign prominently but give it context within a lifestyle scene. These images perform far better on visual platforms than plain product shots against a white background.
For those interested in turning their Cricut sign hobby into a side income or full business, platforms like Etsy, local Facebook Marketplace, and craft fairs are all viable sales channels. Before pricing your signs for sale, it is important to calculate your costs thoroughly: the price of the vinyl, the sign base, transfer tape, packaging, shipping supplies, and a fair hourly rate for your design and labor time. Many beginning sellers underprice their work significantly, which leads to burnout and unsustainable business practices. Research what comparable handmade signs sell for in your market, factor in your material costs and time, and price accordingly. Customers who appreciate handmade, custom items understand and respect fair pricing.
Intellectual property is an important consideration if you are selling your Cricut creations. Many fonts and design images available in Cricut Design Space or elsewhere online have licenses that permit personal use only, meaning you cannot legally sell products made with them commercially without purchasing a commercial license. Always check the licensing terms of any font or graphic you use in a for-sale product. Many independent designers sell commercial license fonts and graphics on platforms like Creative Market and Design Bundles specifically for this purpose, and investing in properly licensed assets protects your business and respects the work of graphic designers and typographers who created those resources.
Whether you keep your Cricut sign making as a purely personal creative outlet or build it into a thriving small business, the skills and knowledge you develop are endlessly rewarding. The craft continues to evolve as Cricut releases new machine capabilities, materials, and Design Space features, which means there is always something new to learn and explore. The DIY crafting community is also one of the most generous and supportive online communities you will find, with crafters openly sharing tips, tutorials, free design files, and encouragement. So gather your tools, fire up Design Space, and start creating — your first beautiful Cricut sign is closer than you think, and the creative journey that follows it is just beginning.








What do you think?
It is nice to know your opinion. Leave a comment.