










Minimalist Crochet Woven Backpack Pattern for Casual Days
Introduction to Minimalist Crochet Backpacks
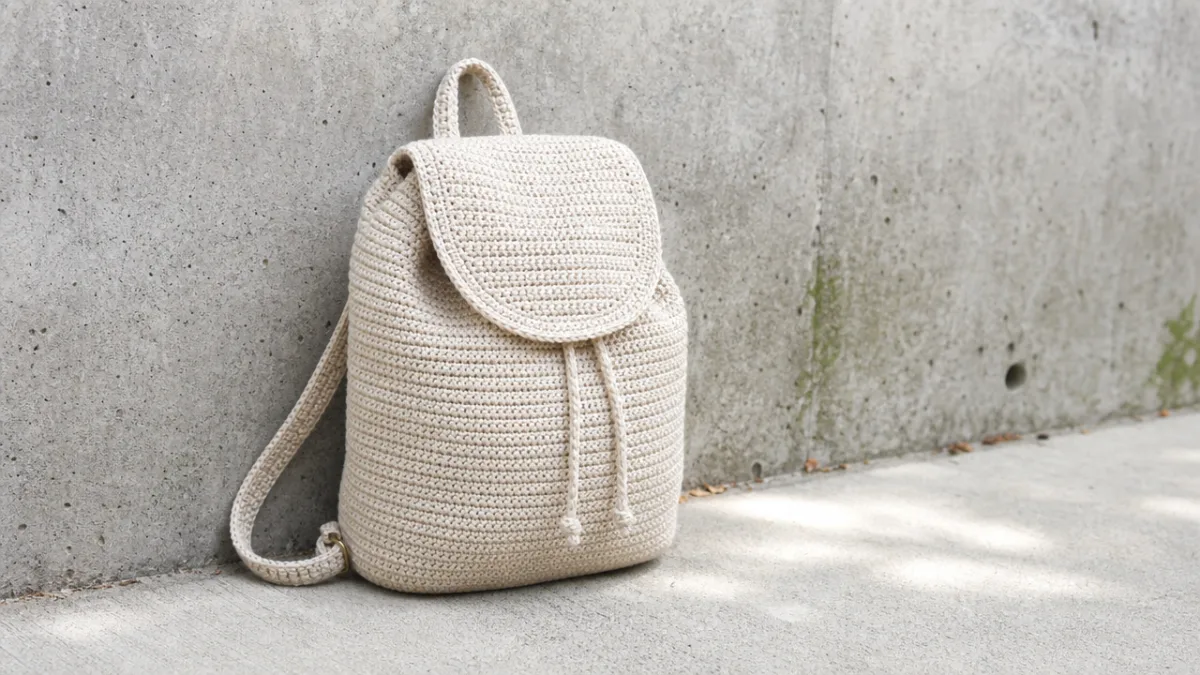
The minimalist crochet woven backpack has quietly become one of the most beloved handmade accessories of recent years. Blending the timeless craft of crochet with a clean, pared-back aesthetic, this style of bag appeals to anyone who wants a functional carryall that feels both artisanal and modern. Whether you are heading to a farmers market, a casual brunch, or a weekend hike through a sun-dappled forest trail, this backpack sits comfortably between practical necessity and wearable art.
What makes the minimalist approach so appealing in crochet work is the emphasis on texture over decoration. Rather than relying on colorful motifs or elaborate embellishments, the woven backpack pattern draws its visual interest from the interplay of stitches themselves. The way light falls across a tightly worked woven stitch creates shadow and depth that no painted surface could replicate. This is a bag that earns its beauty through process, and every loop and pull of the hook tells a quiet story of patient, deliberate making.
Beyond aesthetics, there is a deeply satisfying practicality to crocheting your own backpack. You control the dimensions, the yarn weight, the strap length, and the closure style. You are not restricted by what is available on a store shelf. The minimalist crochet backpack is a project that rewards careful planning as much as skilled execution, making it ideal for intermediate crocheters who are ready to tackle a structured, wearable item that they will use and treasure for years to come.
Choosing the Right Materials and Yarn
Selecting the correct yarn for a crochet backpack is arguably the most important decision you will make before picking up your hook. Because a backpack endures far more physical stress than, say, a decorative pillow or a lightweight scarf, the yarn must be durable, washable, and capable of holding its shape over time. Cotton and cotton-blend yarns are consistently the top recommendation for this type of project. They offer firmness, minimal stretch, and the kind of structural integrity that allows the finished bag to stand upright and maintain its silhouette even when filled with everyday essentials.
For a truly minimalist look, consider working with a natural, undyed cotton or a muted earthy tone such as oat, sand, sage, or a warm terracotta. These shades photograph beautifully and age gracefully, developing a gentle patina with regular use rather than fading into something tired and worn. A worsted weight yarn, typically labeled as a number 4, pairs well with a 5mm or 5.5mm crochet hook and produces a fabric dense enough to prevent small items from poking through or snagging on the weave.
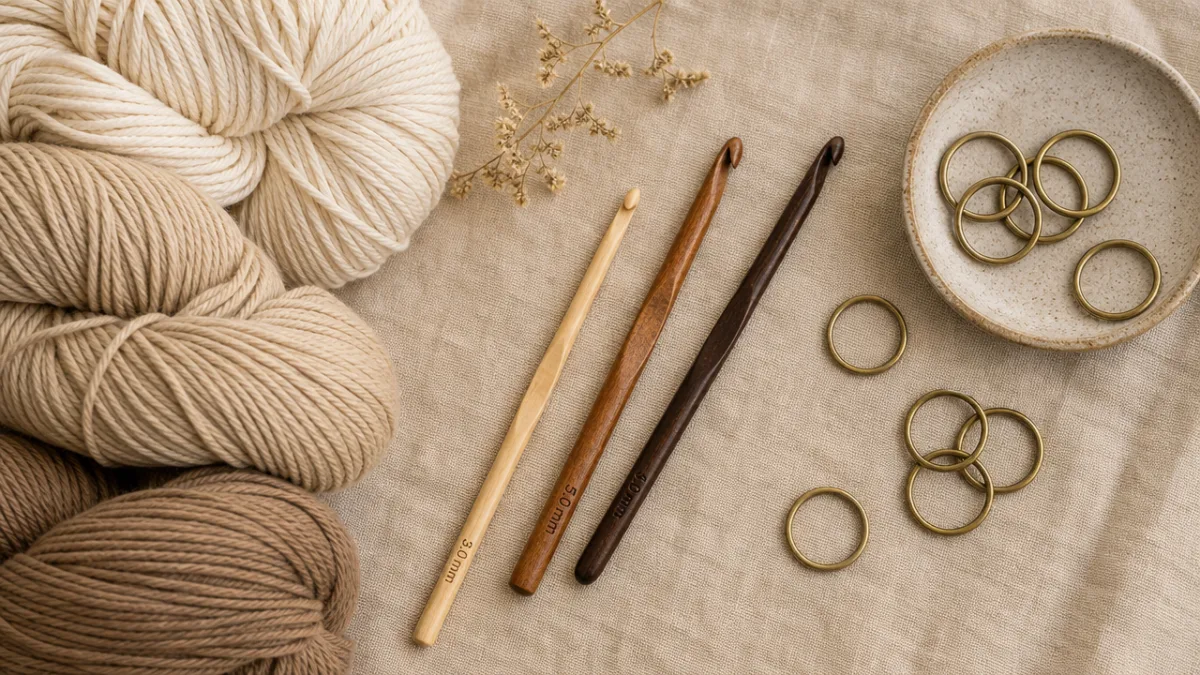
In addition to yarn, you will need a handful of supporting materials to complete the project properly. A pair of metal or wooden D-rings or O-rings provides the anchor points for adjustable straps. A zipper or a magnetic snap closure keeps the bag secure during daily use. You may also want a fabric lining cut from canvas or a sturdy cotton twill, which not only protects the contents of the bag but also prevents the crocheted fabric from stretching unevenly under load. Having all of these components gathered before you begin will make the construction process far smoother and more enjoyable.
- Worsted weight cotton or cotton-blend yarn in a neutral or earthy tone, approximately 400 to 600 yards depending on finished size
- 5mm or 5.5mm crochet hook, ergonomic handle preferred for longer sessions
- Two metal D-rings or O-rings, 1.5 inches in diameter
- One zipper, 10 to 12 inches, in a coordinating or contrasting color
- Optional canvas or cotton twill lining fabric, roughly half a yard
- Yarn needle, scissors, stitch markers, and measuring tape
Understanding the Woven Stitch Technique
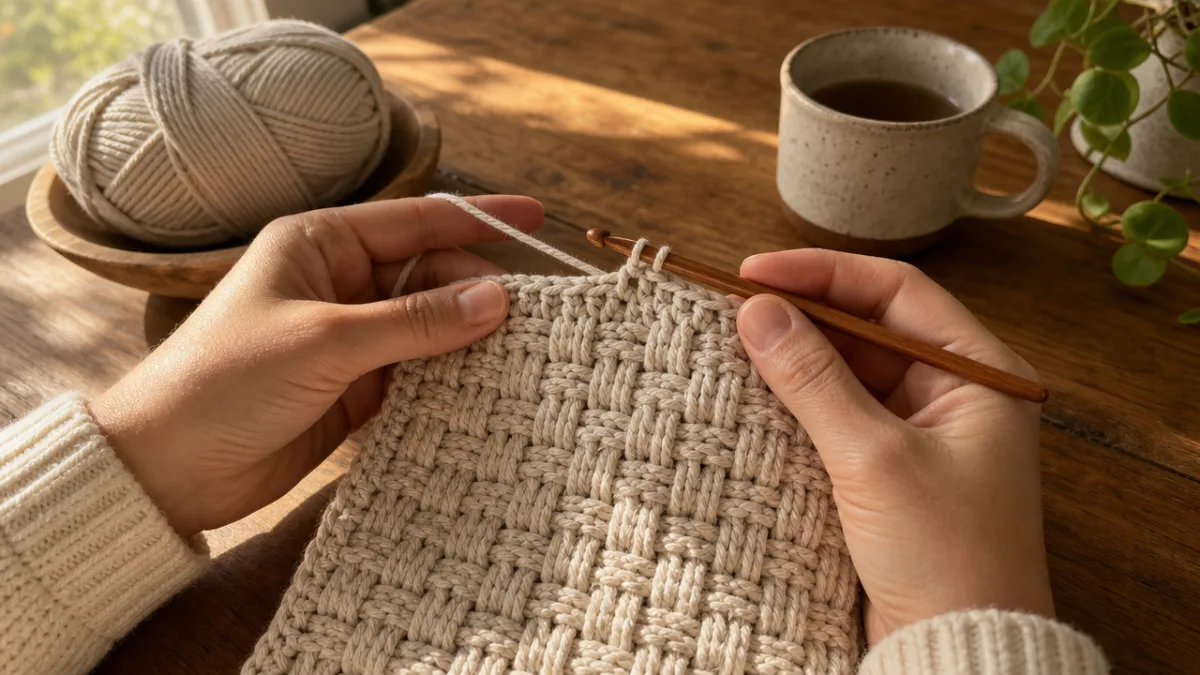
The defining characteristic of this backpack pattern is the woven stitch, sometimes called the linen stitch or the moss stitch depending on regional crochet traditions. Despite its impressively textured appearance, the woven stitch is built on a simple and highly repeatable structure that becomes almost meditative once you have worked a few rows. The core principle involves alternating single crochet stitches with chain-one spaces, offsetting each row so that the chains and stitches line up in a brick-like arrangement that mimics the over-under rhythm of hand weaving.
To begin the woven stitch, you work a foundation chain in a multiple of two, plus one turning chain. Row one establishes the pattern: single crochet into the second chain from the hook, then work one chain stitch and skip the next chain, single crochet into the following chain, and continue this sequence to the end of the row. On row two, you turn, chain one, then single crochet into the chain-one space of the previous row, chain one, skip the single crochet, and single crochet into the next chain-one space. The staggered placement of stitches across alternating rows is what builds the woven illusion, and it becomes easy to read once you understand the logic behind it.
One of the great advantages of the woven stitch for a backpack application is how evenly it distributes tension across the fabric. Unlike a standard single crochet fabric, which can pull diagonally under stress, the woven stitch creates a balanced, near-square gauge that holds its dimensions reliably. This means that once you have swatched your gauge carefully and blocked your swatch flat, the measurements you calculate will correspond closely to your finished panels. Taking the time to swatch may feel like a delay, but for a structured item like a backpack, it is an investment that pays dividends at every subsequent stage of construction.
Working the Pattern: Step-by-Step Construction
The minimalist crochet woven backpack is constructed in flat panels that are later seamed together, giving the finished bag its clean, angular silhouette. Most standard patterns produce a bag body measuring approximately twelve inches wide by fourteen inches tall, with a depth of three to four inches. The main body panel and the bottom panel are worked separately, as is the front pocket if your design includes one. This modular construction approach makes it straightforward to adjust the size of the bag by simply working more or fewer rows in each panel, and it keeps each piece manageable while you work.
Begin with the back panel, which is also the largest piece. Chain the required number of stitches for your gauge-adjusted width and work the woven stitch back and forth in rows until the panel reaches your intended height. Fasten off and weave in the ends neatly before setting the panel aside. The front panel is worked identically. The bottom panel is a narrow rectangle worked to match the width of the main body, with its length equal to the intended depth of the bag. The side gussets, if your pattern includes them, are similarly narrow rectangles that create the dimensional sides of the backpack.
Once all panels are complete and blocked, assembly begins with a firm, even whip stitch or mattress stitch seam worked in matching yarn. Begin by attaching the bottom panel to the lower edge of the back panel, then attach the front panel to the opposite long edge of the bottom. Seam the side gussets into the remaining open edges to close the bag into its box shape. At this stage the structure of the backpack becomes visible and tangible, and the careful work of planning and swatching pays off in a form that holds its intended dimensions with confidence and precision.
- Work the back panel to gauge-adjusted dimensions in woven stitch, fasten off, and block flat.
- Work the front panel to matching dimensions, fasten off, and block flat.
- Work the bottom panel and side gussets to the intended depth measurement.
- Seam all panels together using a whip stitch or mattress stitch in matching yarn.
- Attach the zipper to the top opening using a slip stitch edging or by hand-sewing through the crochet fabric.
- Crochet or cut and attach the straps, threading them through the D-rings for adjustability.
- Add an optional fabric lining by hand-sewing it inside the finished bag body.
Finishing Techniques for a Polished Result
The difference between a crochet backpack that looks handmade in the most charming sense and one that looks unfinished or slightly amateur often comes down entirely to finishing. Blocking your completed panels before assembly is the single most transformative step you can take. Wet blocking, which involves soaking each panel in cool water, gently squeezing out excess moisture, and pinning the piece to your intended measurements on a foam blocking board, evens out any tension inconsistencies and opens up the woven stitch structure to its fullest, most even expression. Allow each panel to dry completely before seaming, as damp fabric can distort under the tension of stitching.
Seaming deserves as much attention as the crochet work itself. A sloppy seam can undermine even the most beautifully worked panels, introducing lumps or uneven edges that catch the eye. The whip stitch, worked through corresponding edge stitches on both panels with the right sides facing outward, produces a visible but decorative join that suits the handcrafted nature of the bag. If you prefer an invisible seam on the interior, the mattress stitch worked with right sides together is the cleaner choice. Whichever method you select, work slowly, maintain even tension, and check the alignment of the panels frequently as you go.
For the straps, a crocheted cord worked in a tight slip stitch column or a long foundation single crochet chain offers a clean, minimalist look that coordinates beautifully with the bag body. Alternatively, a length of leather or waxed cotton webbing threaded through the D-rings provides a more polished, almost commercial finish that wears well over time. The top edge of the bag benefits from a neat single crochet border worked all around the opening before the zipper is attached, which stabilizes the fabric and provides a firm foundation for sewing the zipper tape into place.
Customization Ideas and Styling Inspiration
One of the most joyful aspects of making your own crochet backpack is the freedom to make it unambiguously yours. The minimalist woven base acts as a versatile canvas that accommodates a wide range of personal touches without losing its clean character. A simple leather patch threaded onto one strap adds a sophisticated visual anchor and reinforces a high-wear area at the same time. A small tassel worked in the same yarn and attached to the zipper pull introduces a tiny note of movement and personality without cluttering the overall look of the bag.
Color blocking is another elegant customization option that stays well within the minimalist spirit. Rather than working the entire bag in a single shade, you might choose to work the front pocket in a slightly deeper or contrasting tone, creating a deliberate visual separation that looks intentional and refined. Two-tone straps, where the crocheted portion fades from one neutral into another through a simple color change, achieve a similar effect with a gentle, understated presence. These subtle choices give the bag visual complexity without resorting to the busyness that minimalism consciously avoids.
Styling the finished backpack is as pleasurable as making it. For casual warm-weather days, the woven texture pairs naturally with linen trousers, a relaxed cotton tee, and leather sandals. In cooler months, the same bag sits comfortably against a chunky knit sweater or a waxed canvas jacket, its earthy tones complementing the heavier, more textural palette of autumn and winter dressing. Because the silhouette is clean and the construction is solid, this is not a seasonal accessory but a year-round companion that earns its place in regular rotation with every outing.
- Add a leather or suede base panel to protect the bottom of the bag from wear and moisture
- Work a contrast-color pocket in a coordinating earthy tone for subtle visual interest
- Incorporate a short macramé tassel or fringe detail along the bottom edge for boho-adjacent styling
- Use a wooden toggle or horn button in place of a zipper for a more rustic aesthetic
- Personalize with an embroidered initial or small floral motif stitched onto the front panel
Care, Durability, and Long-Term Use
A well-constructed crochet backpack, made with quality cotton yarn and finished carefully, is a genuinely durable item that can serve daily use for years. Cotton fiber is naturally strong and becomes even more so after repeated washing and drying cycles, as the individual cotton filaments tighten and compact with use. The woven stitch structure, because it interlocks stitches so closely together, resists snagging and distortion in ways that more open stitch patterns cannot match. With reasonable care, your backpack will age beautifully, developing a softness and suppleness that only improves its character over time.
For routine cleaning, hand washing in cool water with a gentle, pH-neutral soap is ideal. Submerge the bag fully, work the soapy water through the fabric with your hands, and rinse thoroughly until the water runs completely clear. Roll the bag gently in a clean towel to remove excess moisture, then reshape it by hand and allow it to air dry away from direct sunlight, which can cause natural cotton fibers to yellow or bleach unevenly over time. Machine washing on a gentle cold cycle in a mesh laundry bag is an acceptable alternative for sturdy cotton constructions, but always check the yarn label recommendations before proceeding.
Storage deserves consideration as well. When the bag is not in use for an extended period, stuff it lightly with acid-free tissue paper or a small pillow insert to help it maintain its shape. Store it in a breathable cotton dust bag rather than a plastic container, which can trap moisture and encourage mildew growth in natural fibers. Inspect the seams and strap attachments periodically for any signs of wear, and address small repairs promptly before they develop into larger structural problems. A backpack you have made with your own hands is worth the minimal effort of ongoing maintenance, and that care will return to you in years of reliable, beautiful use.








What do you think?
It is nice to know your opinion. Leave a comment.