










How to Crochet Around a Zipper: A Complete Step-by-Step Guide
Crocheting around a zipper is one of those techniques that can feel intimidating at first glance, but once you break it down into manageable steps, it becomes a genuinely satisfying skill that opens up a world of creative possibilities. Whether you’re finishing off a handmade pouch, adding closure to a crocheted bag, or creating a custom wallet, knowing how to cleanly attach a zipper with crochet stitches gives your projects a polished, professional look that sets them apart from the crowd.
This technique combines the softness and flexibility of crocheted fabric with the practical functionality of a zippered closure. The result is a seamless, durable finish that not only looks beautiful but also holds up well with regular use. Many crochet enthusiasts discover this method after struggling with sewing zippers in place and finding that the crochet approach gives them far more control over alignment, tension, and overall finish quality.
Materials and Tools You Will Need
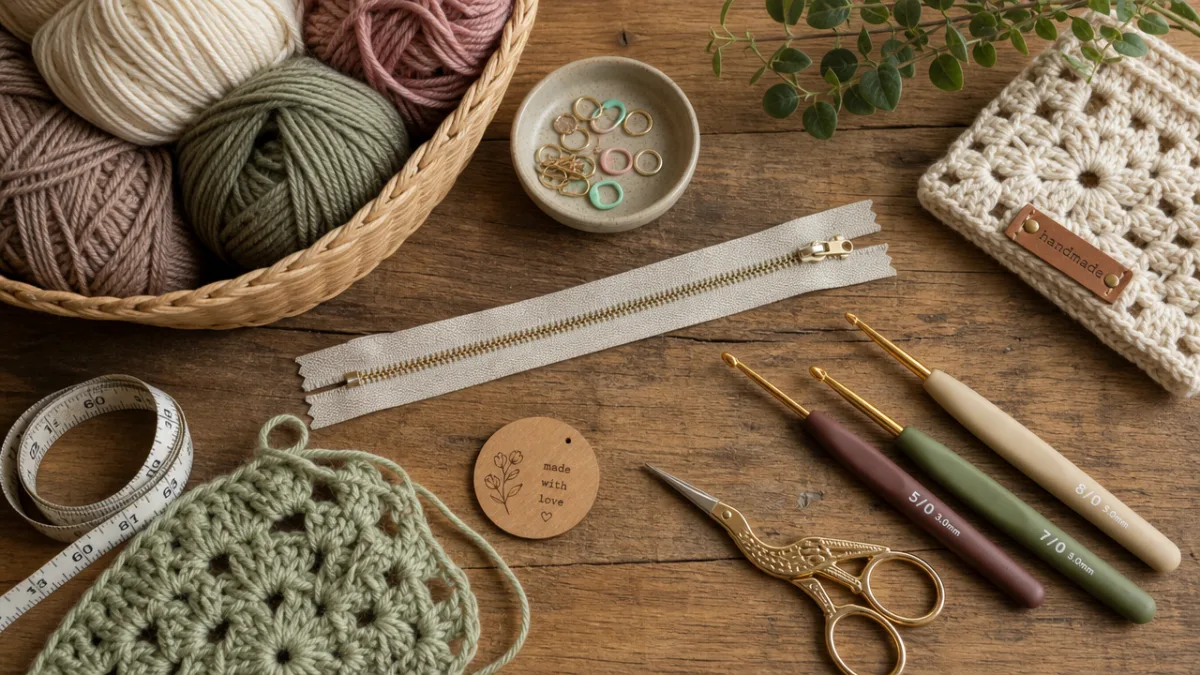
Before you begin, gathering the right materials is absolutely essential to achieving a clean, even finish. You will need a zipper of the appropriate length for your project — nylon coil zippers tend to work best because they are flexible and lie flat, making it much easier to work your crochet hook around them without creating bunching or uneven tension. Metal zippers can also work, but they require a bit more patience due to their rigidity. Always choose a zipper that is the same length as or slightly shorter than the opening you intend to close.
For your yarn, it is best to use the same yarn you used for the main body of your project to ensure a cohesive look and consistent tension. A smooth, tightly spun yarn in a light to medium weight, such as DK or worsted weight, tends to work most easily around zipper teeth. Bulkier yarns can create too much volume around the zipper track and may interfere with the zipper’s ability to open and close smoothly. If you are using a contrasting color for decorative effect, test it first on a swatch to ensure the colors complement rather than clash with each other.
Your crochet hook should be appropriate to your yarn weight, but many crafters find that going down a hook size from their usual recommendation helps create a tighter, neater stitch around the zipper tape. You will also need sharp scissors, locking stitch markers to hold the zipper in place during the process, and a blunt tapestry needle for weaving in ends. Some crafters also like to have a few straight pins or binder clips on hand to temporarily secure the zipper to the fabric edge before they begin crocheting. Good lighting is invaluable for this technique because you will be working in close detail for an extended period.
- Nylon coil zipper in the desired length (typically 7 to 12 inches for pouches and bags)
- Matching or coordinating yarn in DK, sport, or worsted weight
- Crochet hook one size smaller than your project’s main hook
- Locking stitch markers and straight pins
- Sharp scissors and a blunt tapestry needle
- A completed crocheted project piece with a finished edge, or a foundation chain
It is also worth having your finished crocheted piece blocked before attaching the zipper, if blocking is appropriate for your yarn fiber. A blocked piece lies flat and has more defined edges, which makes it significantly easier to align the zipper neatly. Acrylic yarns do not block in the traditional sense but can benefit from a light steam to even out the stitches along the opening edge. Taking this preparation step may add time to your project, but the improved final result is well worth the effort.
Preparing Your Crochet Piece and Zipper for Attachment
Preparation is arguably the most important phase of the entire process. Begin by laying your crocheted piece flat on a clean work surface and positioning the zipper face-down along the opening edge. The zipper pull should be on the right side of the fabric when the piece is held with the right side facing you. Take a moment to measure and confirm that the zipper fits correctly — ideally, the zipper stops should align with the corners of your opening, or extend just slightly beyond them so there is no gap at the ends when the zipper is closed.
Pin or clip the zipper tape to the wrong side of the crocheted fabric edge, making sure the teeth of the zipper are just barely visible along the fold line. This positioning is critical because you will be crocheting through both the crochet fabric and the zipper tape simultaneously. If the zipper is positioned too far inside, the teeth will be hidden and the zipper may not function properly. If it is positioned too far out, you will have excess zipper tape showing on the right side of the finished piece, which looks untidy and unprofessional.
Once pinned in place, use your locking stitch markers to secure the zipper at intervals of about an inch along the tape. This prevents the zipper from shifting as you work your way along the edge. Slide the zipper pull to the center of the zipper before you start crocheting — this makes it much easier to work around the pull tab when you reach the middle of the row. Some crafters prefer to close the zipper entirely and start from one end, working to the center, then reopening and working from the other end to the center. Both methods are valid and largely come down to personal preference and the specific project at hand.
Check one more time that your foundation edge is neat and even. If the edge of your crocheted piece is slightly uneven from the original construction, now is the time to add a row of single crochet around the entire opening to even it out before attaching the zipper. This preparatory row of single crochet creates a firm, straight edge that makes the zipper attachment far cleaner and more uniform. Even experienced crocheters often include this step as standard practice, particularly on bags and pouches where the edge sees regular stress and handling.
The Step-by-Step Process of Crocheting Around the Zipper
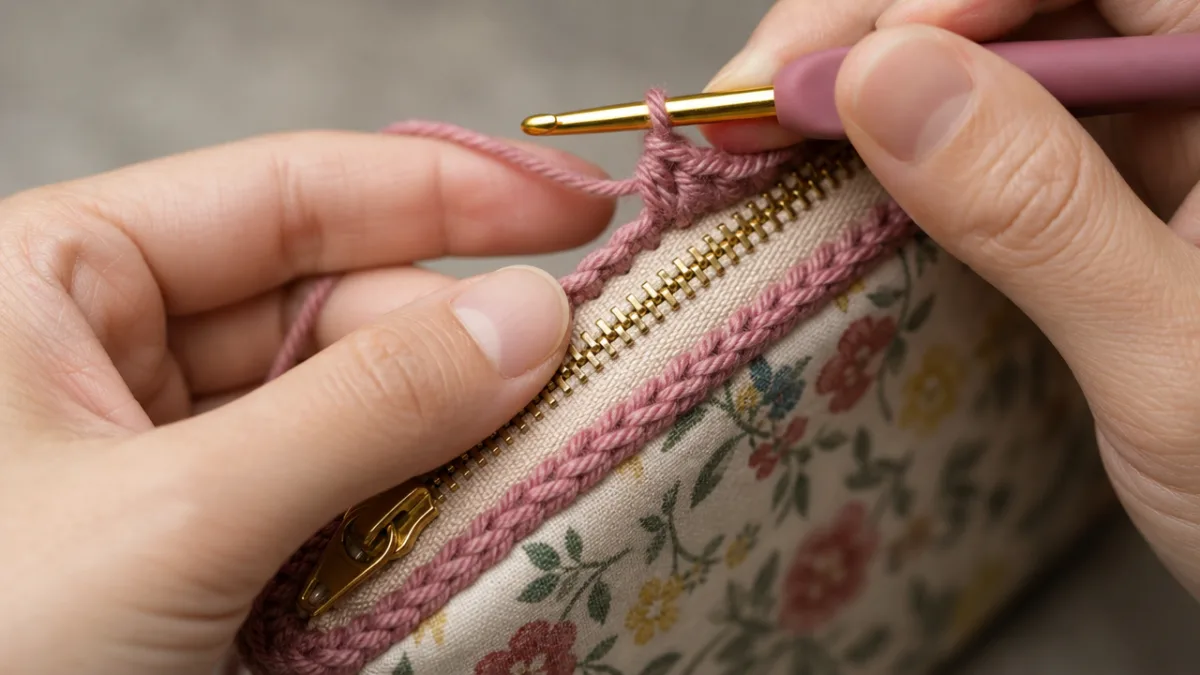
With your zipper pinned in position and your hook and yarn ready, it is time to begin the actual attachment. Start by inserting your hook through the first stitch of the crocheted edge and simultaneously through the zipper tape, positioning your entry point so that you are stitching close to the zipper teeth — approximately one to two millimeters away from the coil. Pull up a loop of yarn and work a single crochet stitch through both layers. This anchors the beginning of your zipper row and sets the tension for the entire seam.
Continue working single crochet stitches along the edge, always inserting your hook through both the crocheted fabric and the zipper tape simultaneously. It is important to maintain consistent tension throughout the row — pulling too tight will cause the zipper tape to pucker and bow, while working too loosely will result in the zipper flopping away from the fabric edge and not lying flat. Aim for stitches that are snug but not strained, similar to the tension you would use when working a standard single crochet edging. Pause every few stitches to check that the zipper is still lying flat and that the tape is not shifting out of alignment.
When you reach the zipper pull, carefully work your stitches up to it and then slide the pull to the section you have already completed before continuing past it. This sounds more complicated than it actually is in practice — simply stitch up to the pull, gently slide it backward past your hook and working yarn, and then continue stitching. Working around the zipper pull becomes instinctive after the first attempt, and most crafters find it surprisingly manageable once they try it. Just be careful not to snag your yarn on any metal parts of the pull as you maneuver past it.
At the end of the zipper tape, work a slip stitch to finish off the row and cut your yarn, leaving a tail of at least six inches for weaving in. Do not cut the tail too short at this stage, as you may need it to reinforce the corners of the zipper attachment. Now repeat the entire process on the second side of the zipper, attaching the other half of the tape to the opposite edge of your crocheted opening in exactly the same manner. Remember to maintain the same tension on the second side as the first to ensure both sides look symmetrical and even when the zipper is closed.
- Attach yarn to the first stitch at one end of the zipper opening with a slip stitch.
- Insert your hook through the crochet stitch and the zipper tape simultaneously.
- Work single crochet stitches evenly along the entire length of the zipper tape.
- When reaching the zipper pull, slide it backward to work past it smoothly.
- At the end of the row, slip stitch and fasten off, leaving a long tail.
- Repeat the process for the second side of the zipper opening.
- Weave in all ends securely using a tapestry needle.
Finishing Techniques for a Clean and Professional Result
Once both sides of the zipper have been crocheted in place, the finishing work begins. Start by weaving in all yarn ends using your tapestry needle, taking care to weave each tail through multiple stitches in different directions to ensure it stays secure under repeated use. The corners of the zipper opening are particularly important areas to reinforce — use your tail ends to work several small overcast stitches through the zipper tape stop and the surrounding crochet stitches to prevent any future pulling or fraying at these stress points.
Open and close the zipper several times to test its functionality. It should glide smoothly without catching on any yarn fibers. If you find the zipper is catching, carefully examine the stitches closest to the coil and use the tip of your tapestry needle to gently push any stray yarn loops away from the zipper teeth. In some cases, you may need to use a seam ripper to remove one or two stitches that are placed too close to the coil and replace them slightly further away. This level of fine-tuning is entirely normal, especially the first few times you attempt this technique.
For a particularly polished finish, consider working a decorative border row around the entire perimeter of your project after the zipper is attached. This not only frames the piece beautifully but also helps reinforce the zipper attachment by adding another layer of stitching around the opening area. A row of crab stitch (reverse single crochet) creates a lovely corded edge that adds durability and a professional touch. Alternatively, a simple row of slip stitches in a contrasting color can create an attractive piped effect along the zipper line. These additional finishing rows are optional but they genuinely elevate the overall appearance of the finished piece.
It is also worth pressing the zipper area lightly with a steam iron (if your yarn fiber permits) or with a damp cloth to help everything lie perfectly flat. Use a pressing cloth between the iron and the crochet fabric to protect the yarn fibers, and avoid applying direct heat to any plastic or nylon components of the zipper. This light blocking and pressing step is particularly effective on cotton and linen yarns, which respond beautifully to steam and will relax into a crisp, flat finish that makes the zipper attachment look as neat as anything you might find in a professionally made accessory.
Common Mistakes and How to Avoid Them
One of the most frequent mistakes beginners make when crocheting around a zipper is failing to keep the zipper teeth free of yarn as they work. Because you are stitching very close to the coil, it is all too easy for a loop of yarn to slip over a tooth, which will cause the zipper to catch and jam every time it is used. To avoid this, get into the habit of pausing every three or four stitches to gently check that the zipper coil is free and unobstructed. Work your stitches consistently close to but never over the teeth, and keep your tension even to prevent loops from straying in the wrong direction.
Another common issue is uneven tension between the two sides of the zipper. Because you work each side in a separate pass, it is natural for slight tension differences to appear if you are not paying close attention. These differences can cause the finished zipper to pull to one side, creating an asymmetrical look and potentially interfering with the zipper’s function. To prevent this, make a deliberate effort to count your stitches on the first side and replicate the same count on the second side. Placing stitch markers at regular intervals — every ten stitches, for example — helps maintain consistency and gives you checkpoints to compare between the two sides.
Skipping the preparation steps is perhaps the single biggest mistake a crafter can make with this technique. Attempting to attach a zipper to a curled, unblocked, or uneven edge almost always results in a puckered, wavy zipper line that cannot be corrected after the fact without ripping out all the work and starting again. Always take the time to prepare your edge properly, block your fabric if appropriate, and pin the zipper carefully before beginning to stitch. What feels like extra effort in the preparation phase pays enormous dividends in the quality and appearance of the finished result.
- Always check that zipper teeth are free of yarn after every few stitches.
- Count your stitches carefully on both sides of the zipper to maintain symmetry.
- Block and prepare your crocheted edge before beginning the zipper attachment.
- Never skip the pinning step — even slight shifts in alignment create visible problems.
- Use a hook one size smaller than your project hook to avoid loose, sloppy stitches.
- Test the zipper function before weaving in ends, so corrections are still easy to make.
Creative Applications and Project Ideas
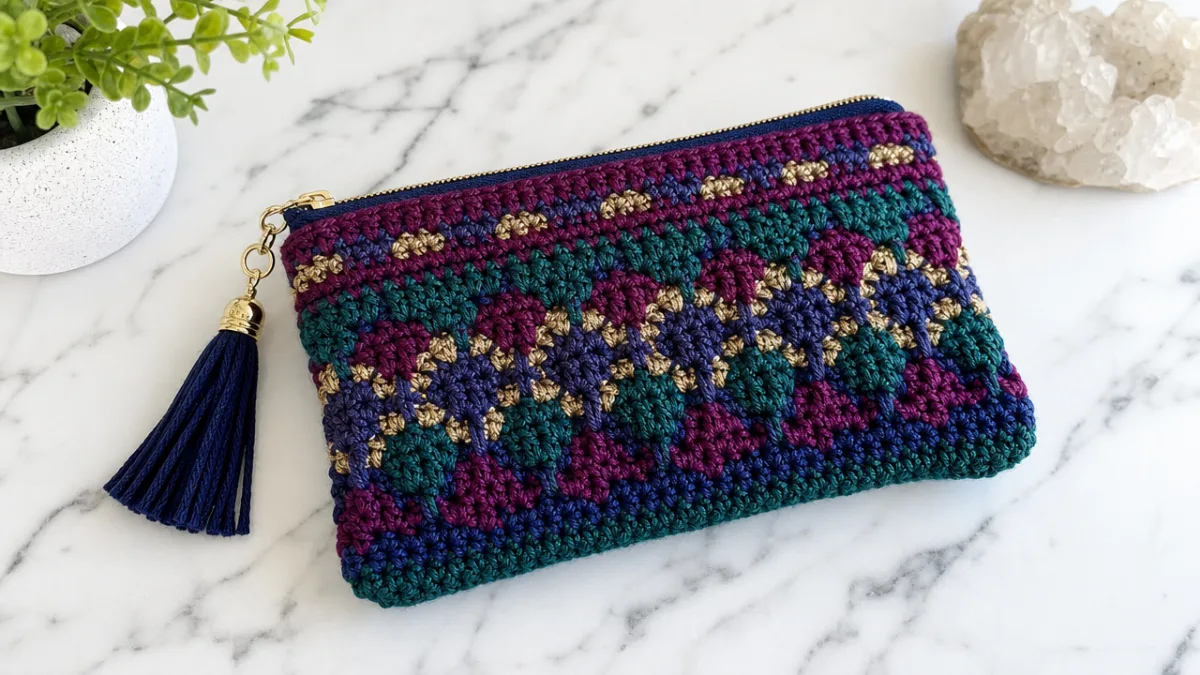
Once you have mastered the fundamental technique of crocheting around a zipper, a wide array of creative projects becomes accessible to you. The most popular application is, of course, the crocheted zippered pouch or cosmetic bag — a perennial favorite among makers and gift-givers alike. These small projects are ideal for practicing the technique because the zipper is short, the stakes are low, and the finished item is genuinely useful. You can experiment with different yarn colors and textures to create a pouch that is as much a piece of art as it is a functional accessory.
Larger bags present an exciting next challenge once you are comfortable with the basics. Tote bags with zippered tops, crossbody bags, and backpacks with multiple zippered compartments are all achievable with this technique. For larger projects, you may want to use a heavier zipper — a size 5 coil zipper, for instance — to ensure the closure can handle the weight and stress of a full bag. Sturdy cotton or nylon blend yarn works particularly well for bags that will see heavy daily use, as these fibers hold their structure and resist stretching better than wool or acrylic alternatives when subjected to the strain of a loaded bag over time.
Crocheted pencil cases, phone pouches, travel wallets, and tablet sleeves are all wonderful projects that incorporate the zipper technique in slightly different configurations. A tablet sleeve, for example, might use a zipper on three sides for easy access, requiring you to navigate corners — an advanced variation on the basic technique that involves working multiple stitches into the corner stitches of the crochet piece to ensure the tape lies flat around the curve. These corner techniques are well worth learning as they dramatically expand the range of shapes and closures you can create with nothing more than a hook, some yarn, and a zipper.
Beyond purely functional items, crocheted zipper work also appears beautifully in wearable projects. Crocheted vest or cardigan closures, bag pockets on larger tote bags, and removable inner pouches for larger handbags are all sophisticated applications of this technique. Some designers even incorporate crocheted zipper work into garments as decorative elements, using contrasting yarn colors to make the zipper attachment itself a focal point of the design. The technical skill you develop by mastering the basic zipper attachment technique translates directly into the confidence and capability needed to tackle these more ambitious and creative applications with real success and satisfaction.
Tips for Adapting the Technique to Different Yarn Weights and Project Types
Adapting the zipper attachment technique to different yarn weights requires some thoughtful adjustments, but the core method remains the same regardless of what yarn you are working with. With fine yarn weights such as fingering or lace weight, you will need to work significantly more stitches across the zipper tape to cover it fully, and your hook will be much smaller and harder to maneuver through the tight confines of the zipper tape holes. Patience is particularly important at fine weights — work slowly, check your alignment frequently, and do not rush the process. The results with fine yarn can be extraordinarily beautiful and delicate, making the extra care absolutely worthwhile.
At the other end of the spectrum, bulky and super-bulky yarns present different challenges. The large stitch size means you will work far fewer stitches across the same length of zipper tape, which can create gaps between stitches that allow the zipper tape to show through. To combat this, try spacing your stitches closer together than the yarn weight would normally dictate, or use a combination of single crochet and slip stitches to achieve a tighter coverage without adding excessive bulk around the zipper opening. Chunky yarn also makes it more difficult to keep stitches away from the zipper teeth, so extra vigilance is needed during each pass of the hook.
For projects made with textured or specialty yarns — including boucle, chenille, or eyelash yarns — it is generally advisable to switch to a smooth, plain yarn of a similar weight for the zipper attachment row. These textured yarns are notoriously difficult to work with in any situation requiring precise stitch placement, and the close, controlled work of zipper attachment amplifies every difficulty that textured yarn presents. Using a coordinating smooth yarn for the zipper row maintains the decorative appearance of the project while making the technical work of attachment far more achievable, particularly for crafters who are still developing their confidence with this technique.
When working on stretchy projects made from elastic or ribbed stitch patterns, it is worth stabilizing the opening edge before attaching the zipper. A row of chain stitches or a length of non-stretch ribbon sewn along the wrong side of the opening can prevent the crochet fabric from stretching unevenly around the rigid zipper tape during attachment and use. This stabilization technique is commonly used in knitting as well, where it is known as a “stay,” and it works equally effectively in crochet. Taking this extra preparatory step ensures that your finished zipper closure will remain neat and functional over months and years of regular use, even in projects made from the stretchiest and most elastic stitch patterns.
Above all, the most valuable tip for adapting this technique across different projects and yarn weights is simply to practice and experiment without fear of imperfection. Every project you attempt builds your muscle memory, your eye for alignment, and your understanding of how different materials behave in combination with each other. Experienced crafters almost universally report that their first attempt at crocheting around a zipper was messy and imperfect, but that by the third or fourth project the technique felt natural, manageable, and even enjoyable. Keep a practice pouch on hand for testing new yarns and zipper types before committing to a finished project, and you will find your skills developing with remarkable speed and confidence.








What do you think?
It is nice to know your opinion. Leave a comment.