










How to Crochet a Twisted Fringe: A Complete Step-by-Step Guide
Introduction to Twisted Fringe and Why Crocheters Love It
Twisted fringe is one of those finishing techniques that transforms an ordinary crochet project into something truly eye-catching and professional. Whether you are decorating the hem of a shawl, the edge of a blanket, or the bottom of a hat, twisted fringe adds movement, texture, and a handcrafted charm that no other embellishment quite replicates. Once you learn this technique, you will find yourself reaching for it again and again across all kinds of projects.
Unlike simple cut fringe, which hangs in straight strands, twisted fringe involves twisting multiple yarn strands together so that they coil back on themselves to form a rope-like tail. This self-twisting action creates a naturally springy, structured fringe that holds its shape beautifully even through wear and washing. The result looks polished and intentional, giving your finished crochet pieces that boutique, artisan quality that stands out from the crowd.
The technique is also wonderfully versatile. You can make twisted fringe thick and chunky for a bold bohemian statement, or fine and delicate for a subtle, elegant trim. It works with virtually any yarn weight and fiber type, from rustic wool to silky cotton to glittery metallic blends. Best of all, it requires no special tools beyond a crochet hook, a pair of scissors, and your own hands, making it one of the most accessible finishing techniques available to crocheters of every skill level.
Materials and Tools You Will Need
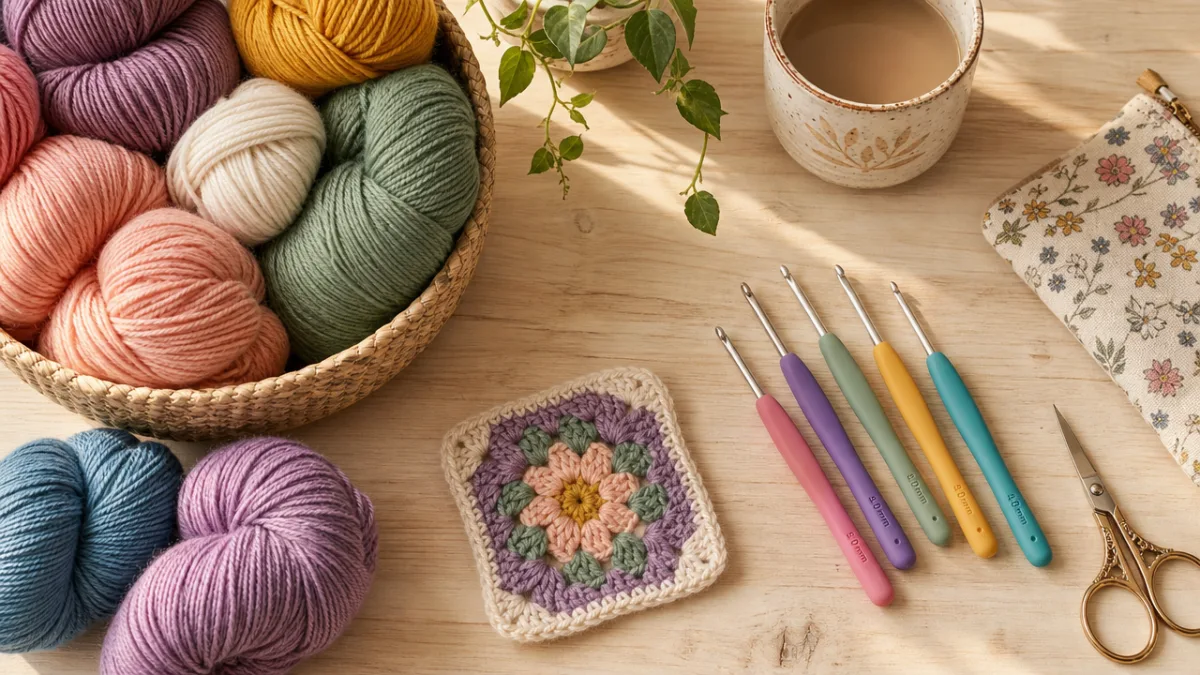
Gathering your supplies before you begin will make the entire process smoother and more enjoyable. The primary material you need is yarn, and ideally you will use the same yarn from your main project so that the fringe matches perfectly in color and texture. However, using a contrasting color or a complementary fiber can also produce stunning results, so do not hesitate to experiment with combinations that reflect your personal style and the intended use of the finished piece.
In terms of tools, you will need a crochet hook in a size appropriate to your yarn weight. While the hook is used mostly to attach the fringe to your project, having the right size ensures that you can pull strands through your stitches cleanly without splitting the yarn or distorting the fabric. You will also need a pair of sharp scissors to cut your strands to a consistent length, and a ruler or a piece of cardboard to use as a cutting guide so that all your fringe strands are uniform.
Consider having a yarn needle on hand as well, particularly if your project edge needs any tidying before the fringe is applied. Some crocheters also like to use a small binder clip or a piece of tape to keep their cut strands organized in bundles, preventing tangles and saving time during the attachment stage. If you plan to create very long fringe, winding yarn around a hardcover book is a classic trick that produces perfectly even strands every single time without any measuring.
- Yarn matching or complementing your project (same dye lot recommended for color consistency)
- Crochet hook in the appropriate size for your yarn weight
- Sharp scissors for clean, even cuts
- Ruler, cardboard template, or a hardcover book for measuring strands
- Yarn needle for finishing and weaving in ends if needed
- Optional: small binder clips to keep strand bundles organized
Preparing Your Yarn Strands for Twisted Fringe
Preparation is everything when it comes to achieving neat, professional-looking twisted fringe. Begin by determining how long you want your finished fringe to hang. Keep in mind that the twisting process will shorten your strands by roughly one quarter to one third of their original length, so you need to cut them noticeably longer than your desired finished length. For example, if you want fringe that hangs six inches after twisting, you should cut your strands to at least eight to nine inches before you begin.
Next, decide how many strands you want to use per fringe bunch. The number of strands directly impacts the thickness and visual weight of the finished fringe. Using two to three strands per bunch creates fine, delicate fringe that suits lacy shawls and lightweight accessories. Four to six strands per bunch produces medium-weight fringe that works beautifully on scarves and wraps. For chunky blankets or dramatic bohemian pieces, you might choose eight or more strands per bunch for a bold, luxurious look.
Once you have decided on your strand count and length, cut all your strands before you begin attaching them. This upfront preparation saves considerable time and frustration once you are in the flow of working. A simple way to ensure consistency is to wrap your yarn around a piece of cardboard cut to the desired strand length, wrapping as many times as needed to create multiple strands at once, then cutting along one edge. Fold the resulting bundle in half and set it aside, ready for attachment.
Choosing the Right Strand Count for Different Projects
The ideal strand count for your twisted fringe depends largely on the yarn weight and the aesthetic you are aiming for. With fingering or lace weight yarns, even a single-strand bunch can look quite substantial after twisting, since the twist adds visual density. With bulky or super bulky yarns, you may find that two to four strands creates a dramatically thick fringe that can overpower a delicate edge, so consider scaling back accordingly and letting the yarn’s own texture do the talking.
Project type also plays an important role in your decision. For a children’s blanket, fewer, shorter strands create a playful but practical fringe that will not become a tangling hazard. For an adult shawl destined for a special occasion, longer, denser strands in a luxurious fiber like silk or alpaca can create fringe that feels truly opulent. For everyday scarves and wraps, a medium strand count in a washable wool or acrylic blend strikes the perfect balance between beauty and practicality.
It can be very helpful to create a small test bunch before committing to a full project. Cut a few strands at your planned length, attach them to a spare piece of crochet fabric, twist them, and let them set. This quick test reveals exactly how the finished fringe will look, allowing you to adjust the strand count or length before you have spent time applying fringe to your entire project edge. This small investment of time at the start saves significant reworking later and builds your confidence as you proceed.
Step-by-Step Instructions for Attaching and Twisting the Fringe
With your strands prepared and your project edge ready, it is time to begin attaching your fringe. Fold your bundle of strands in half so that the fold creates a loop at one end. Insert your crochet hook from front to back through the edge stitch where you want to place your first fringe. Catch the folded loop of your strand bundle with the hook and draw it partway through the stitch, creating a visible loop on the front of your work. Then pass the loose tail ends of the strands through this loop and pull firmly downward to create a tight, secure slip knot attachment. Repeat this process across your entire project edge, spacing the fringe evenly as you go.
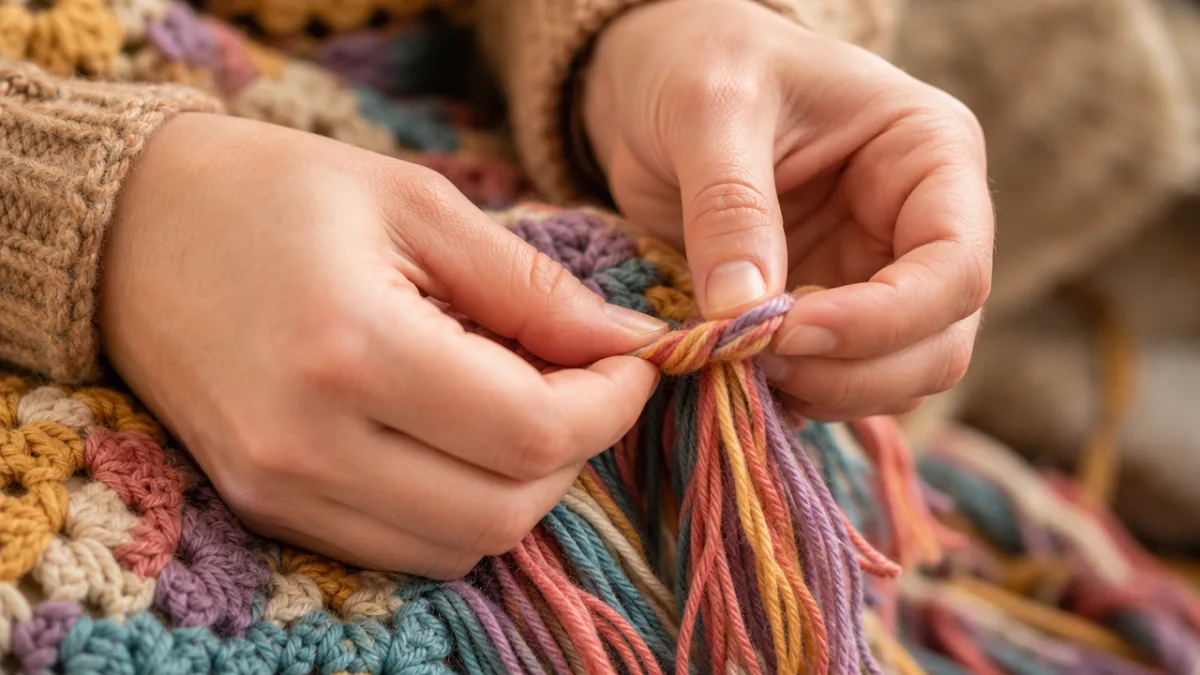
Once all your fringe bunches are attached, the twisting begins. Divide each fringe bunch into two equal groups of strands. Hold one group in each hand and begin twisting them individually in the same direction, typically clockwise, until they are tightly coiled. The key to successful twisted fringe is to twist each individual group quite firmly, perhaps more firmly than feels natural at first, because the yarn will relax slightly as you proceed. Once both groups are tightly twisted, hold them together and allow them to twist around each other in the opposite direction, which is counterclockwise if you twisted the individual groups clockwise.
The two groups will naturally want to coil around each other once you release the tension you have been maintaining, forming a satisfying rope-like twist. To secure the twist and prevent it from unraveling, tie an overhand knot at the bottom of the fringe using all the strand ends together. Pull the knot tight and position it at whatever point gives you the finished fringe length you desire. Trim the ends below the knot evenly with sharp scissors, and your first twisted fringe bunch is complete. Repeat this process for every bunch along your project edge.
Tips for Keeping the Twist Consistent Across Your Project
Consistency is what separates amateur-looking fringe from truly polished, professional results. One of the most common challenges crocheters encounter is that early fringe bunches look different from later ones, either because the twist is looser or because the proportions have shifted slightly. The best way to combat this is to count your twists on the first few bunches and aim to replicate that count with each subsequent bunch. Some crocheters find it helpful to quietly count as they twist, establishing a rhythm that keeps every bunch uniform.
Another tip is to work with similarly tensioned yarn throughout the project. If you pull the strands very tightly when attaching some bunches and more loosely when attaching others, the finished fringe will have an uneven appearance. Try to use the same firm, consistent pull each time you secure the slip knot attachment. If you are working on a large project with many fringe bunches, it can help to take short breaks to rest your hands, since fatigue can gradually cause your tension to shift without you noticing.
Finally, do not skip the finishing knot at the bottom. Some crocheters are tempted to leave the ends loose for a more casual look, but without the knot, the twist will gradually unravel with wear and washing, leaving you with plain straight fringe rather than the twisted style you worked so hard to create. The knot is the anchor that preserves all your effort, so tie it firmly and position it thoughtfully to achieve the finished length and proportion that best complements your project.
Finishing Techniques and Caring for Your Twisted Fringe
Once all your fringe bunches are attached, twisted, and knotted, take a moment to step back and assess the overall look. Check that the spacing between bunches is even and that the knots are all positioned at a similar point along the strands. If any bunch looks slightly shorter or longer than its neighbors, you can often correct this by repositioning the finishing knot slightly higher or lower before trimming. This small adjustment can make a significant visual difference, so it is worth taking the time to do it carefully before making any permanent cuts.
Trimming the ends after knotting is the final physical step in creating your twisted fringe. Lay your finished project on a flat surface and use sharp scissors to trim the tail ends below each knot to a uniform length. Many crocheters prefer a very short trim of half an inch to one inch below the knot for a neat, tidy look, while others prefer to leave an inch or two of fluffy ends for a more relaxed, bohemian aesthetic. Either approach is perfectly valid, and the choice should reflect both your personal taste and the overall style of the project.
Caring for projects with twisted fringe requires a little extra attention compared to unfringed crochet. Before washing, gently gather all the fringe bunches together and secure them loosely with a piece of scrap yarn or a soft hair elastic to prevent the fringe from tangling in the water. Wash on a gentle cycle in a mesh laundry bag, or hand wash in cool water with a mild detergent. After washing, reshape the fringe by hanging the project to dry vertically, allowing gravity to pull the fringe straight as it dries. Re-twist any bunches that have relaxed during washing while the yarn is still slightly damp for the best results.
Creative Variations and Ways to Personalize Your Twisted Fringe
Once you have mastered the basic technique, there are countless ways to put your own creative stamp on twisted fringe. One popular variation is to use two or more contrasting yarn colors within each bunch, so that when the strands twist around each other, they create a naturally barber-pole striped effect. This works particularly beautifully on neutral-colored blankets or shawls where a pop of multicolor fringe adds just the right amount of visual interest without overwhelming the main fabric.
Another creative option is to vary the density and length of fringe across your project edge deliberately. For example, placing longer fringe at the center of a triangular shawl and gradually shortening it toward the corners creates an elegant graduated effect that enhances the shawl’s shape. Similarly, alternating thick and thin fringe bunches in a repeating pattern creates a rhythmic, textured edge that catches the eye and adds dimensionality to the overall piece.
You can also experiment with adding beads or charms to your twisted fringe for extra decorative impact. Thread a bead or two onto individual strands before twisting, positioning them so that they end up incorporated within the twisted section or dangling just below the finishing knot. Large wooden beads work beautifully for bohemian-inspired pieces, while small glass or metal beads suit more delicate, elegant projects. Whatever variation you choose, the underlying technique remains the same, making it easy to adapt your skills in endless creative directions as your confidence and vision grow.

Common Mistakes to Avoid When Making Twisted Fringe
Even experienced crocheters can run into trouble with twisted fringe if they overlook a few key details. One of the most frequent mistakes is cutting strands that are too short. Because the twisting process consumes a significant portion of the strand’s length, strands that seem adequately long before twisting can end up disappointingly short in the finished fringe. Always err on the side of cutting strands longer than you think you need, and create a test bunch before cutting all your strands to avoid wasting yarn on strands that will not produce the results you want.
Another common mistake is twisting the individual groups in opposite directions before combining them. For the self-twisting action to work correctly, both groups must be twisted in the same direction before you bring them together and allow them to coil around each other in the opposite direction. If you accidentally twist one group clockwise and the other counterclockwise, the two groups will not naturally coil together but will instead fight each other, producing a limp, unconvincing result that lacks the characteristic springy rope structure of true twisted fringe.
Finally, many beginners underestimate how important consistent attachment spacing is to the finished appearance. Fringe bunches that are spaced irregularly along the project edge will look untidy no matter how perfectly each individual bunch is twisted. Before you begin attaching fringe, count your edge stitches and divide them evenly to plan your spacing. Mark every attachment point with a stitch marker or a small piece of contrasting yarn before you begin, and stick to those markers as you work across the edge. This small investment in planning produces a beautifully regular fringe that looks deliberate, skillful, and truly professional.
- Always cut strands longer than needed to account for length lost during twisting.
- Twist both strand groups in the same direction before combining them.
- Plan and mark your attachment spacing before you begin to ensure even distribution.
- Tie a firm finishing knot at the base of each twist to prevent unraveling over time.
- Test your strand count and length on a sample piece before committing to a full project edge.
- Care for fringed projects carefully during washing to preserve the twist structure.
Learning to crochet twisted fringe is a genuinely rewarding skill that elevates your finished projects from lovely to truly exceptional. With a little practice and attention to the details outlined in this guide, you will be creating beautifully twisted, professional-quality fringe that brings out the best in every crochet piece you make. The technique is straightforward enough for confident beginners and satisfying enough to remain a favorite tool for experienced makers, making it one of the most valuable finishing skills you can add to your crochet repertoire.








What do you think?
It is nice to know your opinion. Leave a comment.