










From Peanut to Pick: How to Make a Miniature Guitar for Your Pet or Plush Character
There is something undeniably heartwarming about crafting a tiny musical instrument for a beloved companion, whether that companion is a real pet, a stuffed animal, or even a quirky character you have built around a peanut-shaped figure. The viral Pinterest trend of making miniature guitars for small plush creations has captured the imagination of crafters all over the world, and it is easy to understand why. These tiny instruments combine the joy of miniature making with the charm of personalization, resulting in a keepsake that is as unique as the little character it belongs to.
What makes this craft so compelling is the accessibility of it. You do not need to be a luthier or even particularly experienced with woodworking to create something that looks impressively detailed. Many crafters use materials they already have at home, from popsicle sticks and toothpicks to thin cardstock and embroidery thread. The process is deeply satisfying precisely because it transforms humble, everyday materials into something that resembles a real instrument, just scaled down to fit in the hands of a tiny peanut character.
This article will walk you through everything you need to know about this delightful craft trend, from gathering your materials and understanding the basic structure of a guitar to decorating your finished instrument and displaying it proudly. Whether you are a seasoned crafter looking for a new challenge or a complete beginner who simply fell in love with the idea, you will find all the guidance you need right here to give your peanut the rock star life it deserves.
Understanding the Anatomy of a Miniature Guitar
Before you can build anything, it helps enormously to understand what you are building. A standard guitar, whether acoustic or electric, consists of several key components that together create both its iconic silhouette and its functional structure. Even in miniature form, replicating these components as faithfully as possible is what separates a toy prop from a genuinely impressive tiny instrument. The main body, the neck, the headstock, the frets, the tuning pegs, the bridge, the nut, and the strings all play a visual role in making the piece convincing.
The body of the guitar is the large, often hourglass-shaped section that gives the instrument its recognizable form. For an acoustic guitar, this includes a hollow chamber and a sound hole in the center. For an electric guitar, the body tends to be solid and can take many different shapes, from the classic Stratocaster curves to the angular lines of a Flying V. When crafting a miniature version, you will be cutting or shaping this body from a flat piece of material, so understanding its proportions relative to the neck and headstock is critical to achieving a realistic look.
The neck and headstock are equally important. The neck is the long, thin piece that extends from the body, and the headstock is the wider, flat piece at the very top where the tuning pegs are located. Frets are the thin horizontal lines across the neck that divide it into pitch-specific zones, and even at a tiny scale, these details make the guitar immediately recognizable. By studying reference photos of real guitars before you begin, you can internalize these proportions and carry them confidently into your miniature build.
Choosing Your Guitar Style
One of the first creative decisions you will make is what style of guitar to build for your peanut. An acoustic guitar has a warm, classic look that suits many character aesthetics, particularly those with a folk, country, or singer-songwriter vibe. The sound hole and curved body give it an organic, timeless quality that translates beautifully even at a tiny scale. An electric guitar, on the other hand, opens the door to bolder shapes, flashier colors, and the addition of tiny details like pickup slots, control knobs, and output jack markings.
Bass guitars are another option worth considering, especially if your peanut character has a cool, low-key personality. The bass has a longer neck relative to its body and typically only four strings, which can actually be easier to replicate in miniature. Classical guitars with their wider necks and nylon strings have their own distinct charm, and ukuleles, while technically not guitars, follow a very similar construction process and might be even better scaled to the smallest of peanut figures.
Your character’s personality should guide this choice. A tiny peanut wearing a cowboy hat clearly calls for an acoustic guitar with a warm wood finish. A peanut dressed in a tiny leather jacket might demand a bright red electric guitar with a lightning bolt painted on the body. This is part of the fun of character crafting: every decision feeds into a larger story about who your little peanut is and what kind of music they would play if they could actually play.
Gathering Your Materials and Tools
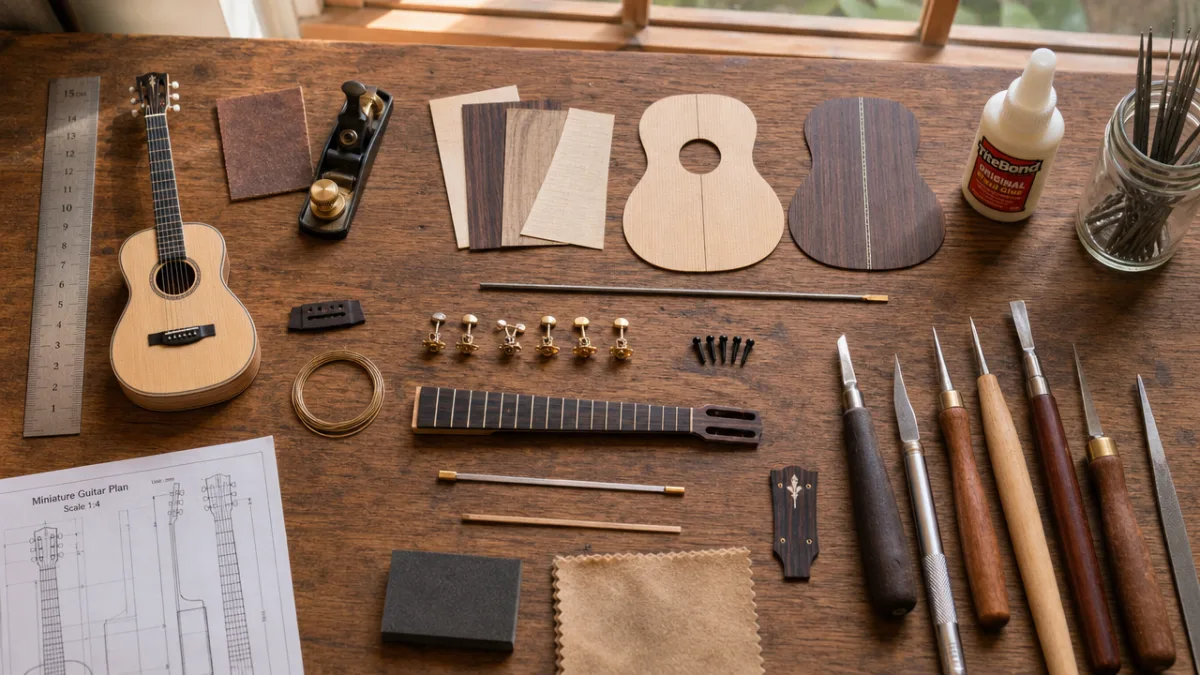
One of the best things about miniature guitar crafting is that it does not require expensive or hard-to-find supplies. The foundation of most miniature guitar builds is thin wood or a wood alternative. Craft sticks, also known as popsicle sticks, are a perennial favorite because they are the right thickness, easy to cut, and take paint well. Balsa wood sheets, available at most craft stores for just a few dollars, offer even more flexibility because they can be cut into custom shapes with nothing more than a craft knife and a cutting mat.
For the strings, crafters have devised a wonderfully creative range of solutions. Fine embroidery thread in black or gold gives a soft, convincing look. Thin wire bent carefully around tiny anchor points can look remarkably realistic, especially for electric guitar models. Some crafters even use fishing line for a transparent, nylon-string effect, or unraveled bits of metallic thread from embroidery floss packs. The key is finding something thin enough to be in scale with the rest of the instrument while still being strong enough to stay in place once attached.
Your tool kit should include a sharp craft knife or precision scissors, a self-healing cutting mat, fine-grit sandpaper, wood glue or super glue, a fine-tipped paintbrush, acrylic paints in your chosen colors, and a clear sealant or varnish to protect the finished piece. Toothpicks make excellent handles for applying tiny dabs of glue with precision. A ruler or small scale is invaluable for keeping proportions consistent as you cut and assemble each component of the guitar.
Working at a Tiny Scale
Scale is everything in miniature crafting, and it requires a slight shift in how you approach the work. When your entire guitar might be only two or three inches long, even a millimeter of deviation can throw off the proportions significantly. Before cutting anything, it is worth sketching your guitar on paper at the actual intended size, then using that sketch as a template to trace your pieces. This extra planning step saves enormous frustration during the assembly phase and helps ensure that the neck actually fits the body and the headstock is proportional to both.
Working at this scale also demands patience with drying times. When you apply glue to tiny pieces, you will be holding them in place for what can feel like an eternity. Having a pair of small binder clips or miniature clothespins to act as clamps is extremely helpful. Alternatively, setting your glued pieces on wax paper and allowing them to cure fully before moving on will prevent accidentally bumping a component out of alignment before the bond has set.
Painting miniatures requires a similarly deliberate approach. Use the finest brushes you can find, and thin your acrylic paints slightly with water so they flow smoothly without building up in thick, texture-obscuring layers. Apply multiple thin coats rather than one thick one, letting each layer dry completely before adding the next. This technique gives your finished guitar a clean, professional look that far exceeds what you might expect from such small-scale work with basic craft materials.

Step-by-Step Construction of Your Miniature Guitar
With your materials gathered and your scale template prepared, you are ready to begin construction. Start by cutting the guitar body from your chosen material using your template as a guide. If you are using craft sticks, you may need to glue two or three together side by side to get a piece wide enough for the body, then sand the joints smooth once the glue has cured. If you are using balsa wood sheet, a single layer will likely be sufficient. Cut slowly and carefully, prioritizing accuracy over speed, especially along the curved edges of an acoustic guitar body.
Once the body is cut and sanded smooth, cut the neck as a single long, narrow strip, tapering it slightly toward the headstock end if you want to capture the subtle wedge shape of a real guitar neck. The headstock can be cut separately and glued to the top of the neck, or carved as a continuation of the neck piece if your material is thick enough to allow shaping. Use fine sandpaper to smooth all the edges and surfaces before any painting begins, as any roughness will be magnified by the paint and become more noticeable, not less, once the piece is finished.
Fret lines can be added in several ways. The simplest method is to use a fine-tipped permanent marker or a very fine brush and black paint to draw horizontal lines across the neck at evenly spaced intervals. For a more three-dimensional effect, thin strips of silver metallic tape or even fine wire can be laid across the neck and secured with a tiny amount of glue. The bridge, nut, and tuning peg details can similarly be painted on or built up from tiny pieces of cut material, depending on how much detail you want to achieve and how small your guitar actually is.
Attaching the Strings
Stringing your miniature guitar is one of the most satisfying parts of the entire process, and it is also the step that most dramatically transforms the piece from a flat painted shape into something that genuinely reads as a musical instrument. Begin by deciding how many strings your guitar will have: six for a standard guitar, four for a bass, and four for a ukulele. Mark the anchor points lightly on the bridge and headstock before you begin attaching anything, ensuring they are evenly spaced.
Thread your chosen string material through or around a small anchor point at the bridge, securing it with a tiny knot or drop of glue. Then draw the thread up the neck to the corresponding point on the headstock, pulling it just taut enough to lie flat and straight without bowing the neck. Secure it at the headstock end and trim any excess. Repeat for each string, working from the outermost strings inward to help keep the tension even across the neck as you go.
Once all the strings are in place, step back and assess the overall effect. Minor adjustments to string tension or positioning can make a significant difference in how convincing the final result looks. If any strings are sagging slightly, a tiny additional dot of glue at the bridge or headstock can tighten them up without requiring you to restring the whole instrument. At this stage, your miniature guitar should already look remarkably like the real thing, just perfectly sized for your peanut musician.
Decorating and Personalizing Your Peanut’s Guitar
A plain wood-colored guitar is perfectly charming on its own, but decoration is where you can really let your creativity shine and give the instrument a personality that matches the character it belongs to. Paint is the most versatile decorating tool at your disposal. A glossy red or sunburst finish immediately suggests a vintage rock and roll aesthetic. A matte black body with white binding trim looks sleek and modern. Natural wood grain, achieved by applying diluted brown and tan paints in overlapping brushstrokes, gives a warm acoustic guitar its most authentic appearance.
Decals and tiny painted details can elevate a miniature guitar from charming to genuinely impressive. Using the finest brush and a steady hand, you can add faux binding lines along the edges of the body, dot inlays on the neck, a pickguard, control knobs, or even a tiny painted logo on the headstock. Metallic gold or silver paint works beautifully for hardware details like tuning pegs and bridge saddles. Even a small, carefully placed sticker or piece of decorative washi tape can serve as an unexpectedly convincing guitar strap button or pickup cover.
Do not overlook the finish. A coat of clear varnish or Mod Podge applied over the completed and painted guitar does several things simultaneously: it protects your paintwork from scratches and handling, it gives the piece a satisfying sheen that mimics the lacquered finish of a real guitar, and it strengthens the bond between all the various small components. Matte varnish for an aged or acoustic look, gloss varnish for a bright electric guitar shine — this final step takes only moments but makes a substantial difference to the overall presentation of your finished piece.
Creating a Matching Display
Once your peanut’s guitar is complete, you will naturally want to display it in a way that does justice to the work you have put into it. A tiny guitar stand, built from bent wire or thin metal strips, adds an authentic touch and allows the guitar to be displayed upright, just like a real instrument leaning against a studio wall. These can be fashioned from paperclips bent into the classic A-frame stand shape, painted black, and adjusted until the guitar rests securely.
A shadow box frame creates a wonderful presentation for both the peanut character and their guitar together. Arrange the figure and instrument inside the frame with a backdrop that suggests a stage or a cozy music room, and the whole piece becomes a tiny diorama that tells a story. Miniature music notes, a tiny amplifier crafted from a matchbox, or even a minuscule setlist pinned to the shadow box backing all add narrative depth and charm to the display.
You might also consider photographing your creation in a thoughtfully arranged scene to share with the online crafting community. Good lighting, whether natural window light or a small ring light, can dramatically improve how a miniature subject photographs, capturing the fine details of your work that might otherwise be lost in a snapshot. The Pinterest community that inspired this project is filled with crafters who would love to see your interpretation, and sharing your peanut musician’s portrait is a wonderful way to connect with others who share your enthusiasm for this wonderfully specific and joyful craft.

Tips, Troubleshooting, and Taking It Further
Even the most experienced miniature crafters encounter challenges, and it is worth anticipating the most common ones before they derail your project. The single most frequent frustration is breakage: tiny components made from thin materials are inherently fragile, and a slip of the craft knife or an accidental bump can snap a neck or send a string anchor flying across the room. The best solution is to build redundancy into your process by cutting extra copies of your most delicate pieces at the start, so that if one breaks, you have a backup ready to go without having to start the cutting process again from scratch.
Glue management is another area where things can go wrong quickly. Too much glue creates visible, unsightly blobs that obscure fine details and are very difficult to remove cleanly once cured. The solution is to use glue sparingly, applying it with a toothpick rather than directly from the bottle, and to wipe away any excess immediately with a damp cotton swab before it has a chance to dry. Super glue, while powerful, can also cause clouding on transparent or glossy surfaces, so always test it on a scrap piece of your material before committing to it on your finished guitar body.
If your paint is not behaving as expected, the culprit is usually either surface preparation or paint consistency. Wood and craft stick surfaces can be slightly absorbent and rough, causing the first coat of paint to look streaky or uneven. A light sanding followed by a thin coat of white gesso as a primer layer solves this problem entirely and gives subsequent coats of color something smooth and consistent to adhere to. Paints that are too thick can be thinned with a small amount of water; paints that are too thin can be allowed to air-dry slightly in the bottle before use.
Expanding the Concept
Once you have successfully built one miniature guitar, it is nearly impossible not to start imagining the other instruments you could create to populate your peanut’s miniature music world. A tiny drum kit, built from bottle caps and thin wooden discs, would make a spectacular companion piece. A miniature keyboard crafted from a thin rectangle of white painted card with black key details drawn on would complete a band setup. Bass guitars, violins, banjos, and mandolins all follow broadly similar construction principles and represent satisfying next steps for a crafter whose skills have grown through the guitar-making process.
The peanut character concept itself is also endlessly expandable. Different costumes, accessories, and props can transform the same basic figure into a cast of characters: a peanut conductor with a tiny baton and tuxedo, a peanut drummer with a headband and drumsticks, a peanut vocalist with a miniature microphone stand. Each new character is an opportunity for a new instrument build, and before long you may find yourself with an entire peanut band assembled on a shelf, each member perfectly equipped with their handmade instrument.
Sharing the craft with others is perhaps the most rewarding expansion of all. Teaching a child or a friend how to make their own miniature guitar passes on not just a technique but an attitude toward creative problem-solving and patience. The skills developed through miniature making, such as careful measurement, steady-handed detail work, and creative material substitution, are genuinely transferable to dozens of other craft disciplines. What starts as a sweet project to give your peanut a guitar can quietly become the beginning of a lifelong passion for miniature making, one tiny rock star at a time.
- Always sketch your guitar at actual size before cutting any materials, using the sketch as a precision template throughout the build process.
- Sand all surfaces before painting, and apply a gesso primer layer to ensure smooth, even color coverage on wood or card materials.
- Use toothpicks to apply glue with precision, and wipe away excess immediately to avoid clouding or unsightly blobs on finished surfaces.
- Build redundant copies of fragile components at the cutting stage so that accidental breakage does not derail the entire project.
- Finish every guitar with a clear varnish coat to protect your paintwork, strengthen joints, and give the piece a convincing lacquered sheen.
- Photograph your finished creation in good natural or ring light to capture fine details for sharing with the online crafting community.








What do you think?
It is nice to know your opinion. Leave a comment.