










Crochet Frog Pattern: Your Complete Guide to Making an Adorable Amigurumi Frog
Introduction to Crochet Frog Patterns and the Magic of Amigurumi
Amigurumi, the Japanese art of crocheting small, stuffed yarn creatures, has taken the crafting world by storm over the past decade. Among the most beloved characters in this genre is the humble frog — charming, round, and endlessly expressive. A crochet frog pattern offers crafters of all skill levels the opportunity to bring a whimsical little amphibian to life using nothing more than yarn, a hook, and a little patience. The result is a handmade treasure that appeals to children and adults alike, making these frogs perfect as gifts, decorations, or simply satisfying personal projects.
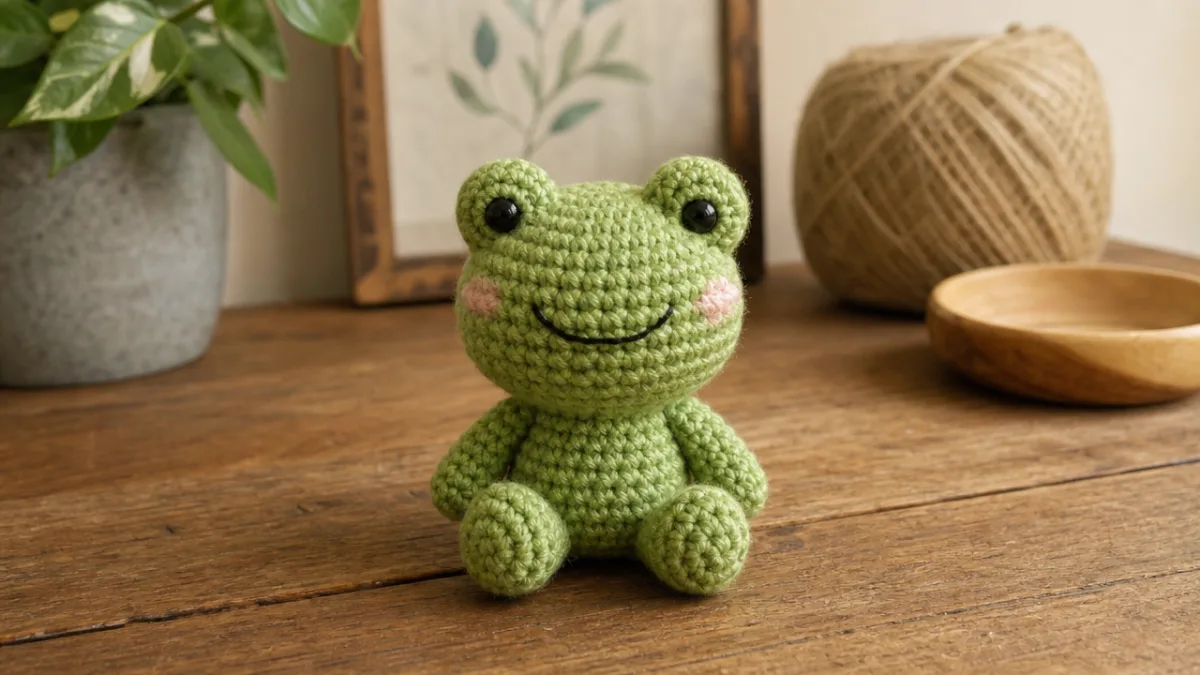
The crochet frog pattern found at thecaffeinatedsnail.com stands out among the many available designs because of its carefully balanced construction. It strikes a wonderful middle ground between approachability for beginners and enough detail to keep more experienced crocheters engaged and challenged. The finished frog has that irresistible round belly, wide expressive eyes, and tiny outstretched limbs that make it look like it is perpetually ready for a hug. Whether you are brand new to amigurumi or have a shelf full of crocheted animals already, this pattern is genuinely worth your time and yarn stash.
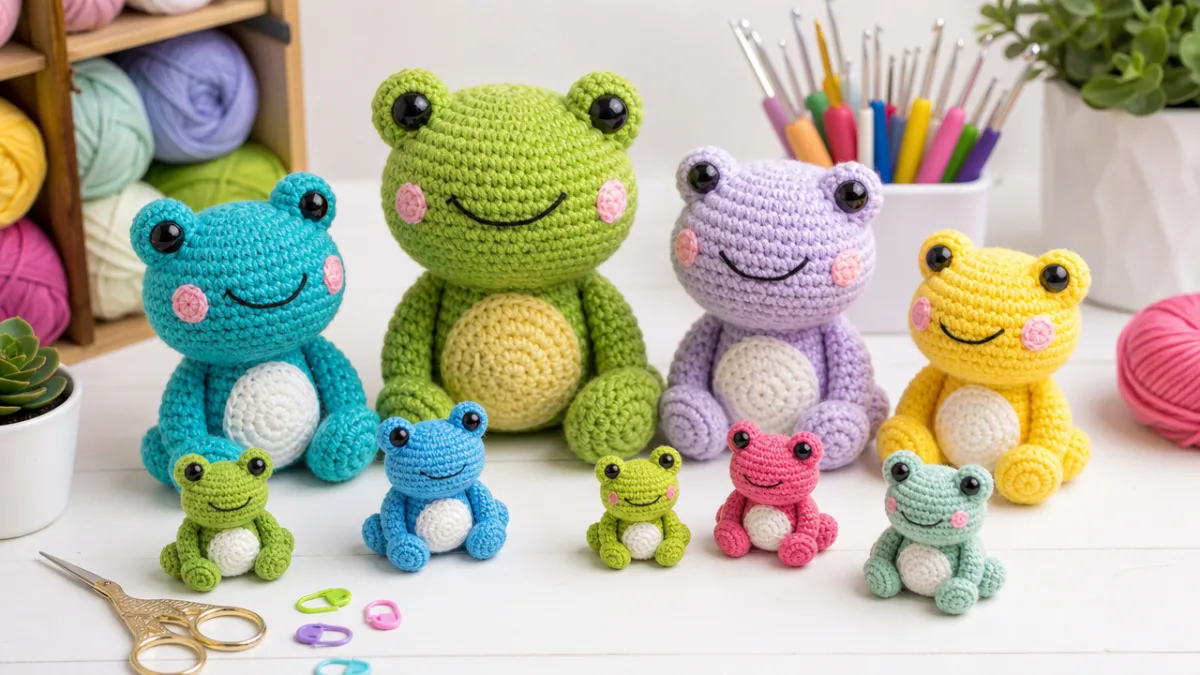
What makes frog patterns particularly special in the world of amigurumi is the versatility they offer. You can adjust the size of your hook and yarn weight to create everything from a palm-sized pocket frog to a large, pillow-like companion. Color variations are equally endless — while classic green is always charming, crafters have made frogs in pastel pink, sunny yellow, deep purple, and even variegated rainbow yarns. The basic structure remains the same regardless of the color palette you choose, which means once you master this pattern, you can create an entire frog family in every shade imaginable.
Why Frogs Are a Favorite Among Amigurumi Crafters
Frogs have a natural structural advantage in amigurumi design. Their bodies are essentially spherical or oval, which maps perfectly onto the magic ring and continuous round construction that forms the backbone of crochet toy making. Unlike more complex animals with elaborate wing shapes or intricate facial features, a frog’s defining characteristics — the wide mouth, the prominent eyes set on top of the head, the splayed feet — are all relatively straightforward to construct and attach. This makes frogs an ideal subject for those learning the core techniques of amigurumi for the first time.
Beyond their structural simplicity, frogs carry a lot of personality in a small package. A slight change in the placement of safety eyes, the angle of the mouth embroidery, or the positioning of the limbs can transform your frog from sleepy to surprised, grumpy to gleeful. This expressive range is one reason so many crafters return to frog patterns again and again, experimenting with different personalities each time. The emotional resonance of a well-made amigurumi frog is surprisingly powerful — they have a way of making people smile the moment they lay eyes on them.
There is also something deeply satisfying about the community that has grown up around frog amigurumi specifically. Online crafting spaces, particularly Pinterest boards and Instagram feeds, are filled with thousands of finished frog projects, each one unique despite often being made from the same pattern. Seeing how different yarn choices, eye sizes, and embellishments transform what is technically the same set of instructions into wildly different personalities is both inspiring and humbling. It is a reminder that the crafter’s individual touch is always present in the final piece, making every handmade frog genuinely one of a kind.
Materials and Tools You Will Need
Before you begin crocheting your frog, gathering all your materials in advance will make the process significantly smoother. There is nothing more frustrating than getting halfway through a project only to discover you are missing a crucial component. The good news is that amigurumi projects are generally quite economical when it comes to materials — a single skein of yarn is often more than enough for a small to medium frog, and most of the other tools are inexpensive and reusable across many future projects.
Yarn selection is one of the most important decisions you will make for this project. For a traditional amigurumi look, medium weight yarn, also known as worsted weight or size 4 yarn, is the most common choice. It works up quickly, holds its shape well, and is easy to find in a wide range of colors. However, some crafters prefer to work with lighter weight yarn and a smaller hook for a finer, more detailed finished piece. Whatever weight you choose, look for a yarn with minimal stretch and a smooth texture that will allow your stitches to be visible and even. Acrylic yarns are particularly popular for amigurumi because they are easy to care for, widely available, and come in an enormous color range.
Beyond your main yarn, you will need a handful of additional materials to complete your frog. Safety eyes are essential for that classic amigurumi look — for a standard frog, 12mm or 15mm eyes work beautifully, though you can go larger for a more cartoonish effect. Polyester fiberfill stuffing will give your frog its satisfying round shape, and you should use enough to make it firm but not so much that the stuffing distorts the shape of your stitches. A yarn needle for sewing pieces together and weaving in ends is absolutely necessary, as is a stitch marker to keep track of rounds. Scissors complete the essential toolkit.
Choosing the Right Hook Size
Hook size selection in amigurumi is slightly counterintuitive for those coming from other crochet projects. While yarn labels typically recommend a hook size, amigurumi crafters almost always go one or two sizes smaller than recommended. The reason is simple: smaller hooks create tighter stitches with smaller gaps, which prevents the stuffing from showing through the finished fabric and gives the piece a cleaner, more professional appearance. If the label on your worsted weight yarn suggests a 5mm hook, consider reaching for a 3.5mm or 4mm hook instead.
The best way to determine if your hook size is correct for amigurumi is to crochet a small test swatch in the round, stuff it lightly, and hold it up to the light. If you can see the white stuffing through the stitches, your fabric is too open and you should try a smaller hook. If the fabric feels stiff and difficult to work, you may have gone too small and can size up slightly. Finding this sweet spot takes a little experimentation, especially when working with a new yarn, but it is well worth the effort since it directly impacts how polished and clean your finished frog will look.
Ergonomic hooks have become increasingly popular among amigurumi crafters, and for good reason. Because amigurumi involves working tight, dense stitches in the round for extended periods, the repetitive motion can cause hand fatigue or discomfort over time. An ergonomic hook with a soft rubber or silicone handle distributes pressure more evenly across the hand and reduces the strain on your wrist and fingers. If you plan to make multiple amigurumi projects — which, once you catch the frog-making bug, is almost inevitable — investing in a set of ergonomic hooks is a decision you are very unlikely to regret.
Understanding the Pattern: Key Techniques and Stitches
The crochet frog pattern from thecaffeinatedsnail.com relies on a set of foundational amigurumi techniques that, once learned, will serve you across virtually every amigurumi project you ever attempt. The most fundamental of these is the magic ring, also called the magic circle or magic loop. This technique allows you to begin crocheting in the round without leaving a hole at the center of your work, which is essential for creating the clean, closed shapes that give amigurumi their characteristic look. If you have never done a magic ring before, it is worth watching a video tutorial and practicing several times before beginning the actual frog pattern.
Single crochet is the primary stitch used throughout this pattern, as it is in most amigurumi designs. The tight, dense fabric created by single crochet is ideal for stuffed toys because it holds its shape well and keeps the stuffing securely inside. You will also use increases, which involve working two single crochet stitches into the same stitch to expand the circumference of a round, and decreases, which join two stitches together to reduce the circumference. The invisible decrease technique, where you insert your hook through only the front loops of two consecutive stitches, is particularly recommended as it creates a much neater finish than the standard decrease and is worth learning before you begin.
The pattern is worked primarily in continuous rounds rather than joined rounds, which means you do not slip stitch to join at the end of each round or chain at the beginning of the next. This creates a continuous spiral of stitches, which is why a stitch marker is essential — without one, it becomes very easy to lose track of where one round ends and the next begins. Place your stitch marker in the first stitch of each new round and move it up as you complete each round. This small habit will save you a significant amount of frustration and ensure your stitch count stays accurate throughout the project.
Assembly and Finishing Techniques
Many crafters find that assembling the various parts of an amigurumi is actually the most challenging and most satisfying part of the entire process. Your frog will be made up of several separate pieces — the body, the head (or the head and body worked as one continuous piece, depending on the pattern version), the legs, the arms, and the eye bumps or mounts. Each of these pieces needs to be stuffed to the appropriate firmness and then sewn together securely enough to withstand handling, particularly important if the frog is intended as a child’s toy.
When attaching limbs and other features, pin everything in place before sewing to ensure you are happy with the positioning. The placement of the legs, in particular, can dramatically affect the character and personality of your finished frog. Legs positioned further forward will give a more sitting posture, while legs spread wide to the sides create a more relaxed, sprawling look. Arms angled upward give an excited, reaching appearance, while arms positioned lower create a calmer expression. Taking the time to experiment with different placements before committing to sewing is always worthwhile.
Finishing details are what truly bring an amigurumi frog to life. Once all pieces are attached, you may want to add embroidered nostrils, a stitched smile, or other facial features using a yarn needle and a contrasting color of yarn or embroidery floss. Weaving in your yarn ends securely is crucial — use your yarn needle to weave each end through several stitches in different directions before trimming closely. For a particularly secure finish, some crafters tie a small knot in the end before weaving it in. A finished, well-assembled frog with clean details is a genuinely impressive handmade object.
Customization Ideas and Creative Variations
One of the greatest joys of working from a solid base pattern like this crochet frog is the creative freedom it gives you to personalize and experiment. Once you have made the pattern as written and feel comfortable with its construction, you have a reliable foundation from which to launch in any creative direction that appeals to you. Customization can be as simple as a color change or as ambitious as adding entirely new structural elements like a tiny bow tie, a miniature hat, or a small crocheted lily pad for your frog to sit upon.
Color is the most immediately accessible form of customization and can completely transform the mood and personality of your frog. Classic greens range from vivid lime to deep forest, and each creates a very different frog character. But do not let tradition constrain you — a soft lavender frog with cream accents has a dreamy, fantastical quality, while a bright orange frog with contrasting eyes feels bold and energetic. You might also consider using variegated yarn for the body, which creates an organic, mottled effect reminiscent of actual frog skin patterns. The only limit is the color range available in your preferred yarn brand.
Size scaling is another powerful customization tool. By using bulky weight yarn and a larger hook, you can create an oversized frog that functions almost like a stuffed animal pillow — soft, squishy, and wonderfully huggable. Conversely, using fingering weight or sock yarn with a 1.5mm or 2mm hook will produce an incredibly tiny, detailed frog that fits in the palm of your hand and makes an enchanting keychain or charm. The mathematics of crochet scale beautifully, so the pattern itself requires no modification — simply change your materials and let the size follow naturally from those choices.
Making It Gift-Ready
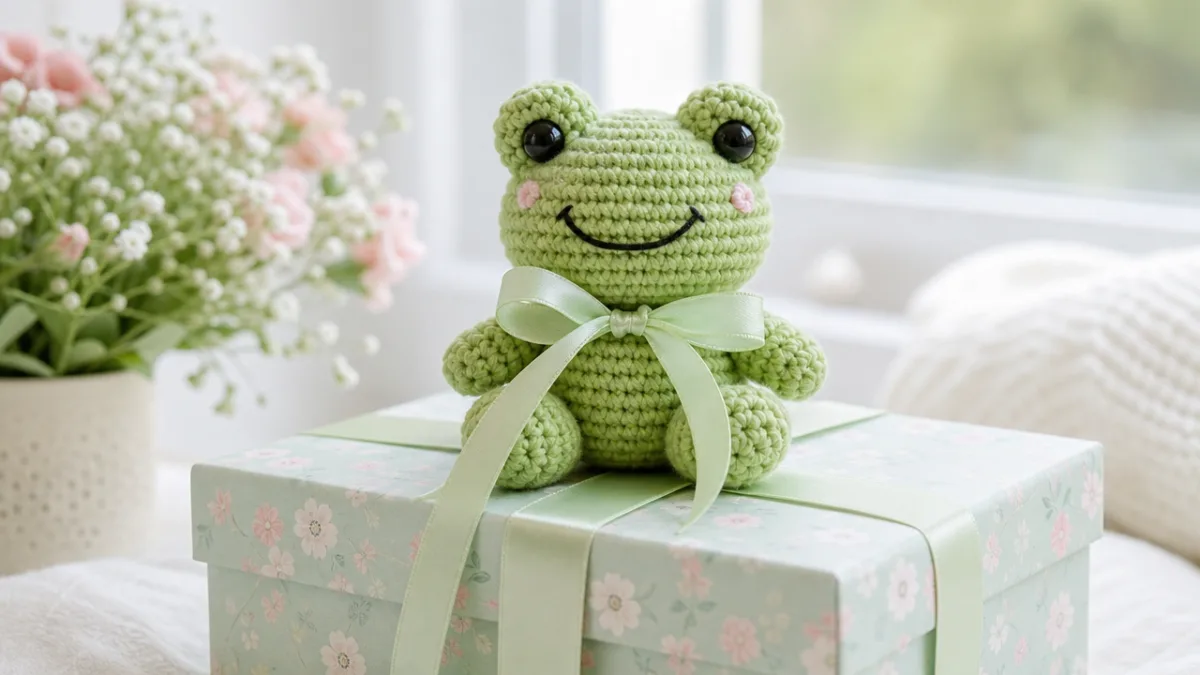
A handmade crochet frog makes an exceptionally thoughtful and personal gift for a wide range of occasions. Baby showers are a natural fit — frogs are a classic nursery theme, and a handmade amigurumi is a keepsake quality item that many families hold onto for years or even generations. When making a frog intended for a very young child, it is important to ensure all safety eyes are attached with their locking washers securely in place, or alternatively to embroider the eyes using yarn rather than using plastic hardware at all, eliminating any choking hazard entirely.
For older children, teens, or adults, you can lean into more specific personality customization. Consider crocheting a frog in the recipient’s favorite colors, or adding accessories that reflect their interests — a tiny graduation cap for a graduate, a miniature book for a reader, or a small musical note embroidered on the belly for a music lover. These thoughtful additions transform a charming crocheted toy into a deeply personal gift that shows real care and attention. Pairing the finished frog with a handwritten note explaining that it was made by hand adds another layer of meaning that store-bought gifts simply cannot replicate.
Presentation matters when giving a handmade gift, and a little effort in this area goes a long way. Consider placing your finished frog in a small gift box with tissue paper, or tucking it into a fabric pouch. If you make a habit of giving crocheted gifts, you might even develop a signature tag or label that identifies the piece as your handmade work — something like a small card that says “made with love” along with your name and the date. These presentation touches elevate the gift-giving experience and make the recipient feel that the item is something truly special, which of course it is.
Tips for Success and Troubleshooting Common Challenges
Every crafter, regardless of experience level, encounters challenges when working on a new amigurumi pattern for the first time. Knowing what common issues to look out for — and how to address them — can save you significant time and frustration. The most frequently reported issue among new amigurumi makers is an inconsistent stitch count, where the number of stitches in a round does not match what the pattern specifies. This is almost always caused by losing track of where rounds begin and end, which is precisely why the stitch marker habit mentioned earlier is so critical to build from the very beginning.
Stuffing is another area where new crafters frequently struggle. Under-stuffed amigurumi looks limp and sad, losing the round, firm quality that makes these pieces so appealing. Over-stuffing, on the other hand, stretches the fabric and can make individual stitches gap open, allowing stuffing to show through or, in extreme cases, pop through the fabric entirely. The goal is a firm but yielding texture — like a stress ball or a ripe orange. Stuffing in small amounts as you go, rather than waiting until the very end, gives you much better control over the final result and is generally the recommended approach for most amigurumi pieces.
Gauge inconsistency can be a challenge for newer crocheters whose tension naturally varies as they work, particularly over a long session. If you notice that your stitches are getting tighter or looser as you go, taking a short break to rest your hands often helps reset your natural tension. Working in good lighting is also important — not only for eye comfort but because it is much easier to identify and correct mistakes in individual stitches when you can clearly see what you are doing. Many experienced amigurumi crafters recommend working in natural daylight whenever possible for the most accurate view of your work.
Building Your Crochet Skills Through Practice
The skills you develop making this crochet frog pattern are genuinely transferable and will make every subsequent amigurumi project faster and more intuitive. The magic ring, the invisible decrease, sewing pieces together, and the art of stuffing — these techniques form the core vocabulary of amigurumi construction and appear in virtually every pattern in the genre. Each frog you make will be noticeably better than the last, as your muscle memory develops and your eye for detail becomes more trained.
Keeping a small project journal or photo log of your amigurumi journey is something many crafters find deeply rewarding. Photographing each finished piece alongside notes about what yarn you used, what hook size worked best, and what you would do differently next time creates an invaluable personal reference. Over time, this journal becomes a record of your growth as a crafter and a resource that helps you make better decisions on future projects. It is also simply a lovely thing to look back on — a visual record of the hours of creativity and care you have invested in your craft.
The amigurumi community is vast, generous, and genuinely welcoming to crafters at every skill level. Sharing your finished frog on platforms like Pinterest, Instagram, or Ravelry connects you to thousands of fellow enthusiasts who are always excited to celebrate a new finished project, offer encouragement, and share their own tips and variations. Many pattern designers, including those behind thecaffeinatedsnail.com, are active in these communities and genuinely enjoy seeing how their patterns are interpreted and personalized by crafters around the world. Engaging with this community enriches the crafting experience in ways that go far beyond the finished object itself, turning a solitary hobby into a genuinely social and connected one.
- Always use a stitch marker — Place it in the first stitch of every new round and move it up as you work to maintain an accurate stitch count throughout.
- Go smaller on hook size — Choose a hook one or two sizes smaller than your yarn label recommends to create tight, polished amigurumi fabric that hides stuffing.
- Practice the invisible decrease — This technique creates a noticeably neater finish than the standard decrease and is well worth learning before starting your frog.
- Stuff as you go — Rather than waiting until a piece is complete, add fiberfill incrementally for better control over firmness and shape.
- Pin before you sew — Always pin limbs and features in place and assess the overall look before committing to sewing them permanently.
- Work in good lighting — Natural daylight is ideal for seeing your stitches clearly and catching any errors before they become difficult to correct.
- Weave in ends thoroughly — Use your yarn needle to weave each end through multiple stitches in different directions before trimming to ensure a secure, lasting finish.
Creating a crochet frog from the thecaffeinatedsnail.com pattern is more than just a craft project — it is an invitation to slow down, be creative, and make something genuinely charming with your own two hands. Whether your finished frog becomes a cherished gift, a shelf decoration, or simply the first of many amigurumi adventures, the skills and satisfaction you gain from the process will stay with you long after the last yarn end is woven in. Pick up your hook, choose your favorite shade of green — or purple, or yellow, or anything in between — and let the magic of amigurumi bring your very own little frog to life.








What do you think?
It is nice to know your opinion. Leave a comment.