










Introduction to Smart Craft Room Organization
Creating a dedicated craft room is one of the most exciting projects a creative person can undertake, but it quickly becomes overwhelming without a clear plan. Whether you are working with a sprawling spare bedroom or a modest closet converted into a studio nook, the principles of smart organization remain the same. Understanding how to balance accessibility, aesthetics, and practicality will transform even the smallest space into a sanctuary where creativity flows freely and frustration stays at the door.
Many crafters make the mistake of purchasing storage solutions before they fully assess what they actually own and how they actually work. This leads to mismatched bins, overstuffed drawers, and surfaces cluttered with supplies that have nowhere logical to live. Taking stock of your materials, understanding your creative workflow, and identifying your most-used tools before you buy a single shelf or basket is the single most important step you can take before setting up any craft room, regardless of its size.
The emotional component of a well-organized craft room is often underestimated. When your space is chaotic, your creative energy gets redirected toward managing the chaos rather than making things. Studies in environmental psychology consistently show that physical clutter creates mental clutter, making it harder to concentrate, harder to make decisions, and harder to feel motivated. A thoughtfully arranged craft room is not a luxury — it is a genuine investment in your creative output and your overall wellbeing.
Assessing Your Current Setup
Before moving a single item, spend time in your craft room simply observing. Notice where you naturally reach first, which supplies are perpetually lost, and which storage solutions you ignore entirely. This observational phase reveals patterns in your behavior that no organizational system can fix if they go unacknowledged. The goal is to design around how you actually work, not how you imagine you should work or how someone else’s beautifully staged studio operates on social media.
Take photographs of your current space from multiple angles. These images become an invaluable reference point as you plan, and they provide a deeply satisfying before-and-after comparison once your transformation is complete. Document every storage solution you currently use, noting what works and what fails. Write down the supplies you use daily, weekly, and seasonally, because frequency of use should directly determine how accessible those items are in your final arrangement.
Maximizing Vertical Space for Storage
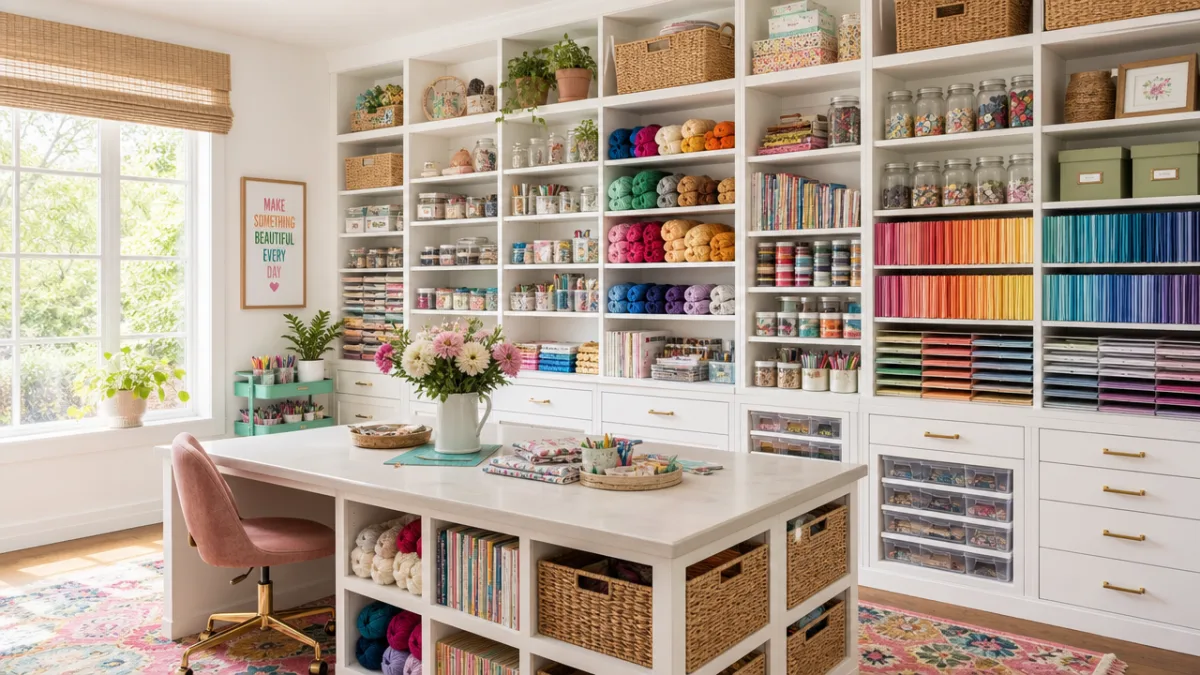
The most underutilized dimension in any craft room is height. Most people organize at eye level and below, leaving the upper reaches of walls completely bare while struggling to find room for their supplies at counter height. Installing shelving from floor to ceiling instantly multiplies your available storage without consuming a single additional square foot of floor space. Open shelves work particularly well in craft rooms because they keep supplies visible and accessible, reducing the time you spend hunting for materials mid-project.
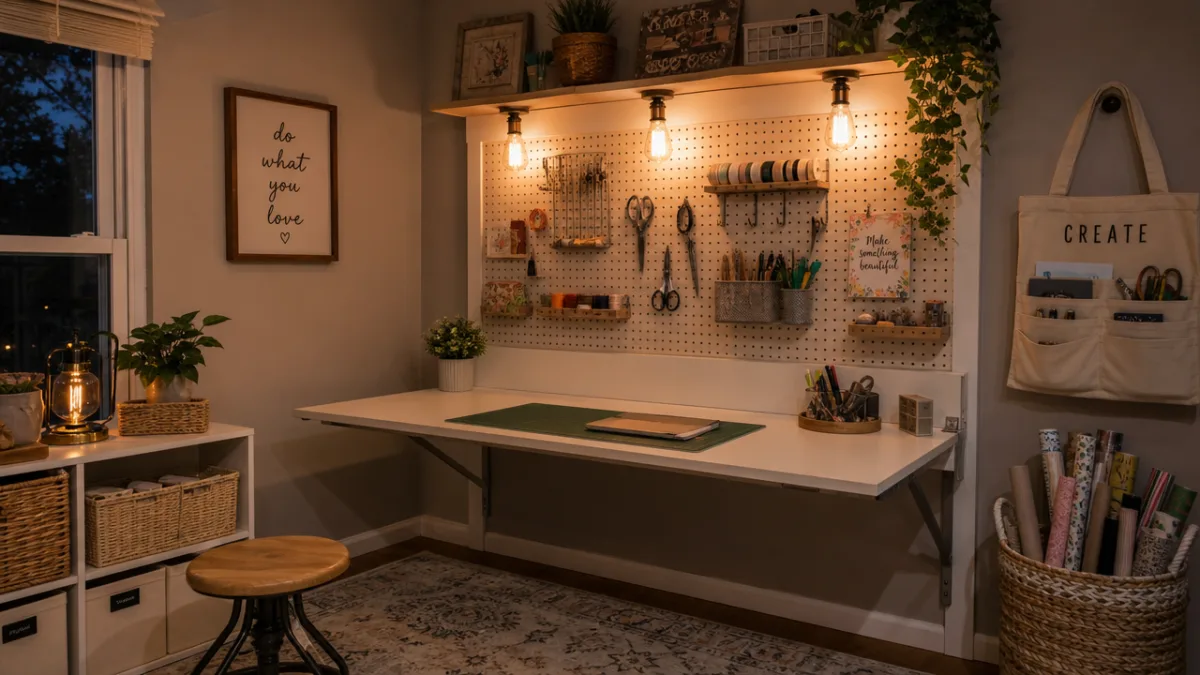
Pegboards are among the most versatile and cost-effective vertical storage solutions available to crafters. A large pegboard mounted on a primary work wall can hold scissors, rulers, tape dispensers, spools of ribbon, small baskets of embellishments, and an astonishing variety of tools using customizable hooks and holders. The system is infinitely rearrangeable, which matters because your storage needs will evolve as your crafting interests grow and change. Painting the pegboard a color that complements your room also turns a purely functional element into a visual feature.
Wall-mounted rails with sliding hooks, magnetic knife strips repurposed for metal tools, and tension rods installed horizontally inside cabinets to hang spray bottles or rolls of wrapping paper are all examples of creative vertical thinking. When you begin to see every wall surface as potential storage rather than decoration, the entire character of your organizational challenge shifts. You move from feeling constrained by a small room to feeling empowered by a space where every inch is thoughtfully activated.
Shelving Systems Worth the Investment
Not all shelving is created equal, and in a craft room where supplies can be heavy and numerous, the structural integrity of your shelving system genuinely matters. Adjustable wire shelving, solid wood bracket shelves, and modular cube systems like the KALLAX from IKEA have all proven popular with crafters for different reasons. Wire shelving allows air circulation and makes items easy to spot from multiple angles. Cube systems provide a uniform, tidy appearance and pair beautifully with fabric baskets and labeled bins for a polished, boutique-style aesthetic.
Deep shelves can quickly become black holes where smaller items disappear behind larger ones. Counter this by using shallow shelves wherever possible and reserving deep shelving exclusively for bulkier materials like rolls of fabric, large paper pads, or storage boxes. Turntables or lazy Susans placed on deep shelves allow you to rotate items into view rather than digging through layers to find what you need. This one small addition can eliminate a surprising amount of daily frustration at virtually no cost.
Creating Efficient Work Surfaces and Zones
A well-designed craft room is organized around activity zones rather than supply types. Instead of storing all paper together simply because it is paper, consider storing cutting materials near your cutting surface, adhesives near your assembly area, and finishing supplies near wherever you do your final embellishments. This zone-based approach, borrowed from professional kitchen design, dramatically reduces the number of steps you take during a project and keeps your workflow smooth and uninterrupted by supply-hunting detours.
Your primary work surface deserves serious consideration. A large, smooth, dedicated table at the correct ergonomic height for your dominant activity will protect your posture and extend the time you can work comfortably. For many crafters, a table with built-in storage underneath — whether drawers, pull-out shelves, or open cubbies — serves double duty as both workspace and storage furniture. A cutting mat permanently installed on one section of the table preserves the surface and keeps your cutting zone clearly defined without any extra thought.
If space is extremely limited, a fold-down Murphy-style craft table mounted to the wall can give you a full-size workspace that disappears completely when not in use. Paired with vertical storage solutions on the surrounding walls, this setup can function as a fully equipped craft studio in a footprint barely larger than a closet. The key to making folding surfaces work is ensuring that the items stored on or near them do not need to be moved each time you open and close the surface, otherwise the inconvenience will erode your enthusiasm for using the space.
Lighting Strategies That Make Every Project Easier
Poor lighting is one of the most common and most correctable problems in home craft rooms. Natural light is ideal for color-sensitive work, so positioning your primary work surface near a window should be a priority wherever possible. When natural light is insufficient or unavailable, a combination of ambient overhead lighting and task lighting placed directly above your work surface will give you the clarity and contrast you need to see fine details, match colors accurately, and work comfortably for extended periods without eye strain.
LED daylight-spectrum bulbs rated at 5000K to 6500K most closely replicate natural daylight and are highly recommended for craft spaces. Under-cabinet LED strips provide even, shadow-free illumination directly on your work surface without taking up any floor or table space. Articulating arm lamps that clamp to the edge of your desk offer targeted brightness that can be repositioned depending on the nature of your current project, making them a flexible and affordable addition to any craft room lighting scheme.
Organizing Supplies by Category and Frequency
Once your zones are defined and your shelving is in place, the real organization begins. Grouping supplies by category creates a logical mental map of your room that becomes intuitive over time — you simply know where things live without having to think about it. Within each category, frequency of use determines placement height and distance from your work surface. Daily tools go on the desk or within arm’s reach. Weekly supplies go on nearby open shelves. Seasonal or specialty materials go higher up or into closed storage where they wait without creating visual noise.
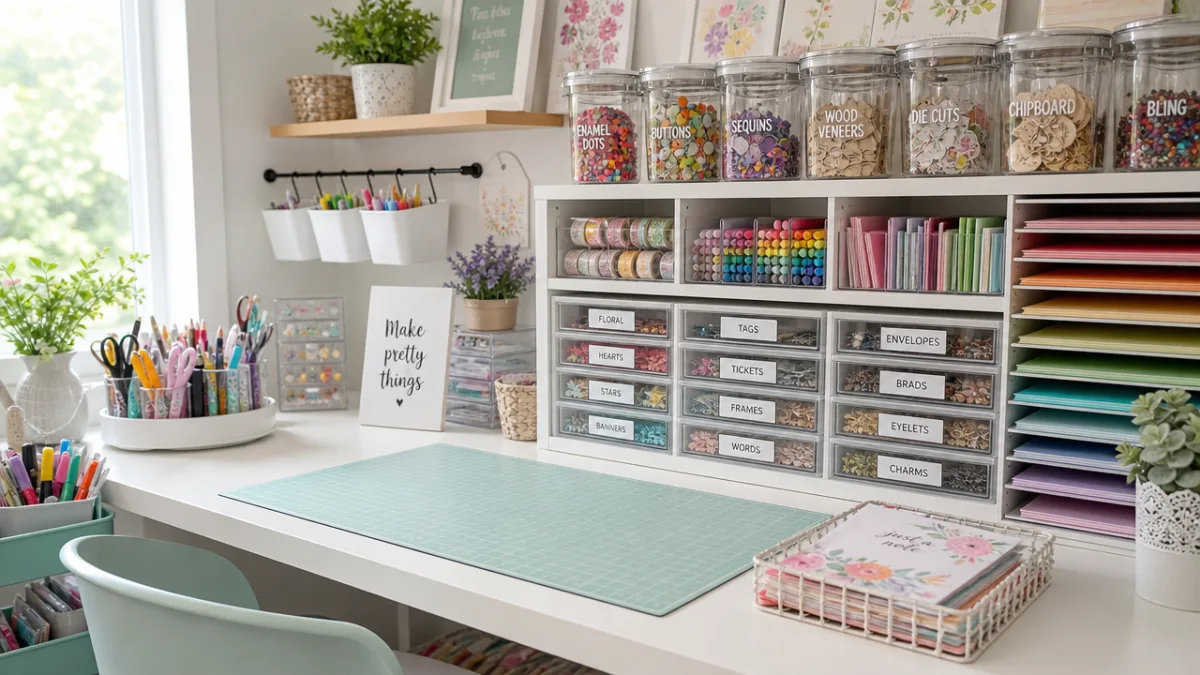
Clear containers are transformative in a craft room because they eliminate the guessing game of what is stored inside. Stackable clear bins, jars, and drawers allow you to instantly assess inventory levels and locate specific items without opening and closing multiple containers. Labels add a second layer of clarity, particularly for items that look similar in silhouette. A simple label maker investment pays for itself quickly in time saved and frustration avoided, and it gives your space a polished, intentional appearance that makes working there feel genuinely pleasurable.
Consider implementing a color-coding system for categories that have multiple subcategories. For example, all paper-related supplies might live in blue-labeled containers, all fabric and sewing notions in green, and all adhesives and tapes in yellow. This visual shorthand allows you to scan a shelf and locate the right section instantly rather than reading every individual label. When multiple people use the craft room, color coding also makes it far easier to maintain the organizational system over time, because the logic is immediately visible and self-explanatory.
Managing Small Embellishments and Notions
Tiny craft supplies — brads, eyelets, buttons, beads, sequins, charms, and similar small embellishments — represent a special organizational challenge because they are easy to mix, easy to lose, and deeply satisfying to have neatly sorted. Small compartment boxes designed for fishing tackle or hardware storage work brilliantly for these items, offering customizable divider configurations at a fraction of the cost of craft-specific alternatives. Pill organizers, ice cube trays, and spice jars are other inexpensive repurposed containers that crafters swear by for keeping tiny items sorted and accessible.
Spinning desktop organizers with multiple tiers of small drawers have become a staple in well-organized craft rooms precisely because they provide a high density of categorized storage in a compact footprint. Placing one on or beside your work surface means your most-used embellishments are always within reach without cluttering the actual work area. Labeling each drawer with both a written label and a small sample of the contents — a single brad taped to the front, for instance — makes identification instant even at a glance from across the room.
Budget-Friendly Tips for a Functional Craft Space
Building a beautifully organized craft room does not require a large budget or a complete renovation. Some of the most effective craft room storage solutions cost very little or nothing at all. Repurposing household items, shopping at thrift stores and dollar stores, and making simple DIY organizers from basic materials can yield a space that is every bit as functional as one outfitted with expensive specialty products. The goal is always function first — a system that works reliably for you is infinitely more valuable than one that simply photographs beautifully.
Thrift stores are a remarkable resource for craft room furniture and storage. Vintage dressers with deep drawers provide generous fabric storage. Old bookshelves become excellent supply storage with a fresh coat of paint. Glass jars from the kitchen store thread, brushes, and markers with style. Wooden crates stacked and secured to the wall become rustic open shelves that cost almost nothing. Approaching your craft room setup with a thrifter’s mindset opens up creative possibilities that a purely retail approach would never suggest.
Free and low-cost options worth exploring include repurposing shoe organizers as door-mounted storage for small supplies, using binder rings to organize punch dies or stencils, and making painted tin can organizers for desk storage. A corkboard door panel can turn the back of your craft room door into a functional inspiration board and small-item storage wall. Even a simple tension rod installed inside a cabinet can hold spray bottles, ribbon rolls, or small bins on S-hooks, converting empty vertical cabinet space into active storage without drilling a single hole.
Maintaining Your Organized Space Over Time
Organization is not a one-time event — it is an ongoing practice. The most beautifully organized craft room will deteriorate within weeks if there are no systems in place for maintaining it. The single most effective maintenance habit is to clean up at the end of every crafting session rather than at the end of a project. This five-to-fifteen minute investment keeps the room consistently usable and prevents the accumulation of mid-project chaos that eventually becomes so overwhelming that you avoid the room altogether.
A regular seasonal audit of your supplies is equally important. Crafting interests evolve, and supplies accumulated for a past phase of creative enthusiasm can quietly take over storage space that your current projects need. Donating, destashing through online communities, or selling surplus materials keeps your inventory aligned with your actual creative life and prevents the slow creep of overcrowding that undermines even the best organizational systems. Many crafters find that a quarterly review of their supplies is sufficient to keep the room feeling fresh and functional.
Finally, give yourself permission to adjust your organizational system as your needs change. The arrangement that worked perfectly when you were primarily a scrapbooker may need significant revision when you discover a passion for sewing or mixed media art. A good organizational system is a living framework, not a fixed structure. Building flexibility into your storage choices — adjustable shelves, moveable bins, rearrangeable pegboard layouts — ensures that your craft room can evolve alongside your creativity without requiring a complete overhaul every time your interests shift.
Quick-Reference Tips for Craft Room Success
- Always store supplies with the label facing outward so contents are identifiable at a glance without handling the container.
- Dedicate at least one drawer or bin exclusively to works-in-progress so unfinished projects have a defined home between sessions.
- Install a full-length mirror if space allows — it makes the room feel larger and helps with projects involving fabric or wearables.
- Keep a small trash bin and a recycling bin within arm’s reach of your primary work surface to eliminate clutter as you work.
- Use painter’s tape to temporarily mark zones on your floor or table before committing to any permanent furniture placement.
- Photograph the inside of your storage containers periodically so you can check inventory and plan shopping trips without physically entering the room.
Designing a Space That Inspires Creativity
Functionality is the foundation of a great craft room, but inspiration is its soul. Once your storage solutions are in place and your workflow zones are defined, turn your attention to the aesthetic elements that make the space feel uniquely yours and genuinely inviting. Color plays a powerful role in creative mood — many crafters prefer soft, neutral backgrounds that allow the colors of their supplies to take center stage, while others thrive surrounded by bold, saturated hues that energize and excite. Neither approach is wrong; what matters is that the environment feels like an authentic expression of your creative identity.
A dedicated inspiration wall — whether a large corkboard, a chalkboard, a gallery wall of prints and fabric swatches, or a combination of all three — gives you a place to pin reference images, color palettes, project ideas, and works-in-progress without cluttering your work surfaces. This dedicated space for visual inspiration keeps your creative energy focused and organized in the same way that your supply storage keeps your physical materials focused and organized. The inspiration wall also serves as a personal gallery of your creative journey, which can be a powerful motivator during periods when your enthusiasm ebbs.
Music, podcasts, and ambient sound are often overlooked elements of the craft room environment but can significantly affect your focus and enjoyment. A small Bluetooth speaker mounted out of the way of your work surfaces keeps your audio source from cluttering your space while filling the room with sound that supports your creative state. Some crafters prefer complete silence; others do their best work accompanied by audiobooks or upbeat playlists. Whatever your preference, having a thoughtful audio setup in your craft room completes the sensory environment and signals to your brain that it is time to make things.
Personal Touches That Complete the Space
A craft room that feels personal and welcoming is one you will actually use. Small touches that reflect your personality — a favorite plant on the windowsill, a mug of warm tea on a designated coaster, a framed print of a quote that captures your creative philosophy — transform a functional storage room into a space with genuine warmth and character. These details cost very little but have an outsized effect on how you feel when you enter the room and how long you want to stay there creating.
Consider incorporating a small seating area if your space allows — even a single comfortable chair in a corner creates a place to sit and plan, sketch, or simply look at your space with fresh eyes before diving into a project. Some of the best creative decisions happen in moments of relaxed contemplation rather than active making. A small side table beside that chair for a notebook and a beverage holder completes the vignette and gives you a designated planning spot that is separate from your production area, helping you keep ideation and execution mentally distinct.








What do you think?
It is nice to know your opinion. Leave a comment.