










Crochet Even Mixed Loop Hat: A Complete Guide to the Daisy Farm Crafts Classic
Introduction to the Even Mixed Loop Hat
If you’ve spent any time in the crochet community lately, you’ve probably come across the Daisy Farm Crafts Even Mixed Loop Hat. It’s one of those patterns that just keeps showing up — and for good reason. It combines two classic techniques, the regular single crochet and the loop stitch, to create a fabric that looks way more complicated than it actually is. Whether you’re brand new to crochet or you’ve been at it for years and just want something satisfying to work on, this hat really delivers.
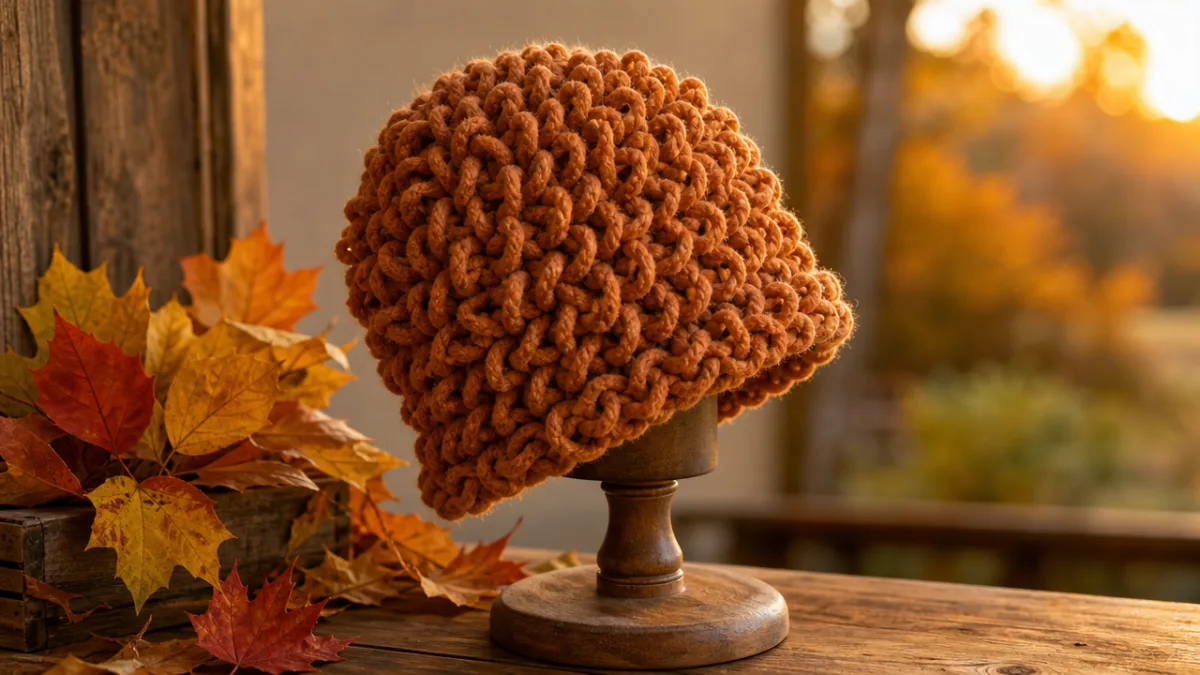
What makes this hat so fun is the visual rhythm it creates. Those alternating smooth and loopy stitches give the finished fabric a wonderfully dimensional, almost shaggy quality — like something you’d find at an artisan market. In chunky yarn especially, the loops really pop and give the hat that tousled, cozy look that feels totally at home in a cold-weather wardrobe. Daisy Farm Crafts — the online crafting community run by Tiffany and her daughters — designed this pattern to be intuitive from the start, which is why crochet teachers keep recommending it to beginners.
It’s also just a genuinely practical project. An experienced crocheter can knock one out in an afternoon, and the dense, layered structure that the mixed loop technique creates makes for a seriously warm hat. The loops add an extra layer of insulation, so this isn’t just a cute fashion piece — it’s a well-thought-out design that’s held up beautifully in an online craft world that churns out new patterns every single week.
Understanding the Loop Stitch Technique
Before jumping into the full pattern, it’s worth taking a moment to get comfortable with the loop stitch, since it’s really the heart of what makes this hat special. It’s a variation of the single crochet where you pull the yarn up into a long loop before completing the stitch. That loop gets anchored in place as you finish the stitch, leaving a little tail of yarn that sticks out from your work. When you alternate these loopy rows with regular stitch rows, you get that distinctive mixed texture the hat is named for.
It takes a little coordination at first, but honestly most crocheters find that after a couple of practice rows it starts to feel pretty natural. The big thing to focus on is keeping your loops a consistent length — that’s what gives the finished hat that clean, even appearance the pattern name promises. A lot of experienced makers use their non-dominant index finger as a guide, wrapping the yarn around it to form each loop before pulling through. It’s a small trick that makes a big difference. Uneven loops are probably the most common beginner stumble with this stitch, and a little focused attention is usually all it takes to fix it.
One important thing to know: the loop stitch forms on the opposite side of the fabric from where you’re working. That matters because you’ll want to decide upfront whether you want the loops on the outside or the inside of your hat. A lot of makers love the loops on the outside for that shaggy, textural effect, which means working with the wrong side facing you. Others prefer a smooth exterior with a soft, loopy lining that feels cozy against the skin — like a built-in fleece. Both options look great, and the Daisy Farm Crafts pattern is easy to adjust either way.

Materials and Tools You Will Need
Getting your materials together before you start is one of those habits that just makes the whole process smoother. For this hat, the list is refreshingly short. Your biggest decision is yarn — the pattern is typically worked in a bulky or super bulky weight, which is what gives it that cozy, quick-to-finish quality. Look for something labeled weight 5 (bulky) or weight 6 (super bulky). Acrylic blends are a great call here because they’re affordable, come in tons of colors, and can go right in the washing machine.
Some popular go-to yarns for this pattern are Lion Brand Pound of Love, Caron One Pound, and Bernat Blanket Yarn — all widely available at craft stores and easy on the wallet. If you’re more of a natural fiber person, a chunky wool or wool blend will make an especially warm and beautiful hat, though you’ll want to hand wash it. For a gift hat or anything going to a kid, a soft acrylic or acrylic-cotton blend is usually the most practical pick — durable and comfortable all at once.
Tool-wise, you’ll need a hook sized to your yarn — usually a 6mm, 6.5mm, or 8mm depending on what you’re working with. Always check the yarn label for the recommended size, and don’t skip the gauge swatch before you dive into the full project. Beyond that, you just need a yarn needle for weaving ends, a pair of scissors, and a measuring tape. Stitch markers are optional, but they can be really handy for keeping track of where your rounds begin, especially when you’re alternating stitch types. Here’s a quick rundown of what to gather:
- Bulky or super bulky weight yarn (approximately 100–150 yards depending on head size)
- Crochet hook in the size recommended for your yarn (commonly 6mm to 8mm)
- Yarn needle for finishing and weaving ends
- Sharp scissors
- Measuring tape or ruler
- Stitch markers (optional but helpful)
Step-by-Step Pattern Instructions
The Even Mixed Loop Hat is worked in the round starting from the brim, which is a nice, clean construction method — no seaming required. You start with a foundation chain that fits around your head. For a standard adult size in bulky yarn, that’s usually somewhere between 60 and 70 stitches, but you’ll want to measure your own head circumference and check it against the pattern gauge rather than just going with the default. Once you’ve got your chain, join it into a ring with a slip stitch, making sure you haven’t twisted it, and you’re off.
From there, the pattern alternates between rounds of regular single crochet and rounds of loop stitch single crochet. The plain rounds are exactly what they sound like — just standard single crochets all the way across. The loop stitch rounds, you work the loop stitch into every stitch while keeping that consistent loop height. One round plain, one round looped — that steady alternation is what creates the “even” quality in the name and gives the hat its beautiful, rhythmic texture instead of a random, patchy look.
After the brim section (usually 4 to 6 rounds), you keep the alternating pattern going up the body of the hat until it reaches the height you need — typically around 9 to 11 inches from brim to crown for a standard adult beanie. Once you’re at the right height, you start the decrease rounds to shape the top. The decreases happen on the regular single crochet rounds rather than the loop stitch rounds, which makes the shaping a lot simpler to manage. You decrease evenly across the round, working down the stitch count until just a few stitches remain, then pull the yarn tail through all of them to close the top and fasten off.
Here’s a simplified overview of the construction steps in order:
- Create a foundation chain sized to your head circumference and join in the round.
- Work rounds of alternating single crochet and loop stitch single crochet for the brim.
- Continue the alternating pattern up the body of the hat to the desired height.
- Begin decrease rounds on the regular single crochet rounds to shape the crown.
- Close the top, fasten off, and weave in all ends securely.

Sizing, Gauge, and Customization Options
One of the best things about this pattern is how easy it is to resize. Because the hat is worked in the round and the stitch count comes from that initial chain, adjusting for a different head size is really just a matter of adding or subtracting stitches at the start. The Daisy Farm Crafts pattern usually includes multiple size options — newborn, baby, toddler, child, and adult — so it’s a natural choice if you want to make a matching set for the whole family or knock out a bunch of gift hats in different sizes.
Gauge is the one technical thing you really can’t skip if you want a well-fitting hat. It just refers to how many stitches and rows fit into a 4-inch square with your specific yarn and hook — and it matters because everyone crochets at a slightly different tension. Two people using the exact same yarn and hook can end up with noticeably different stitch sizes. Take the time to crochet a small swatch, measure it, and swap to a different hook size if things are off. A bigger hook loosens your tension and gives you a larger hat; a smaller hook tightens things up and gives you a smaller one. It’s a small investment of time that saves a lot of frustration later.
When it comes to making the pattern your own, you’ve got a lot of room to play. Color is the most obvious place to start — a single solid color gives you that classic, clean beanie look, but switching colors between rounds opens up all kinds of striping possibilities. Alternating the loop stitch color with the plain stitch color is especially cool because the texture and the color changes reinforce each other for a really graphic effect. You can also mess around with loop length: longer loops give you that dramatic, shaggy faux-fur look, while shorter loops create something subtler that reads almost like a woven fabric. Both are totally worth trying.
Finishing Techniques and Styling Tips
Once your hat is done and your ends are woven in, a few simple finishing steps can really take it from “handmade” to “wow, you made that?” If you’ve worked in multiple colors or used a natural fiber yarn, wet blocking is worth doing. It helps even out any tension inconsistencies and gives the whole fabric a polished, settled look. Just submerge the hat in cool water, gently squeeze out the excess moisture without wringing, and shape it over a balloon or hat form inflated to roughly the right head circumference. Let it dry completely before wearing or gifting.
The loops themselves might benefit from a little love once everything is dry too. You can use your fingers or a wide-tooth comb to gently fluff and separate them, helping them stand up evenly across the fabric. A light mist of water and a gentle shake can also help them settle into place. If you kept your loop length really consistent throughout, you might not need to do much at all — but it’s a useful trick to have in your back pocket for those spots where your tension drifted a little.
Style-wise, this hat is wonderfully versatile. Fold the brim up and you’ve got a structured, classic beanie look. Leave it unfolded and pull it down lower on your forehead and it goes full slouchy and relaxed — great with casual winter outerwear. The loopy texture also pairs really naturally with other handmade pieces, so if you’re feeling ambitious, a matching set of mittens or a cowl in the same yarn makes for a gorgeous winter accessories collection. And honestly, this hat is one of the best gift options in a crocheter’s arsenal — it works up fast, looks impressive, and is genuinely warm enough to be useful.
If you’re planning to give the hat as a gift or sell it at a craft market, a little thoughtful presentation goes a long way. A simple handwritten tag with care instructions makes a real difference — especially if you’ve used a yarn that needs special handling. Just note whether it should be hand washed or machine washed, and whether it should be laid flat to dry or can handle a low tumble dry. It’s a small touch that shows you care, and it helps make sure your hard work holds up for many winters to come.
Why This Pattern Has Endured: Community, Creativity, and Craft
The fact that this pattern is still circulating and being recommended in a corner of the internet that produces hundreds of new crochet designs every week says a lot. Daisy Farm Crafts has built such a devoted following because their patterns hit that sweet spot — achievable for beginners but genuinely satisfying for experienced makers. The Even Mixed Loop Hat is a perfect example of that philosophy. It introduces the loop stitch in the most approachable possible context, giving newer crocheters a real sense of accomplishment while giving seasoned makers a pattern worth returning to again and again.
The community that’s grown up around this pattern is honestly one of its greatest features. On Pinterest, Instagram, Ravelry, and the Daisy Farm Crafts site itself, thousands of makers have shared their finished versions — an inspiring, ever-growing gallery of color choices, yarn substitutions, and creative adaptations. It’s a great reminder that two people following the exact same instructions can end up with pieces that look completely different just based on their yarn color, fiber, and loop length choices. That range of outcomes is part of what keeps the pattern feeling fresh rather than played out.
There’s also something genuinely good for you about learning to crochet or picking up a new technique like the loop stitch. The repetitive, rhythmic nature of crochet has a real meditative quality — research has backed this up, comparing it to mindfulness practices in terms of its calming effect. The combination of physical hand engagement and the creative satisfaction of watching something grow stitch by stitch makes it an surprisingly effective way to decompress. And when you’re making something for someone else — a warm hat for a friend or a family member — there’s an added layer of meaning to it that’s hard to replicate with a store-bought gift.
As you get more comfortable with this pattern, you’ll probably find yourself reaching for it again and again — making hats for everyone you know, trying new yarns, or using it to teach a friend the loop stitch for the first time. It scales beautifully in that way: a beginner will find it a genuine challenge and a real achievement, while a more experienced crocheter can breeze through it while catching up on a podcast. It sits in that rare sweet spot where accessibility and artistry coexist, which is exactly why the Crochet Even Mixed Loop Hat from Daisy Farm Crafts has earned its place as a modern crochet classic.








What do you think?
It is nice to know your opinion. Leave a comment.